Configuration & Setup
Overview
Follow the below instructions to configure Translation Studio.
Enable Translation Studio
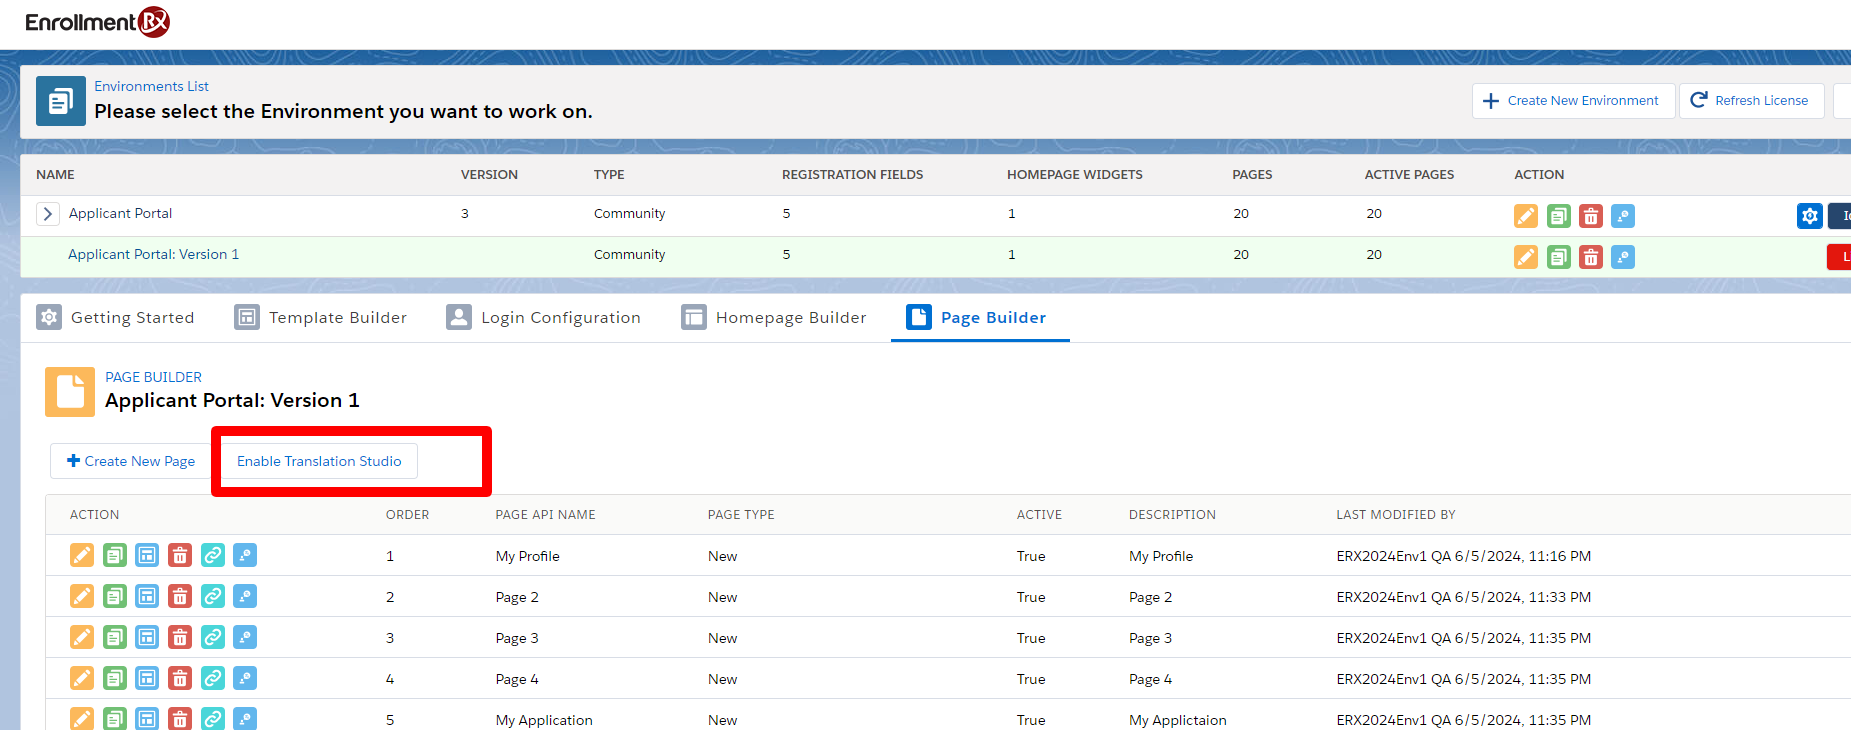
On the Page Builder subtab, you should see a button for each environment labeled “Enable Translation Studio," which will assign a GUID value to each component for translation. You only need to click this once on any environment to enable it for all of them.
Here are the steps:
- Navigate to the FormBuilder Rx tab, which displays the FormBuilder "Admin Panel" and list of environments
- Select any environment
- Click on the Page Builder subtab
- Click the Enable Translation Studio button
Enable Translation Studio processing might take a few moments to process all pages. When finished, you'll see a status message.
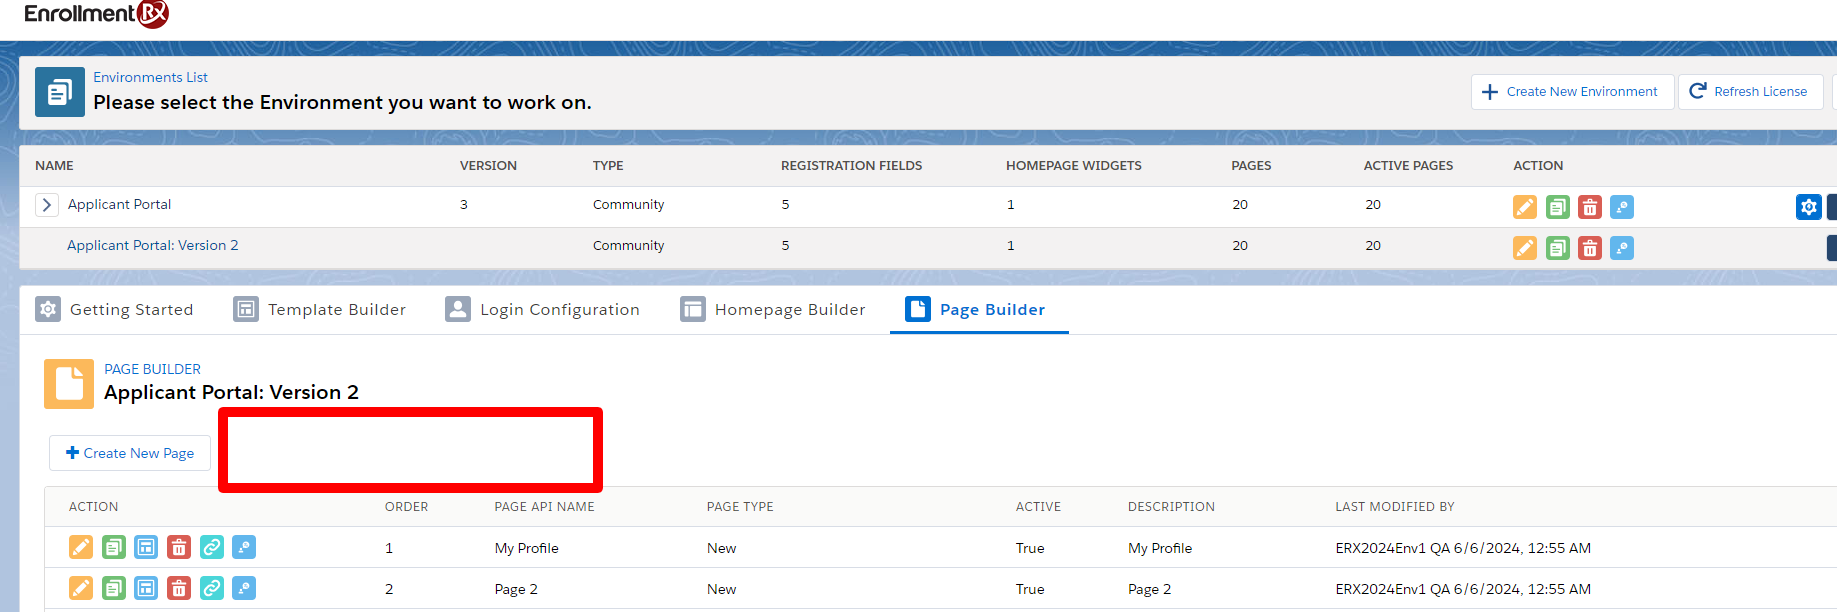
After clicking the OK button on the status message, the “Enable Translation Studio” button will be hidden and you won't be able to see the button.
Enable_Translation_Studio_Message: Using this custom label user will
be able to change the message.
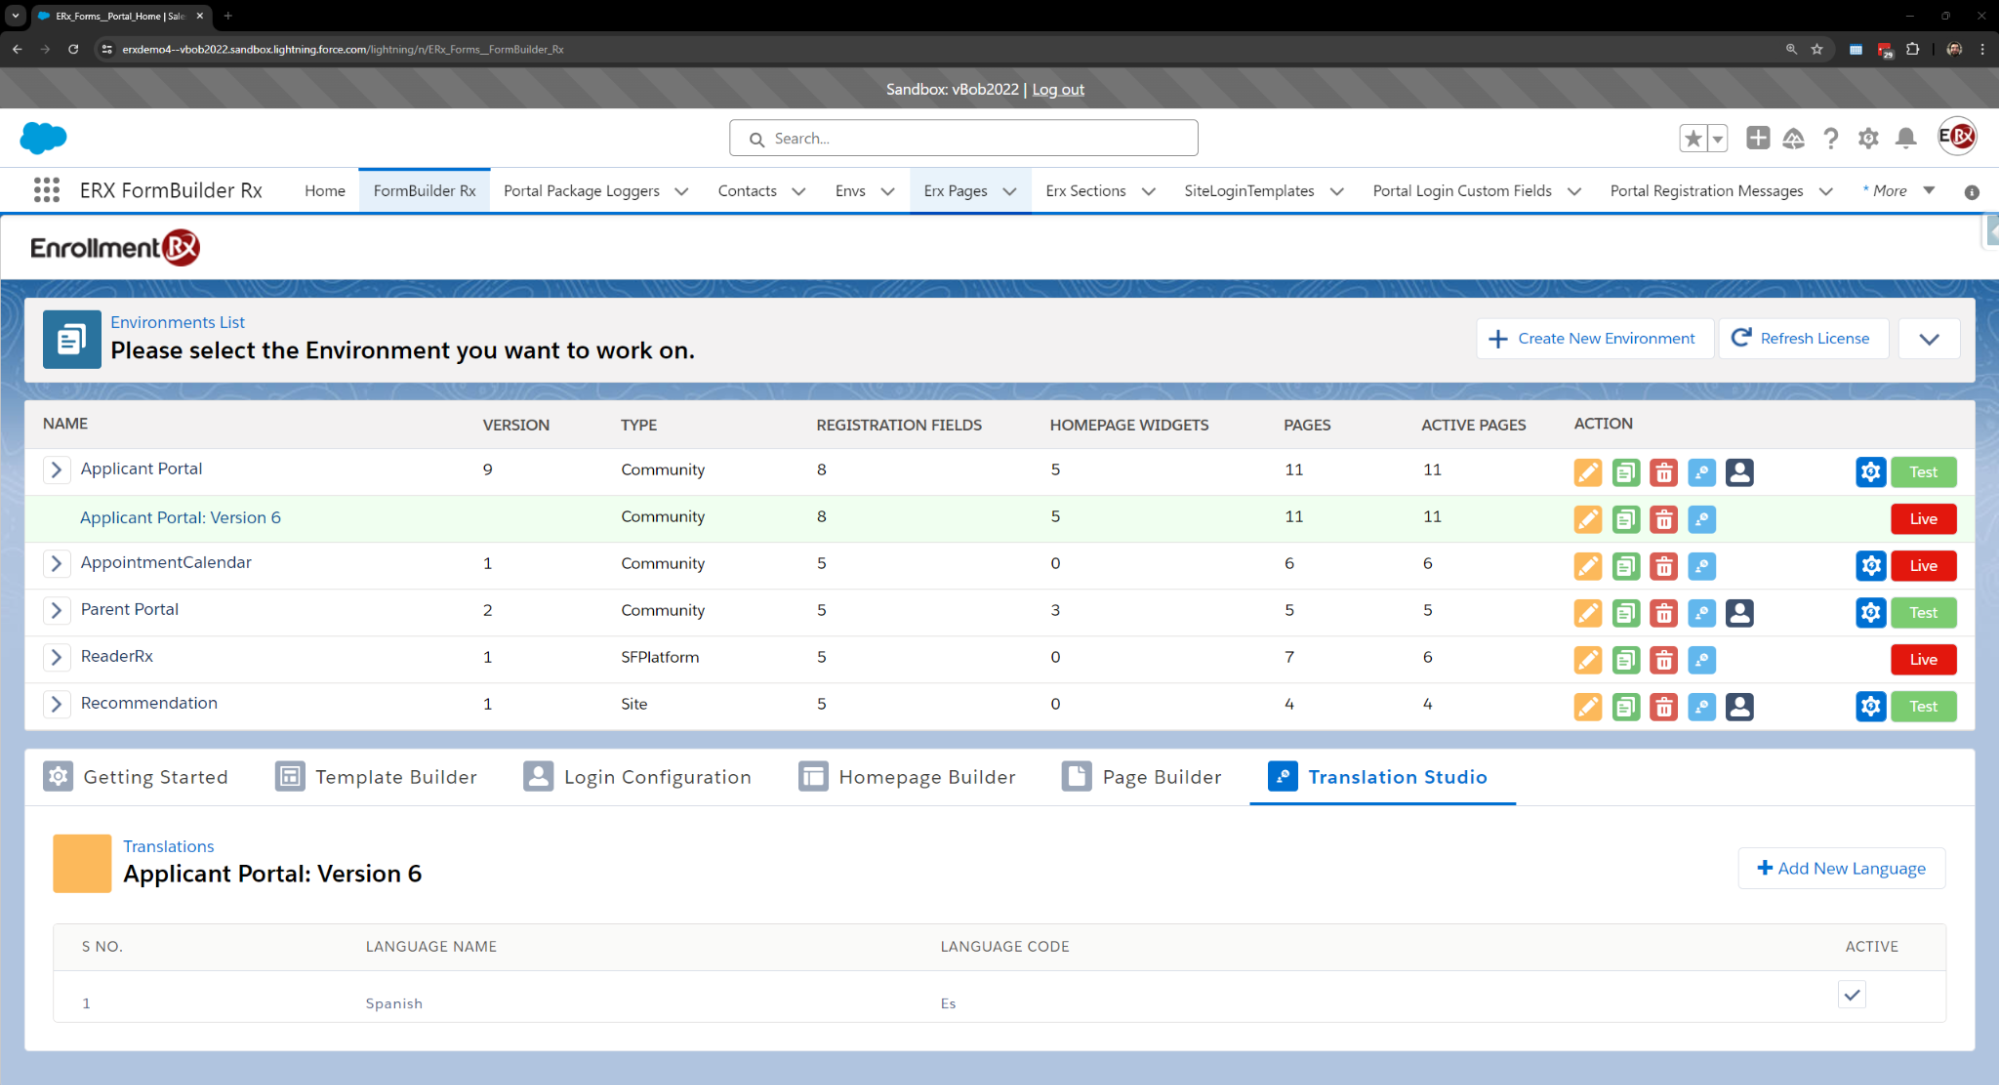
Refresh the entire FormBuilder admin panel and user should be able to see new tab Translation Studio for that version.
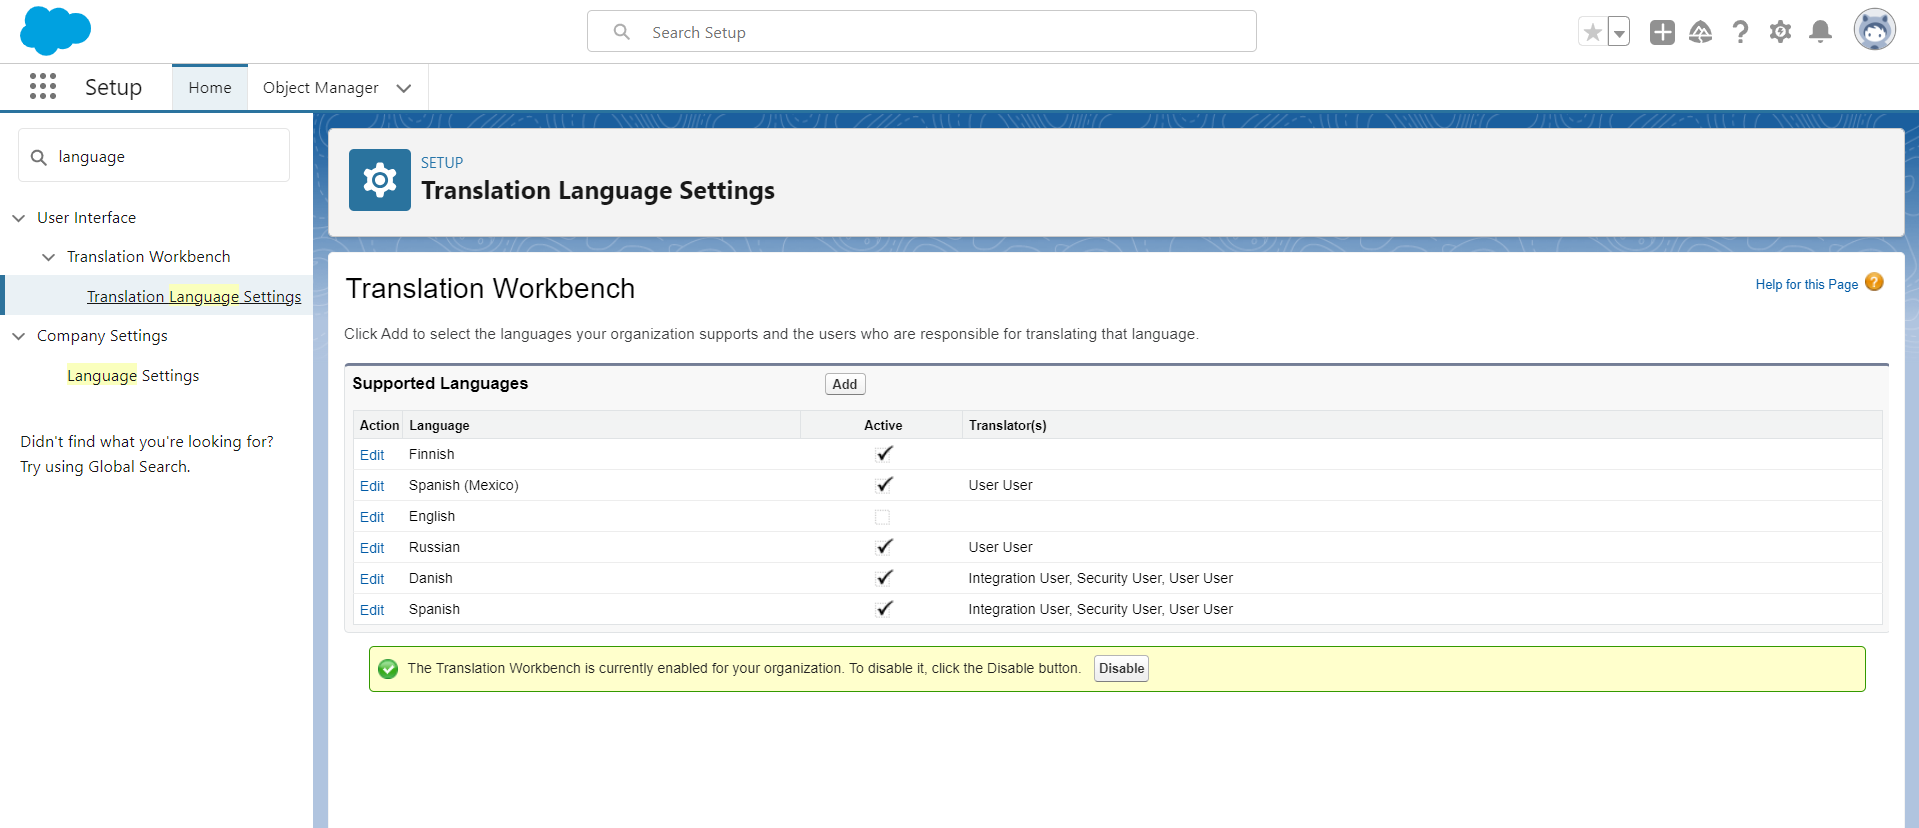
Translation Languages in Salesforce
For the picklist type field values and custom labels, you need to create a language record under the Salesforce’s Translation Language Settings. To do this, follow the below steps:
- Go to Setup
- In the Quick Find box, search for "Translation Language Settings"
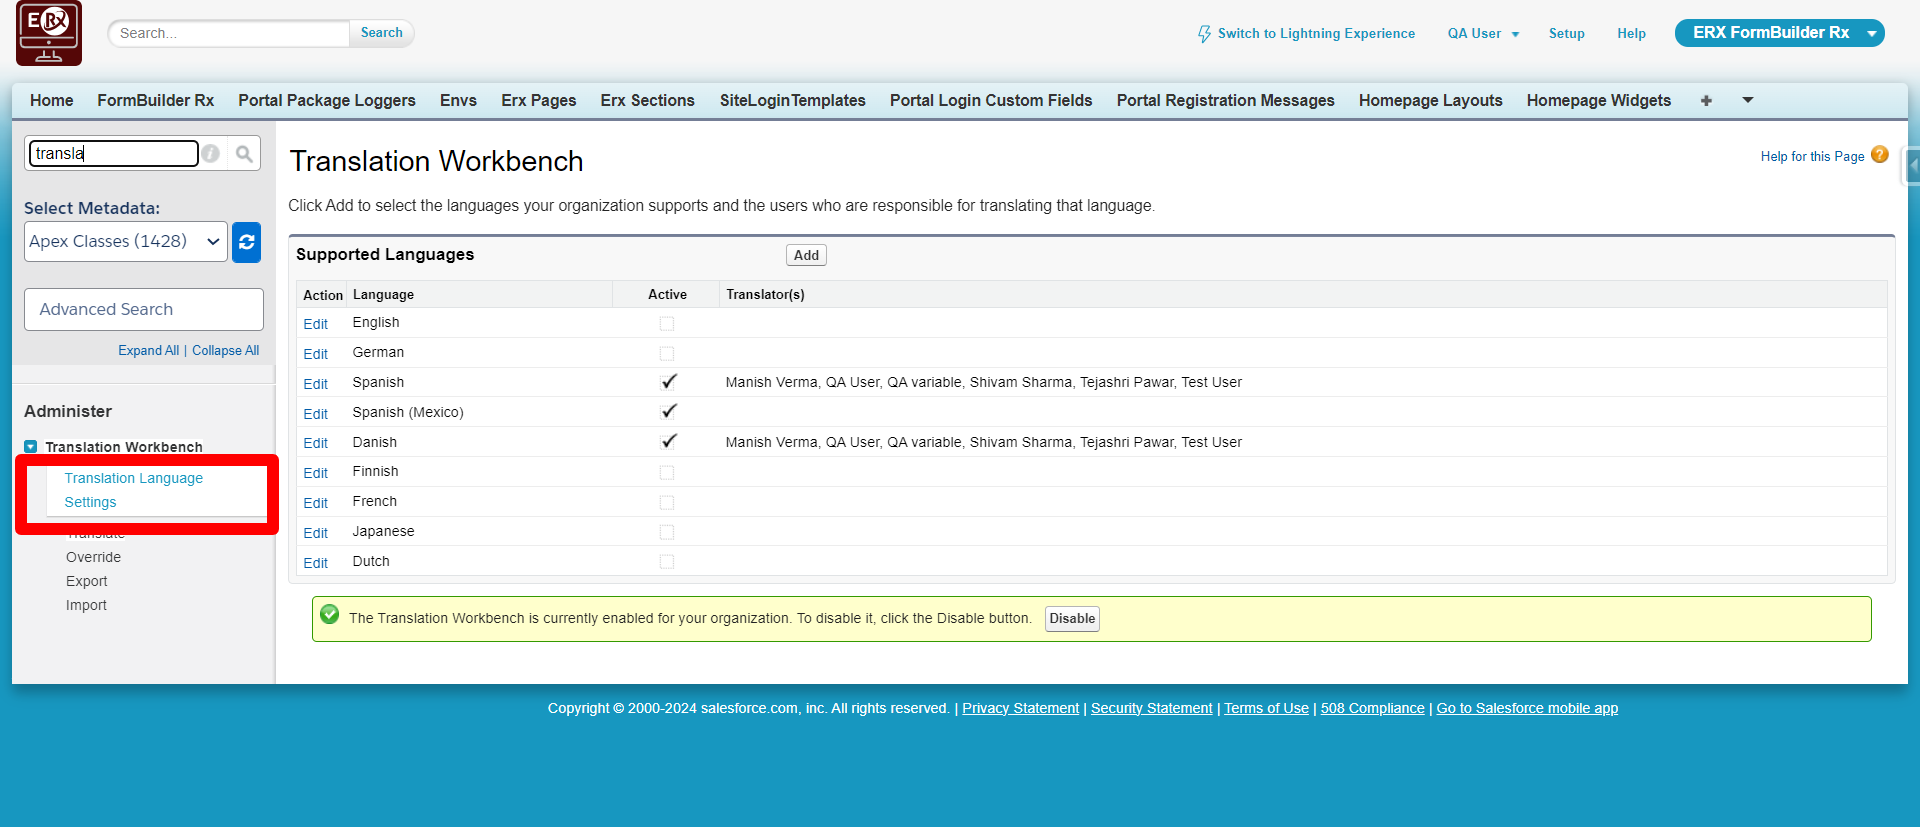
- Click Add to add languages and users
- Keep the language(s) active and Save the settings
Picklist and Multipicklist for Translation Values
- Go to Setup
- Click the Home Tab
- In the Quick Find box search for Translation Studio
- Click Translate
- Select a Language in the Picklist
- Select a picklist value for the Setup Component
- Select the Object to configure
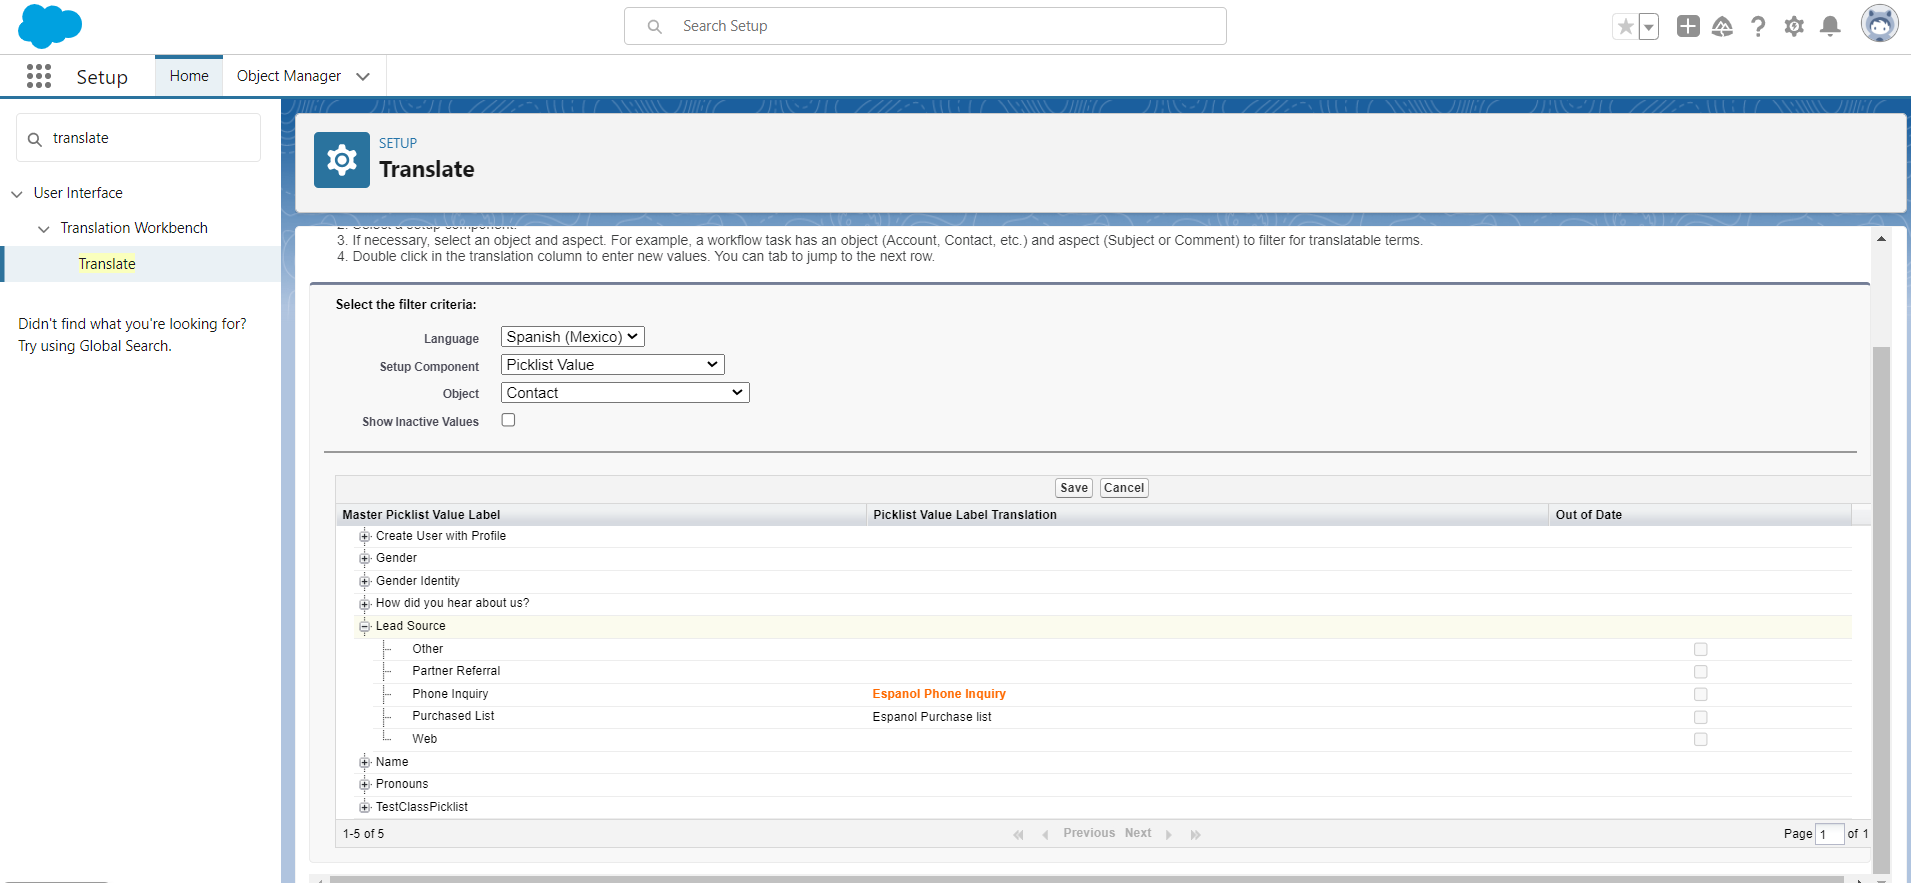
- Scroll down and double click the field to add Translated values
- Double click in the Picklist Value Label Translation column to add translated values
- Click the Save button
Custom Labels Translations
Some messages that are part of code, or any custom messages, are handled with the Salesforce custom label feature. Follow the below steps.
- Go to Setup
- Click the Home Tab
- Click the Quick find box
- Go to Translation Studio > Translation Language Settings
- Click Add
- Select a Language from the picklist
- Set the Language as active
- Select users for the language and Save the configurations

- Click the Quick Find box
- Go to User Interface > Custom Labels
- Click on Custom Labels
- Click the New Local Translations Overrides button in the Local
Translations Overrides section
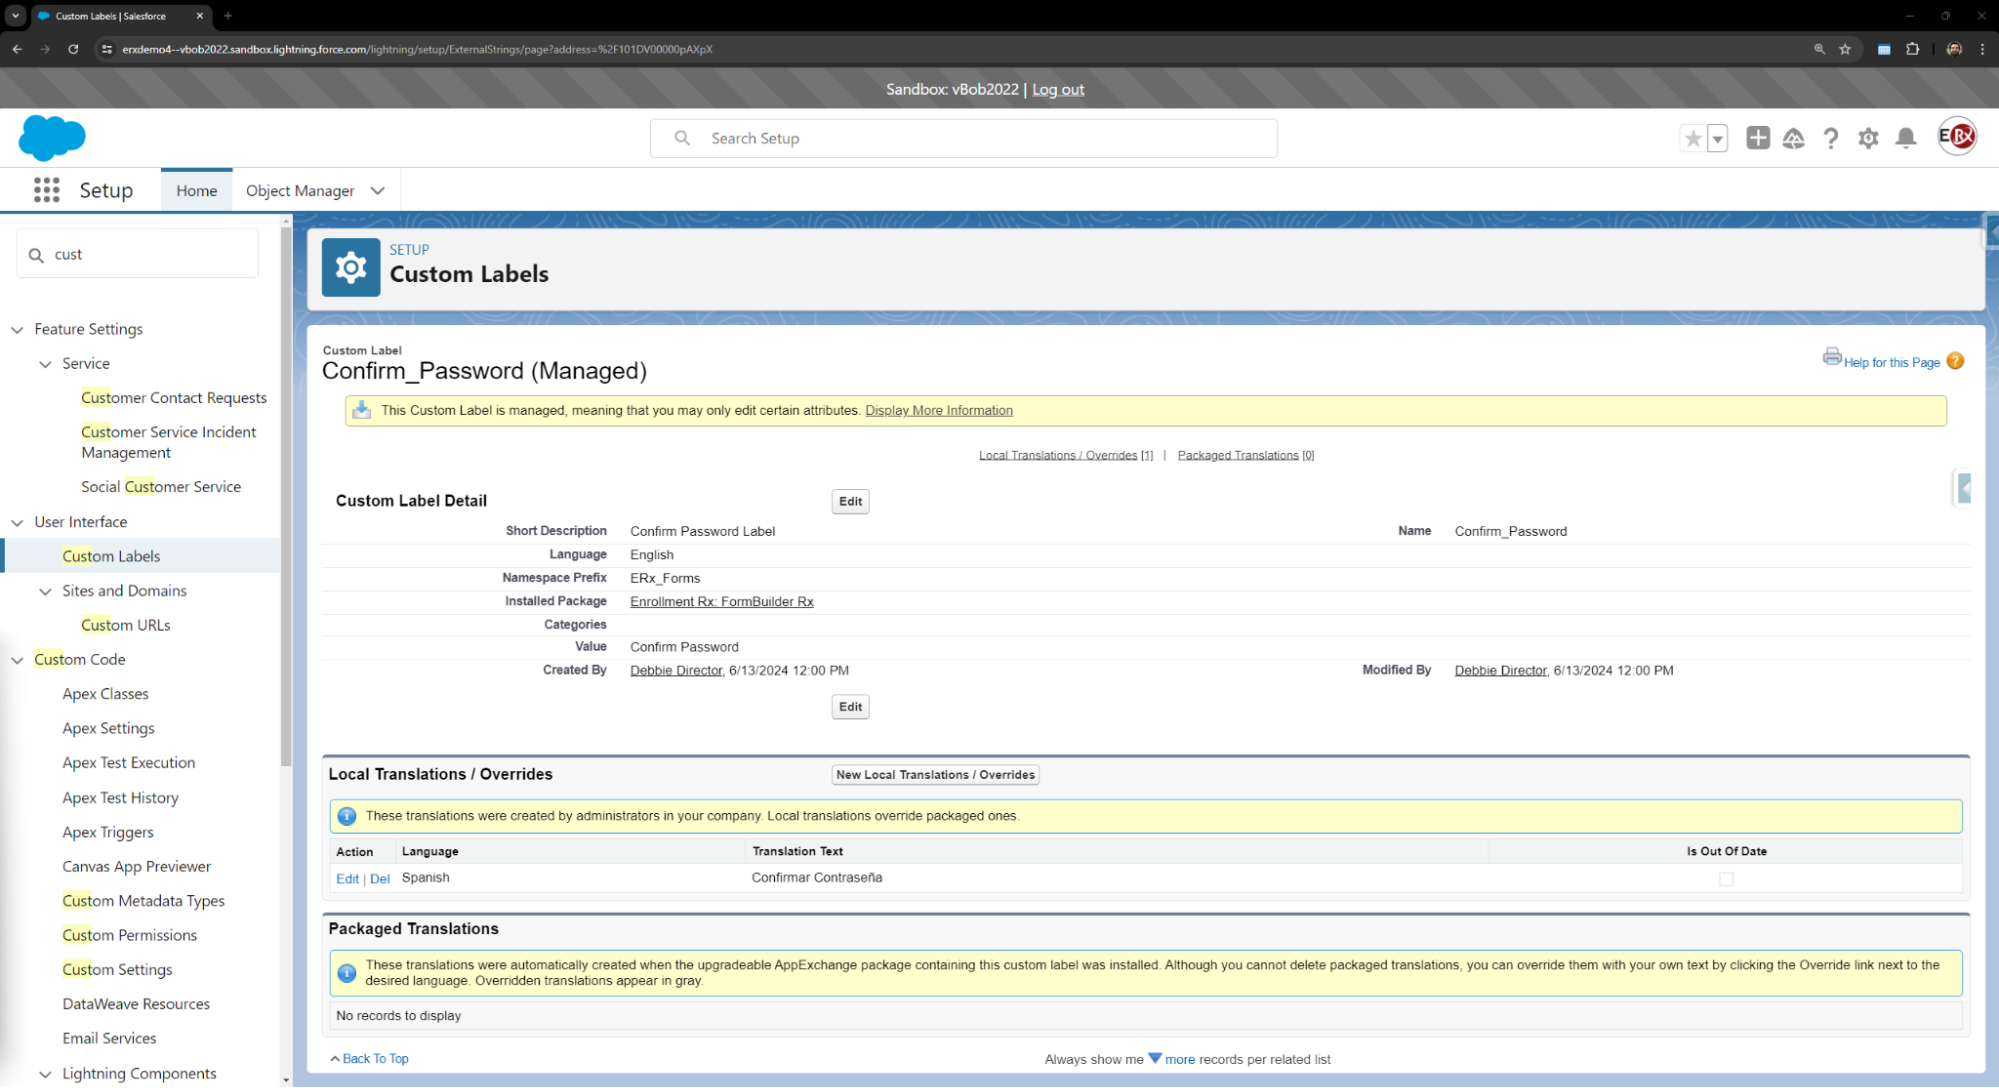
- Select the Language and enter Translation text
- Save the Translation
List of Custom Labels
| Subtab | Label |
|---|---|
| Template Builder | Community_Log_Out_Button |
| Login Configuration |
|
| Homepage Builder |
|
| Homepage Upload |
|
| Page Builder |
|
Translation Studio on the FormBuilder Tab
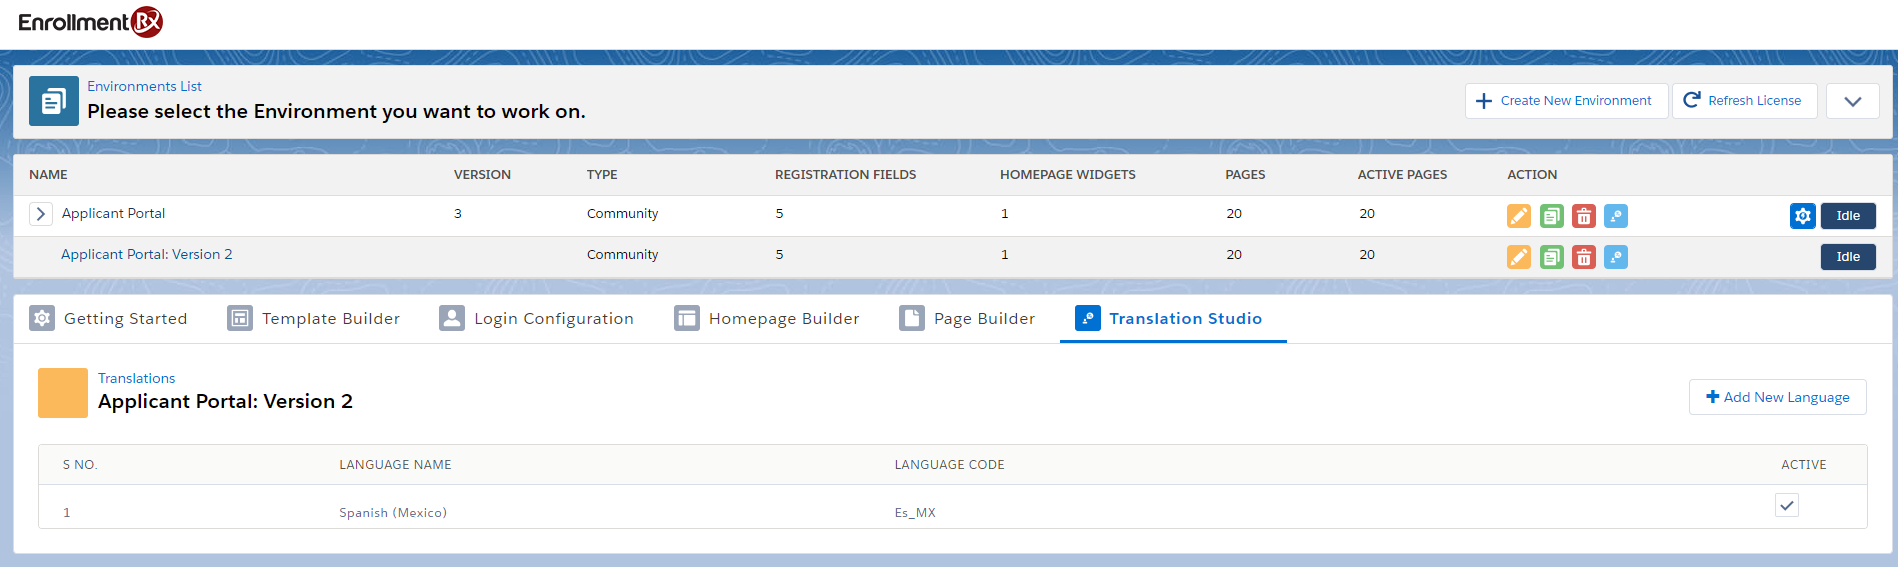
To create a translation record for a page, you need to create a language record first under the “Translation Studio” subtab.
- Go to FormBuilder Admin Panel
- Select the Site and its version
- Open the Translation Studio subtab
- Click on the Add New Language button

- Select the Language you want to configure
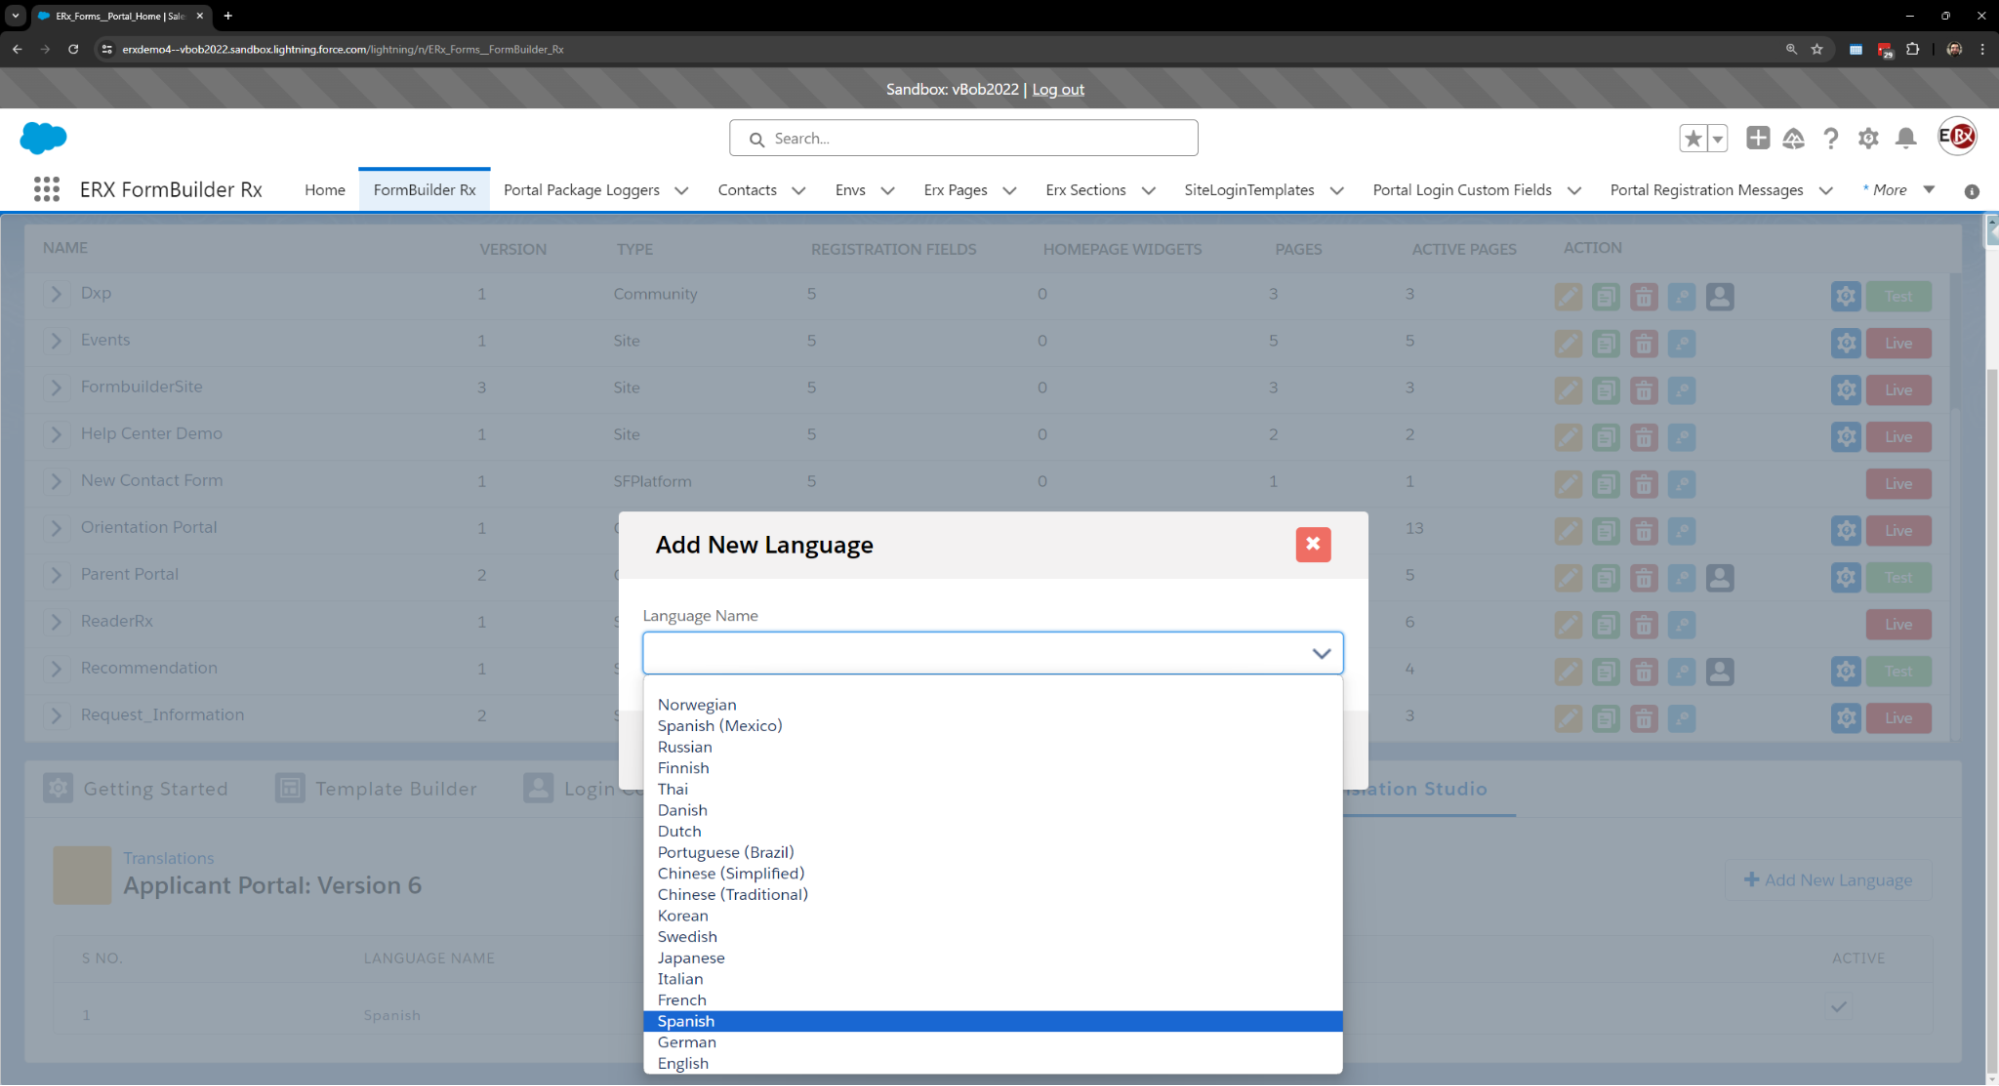
- Click Save
- You can set languages active or inactive
Translation Studio for a FormBuilder Environment
Under the environments section, you'll see a translation icon for each version as below.
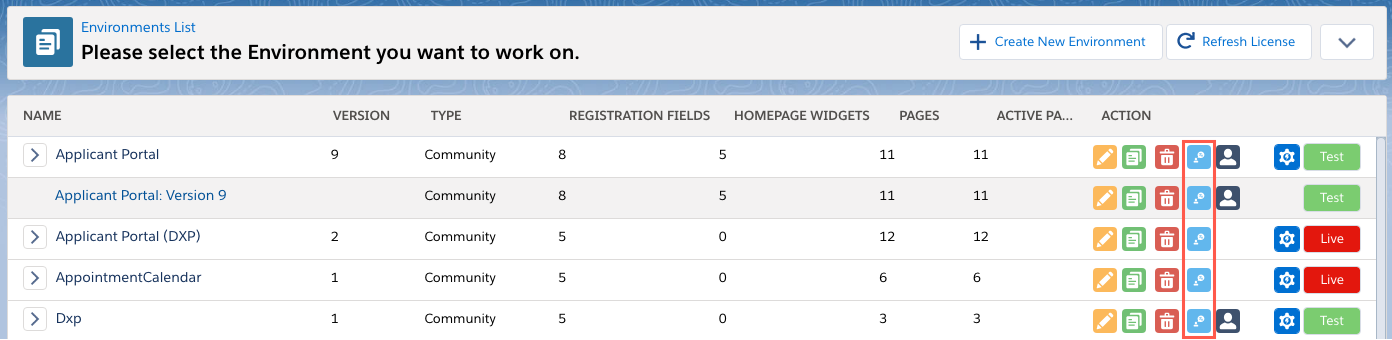
After clicking on the icon, the translation configuration page will display.
On the translation page, only active languages will be available in the dropdown (for an Environment version).
Actual values and translation value fields are displayed as columns. A red border will appear on the translation value if it is blank.
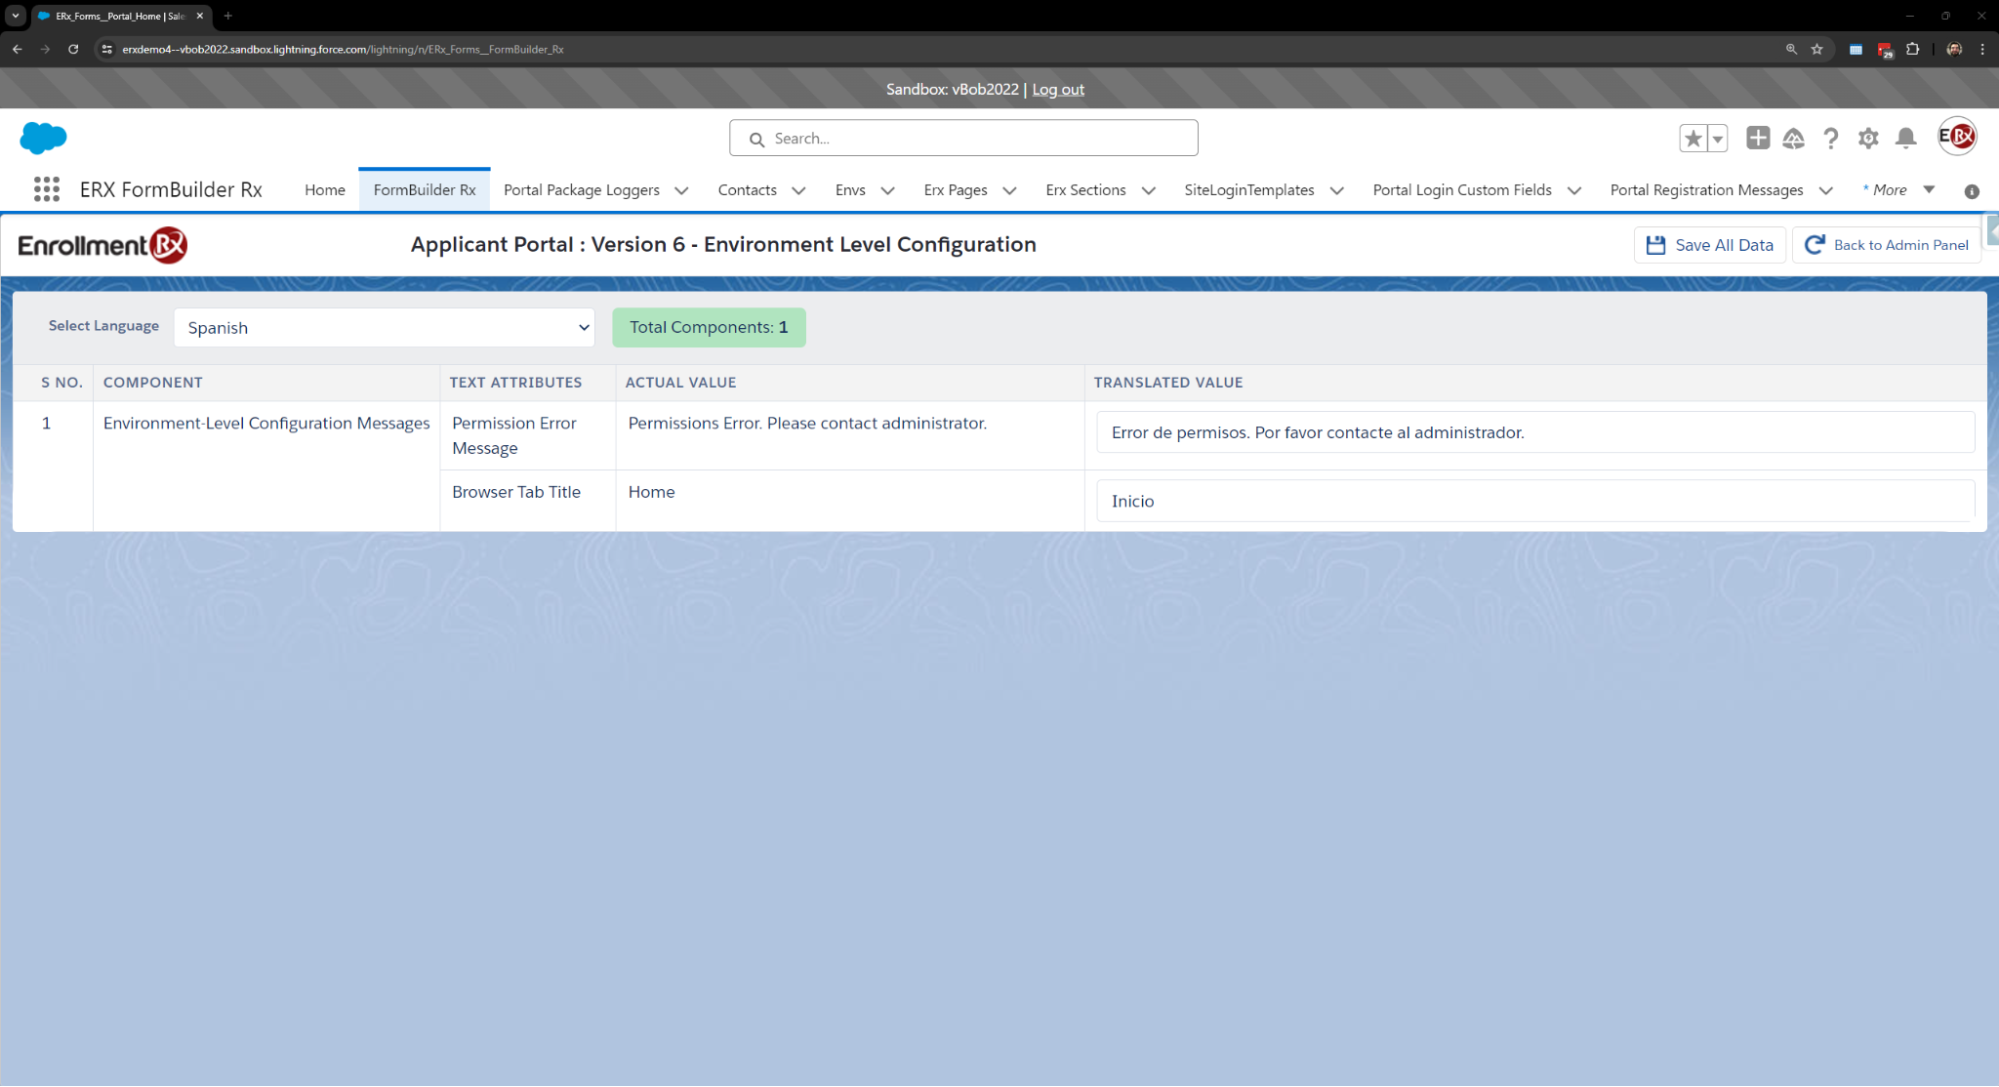
After inserting data, you need to click on the Save All Data button to save all translation configurations for a particular language.
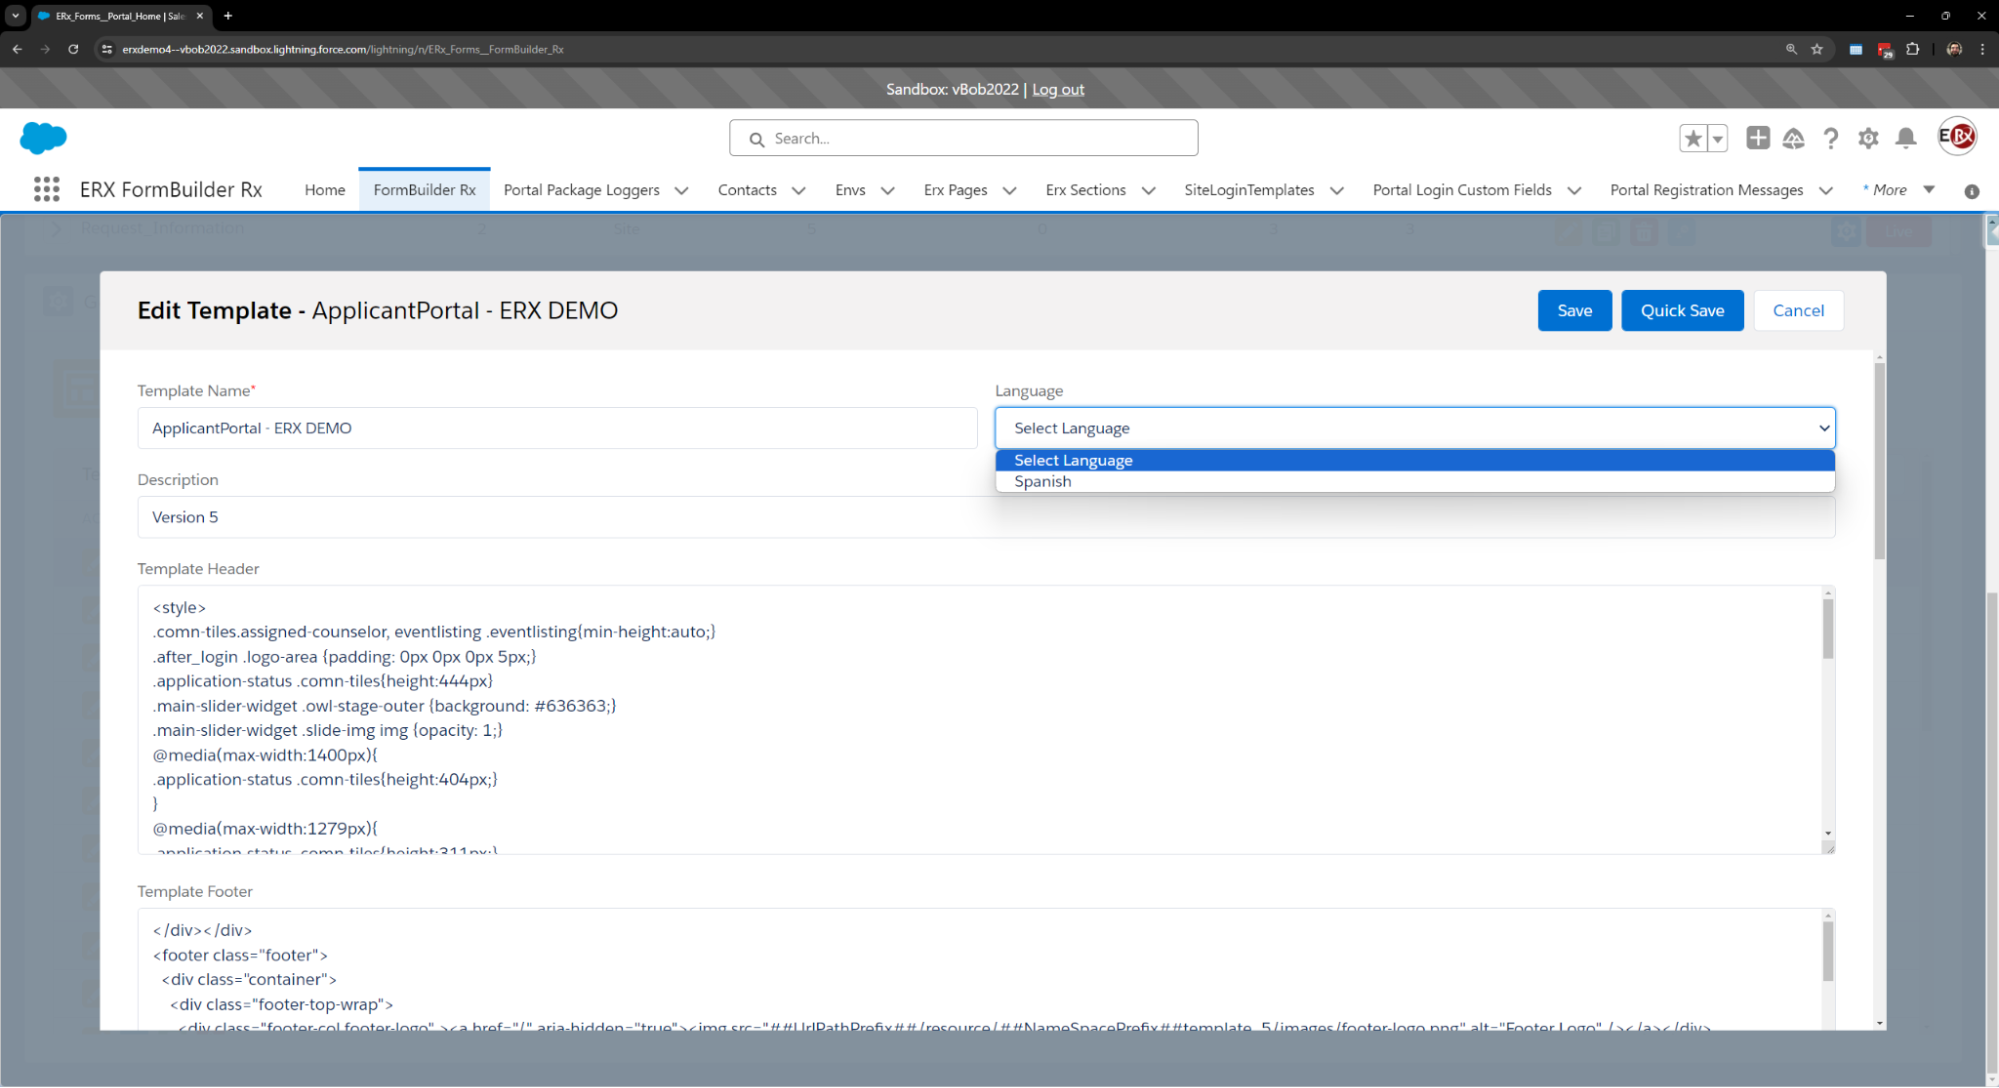
Translations on the Template Builder Subtab
On the Template Builder subtab, you'll see a language picklist option after editing a template.
The default value for the existing template or new template must be blank.
If any active language is used for multiple environments, that language will appear only once in the picklist (e.g., if French is used in both version1 and version 2, that language will appear only one time in the Language picklist).
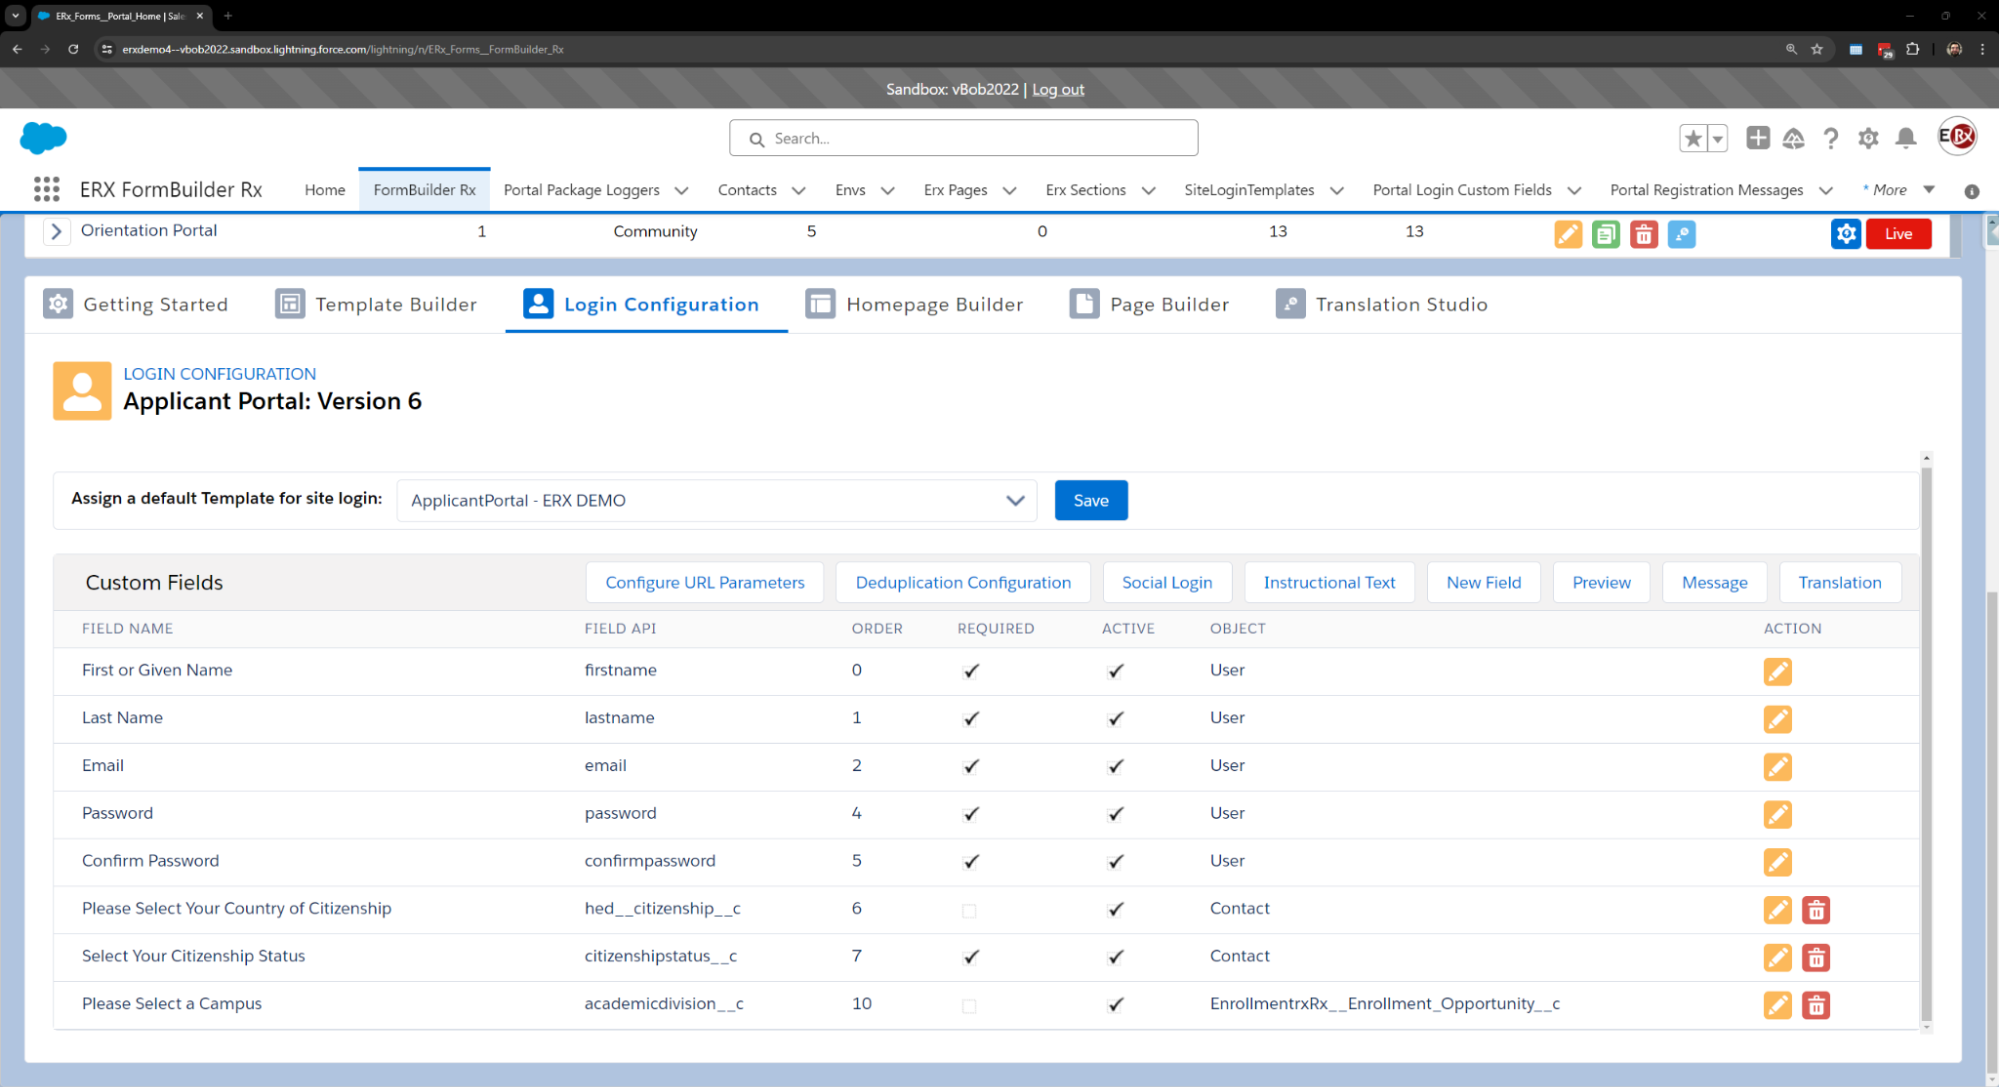
Translations on the Login Configuration Subtab
The Translation button is available on the Login Configuration subtab. Clicking on this will send you to the translation configuration page.
On the Translation page, you're able to see the language picklist field. Only active languages will be displayed in the dropdown (for a version).
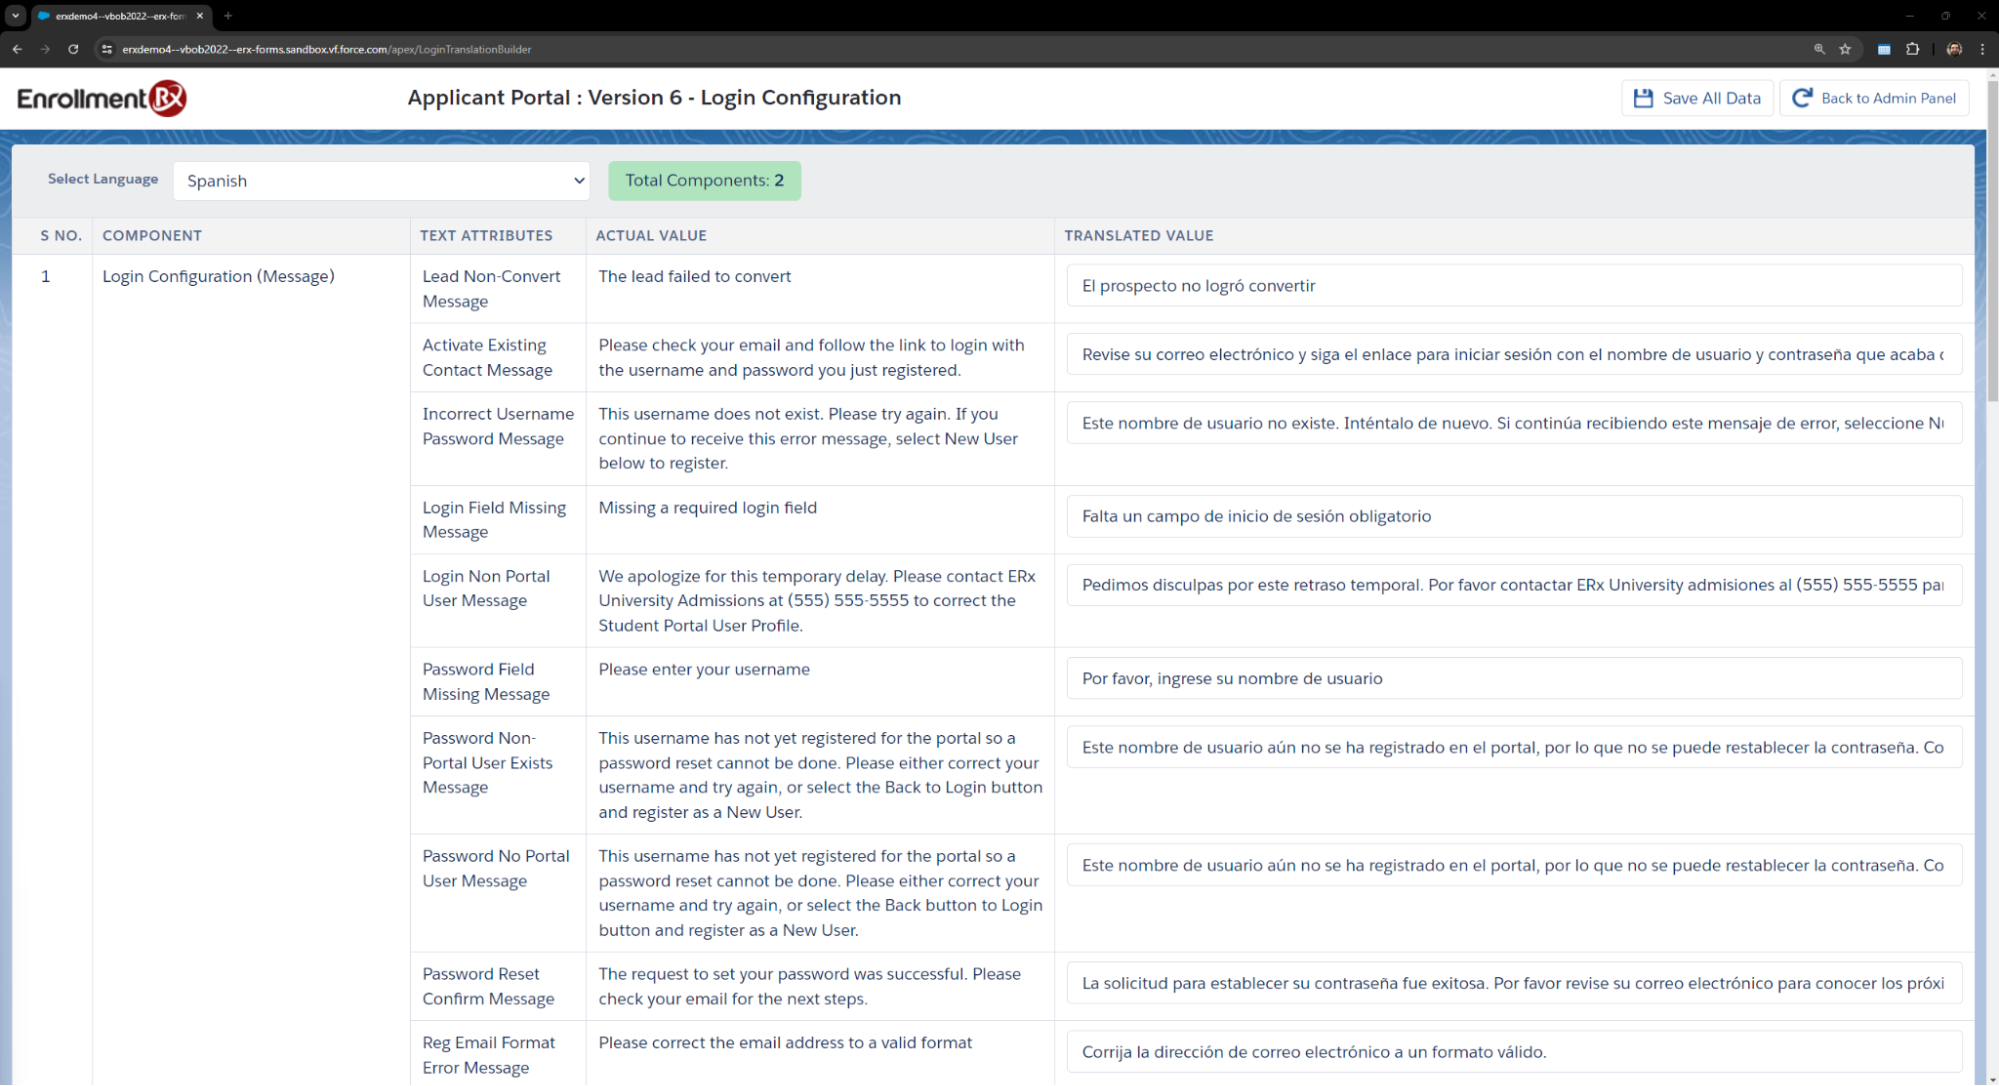
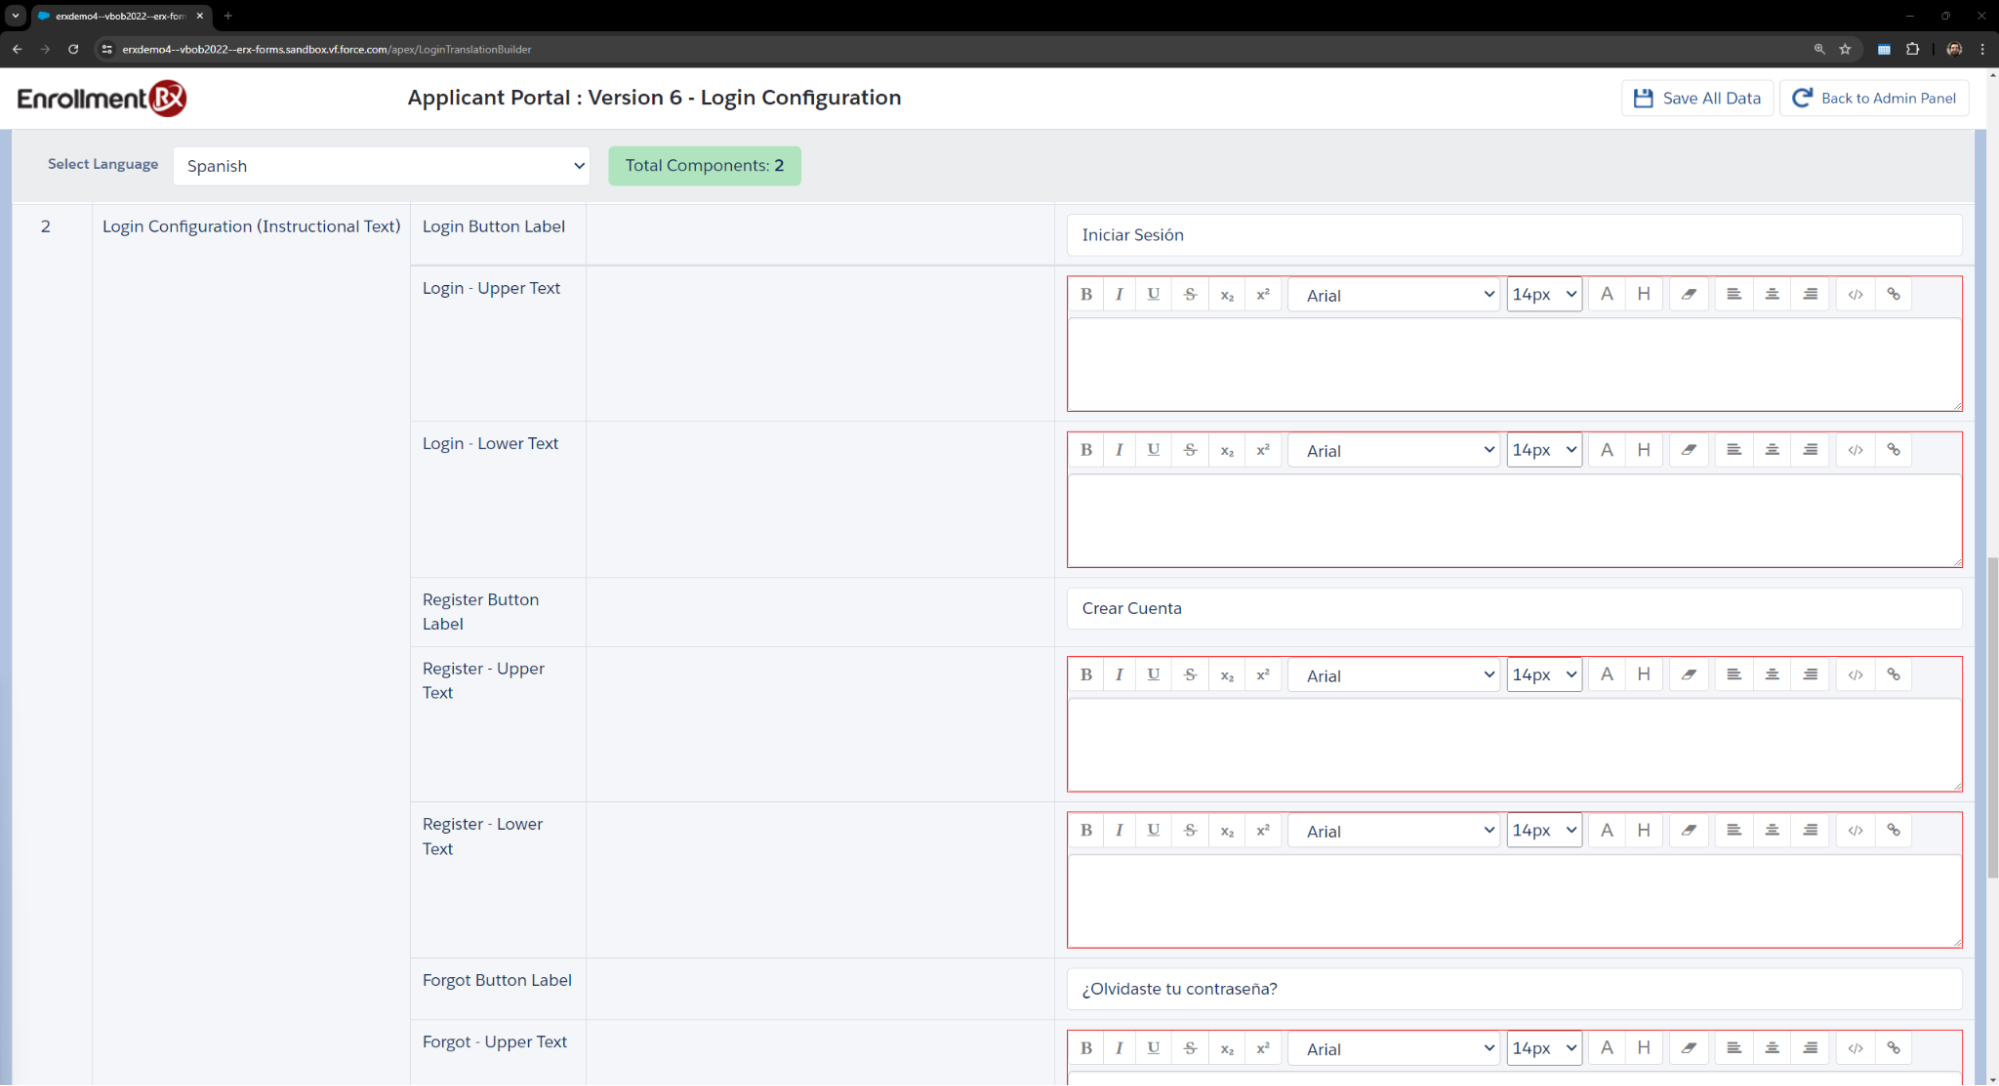
After inserting data, you'll need to click on the Save All Data button. All translation configurations are saved for a particular language.
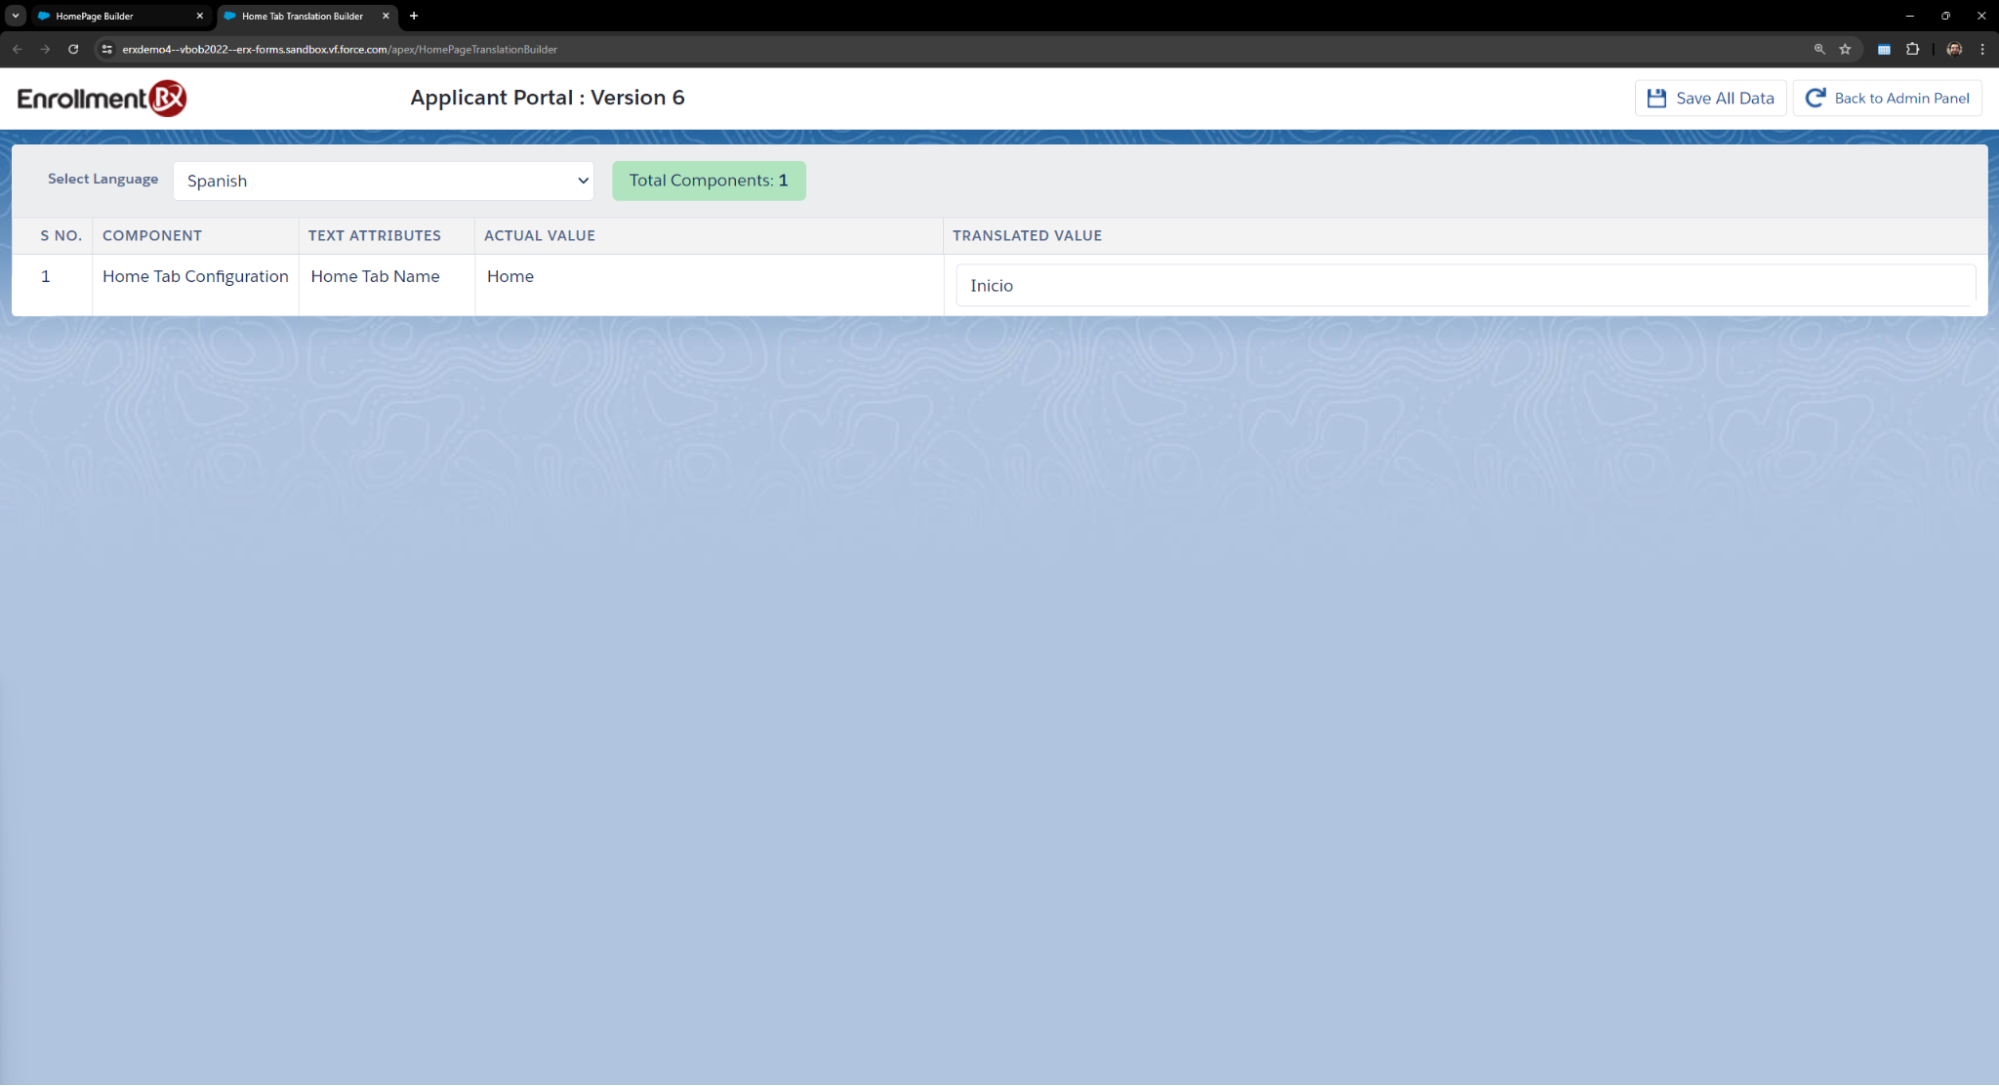
Translations on the Homepage Builder Subtab
The Translation button is also available on the Homepage Builder subtab.
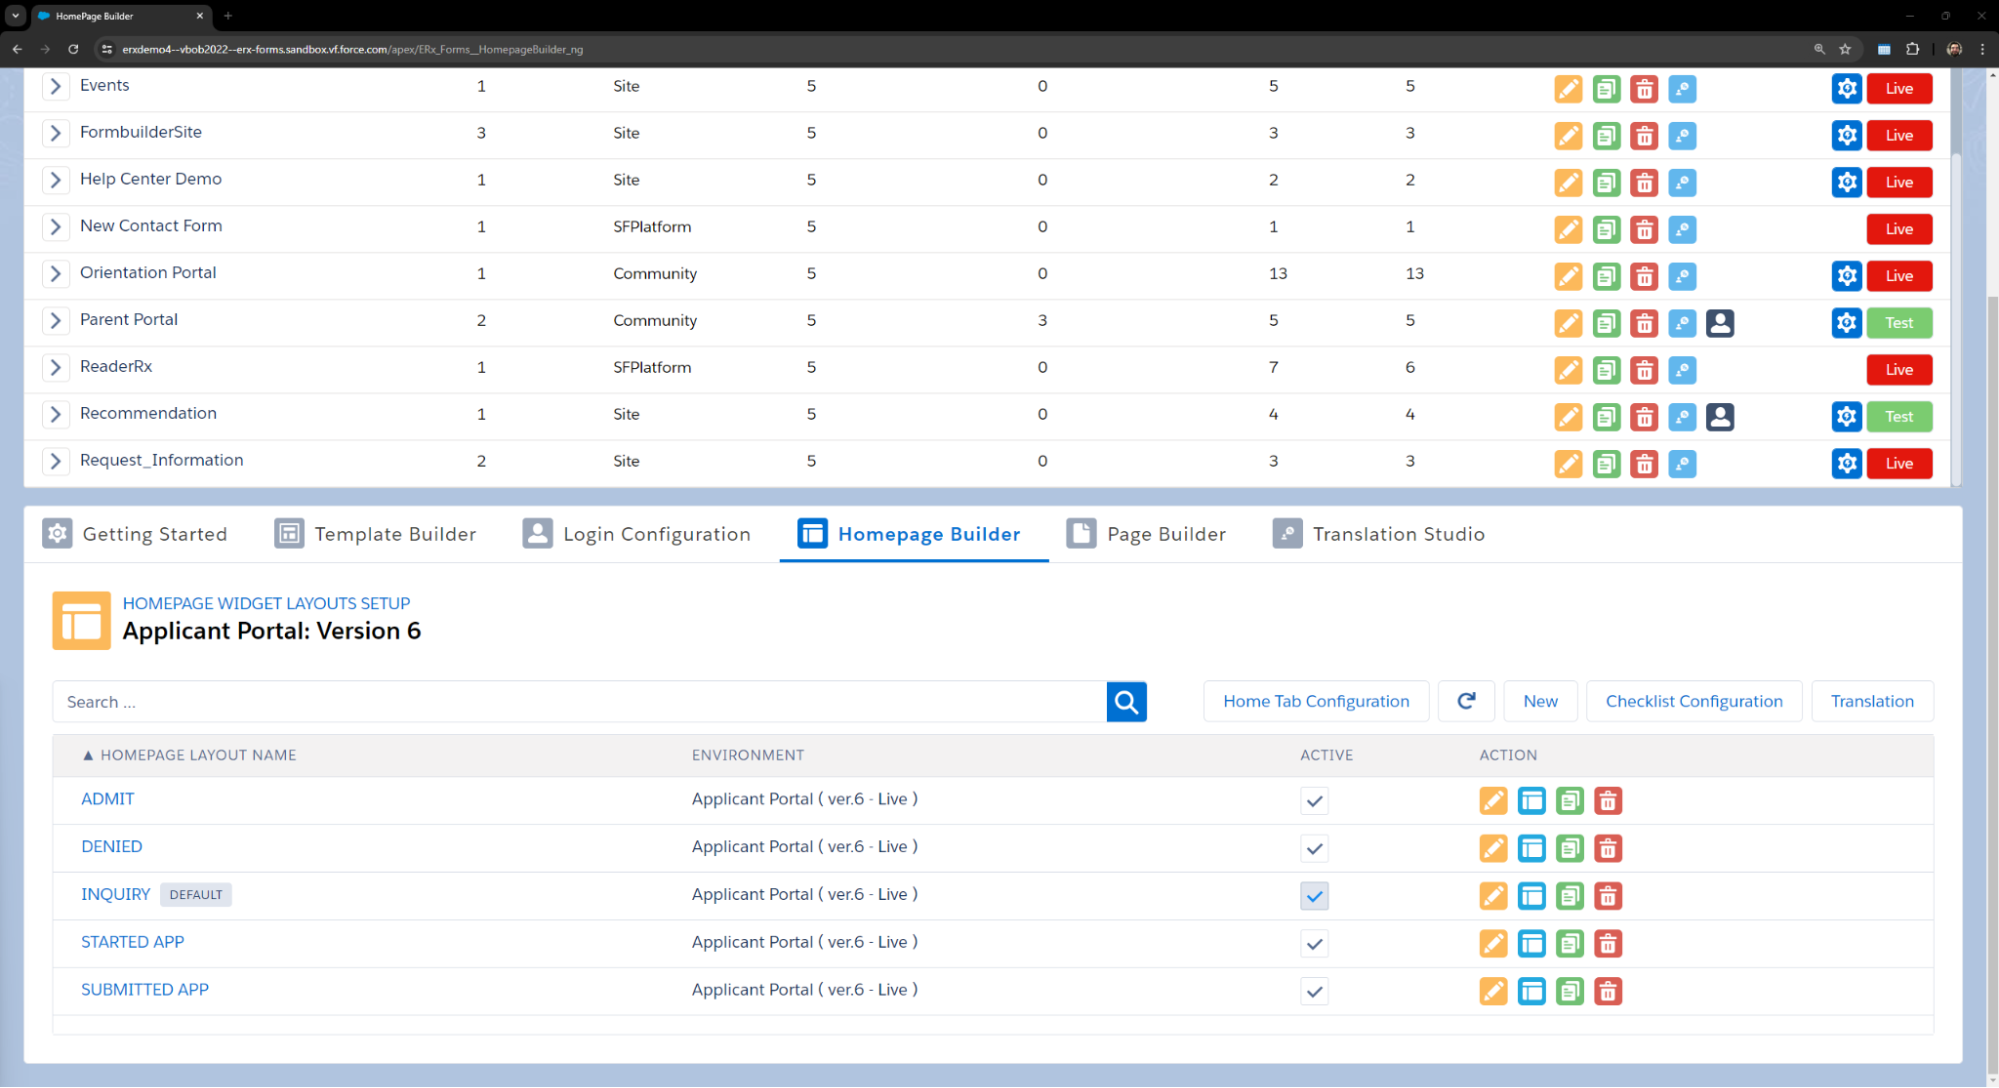
After clicking this button, you'll be redirected to the Translate Home tab.
Translations for Widget Library Items
Under the Homepage Widget section, you'll see a Translation icon on each widget item.
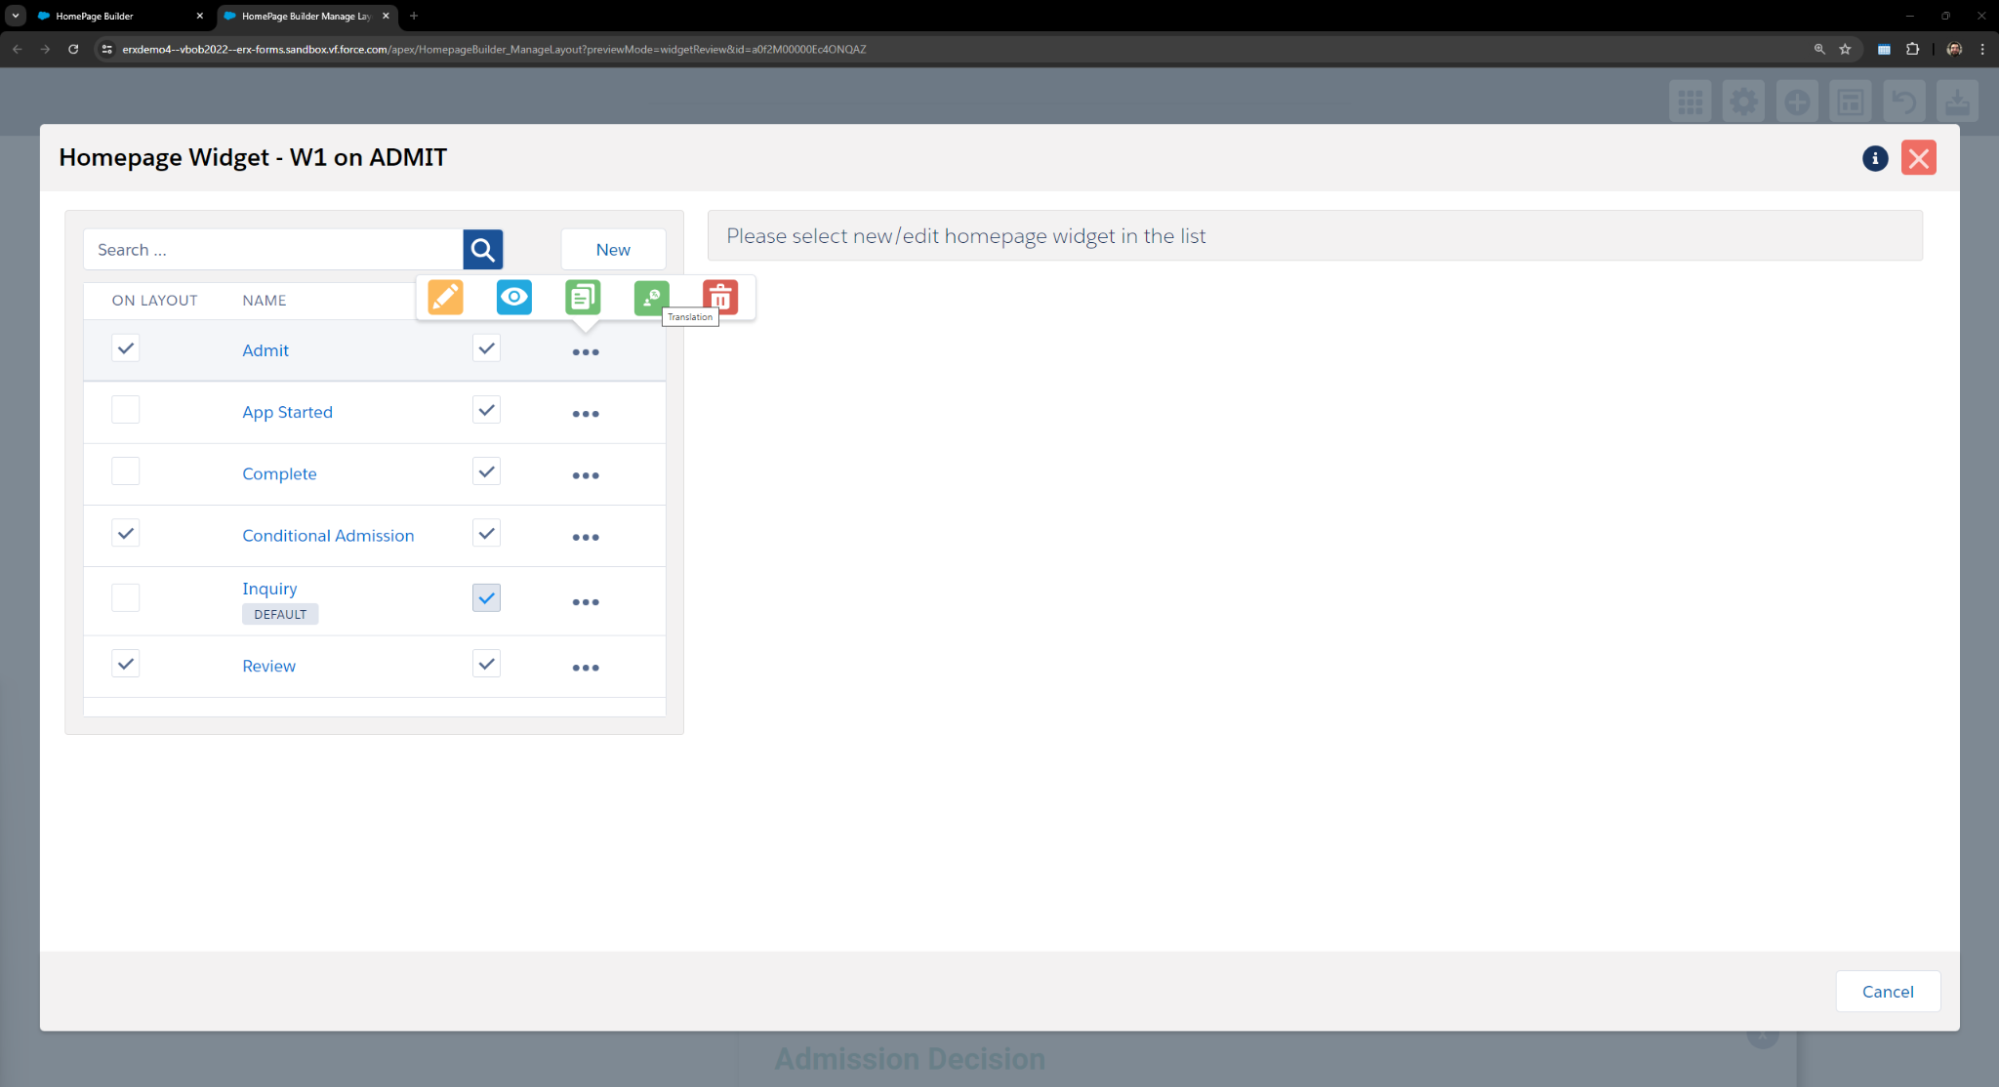
After clicking the icon, you'll be able to configure translations for widgets using the Translated Value column.
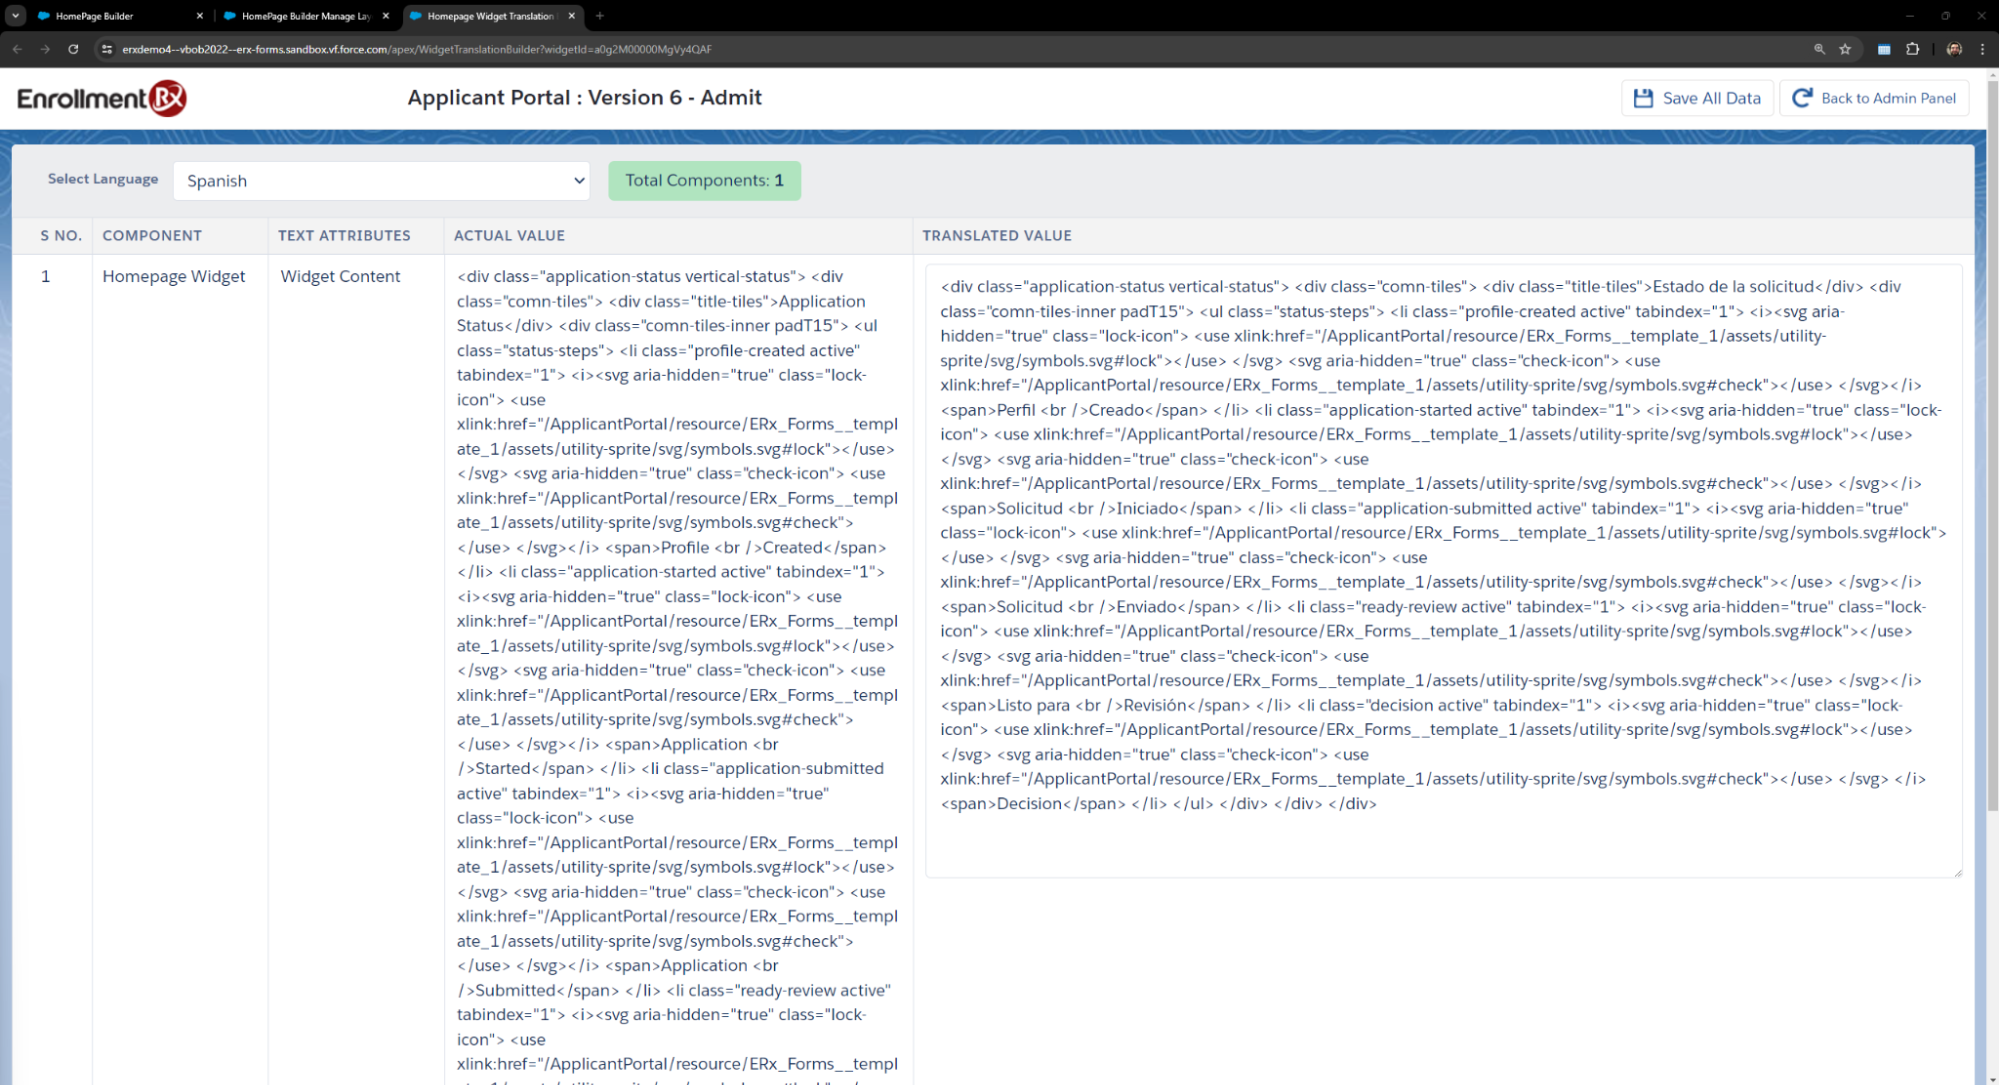
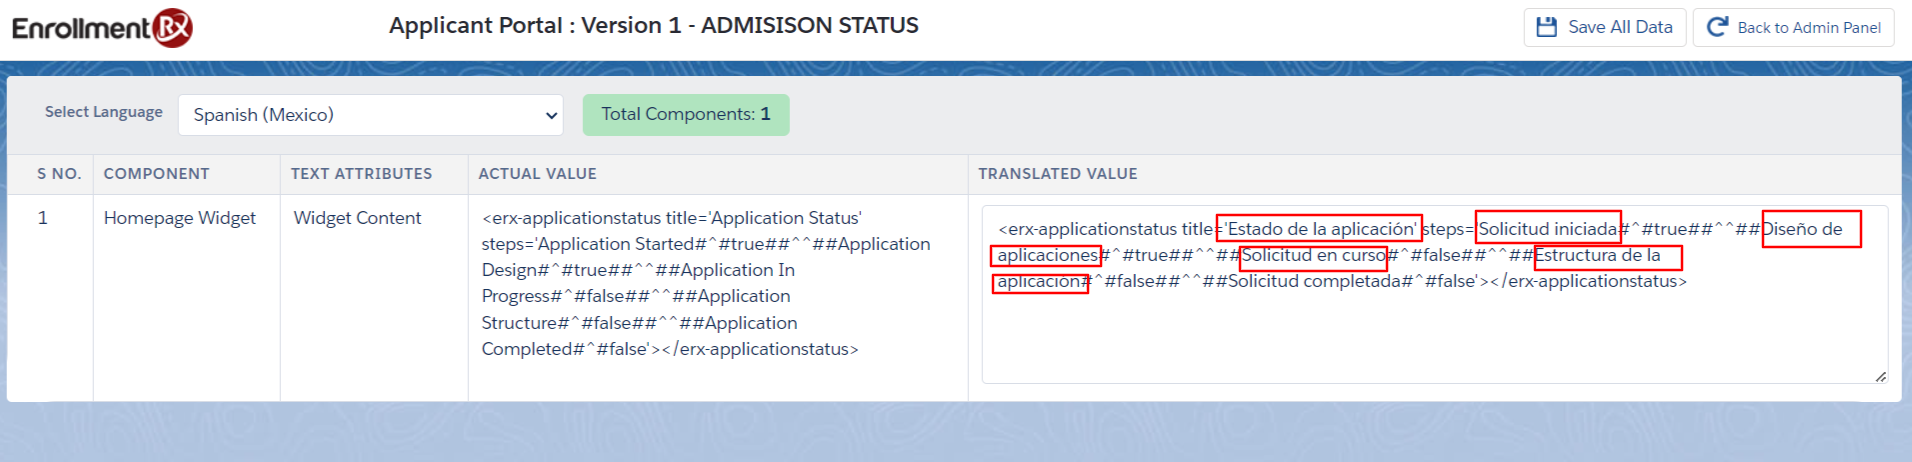
You can configure translations for the following widget types:
- Application Status
- Branding Info
- Social Feed
- Checklist
- Apply Now
- Contact Info
- Text/HTML
- iframe
- Video Link
- Main Slider
- Event Listing
Translations on the Page Builder Subtab
On the Page Builder subtab, you'll see a Translations icon for each page. After clicking on the translation icon, a new page will be displayed with of all the components available. For each component, you can set up translated values.
- Go to the FormBuilder tab
- Click on the Page Builder subtab
- Create a new page or use an existing page
- Click the Translations icon
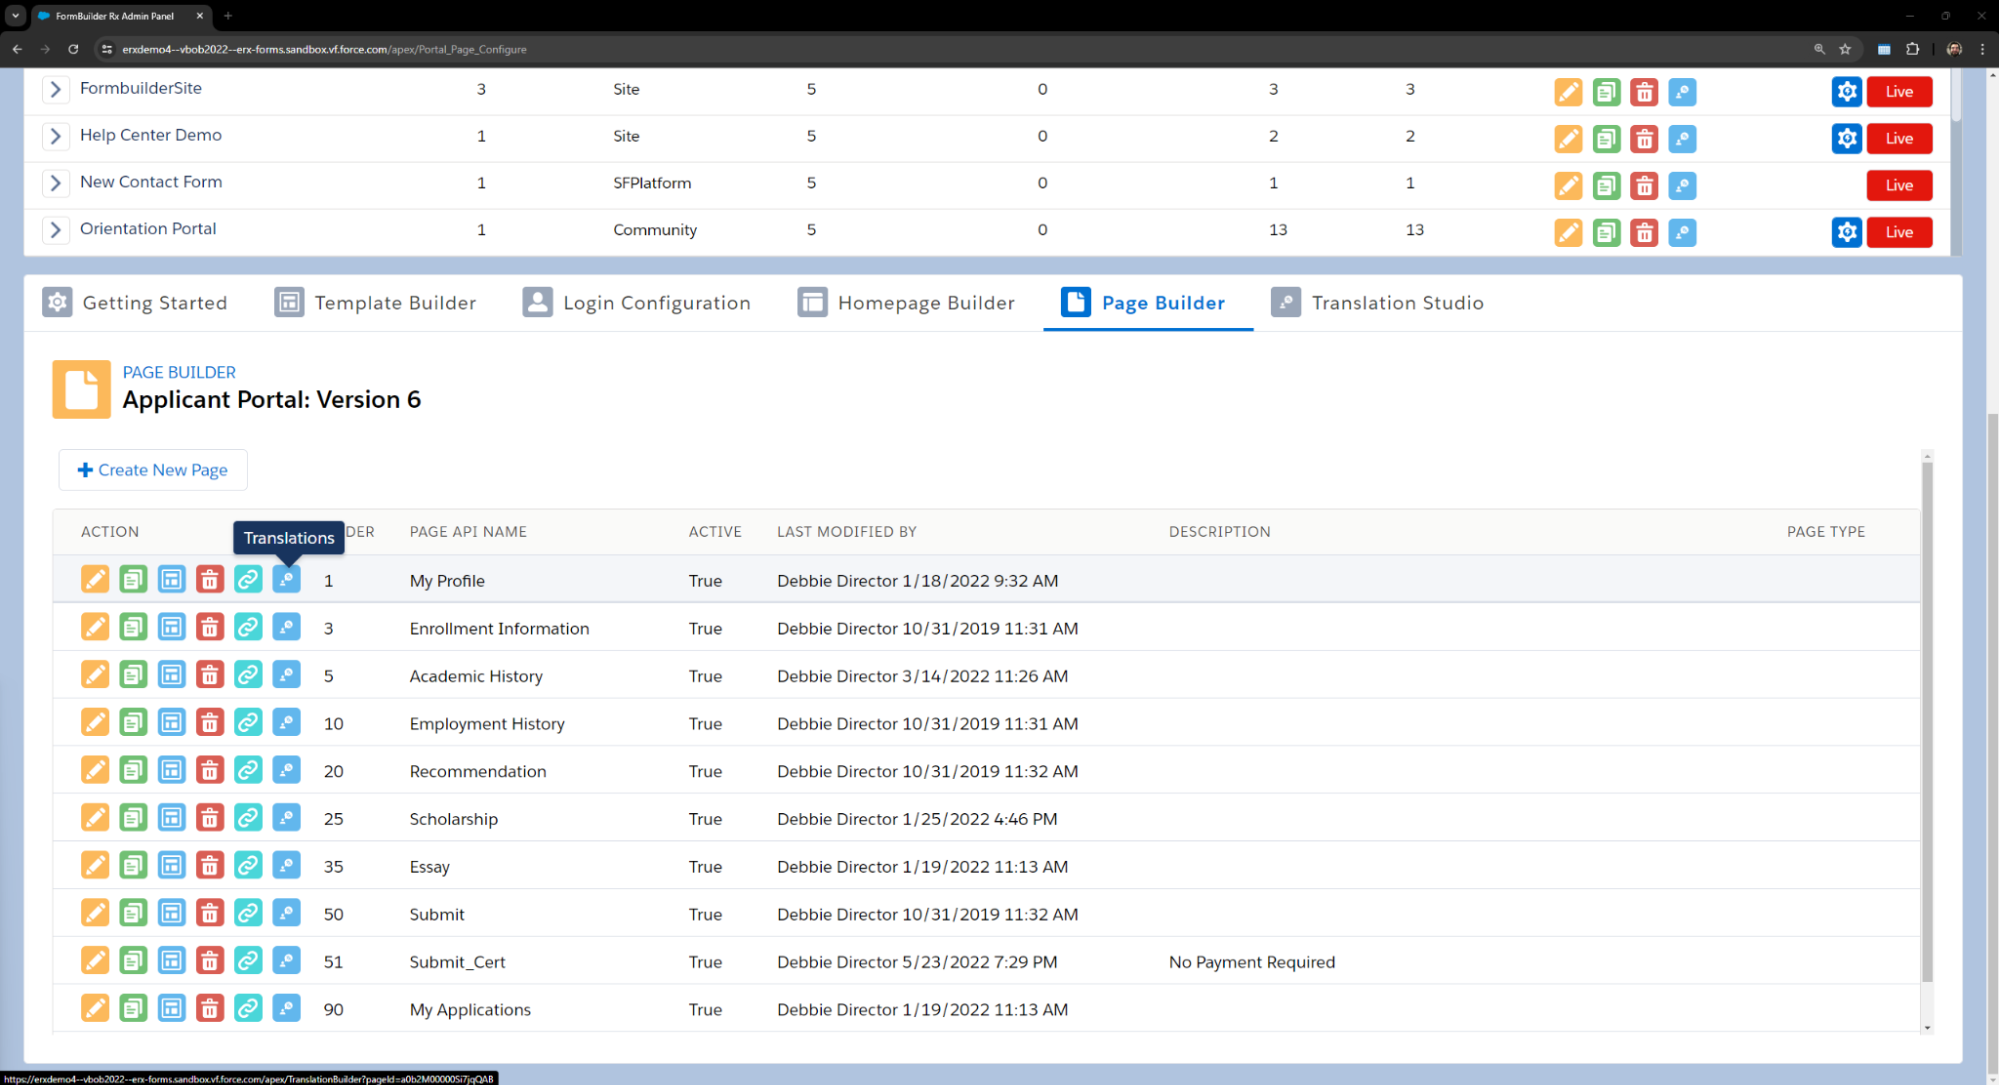
- This will open the Translations page, and all the components (which exist on the page), should be available for translation on the front end.
- Select a Language for Translations. (Selecting the language dropdown will show
all available languages.)
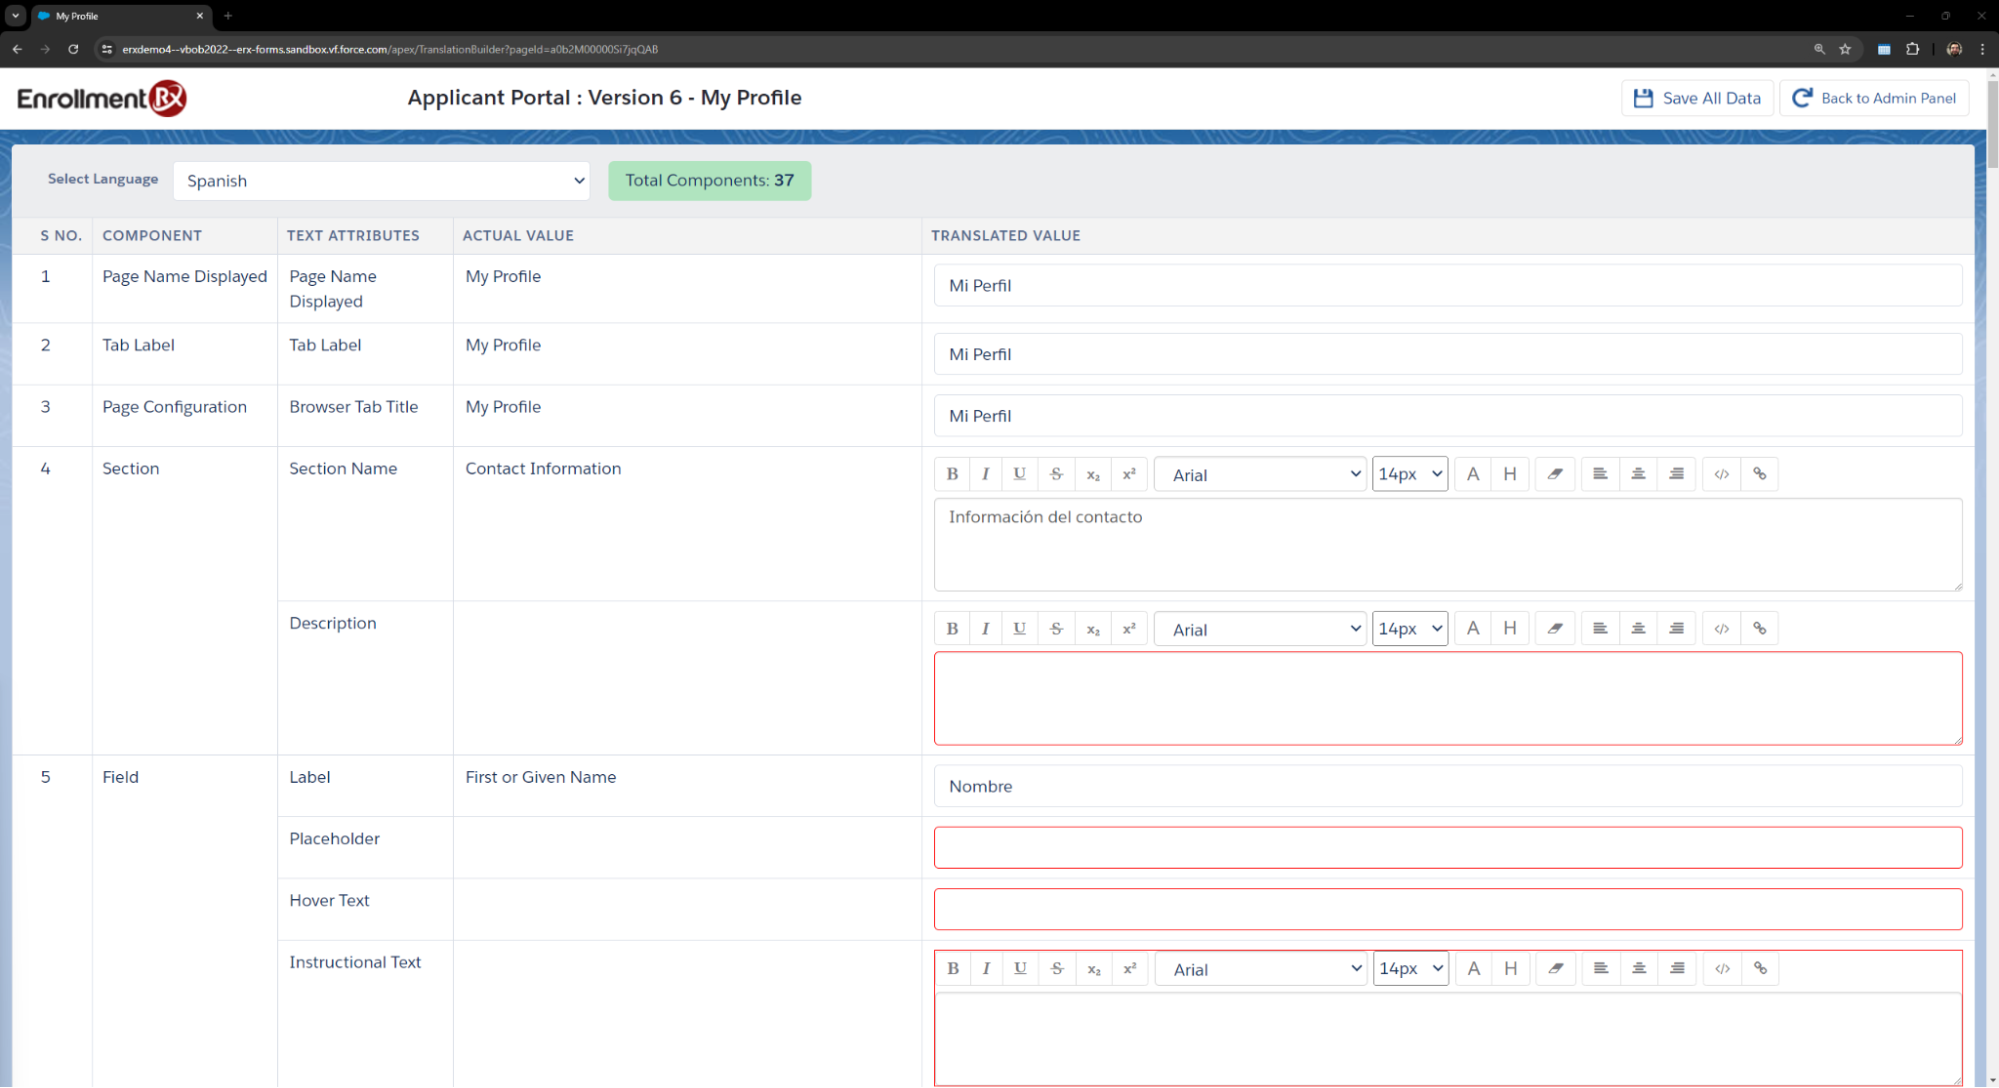
- Write Translations in the Translated Value column.
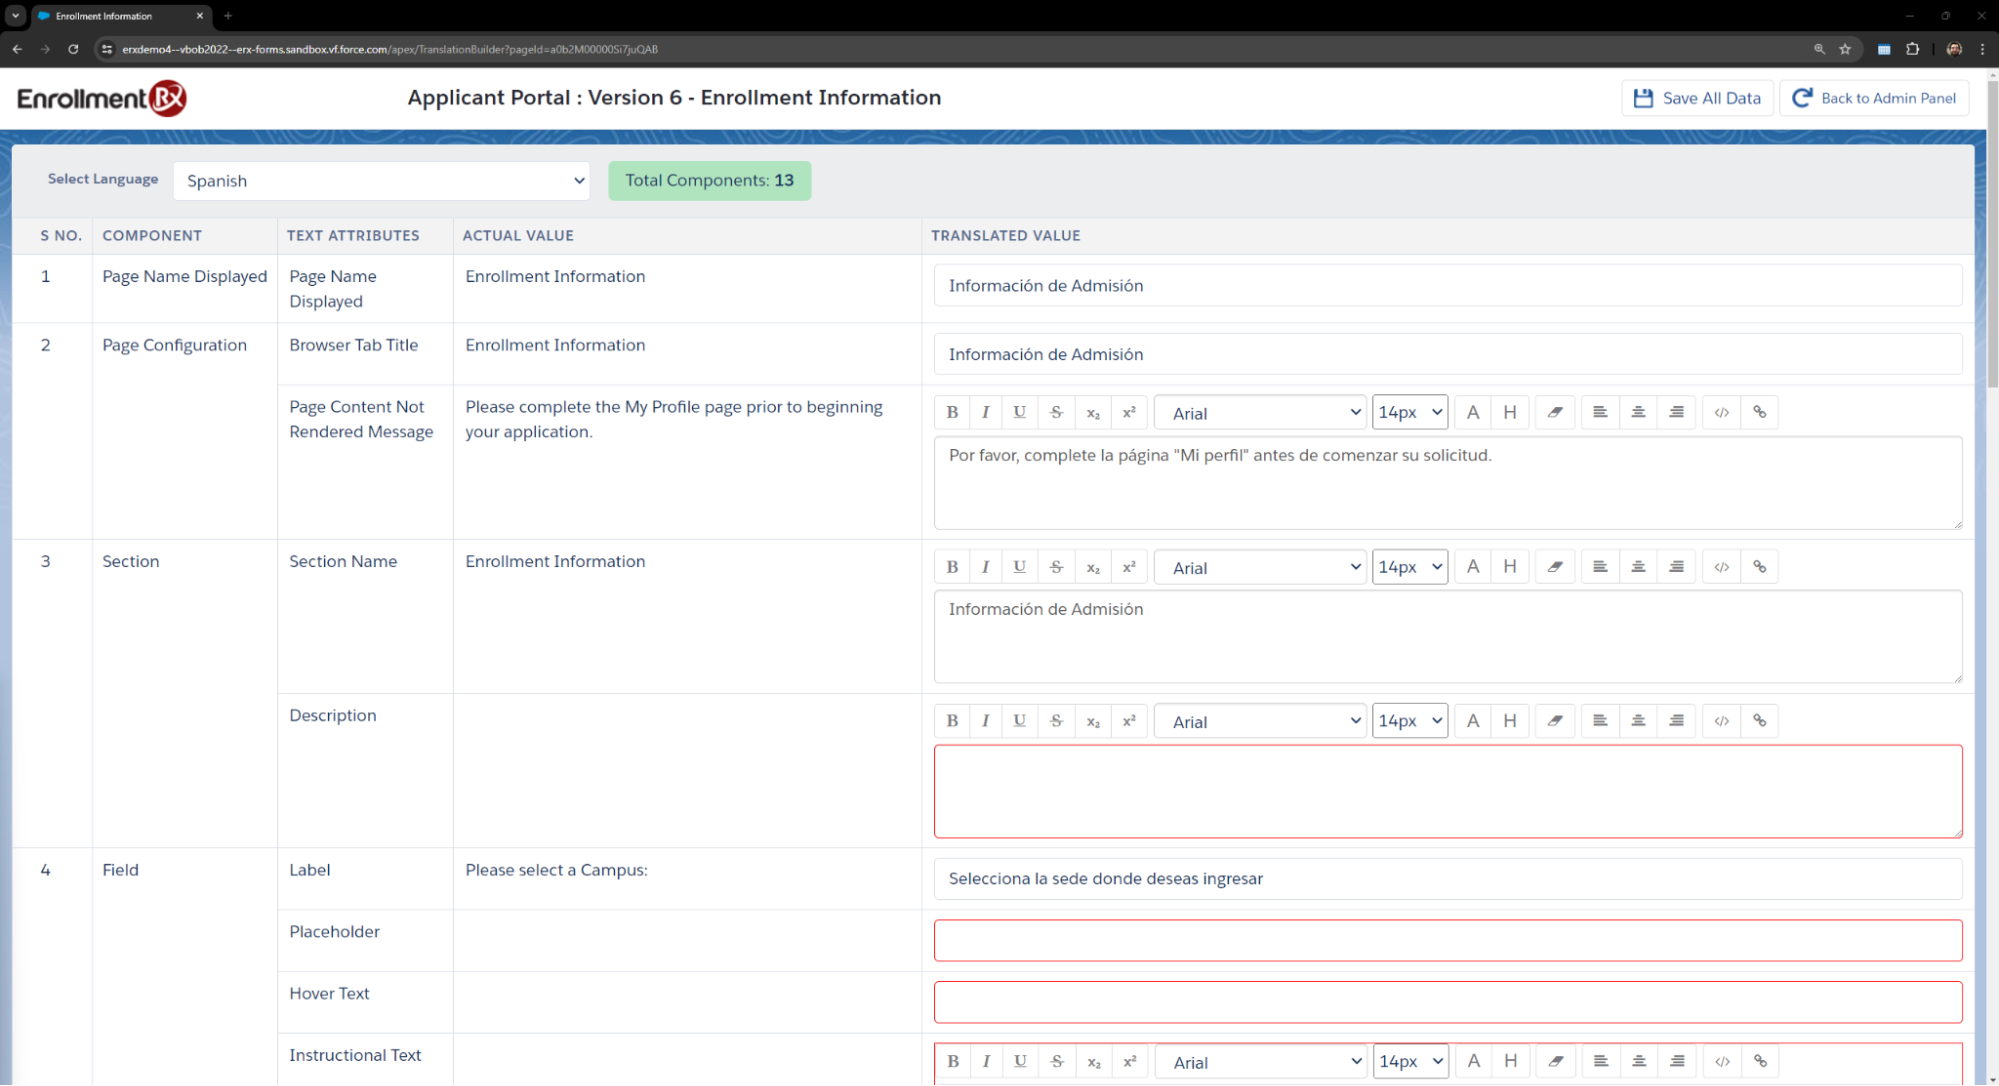
- Click the Save All Data button