Super Clone
Before You Begin
- Target Record Fields
- Target Record Fields set to NULL
- Source Record Fields
In the Super Clone dialog, if any fields in these Field Sets are marked "required" with a red asterisk:
- You must edit all required fields before the "Start Clone" button becomes active.
If none of the fields are marked "required," there are different instructions for each Field Set:
- Target Record Fields: You'll need to change at least one field before the "Start Clone" button is clickable.
- Target Record Fields set to NULL: The "required" attribute has no function. Fields listed in this Field Set will be set to NULL on the target Record.
- Source Record Fields: Updating fields in this Field Set before cloning is optional.
How to Create the Target Record and Source Record Field Sets
- Go to and click on the Application object.
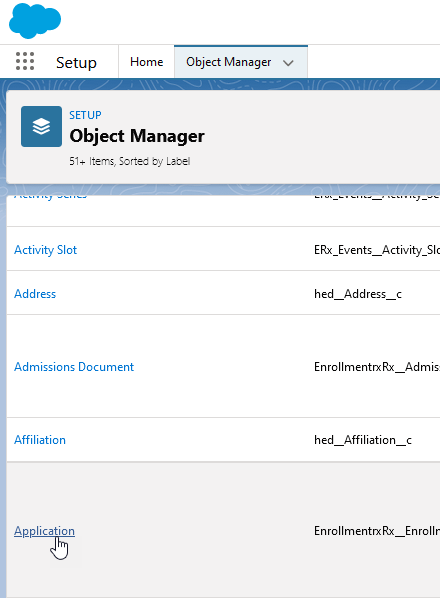
- On the Application Object details page, click Field Sets in the left column.
- On the Field Sets main page, click the New button in the upper right corner. This opens the New Field Set page.
- On the New Field Set page, using Target Record Fields as an example, add the
following information:
- Field Set Label: Target Record Fields
- Field Set Name: Populates automatically as Target_Record_Fields
- Enter a description for Where is this used?.
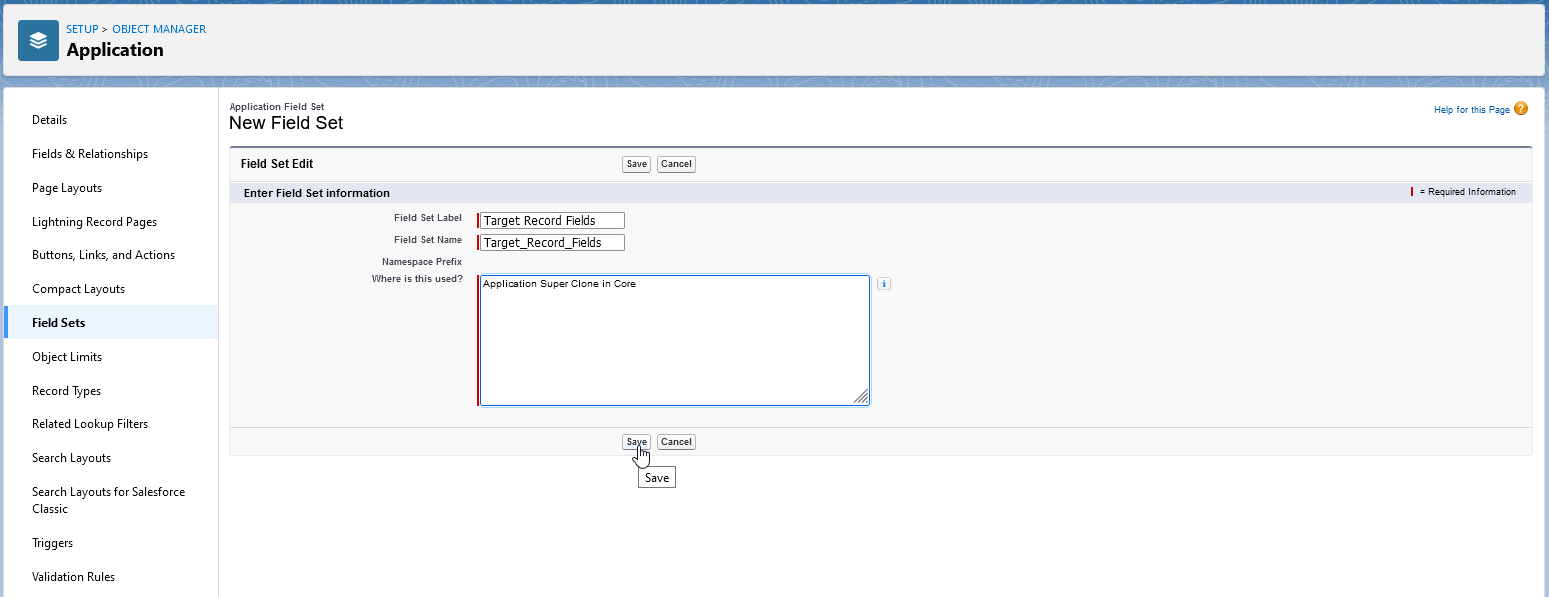
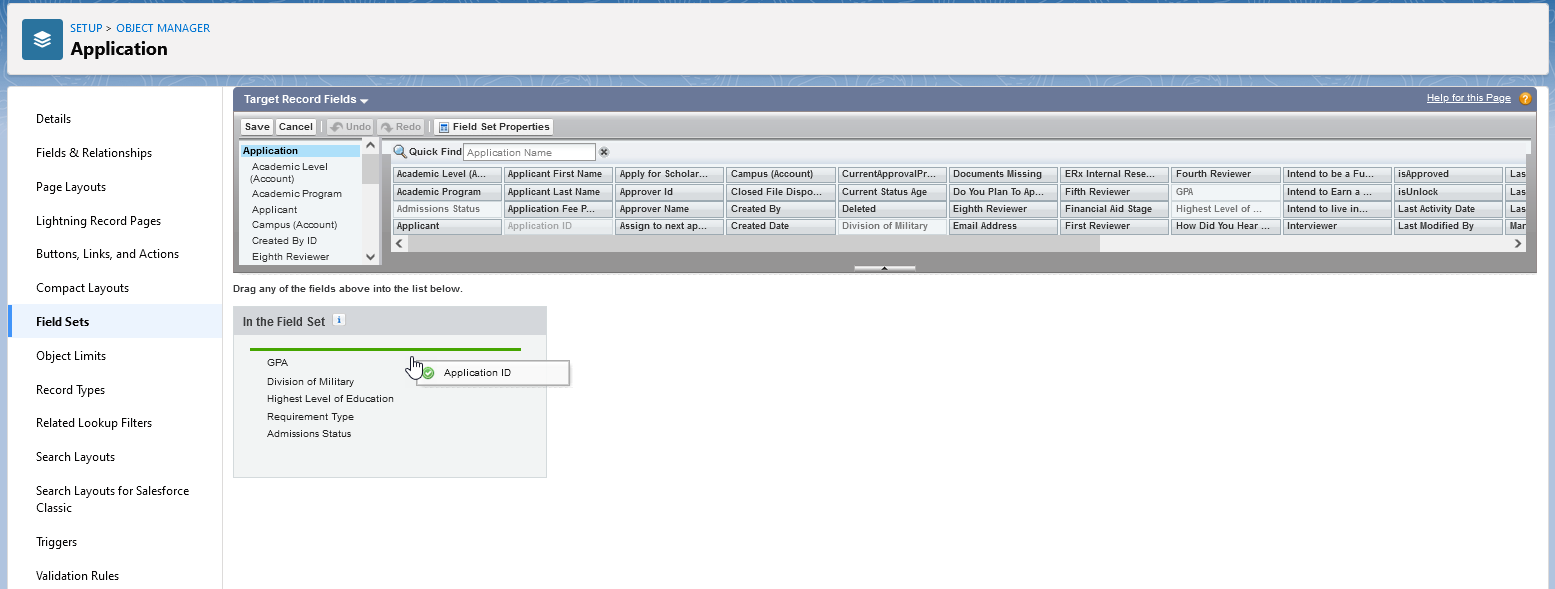
- Click Save. This takes you to a page where you can add the fields to the Field Set by dragging and dropping them.
- Add the fields you wish to include and click the Save button (upper left
corner of the gray field container).
Repeat Steps 1-6 for Target Record Fields Set to NULL and Source Record Fields.
Using Super Clone
On the Application Record, click the Super Clone button.

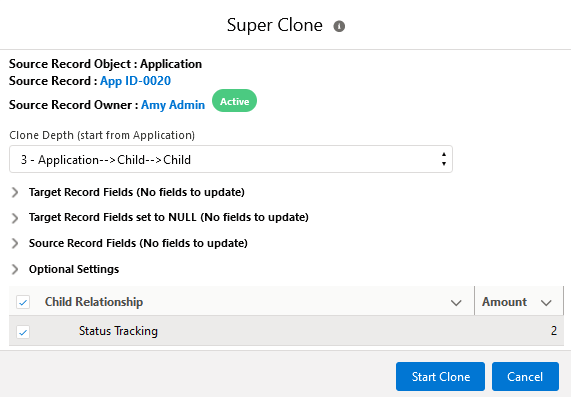
The Super Clone dialog appears.
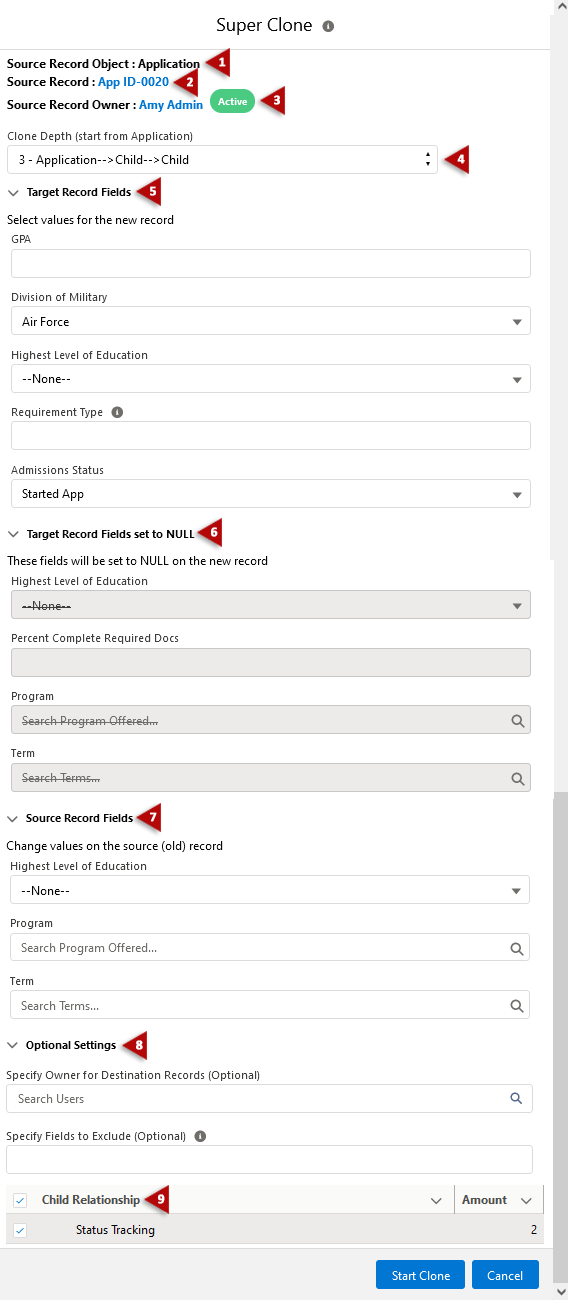
The Super Clone Dialog - Annotations
| Dialog Element | Description |
|---|---|
| 1. Source Record Object | Application |
| 2. Source Record | Application ID |
| 3. Source Record Owner | The Owner listed on the Application Record |
| 4. Clone Depth | Select how many depth levels of the Application to clone. You can step down to the third child level. |
| 5. Target Record Fields | These fields default to the value on the source Record. At least one record must be updated before cloning. (See "Before You Begin" at the top of this page for instructions on creating this Field Set.) |
| 6. Target Record Fields set to NULL | These fields default to the value on the source Record and are set to NULL on the new Record. They appear in the dialog window with a strikethrough over the value. (See "Before You Begin" for instructions on creating this Field Set.) Boolean fields should not be included. To update boolean fields on a new record, add them to the Target Record Fields Field Set. |
| 7. Source Record Fields | These fields default to the value on the Record being cloned. Updating before cloning is optional. (See "Before You Begin" for instructions on creating this Field Set.) |
| 8. Optional Settings |
|
| 9. Child Relationship | Check or uncheck Child Objects for the new Record. |
Instructions for Using a Custom Application Object
If you're using a custom application and not the default
(EnrollmentrxRx__Enrollment_Opportunity__c), you will need to
create the Super Clone button with a manually configured URL. Following are the steps
for Salesforce Classic and Lightning Experience:
Salesforce Classic
Create the Button
- Go to
- Click on the object you're using as your custom application
- Scroll down to the Buttons, Links, and Actions section
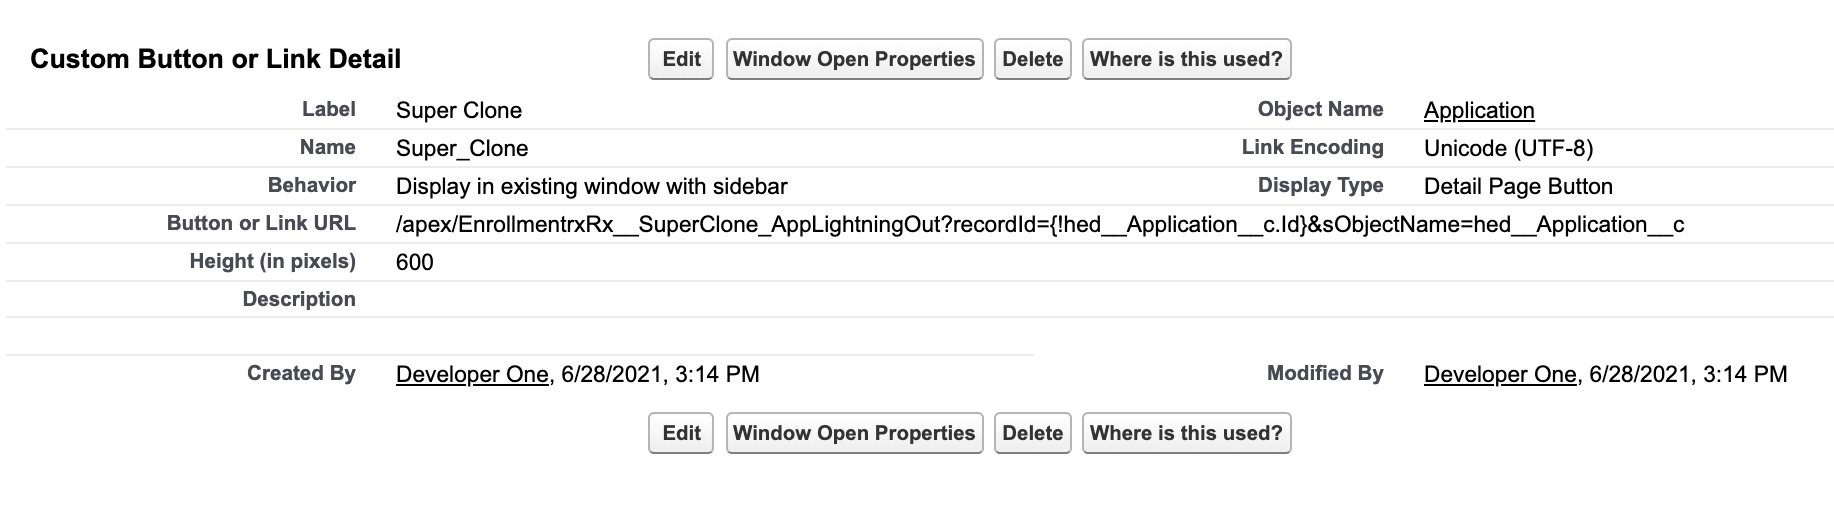
- Click on the New Button or Link button and enter the following settings:
- Label: Super Clone
- Display Type: Detail Page Button
- Behavior: Display in existing window with sidebar
- Button or Link URL:
/apex/EnrollmentrxRx__SuperClone_AppLightningOut?recordId={!Custom_Application__c.Id}&sObjectName=Custom_Application__c - Click Save
Add the Button to the Page Layout
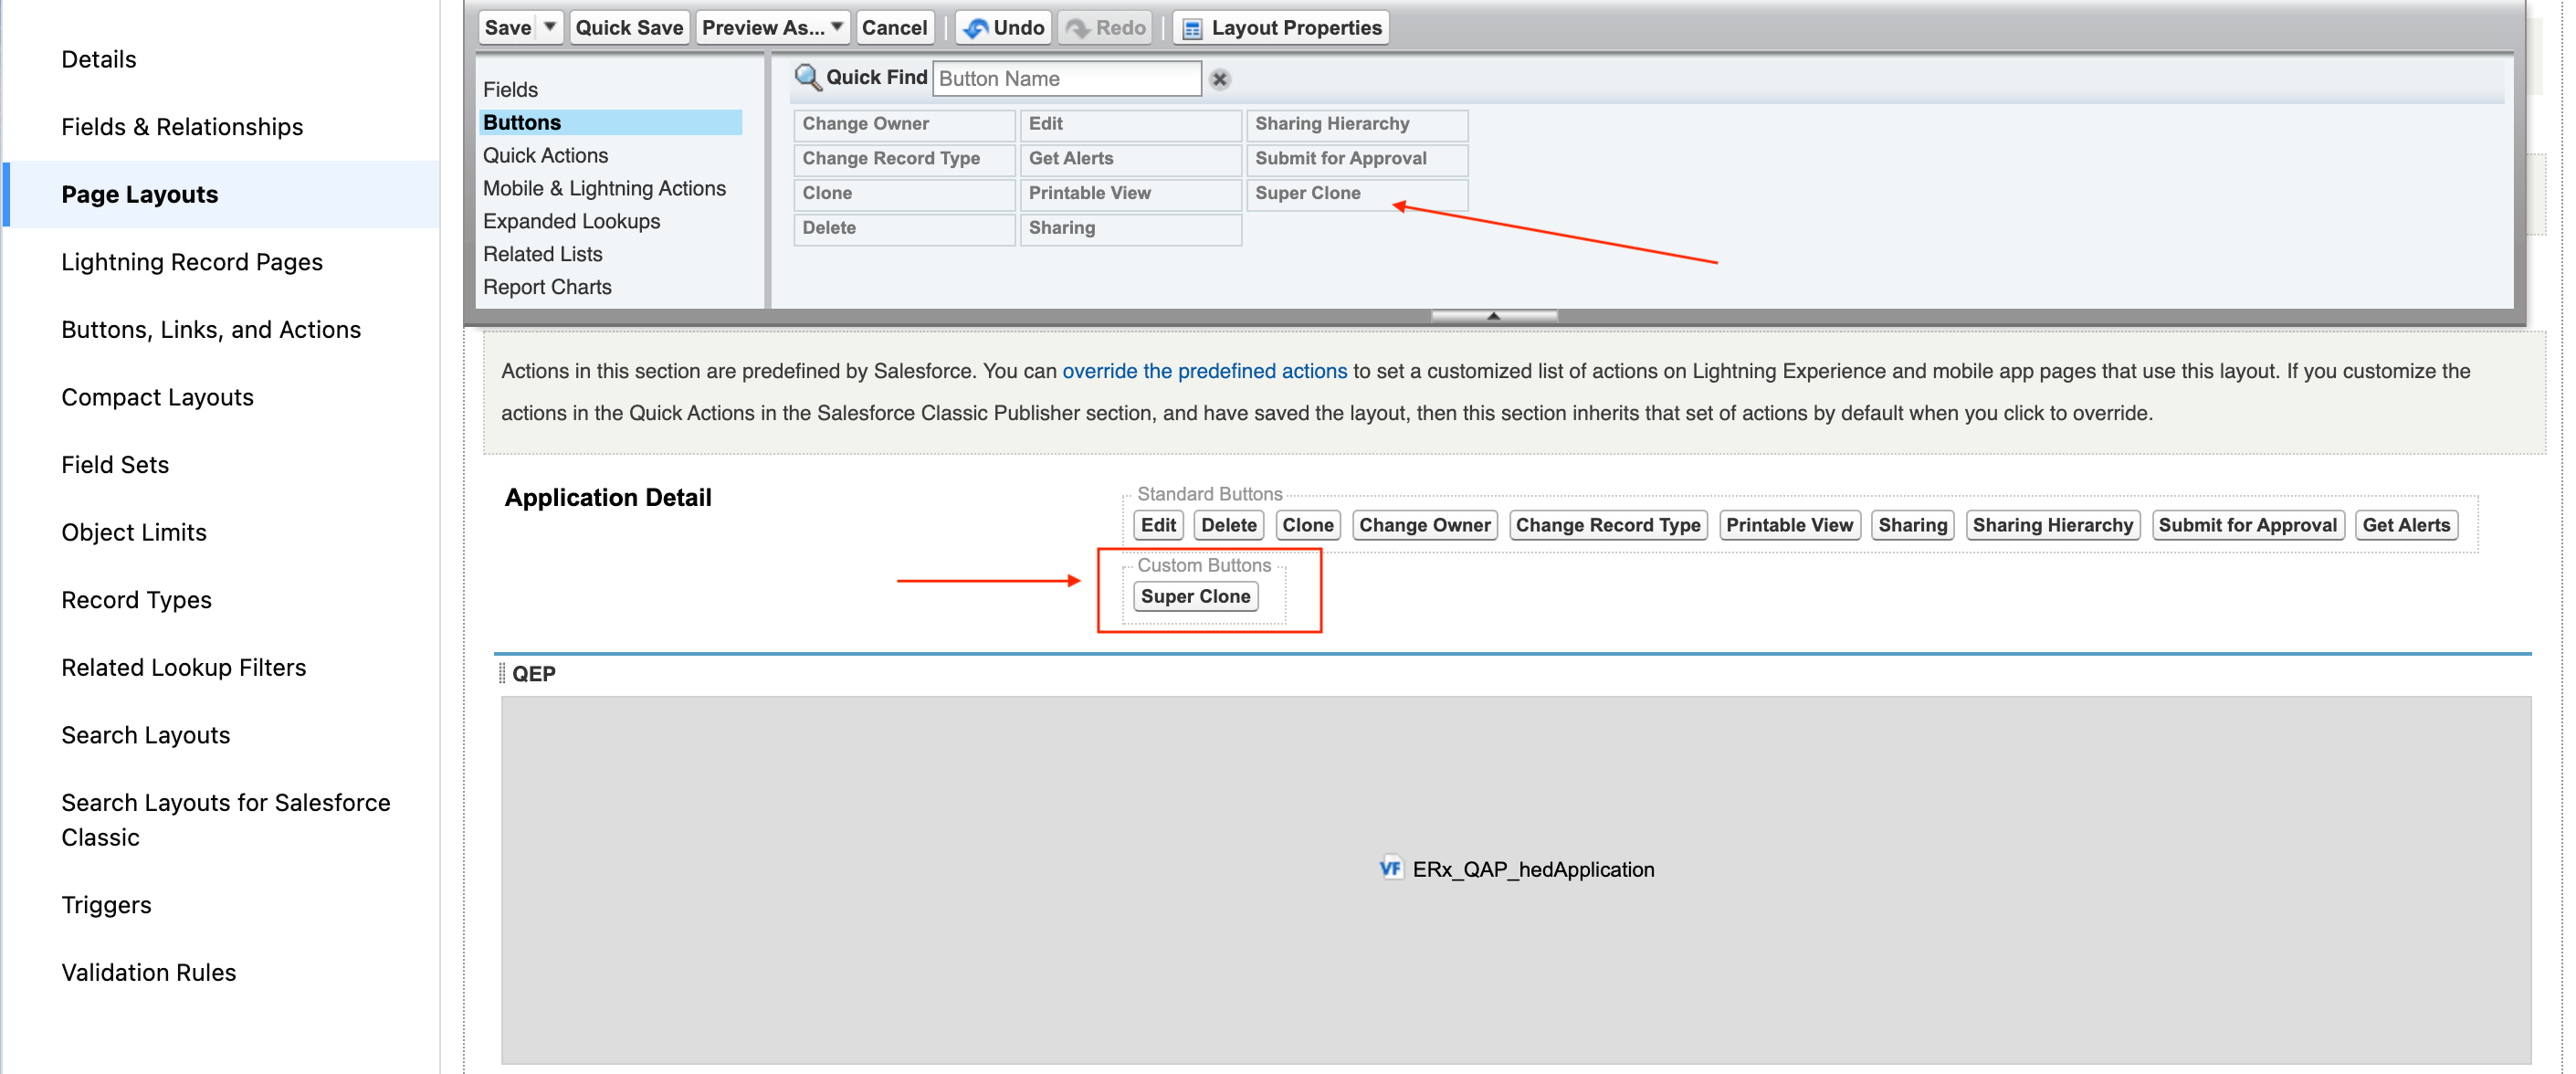
- Return to the object main page and scroll to the Page Layouts section
- Edit the custom application's page layout by dragging and dropping the Super Clone button to the Custom Buttons area under Application Detail
- Click Save. The button should now be visible on the Custom Application record.
Lightning Experience
Create the Button
- Go to
- Navigate to your custom application
- Click Buttons, Links, and Actions in the left column
- Click on the New Action button and enter the following details:
- Action Type: Lightning Component
- Lightning Component: EnrollmentrxRx:SuperClone_Main
- Height: 80px
- Label: Super Clone
- Click Save
Add the Button to the Page Layout
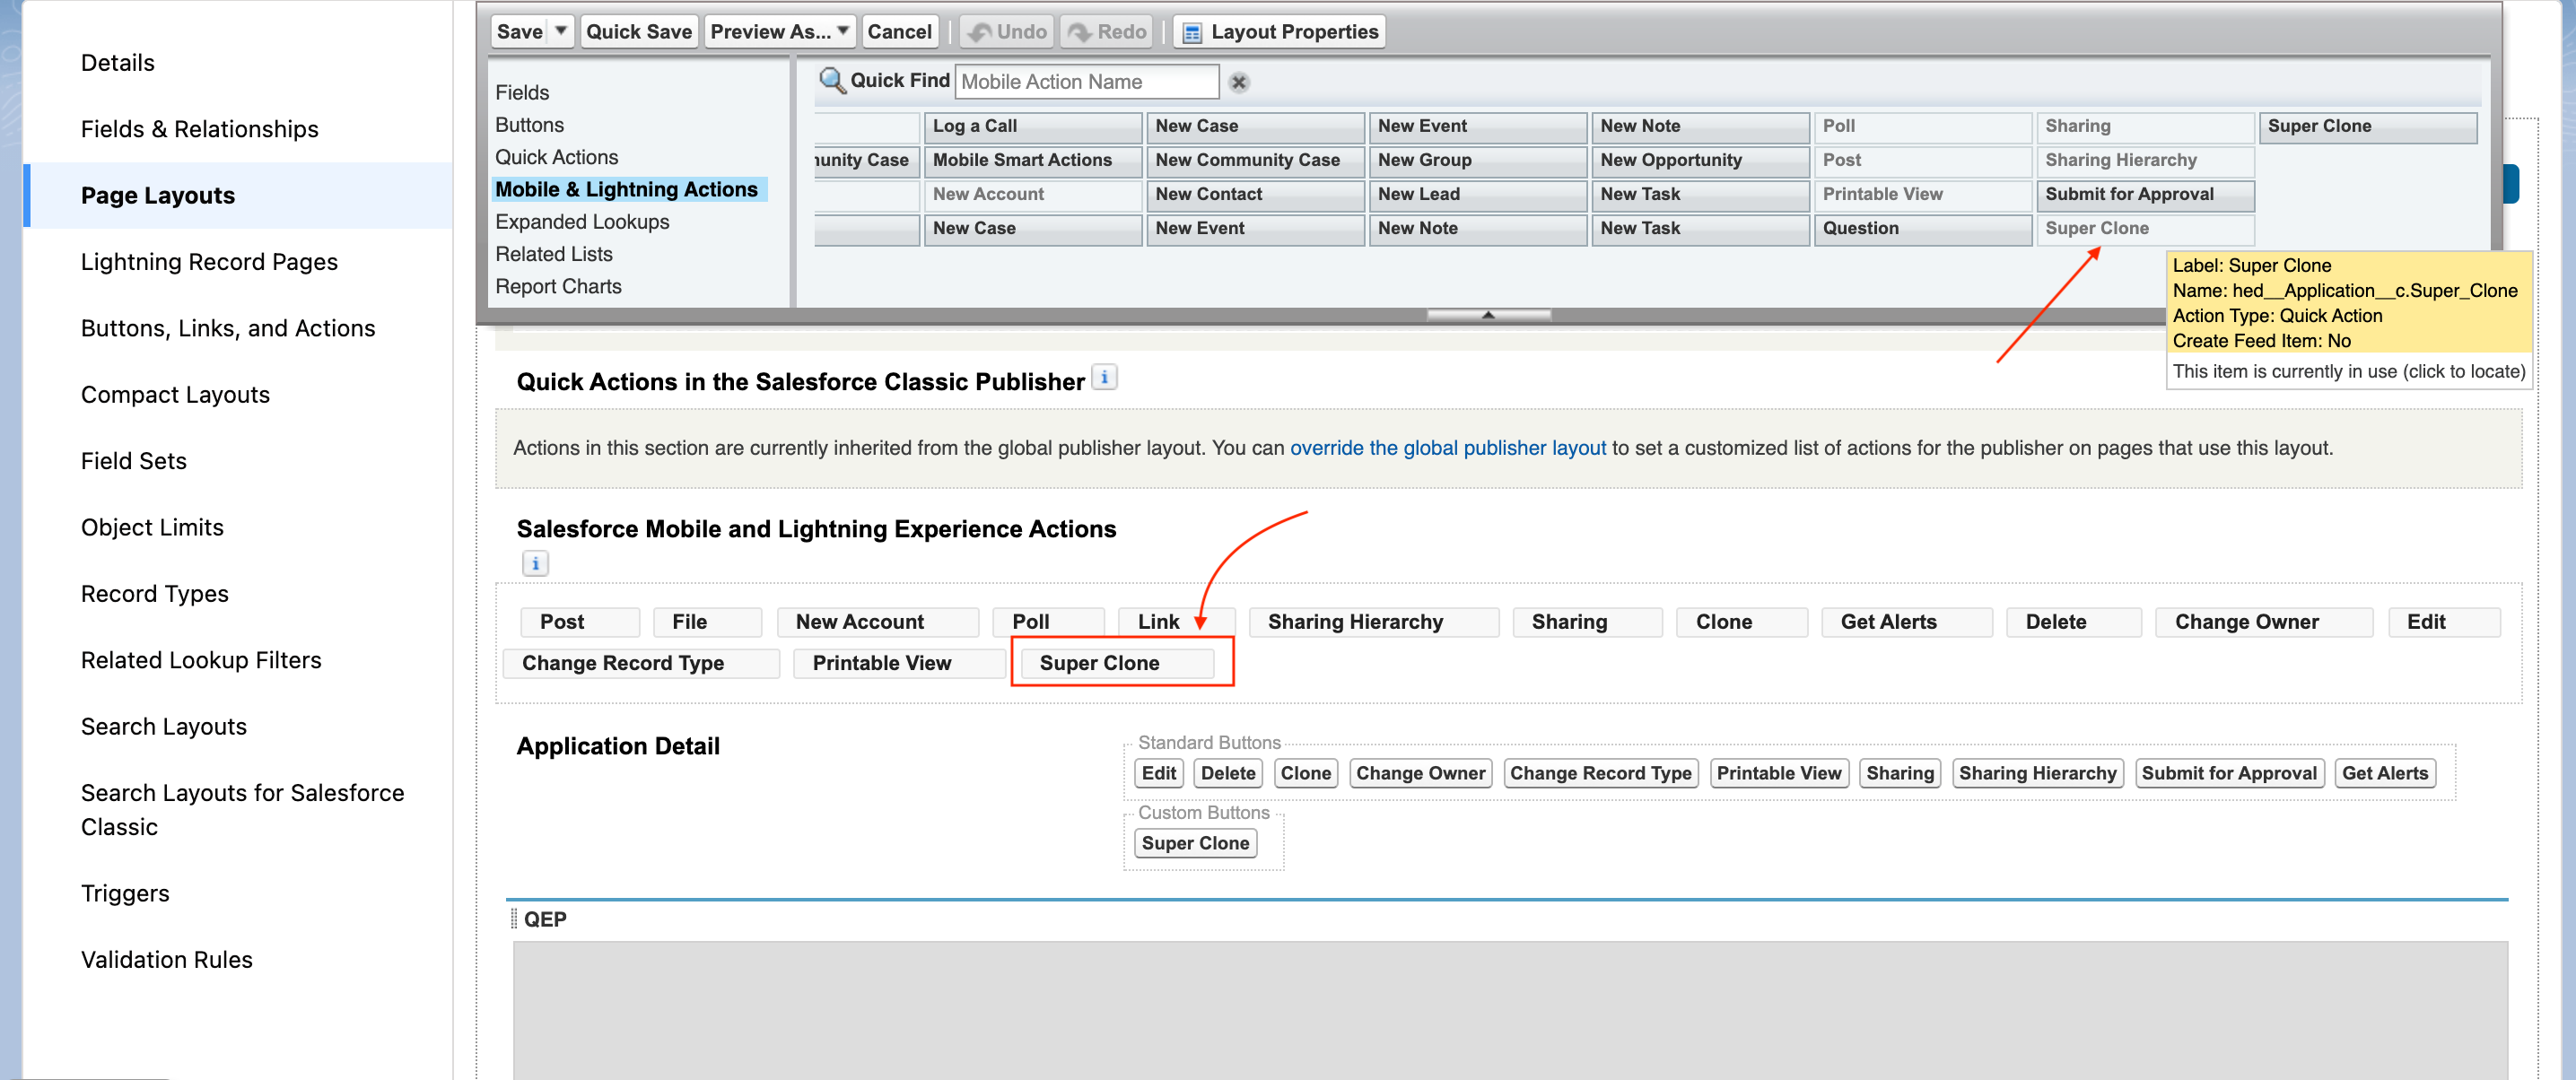
- From the custom application object, navigate to Page Layouts in the left column
- Click on the object's page layout
- Click Mobile & Lightning Actions in the field palette, and drag and drop the Super Clone button to the "Salesforce Mobile and Lightning Experience Actions" on the page layout
- Click Save