Create a Community
Before using FormBuilder Rx to create custom pages, a community must be created and configured. Follow the steps below:
- Go to .
- Check the "Enable Digital Experiences" box and Save.
- Select a domain name and Save.
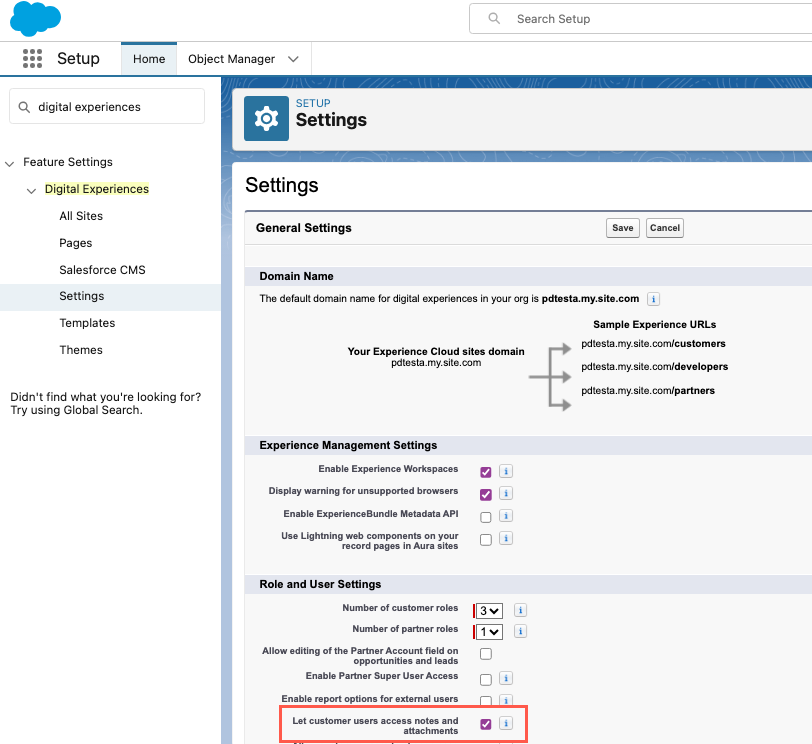
- Go back to .
- Make sure the "Lets customer users access notes and attachments" checkbox is
checked, shown below:
- Go to .
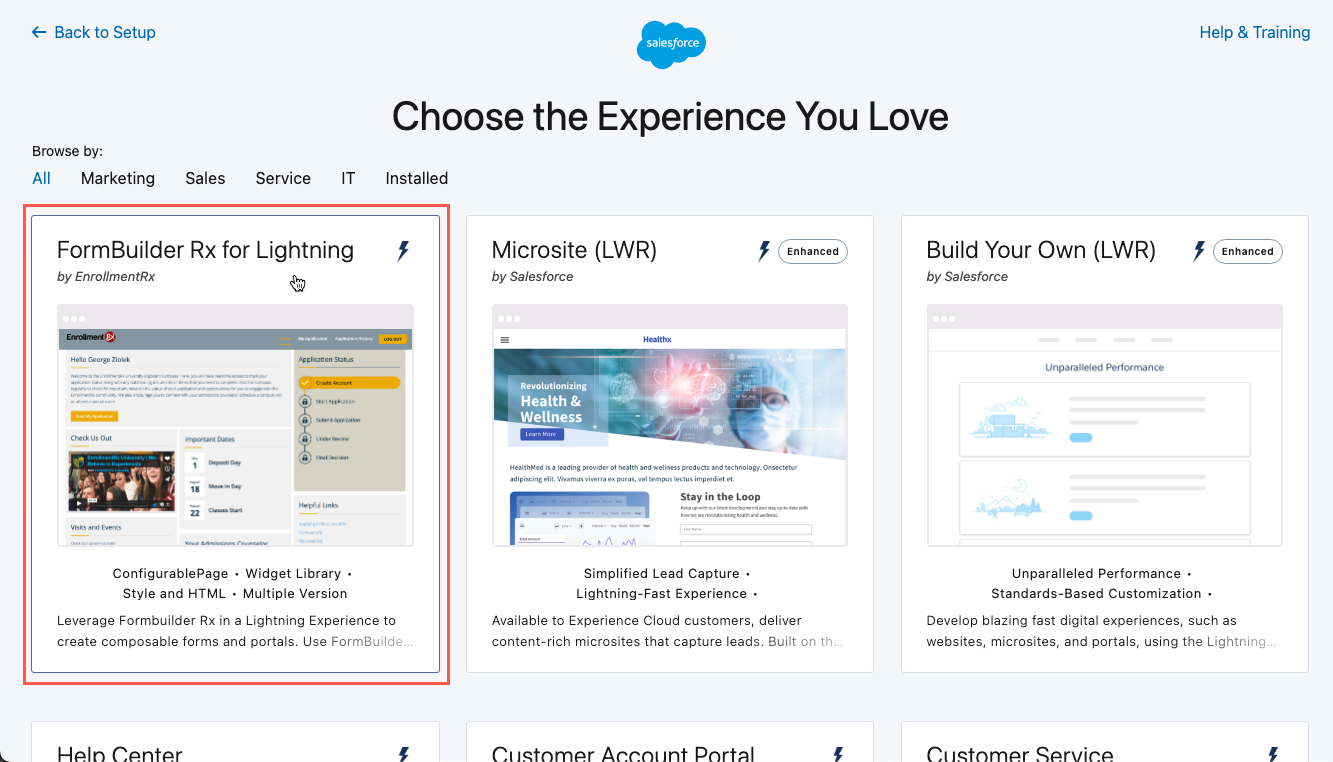
- Click New to create a new community and select the template
called FormBuilder Rx for Lightning, like this:
- This will advance you to a new screen with template details. Click the Get
Started button.

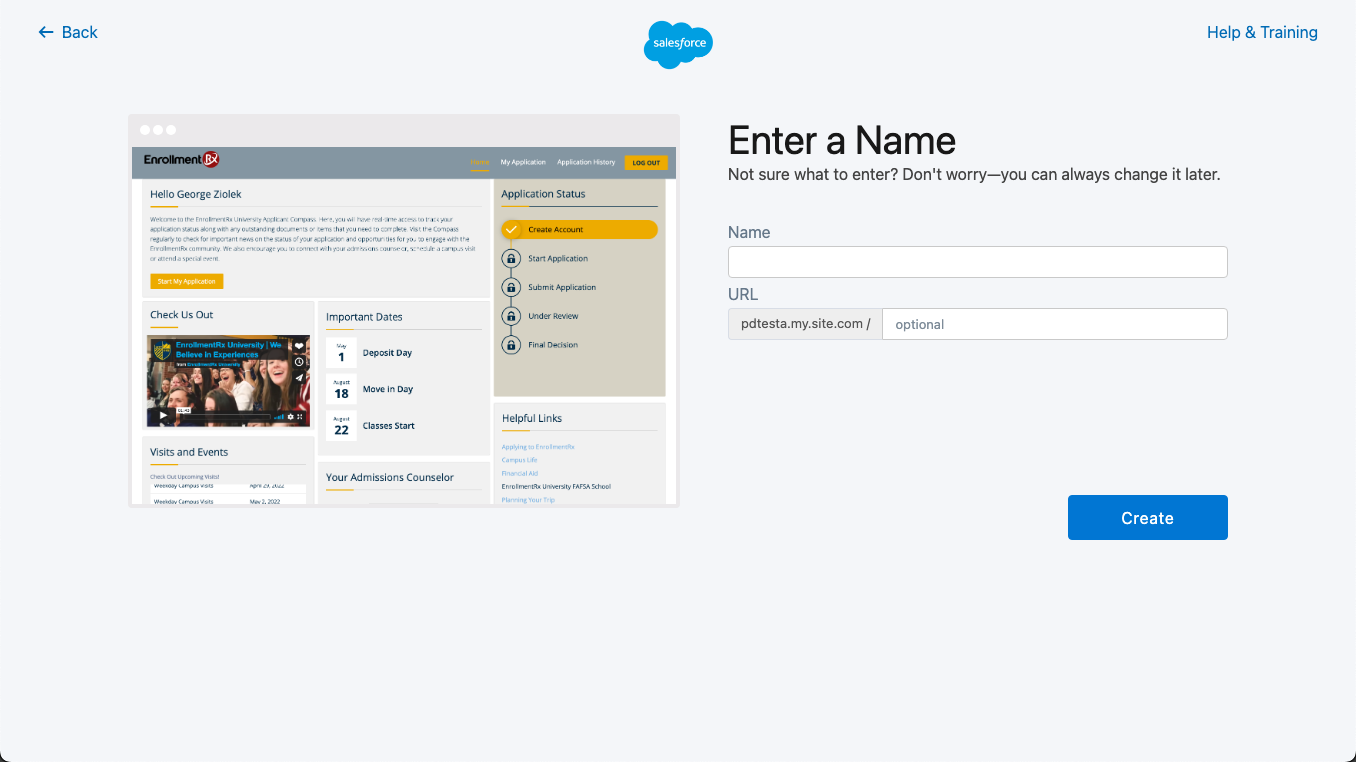
- Name your community and enter an optional prefix (you should enter a prefix
especially if you foresee having more than one community in the future) then click
Create.
- After successfully creating the community, its Workspace will open (you'll see a loading screen in the meantime).
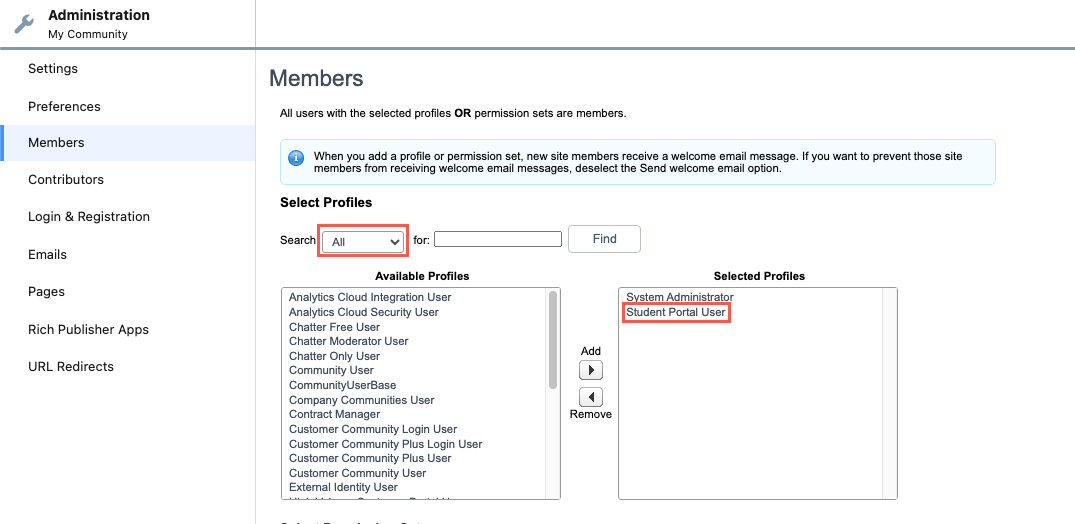
- Select to assign profiles access to the community. Only users with the
selected profiles will be able to log in. See Creating a Profile for
Community Users to create the profile. Add it (or them — you may
have several) here:
- Grant the unauthenticated site guest user access to the Login and Registration
Visualforce pages.
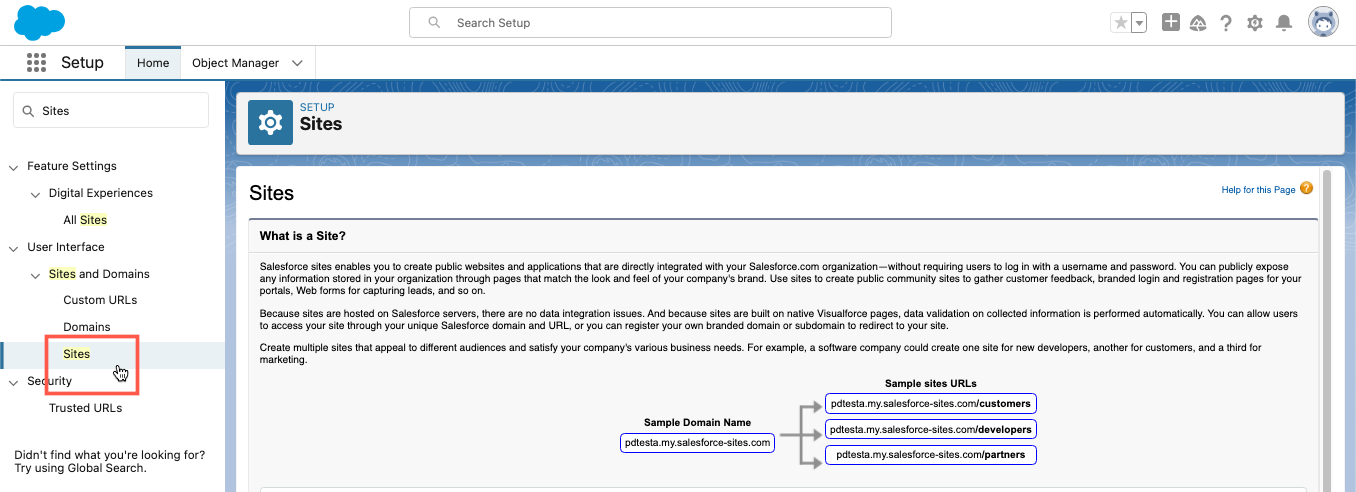
- From Setup, type Sites in the Quick Find box and click the Sites
link.
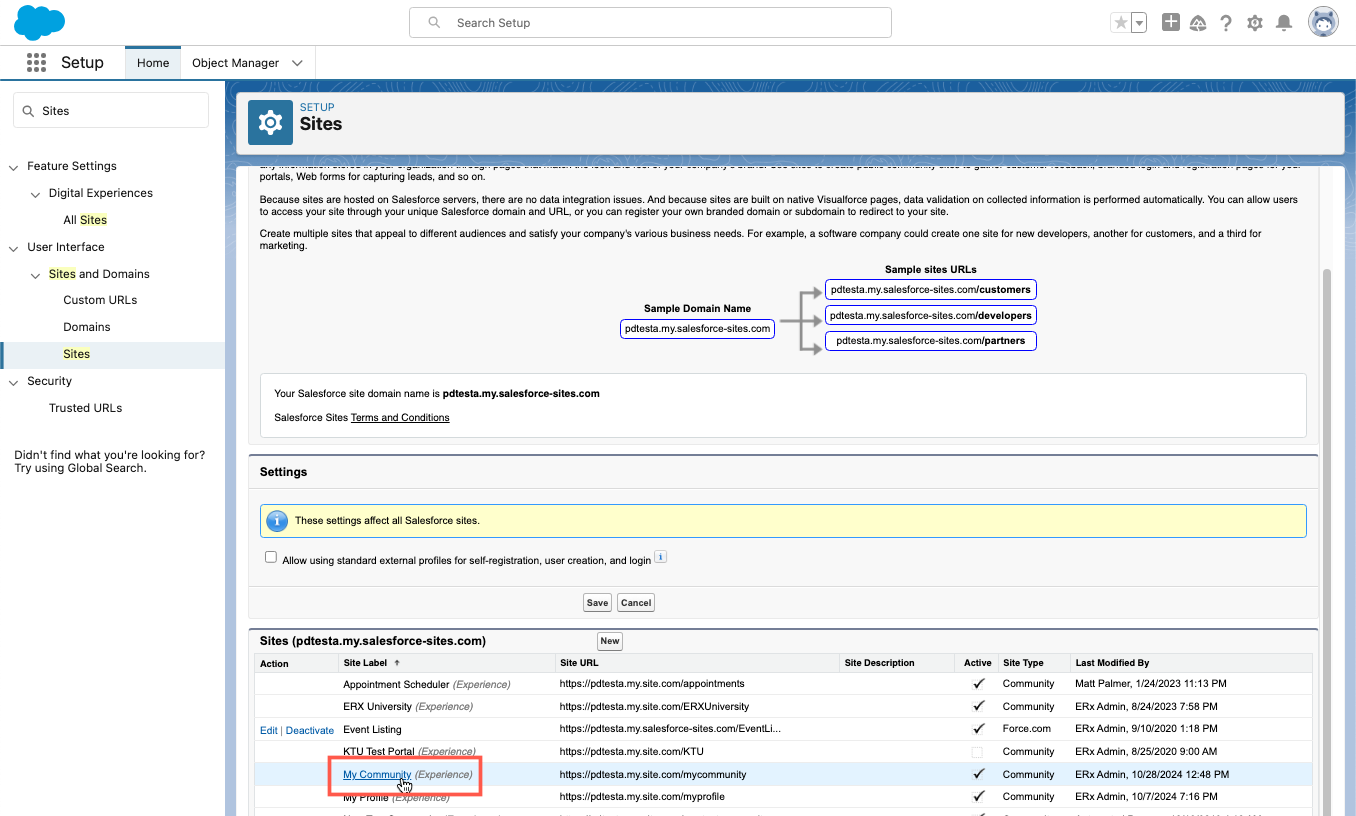
- Click on the Label of the Site that was automatically created by Salesforce
for your community. It has the same name as your community. This will open
the Site Details page.
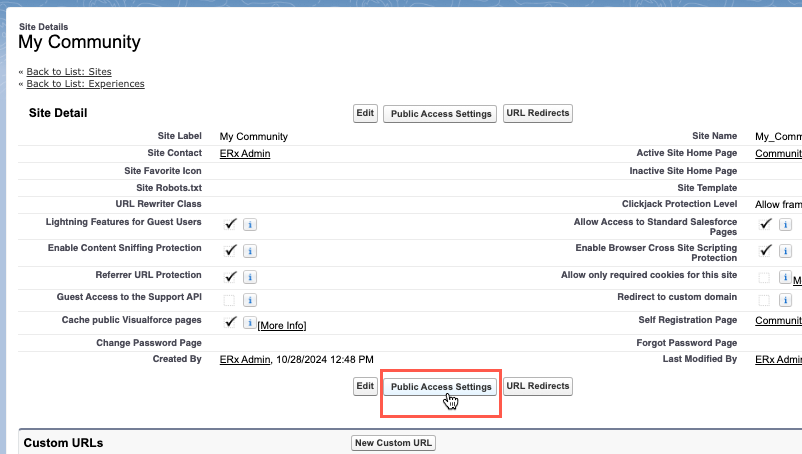
- Click the Public Access Settings button on the Site
Details page. This will open the Profile for the Site Guest User (the
unauthenticated of the community before they log in and become
authenticated). This profile needs access to the Login and Registration
pages.
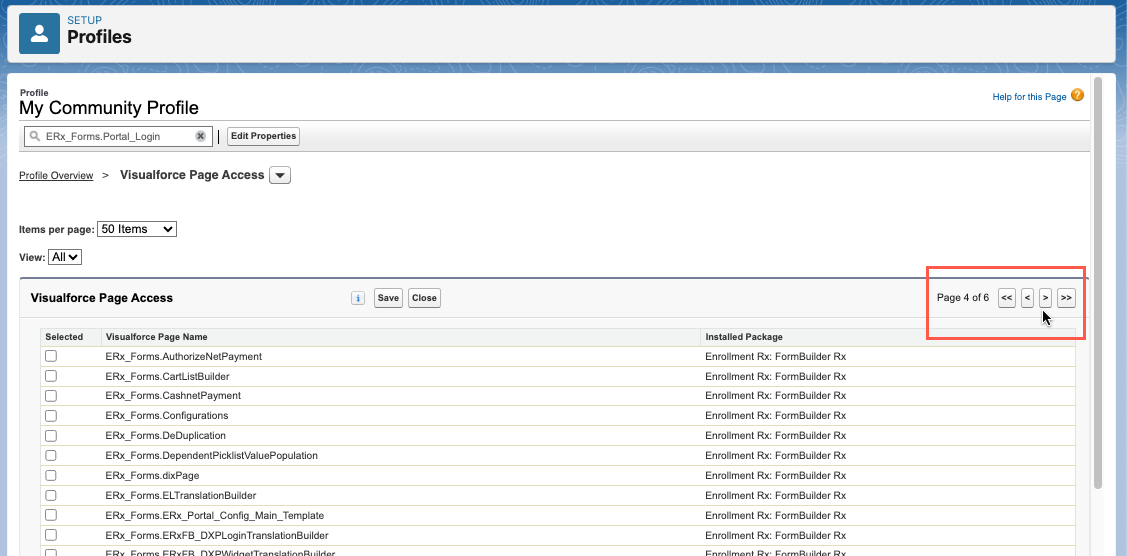
- On the Community Profile, scroll to the Visualforce Page Access link
and click on it. This will open the Visualforce Page Access settings.
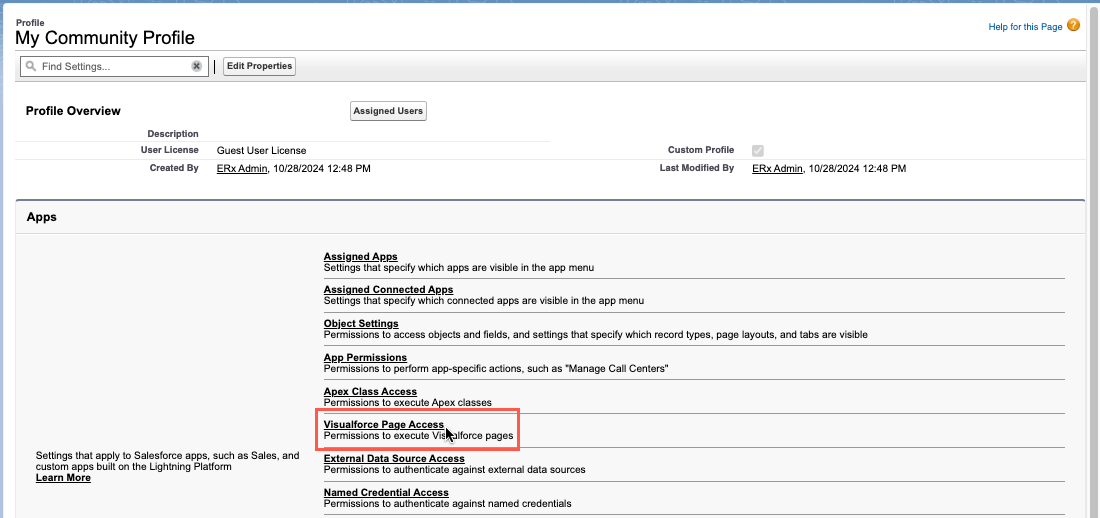
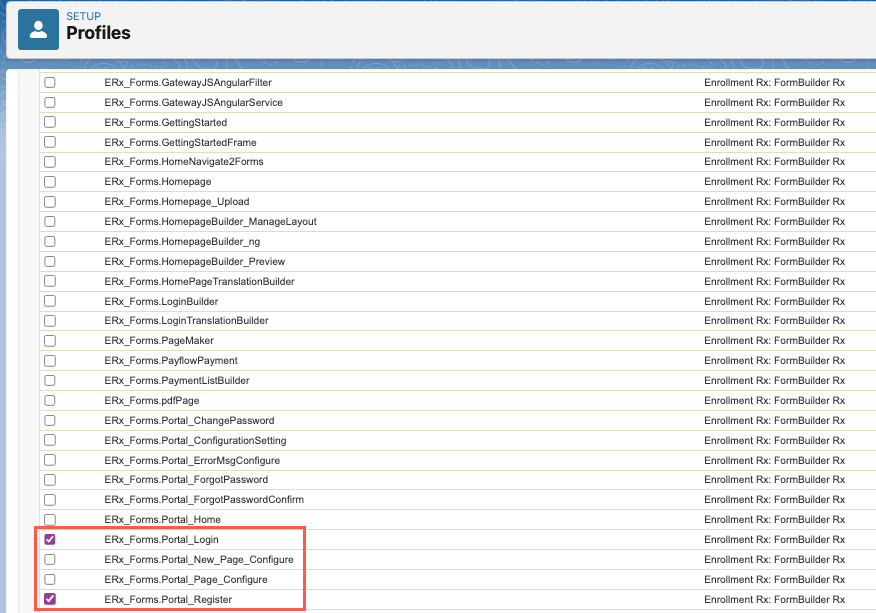
- Click the Edit button and enable the pages called
ERx_Forms.Portal_LoginandERx_Forms.Portal_Register(you may need to click through a few pages to find them). Click Save.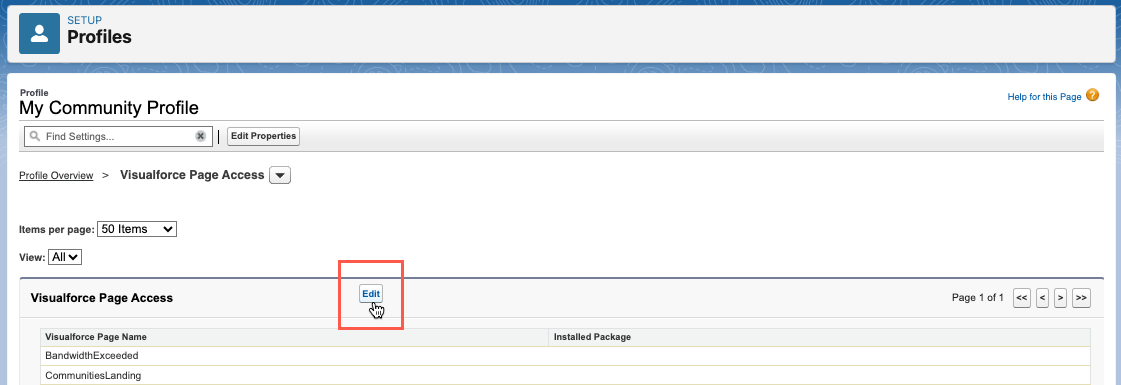
- From Setup, type Sites in the Quick Find box and click the Sites
link.
- Now you can configure the Login and Registration pages for the community. Go to and then click Workspaces next to the name of your community.
Then navigate to , where you will see the page shown below.
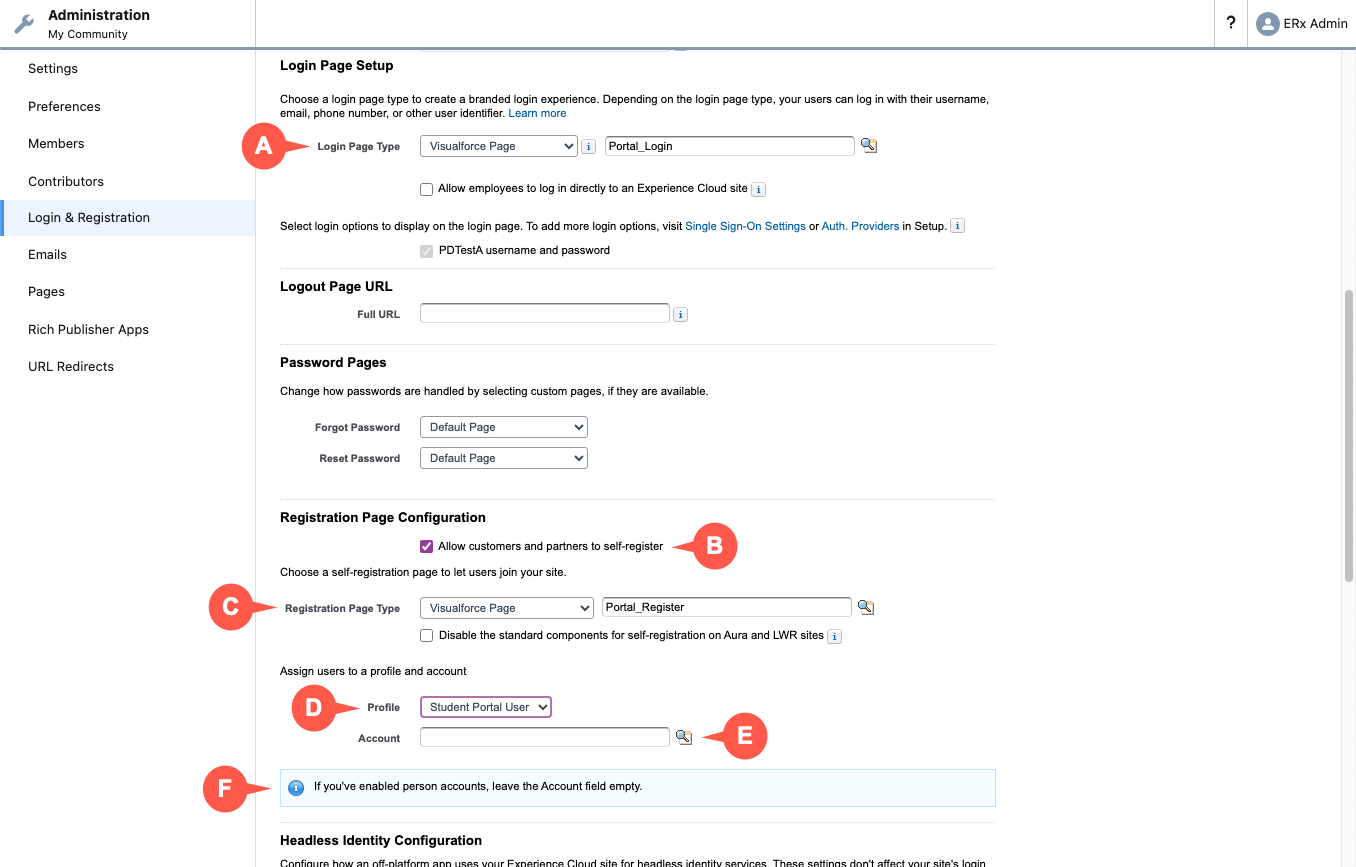
- Scroll down to the Login Page Setup section and select Visualforce
Page as the Login Page Type. A search field will open. Search
for "Portal" and click on
Portal_Loginto populate the field. - Check Allow customers and partners to self-register.
- For Registration Page Type, select "Visualforce Page," search for
"Portal," and select
Portal_Register. - Assign registering users to the custom profile you created.
- Leave the Account field blank.
- If you've enabled Person Accounts, also leave Account blank.
- Scroll down to the Login Page Setup section and select Visualforce
Page as the Login Page Type. A search field will open. Search
for "Portal" and click on
- Go to . In the dropdown list next to Home Page select Visualforce
Page.
- Click the magnifying glass, select the page called
Homepage, and Save, as shown here:
- To test the community without first creating a custom Homepage, set the
community homepage to
HomeNavigate2Formsinstead. This will give you a homepage that features just a button that will direct the user to the first page in the environment.
- Click the magnifying glass, select the page called
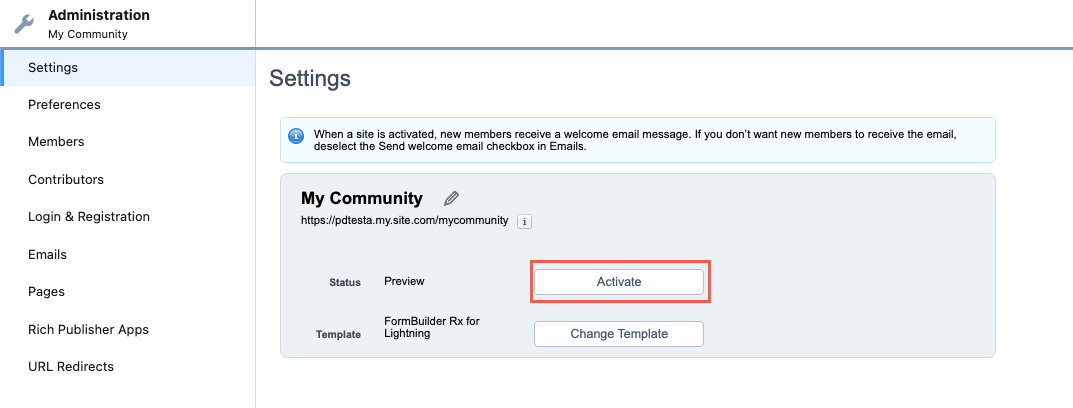
- Select and click Activate.
Note:
For more information, go to Salesforce documentation on enabling Digital
Experiences.