DXP Bolt Solution
DXP Bolt Solution for FormBuilder Lightning
- Home
- Homepage upload
- Page Maker
- Login
- Forgot Password
- Register
- Navigate to All Sites
- Click on the New button
- Select template type: "FormBuilder Rx for Lightning"
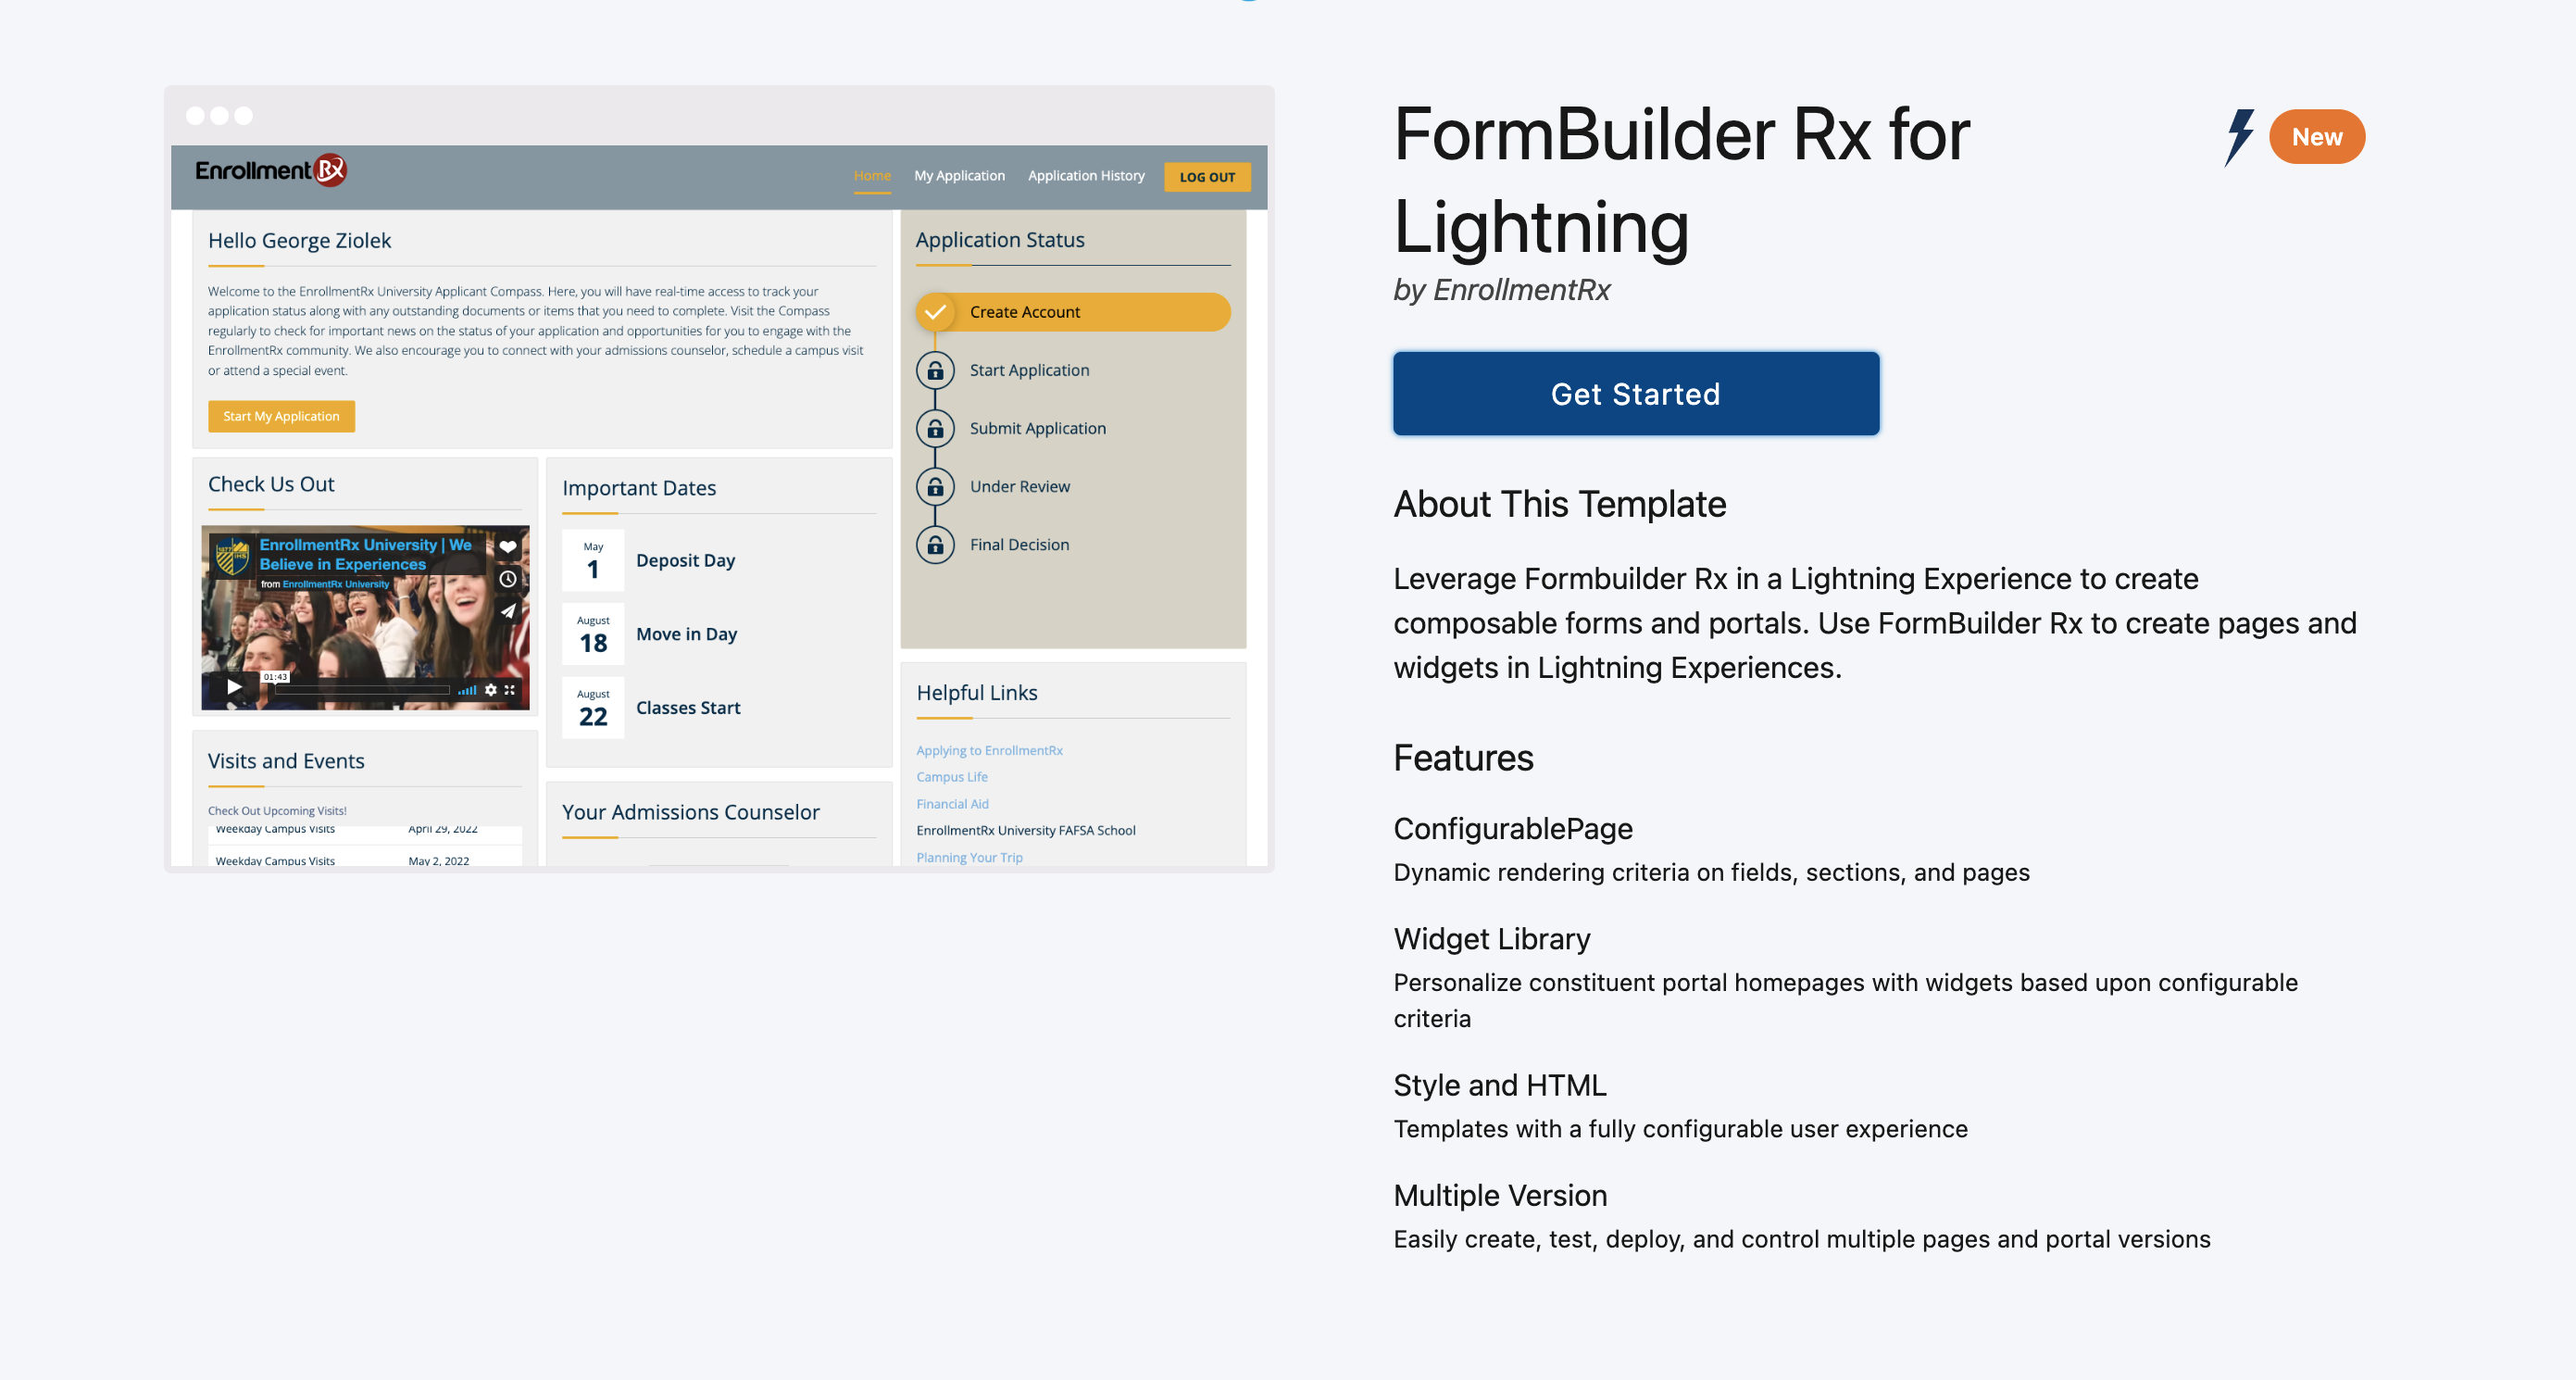
- Click on Get Started
- Enter the Community name and URL

- Click the Create button
- A success message will display once the Community is created successfully
- Click on the Builder tab once the Community is created
FormBuilder Setup Process
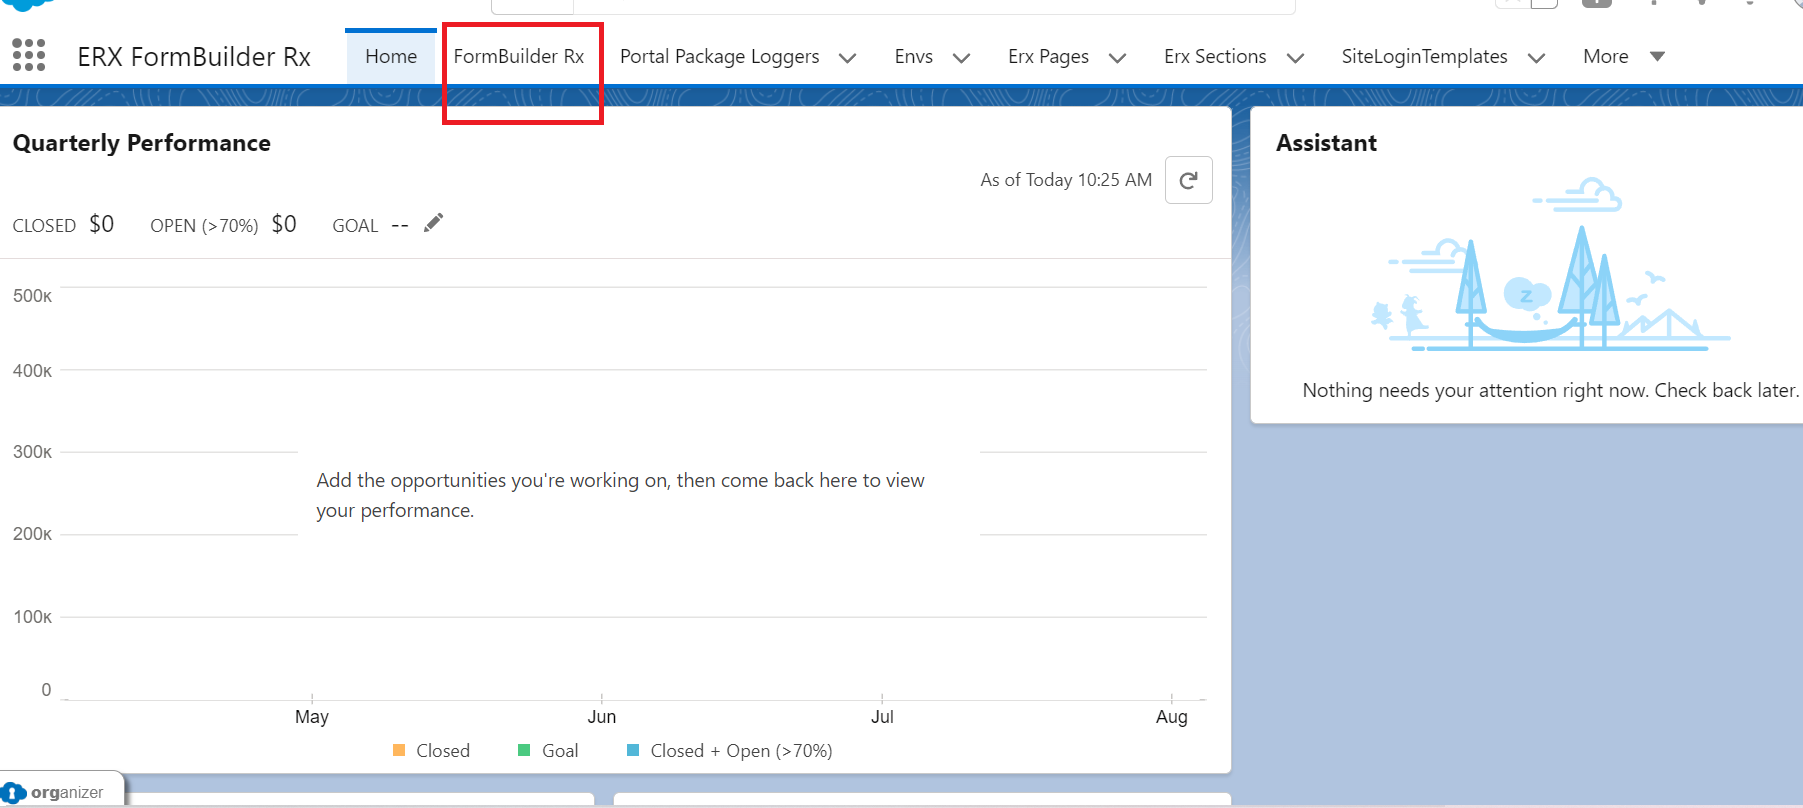
- Go to the App Launcher and search for ERX FormBuilder Rx
- Click on the FormBuilder Rx tab
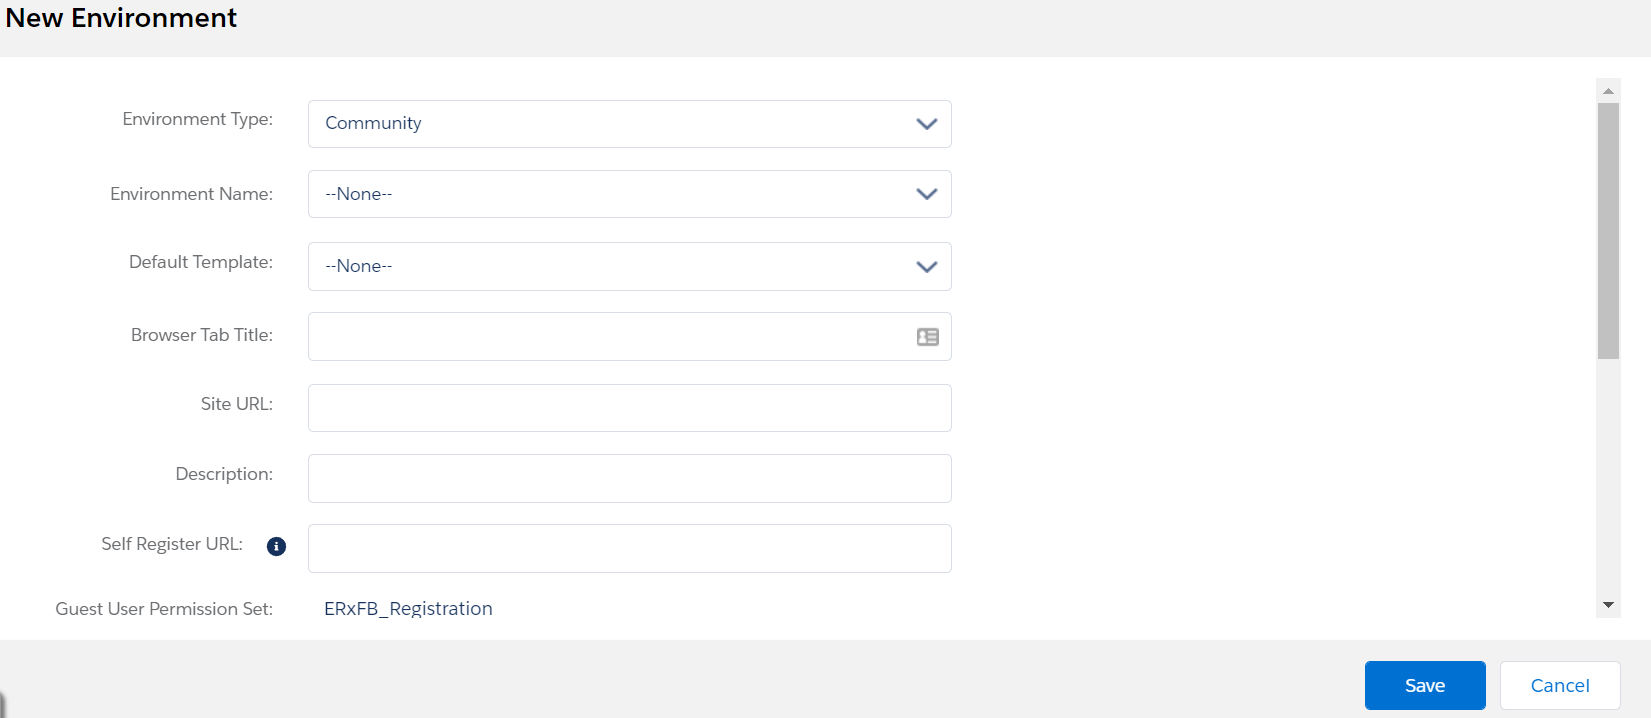
- Click on the Create New Environment button

- Fill in the following details:
- Environment Type: Community
- Environment Name: (This should be the same as the site creation in Salesforce)
- Click Save
- Refresh the Admin Panel
- After saving, the new Community will be created
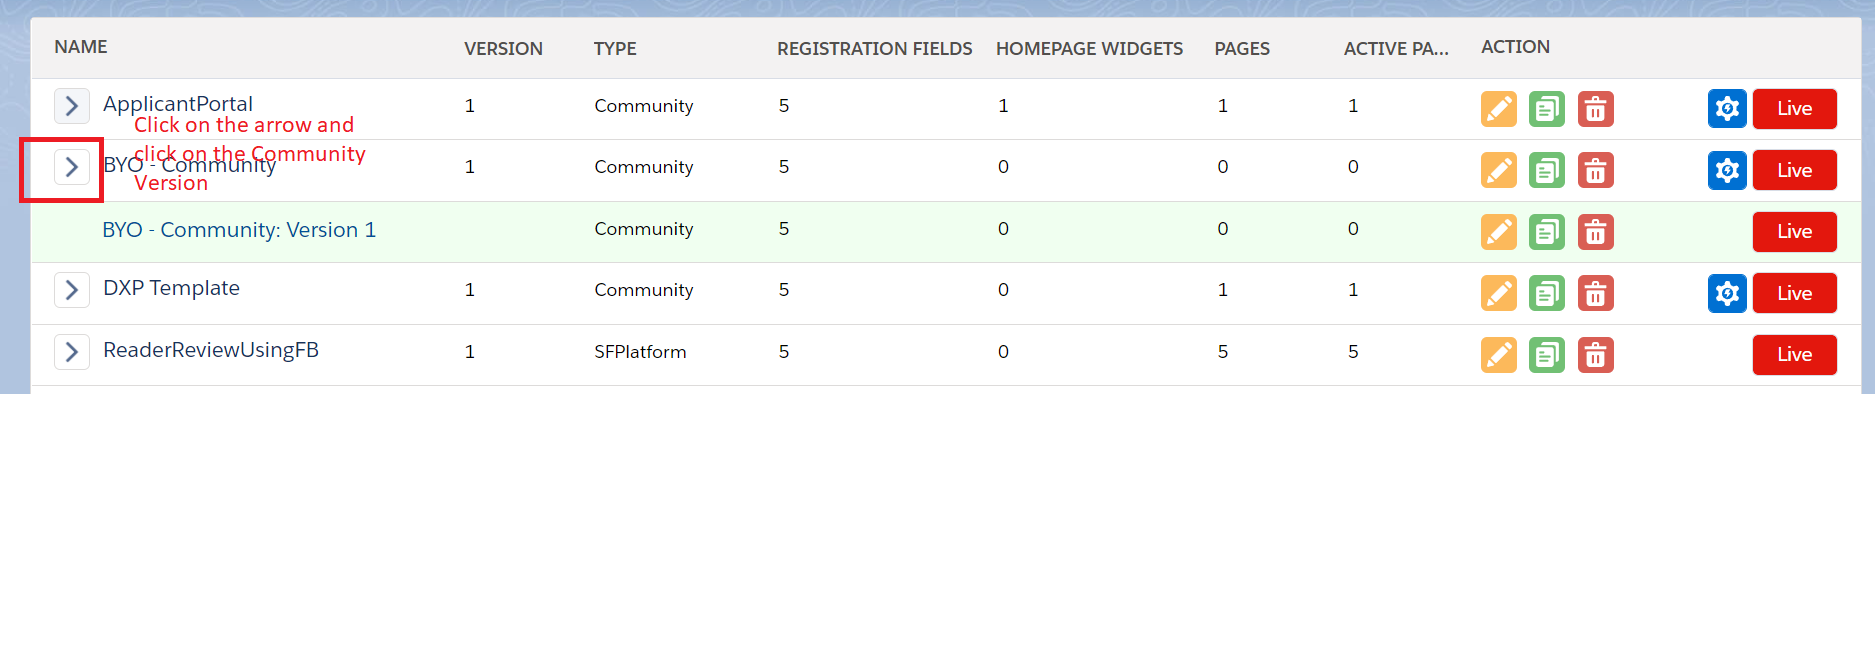
- Click on BYO-Community Version 1
Template Setup Process
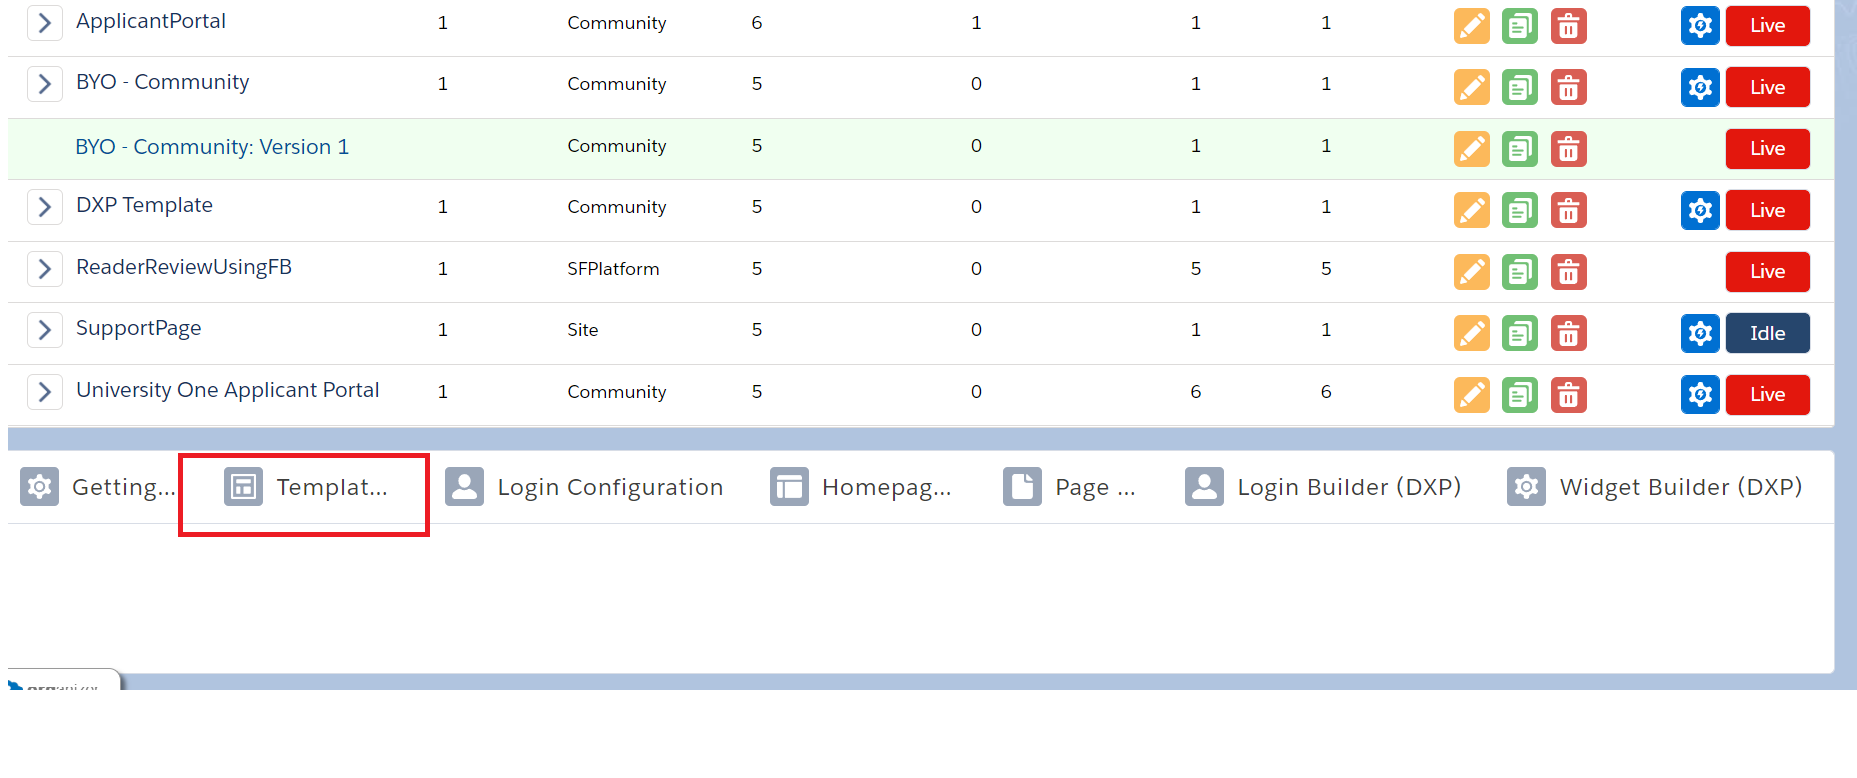
- Go to the FormBuilder Rx Admin Panel

- Click on Template Builder
- Click on New Template
- Select ERX Template
- Selet the Lightning Checkbox
- Select a Template (e.g., Dark, Light, Template 3)
- Enter a Template Name
- Click Save

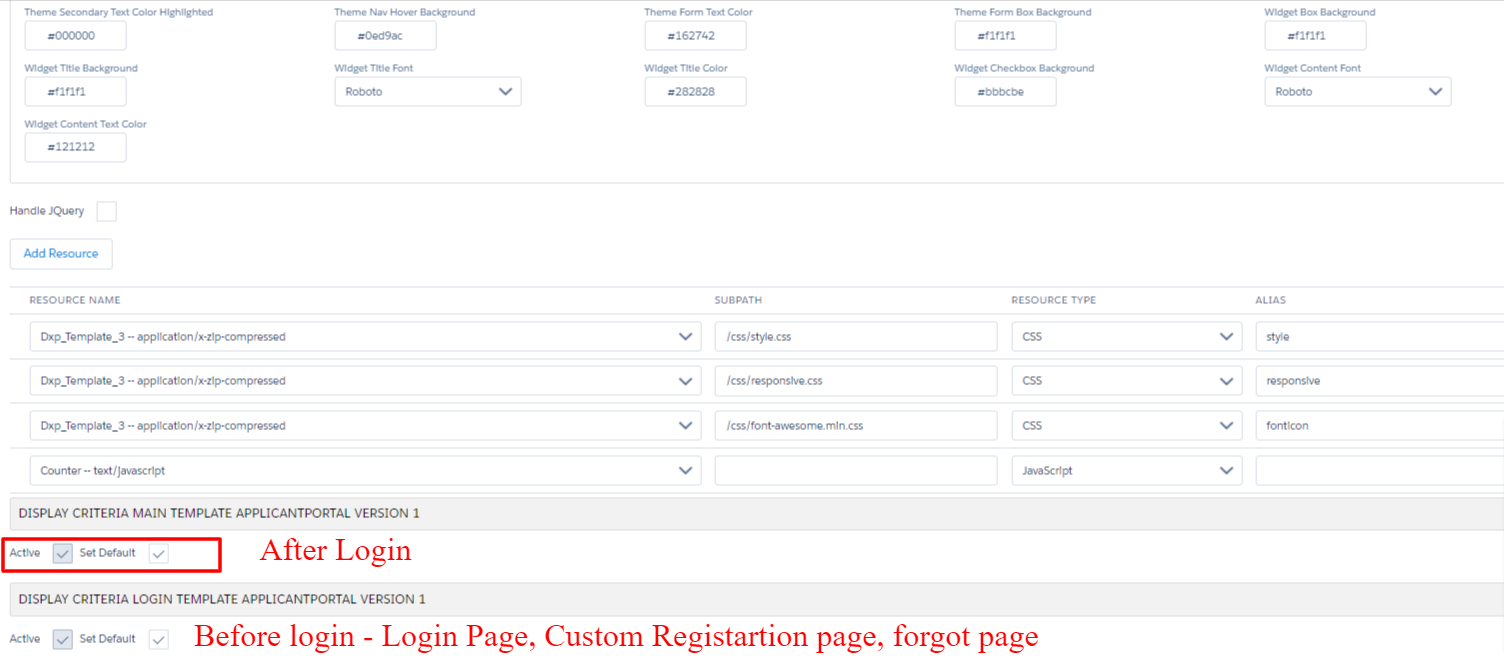
- Edit the above created template and set it as default
Custom Setting Updates
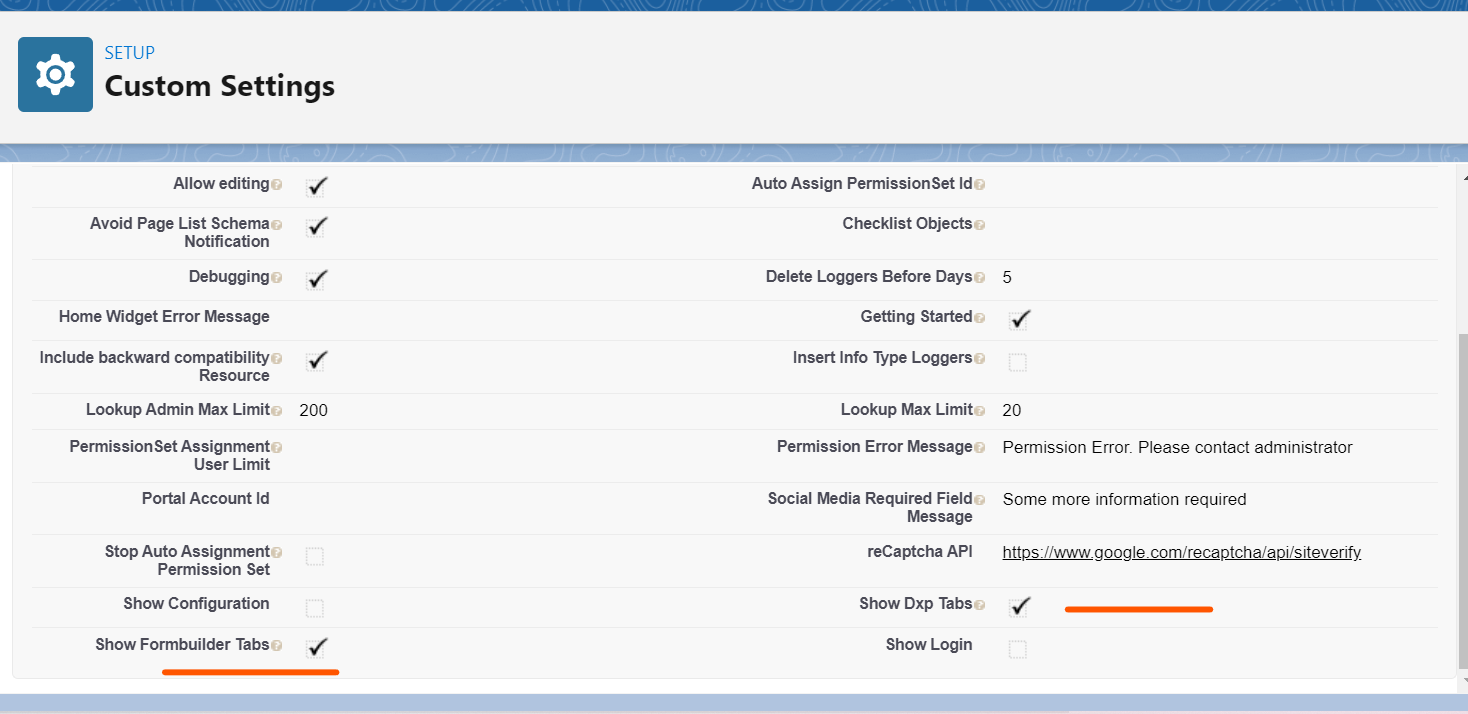
You will need to update the custom setting (FormBuilder Setting) so that you can see the new tabs on the FormBuilder Admin Panel.
- Go to Setup
- Search for "Custom Setting" in the Quick Find box
- Go to the FormBuilder Setting
- Click on the Admin Setting and Edit "Show DXP = True" and "Show FormBuilder = True"
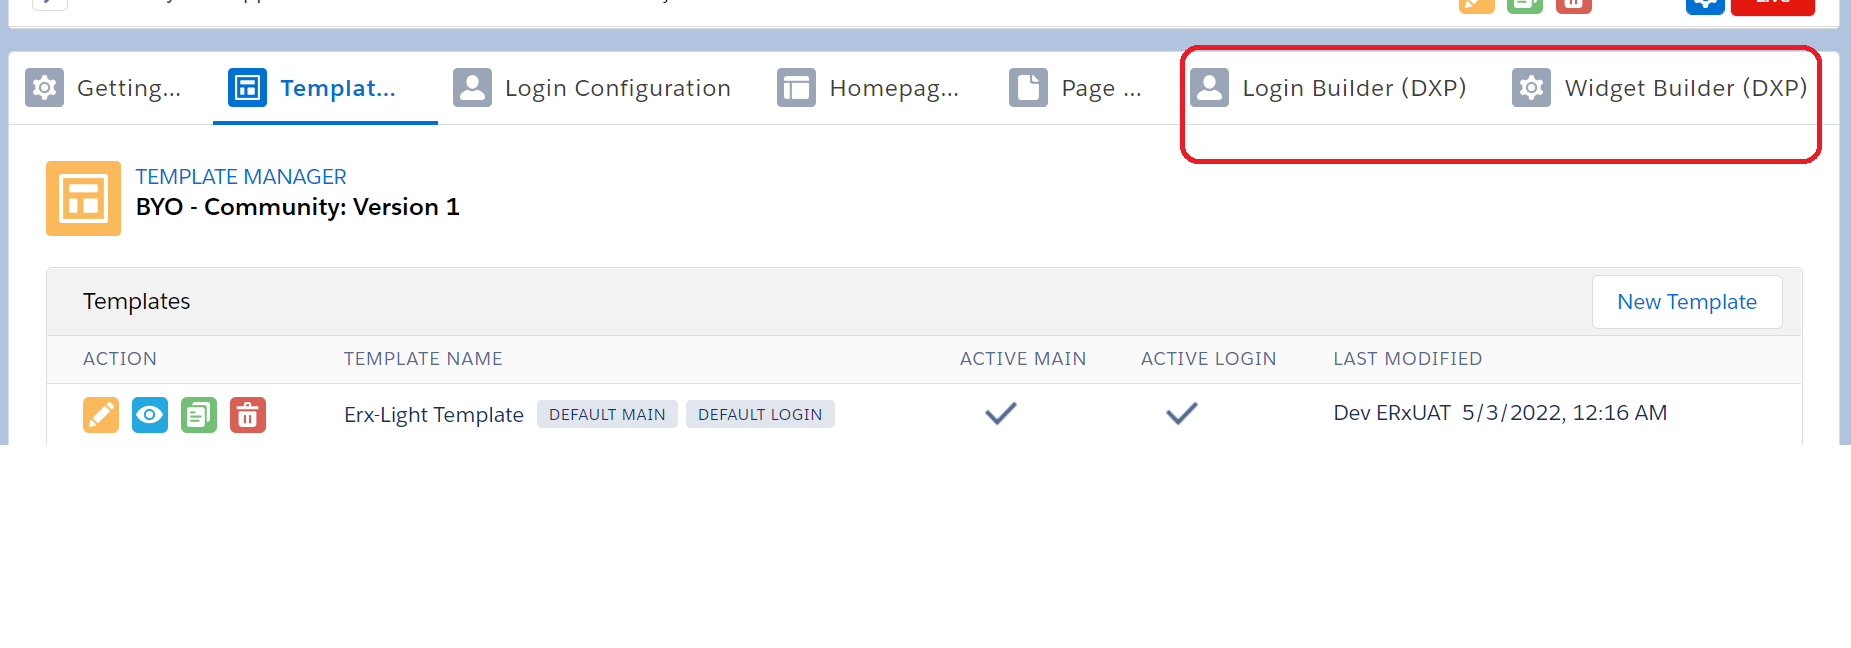
Once the above changes are saved, go to the FormBuilder Admin Panel. You will be able to see two new tables as a replacement of the existing one.
New Tab Name:
- Login Widget (DXP)
- Widget Builder (DXP)
Once the above changes are saved, go to the FormBuilder Admin Panel. You will be able to see two new tables as a replacement for the existing one.
New tab names:
- Login Widget (DXP)
- Widget Builder (DXP)
Changes Required for the Community Site
The following steps outline the required changes you will need to make to the Login, Forgot Password and Registration for the Community site.
- Go to Setup and search for "Sites" in the Quick Find box
- Click on Sites when it appears in the search results
- Click on the Site label "BYO Community"
- Check for CommunitiesLanding as the Active Site Homepage
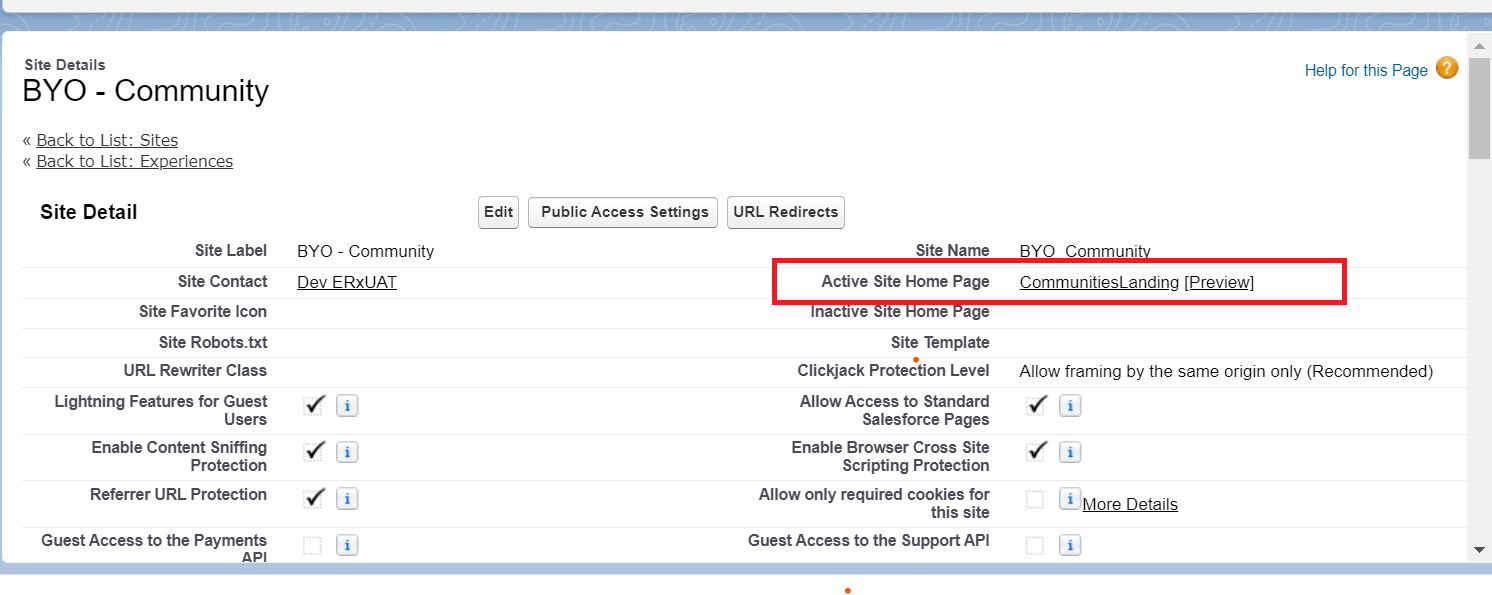
- Click on the Public Access Settings tab
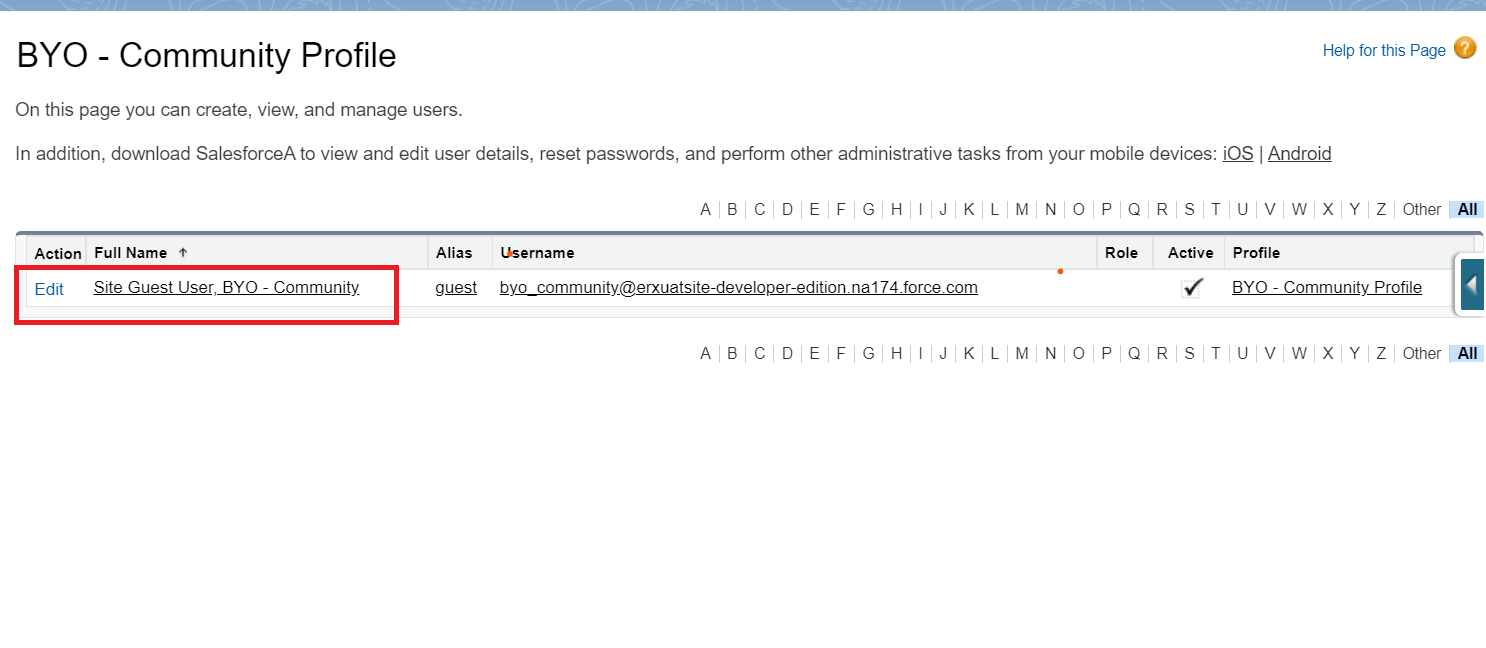
- Click on the Assigned Users tab
- Click on the name of the Site Guest user
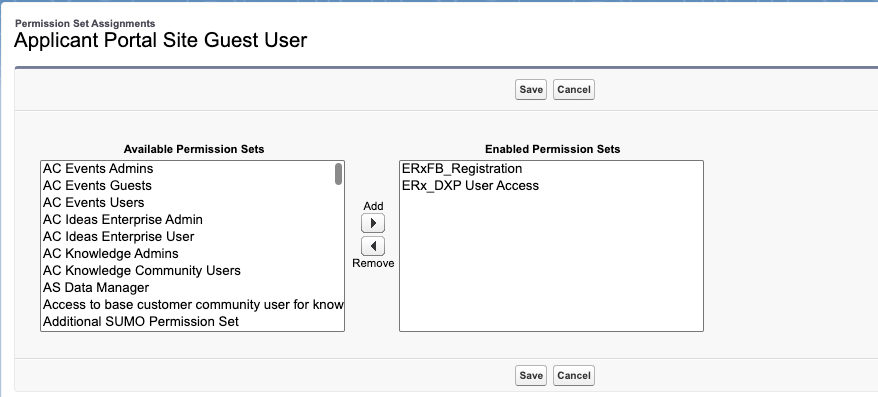
- Click on Permission Set Assignments, and grant permissions for ERx_DXP User
Access and ERxFB_Registration
Login Setup Process
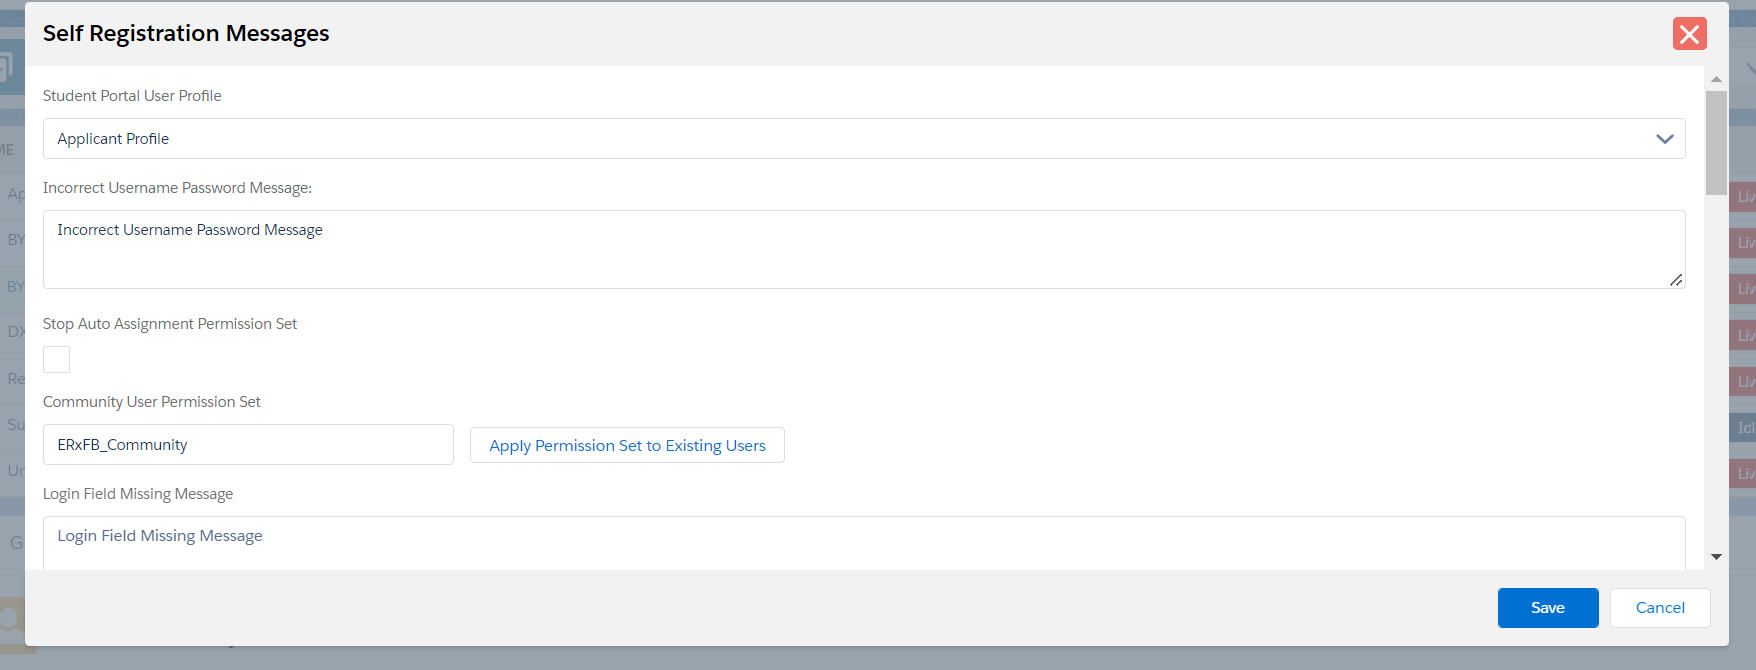
- Click on the Login Builder (DXP) tab
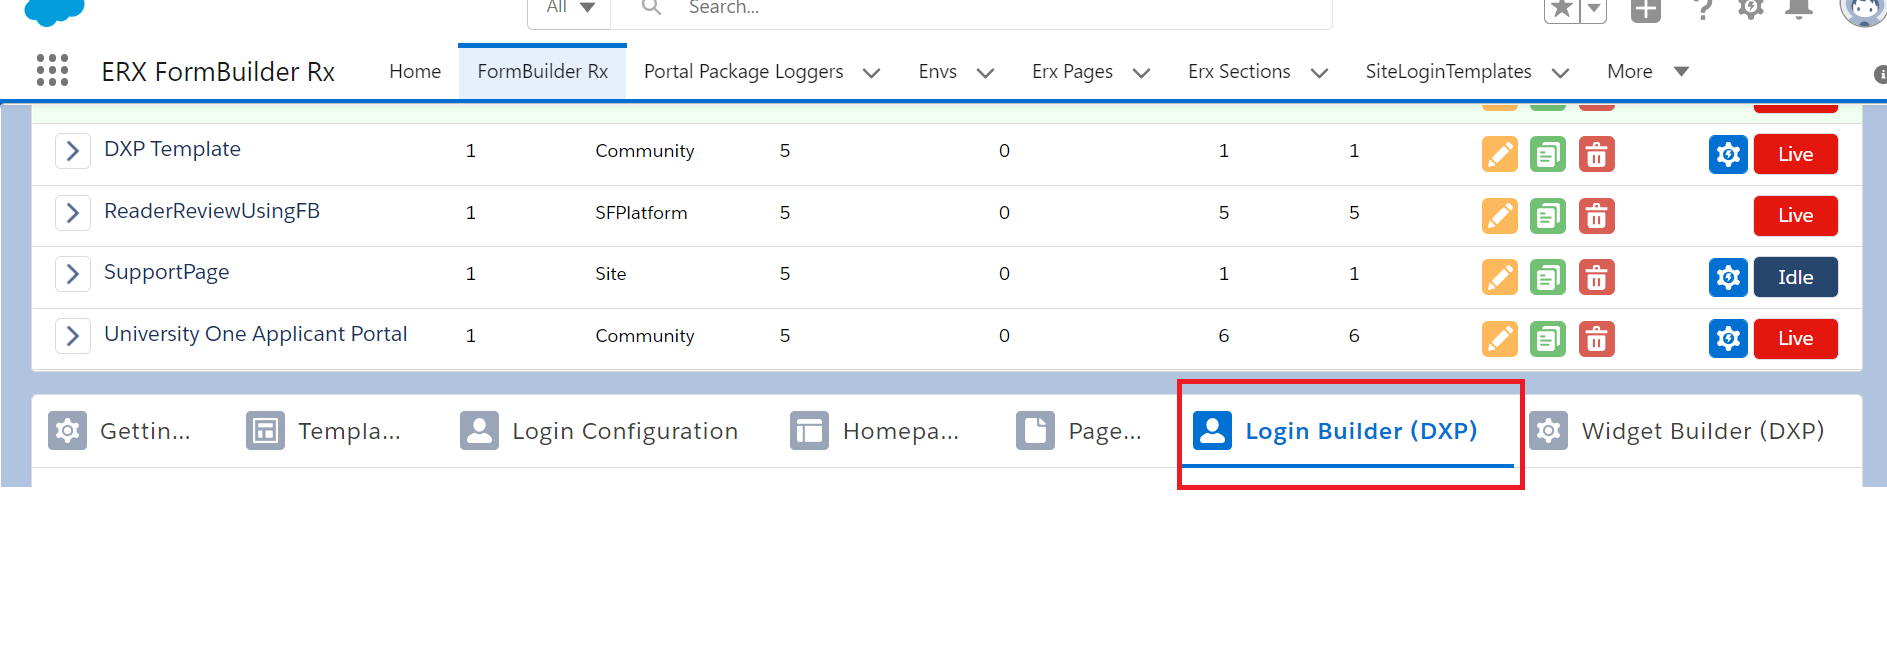
- Click on the message button
- Fill in these details:
- Student Portal User Profile: Applicant Profile
- Error Message: Incorrect details (User)
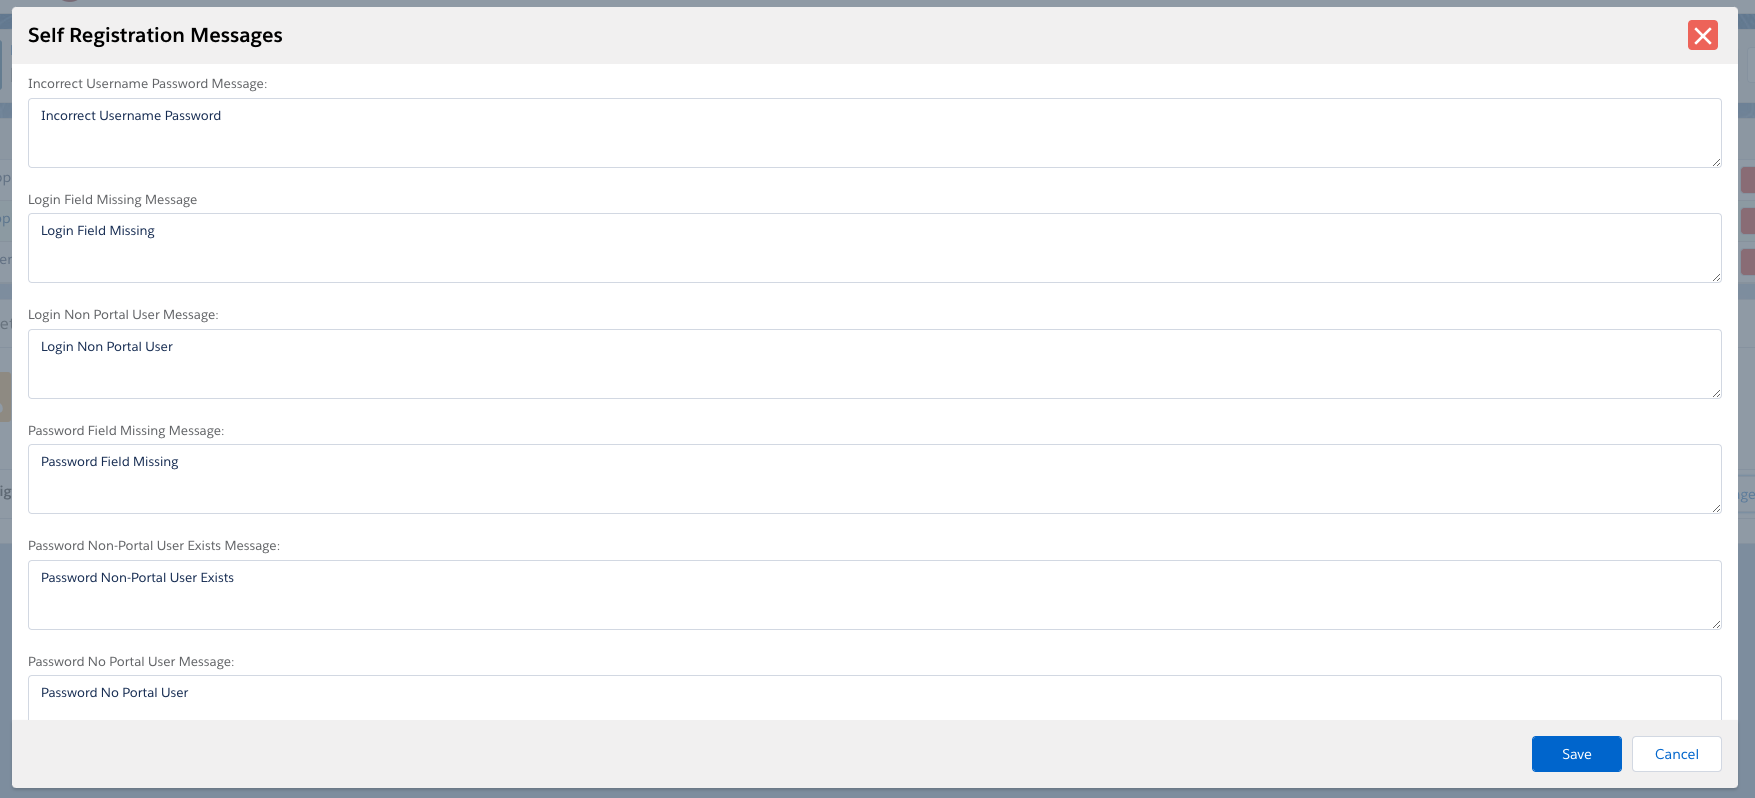
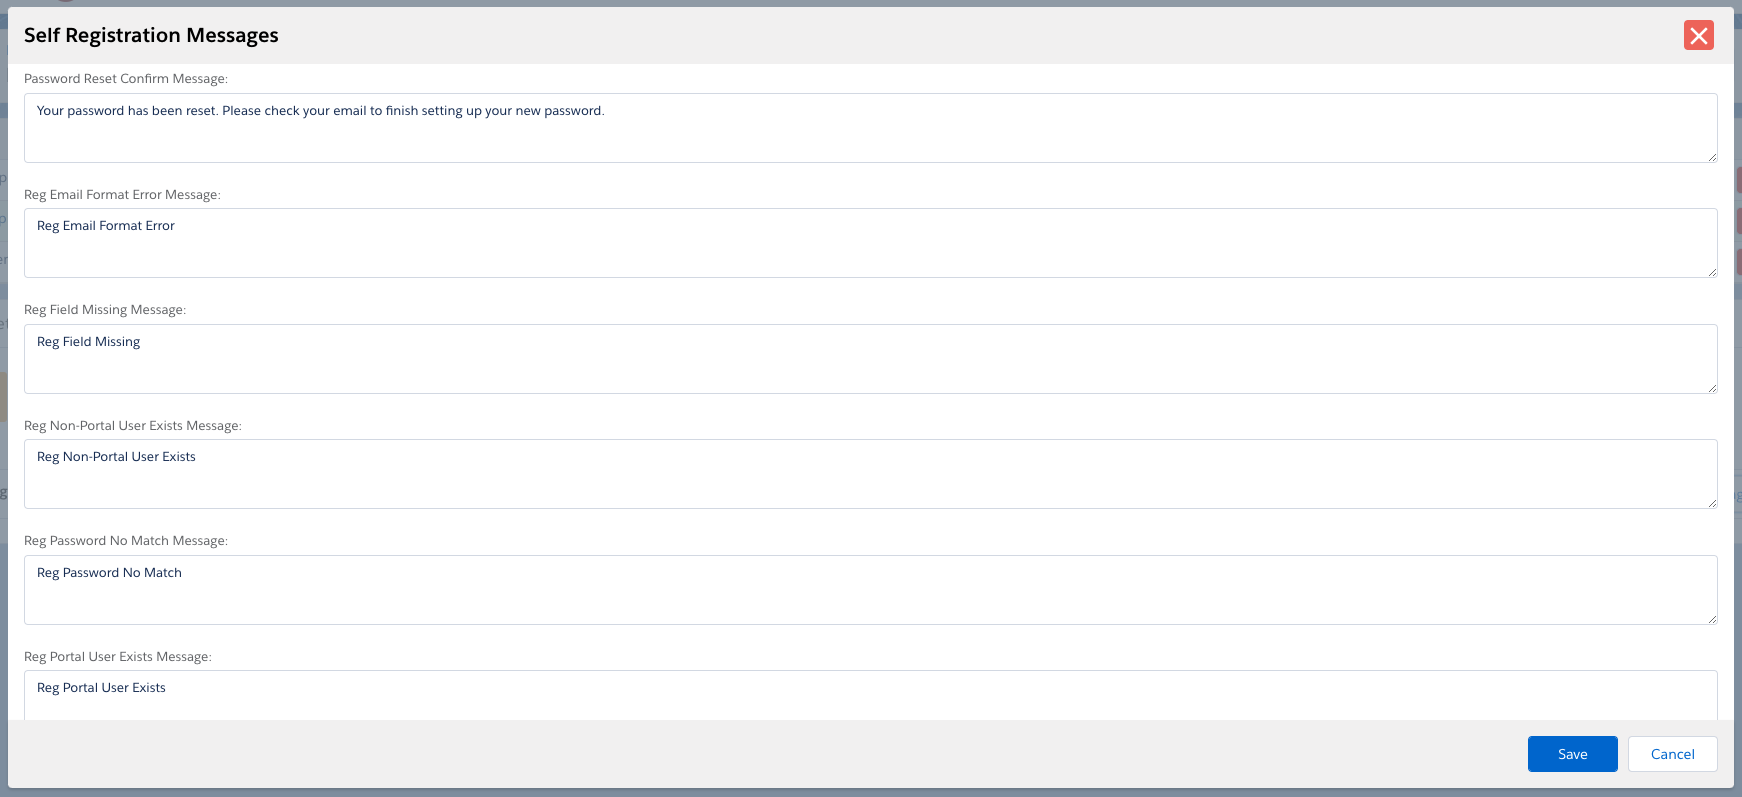
- All self-registration fields starting at Incorrect Username Password
Message and ending at Reg Username Too Long Message need
to be populated
- Click Save
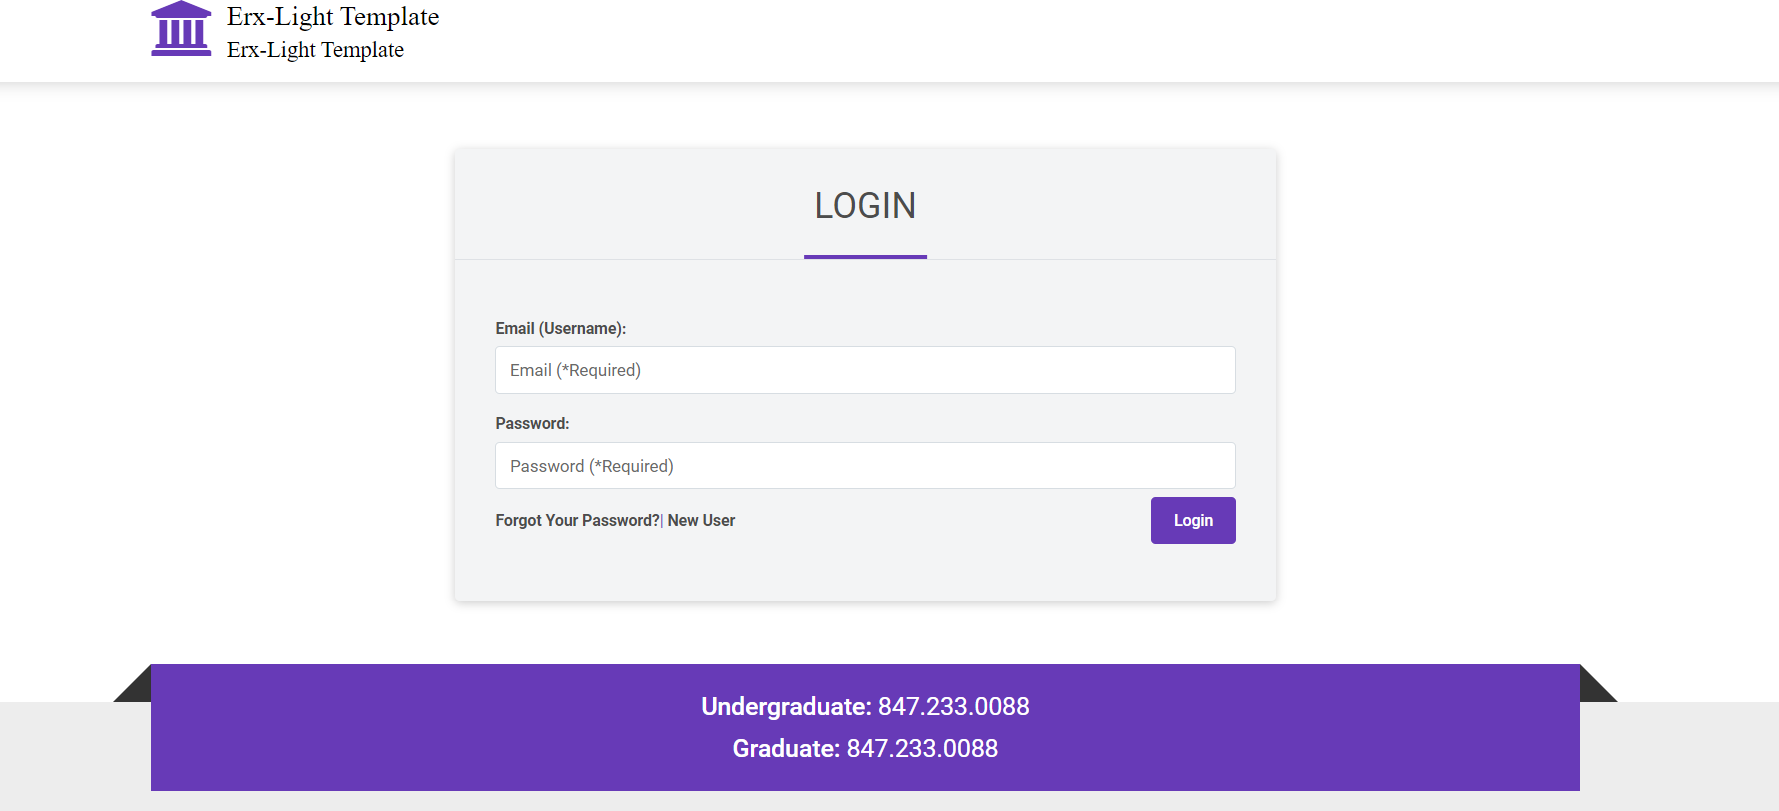
Login Page
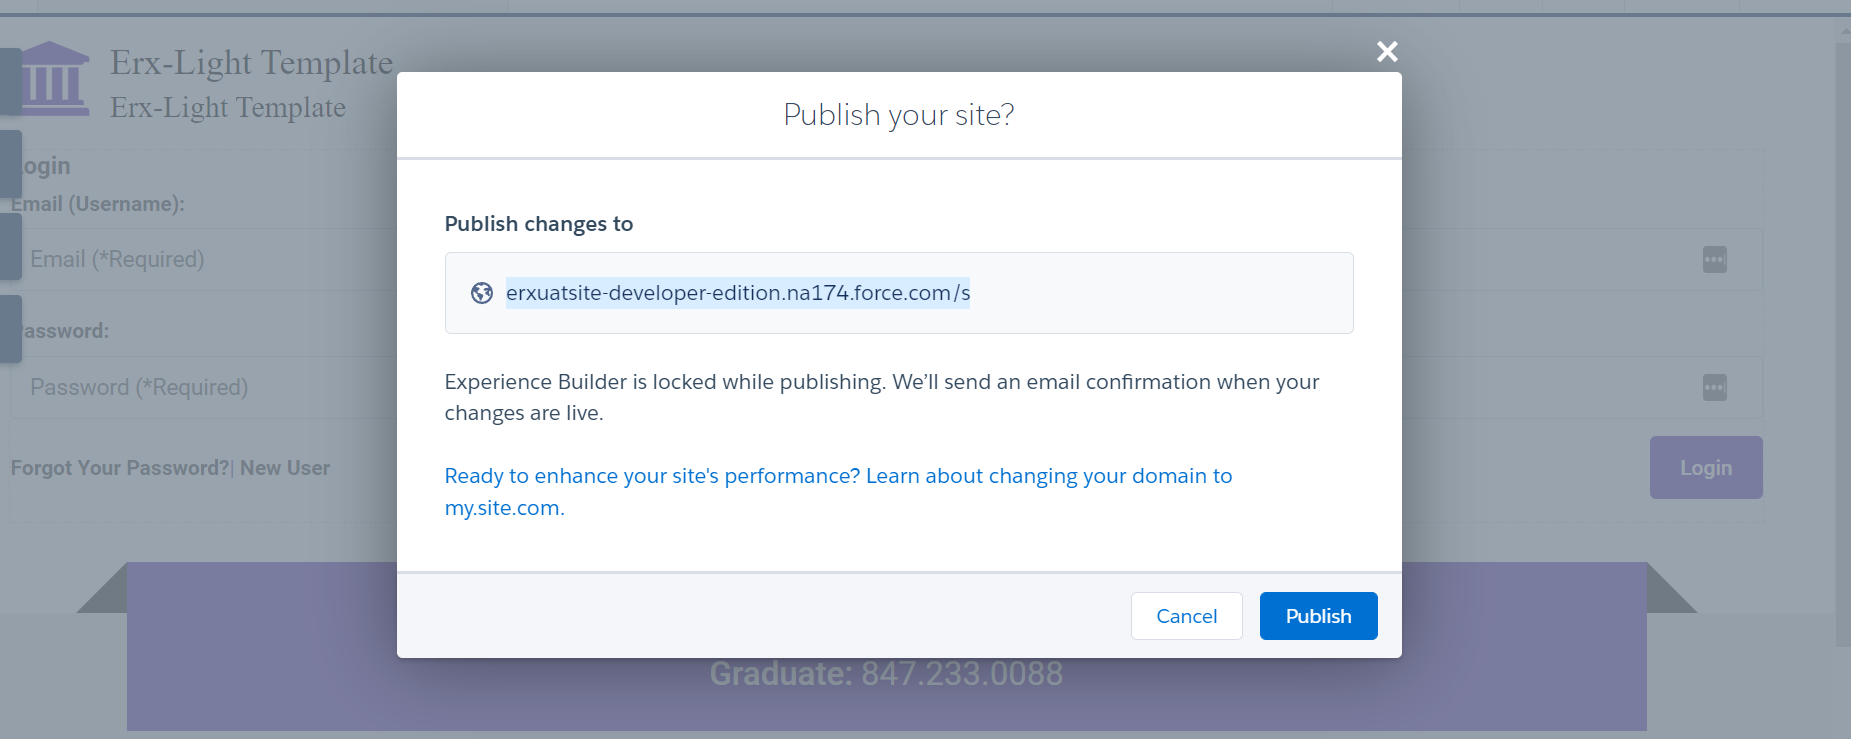
- For the login page, the URL will be different from the existing one
- In DXP when you click the Publish button in Experience Builder, you can see one URL that will be redirected to the login page
- Open the URL (this will vary from org to org) in your browser's "incognito" mode
and it will be redirected to the login page
Forgot Password
When a user clicks the "Forgot Your Password" button, the page will redirect to the Forgot Password page: https://erxuatsite-developer-edition.na174.force.com/s/login/ForgotPassword?
Registration Setup Process
- Navigate to the Community and click the Page Maker tab
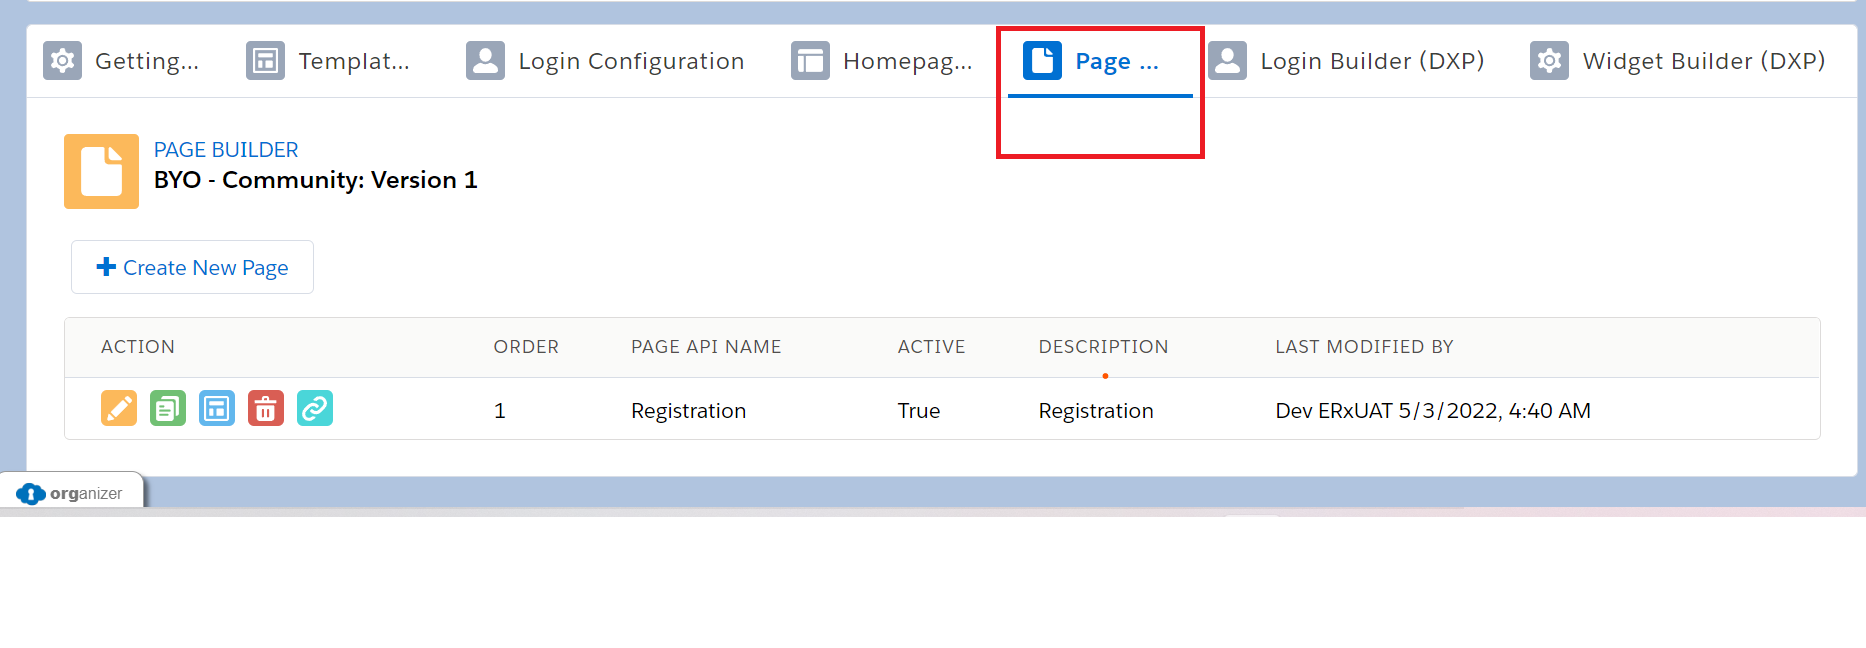
- On the Page tab, click Create New Page and enter the following details:
- Don't include in checklist = True
- Hide Tab Panel on page = True
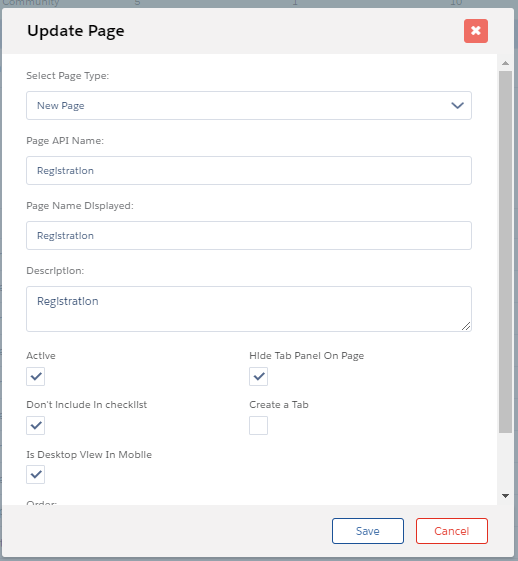
- Save and click on the Configure icon
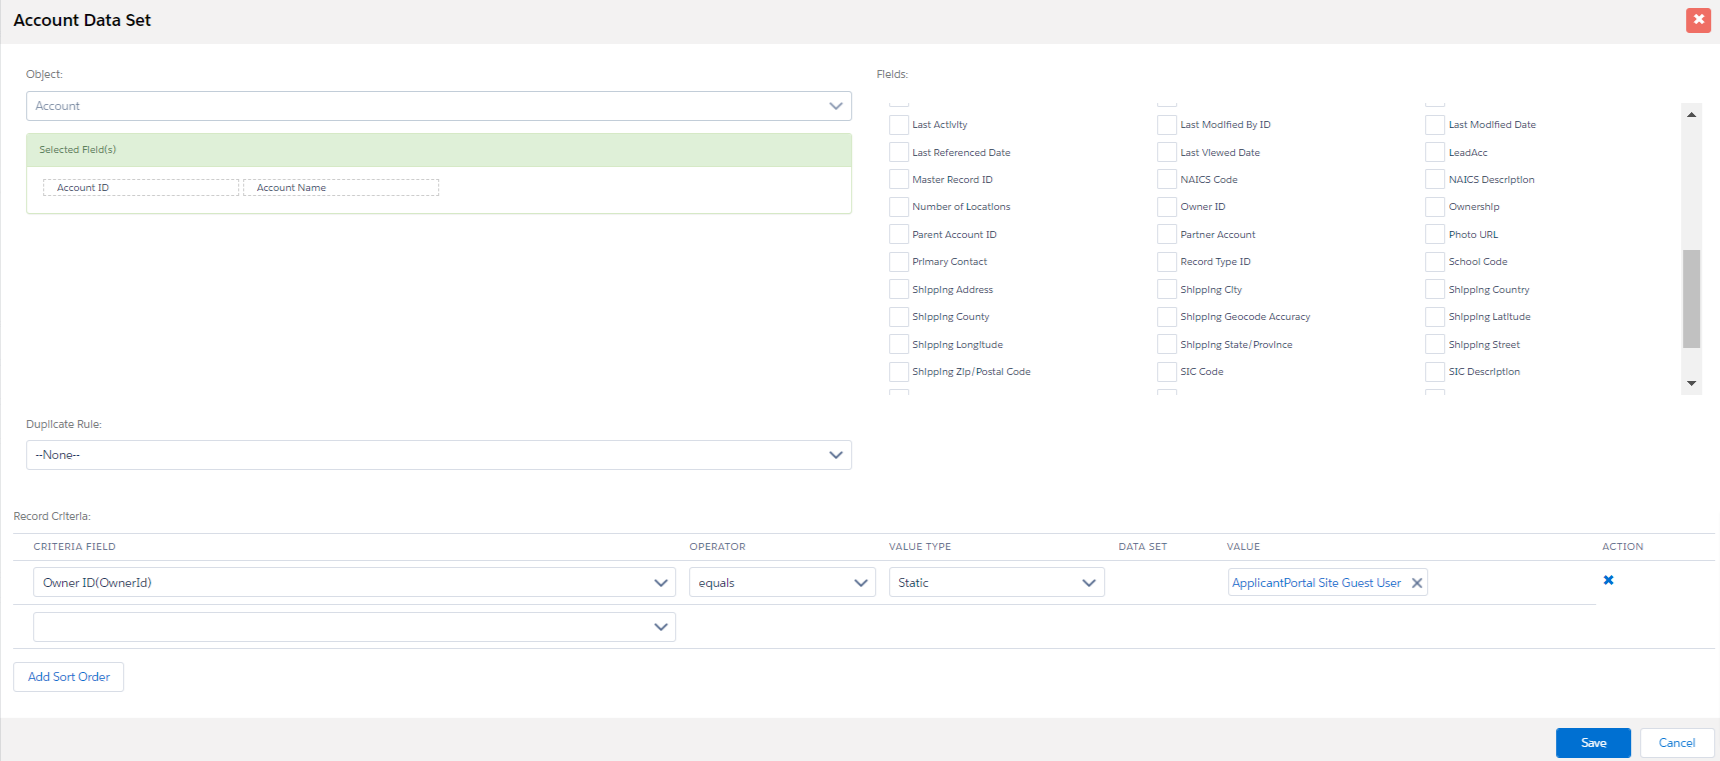
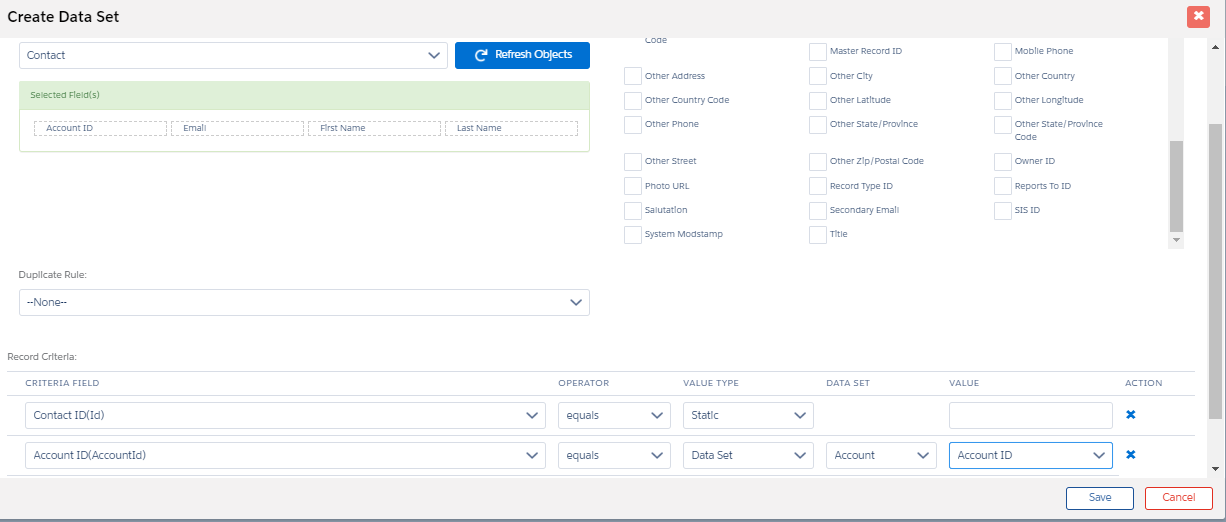
- Create a Data Set for Contact and Account (Account map owner id = Site Guest
User)
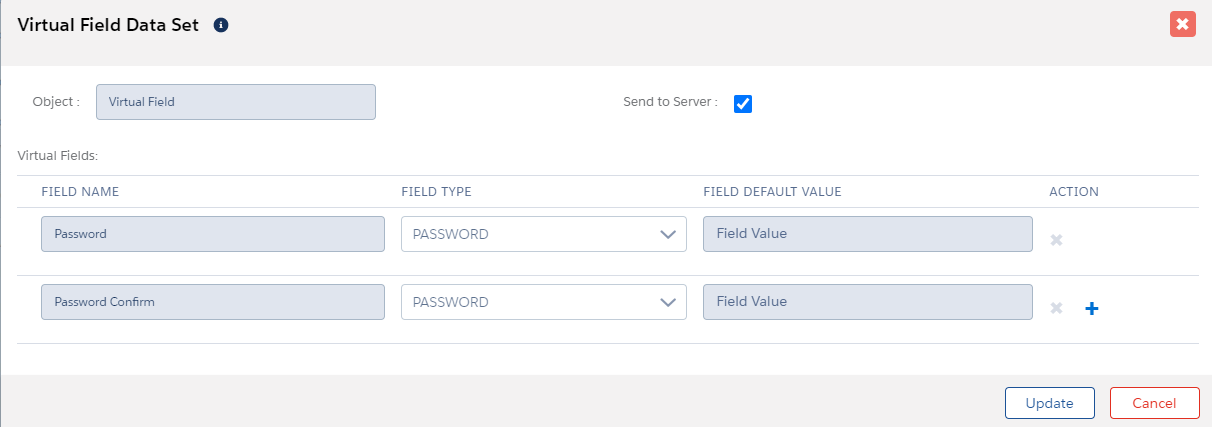
- Create two virtual fields called Password and Password Confirm (Type =
Password). The Virtual Field names must be configured like the below:
- Password
- Password Confirm
- Create a Registration Section, and map fields to it:
- First name
- Last name
- Password
- Password Confirm
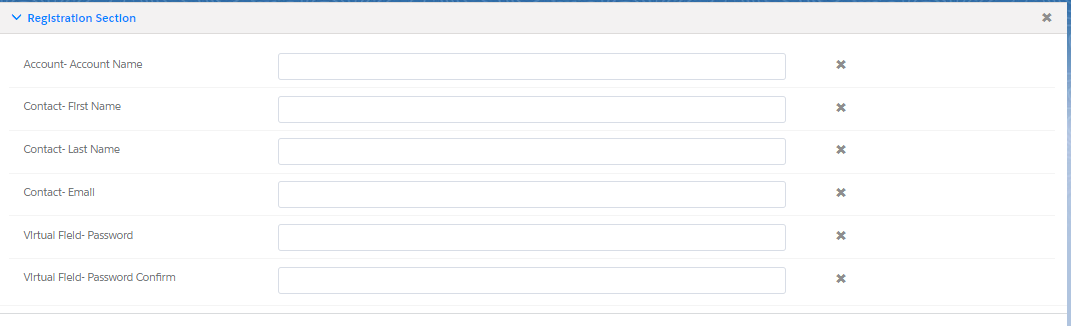
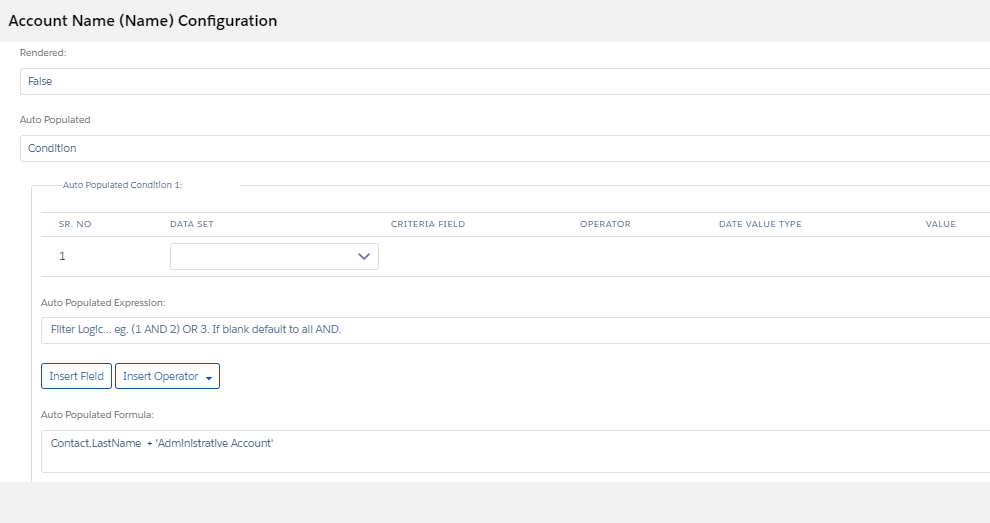
- Then create a Hidden Fields Section (Rendered = False within the section
configuration itself) and map fields to it:
- Account Name (from the Account data set)
- Account ID (from the Contact data set)
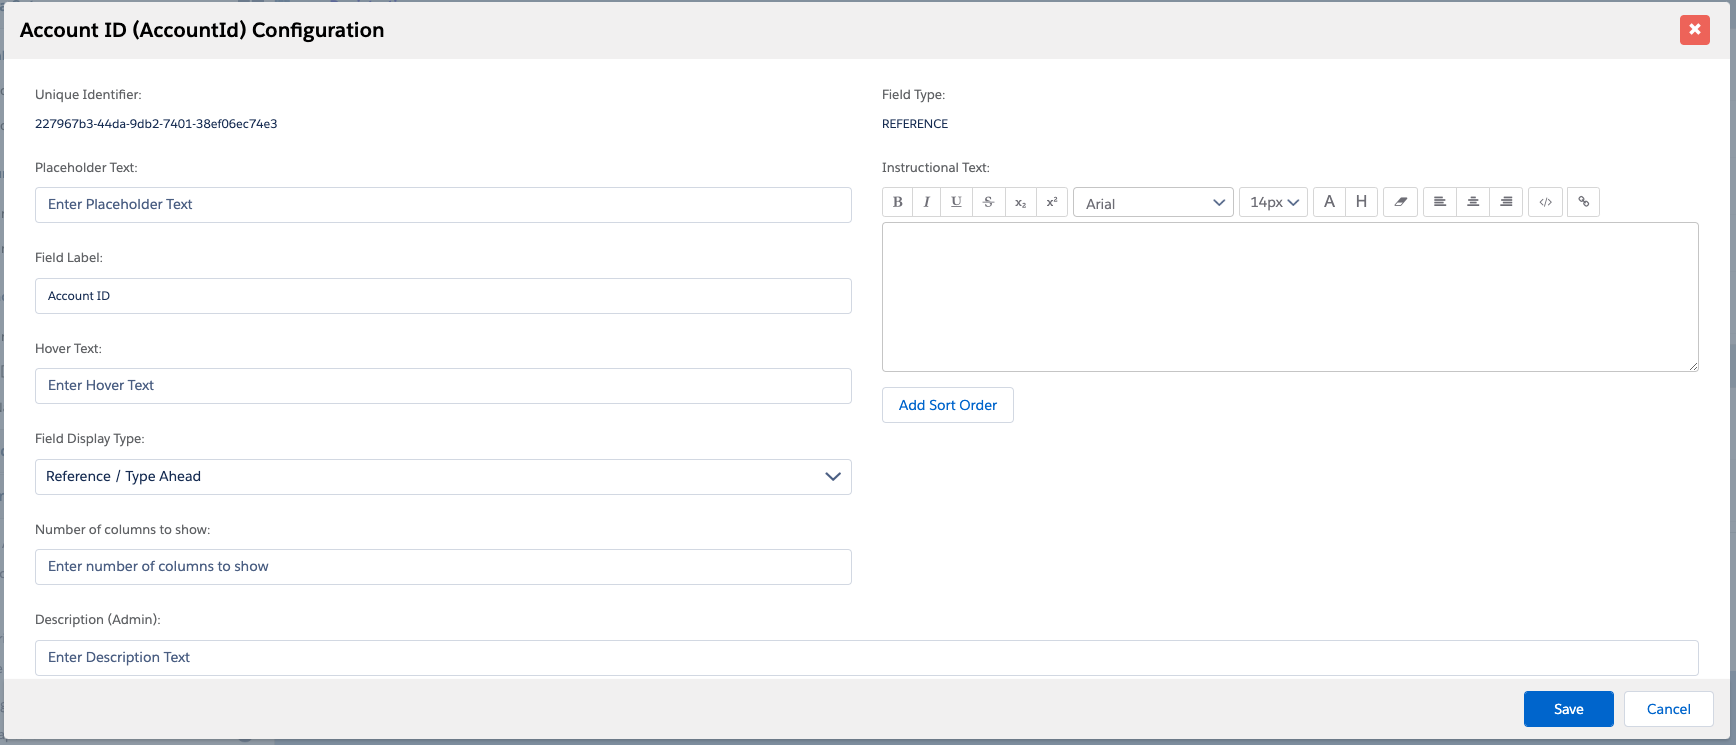
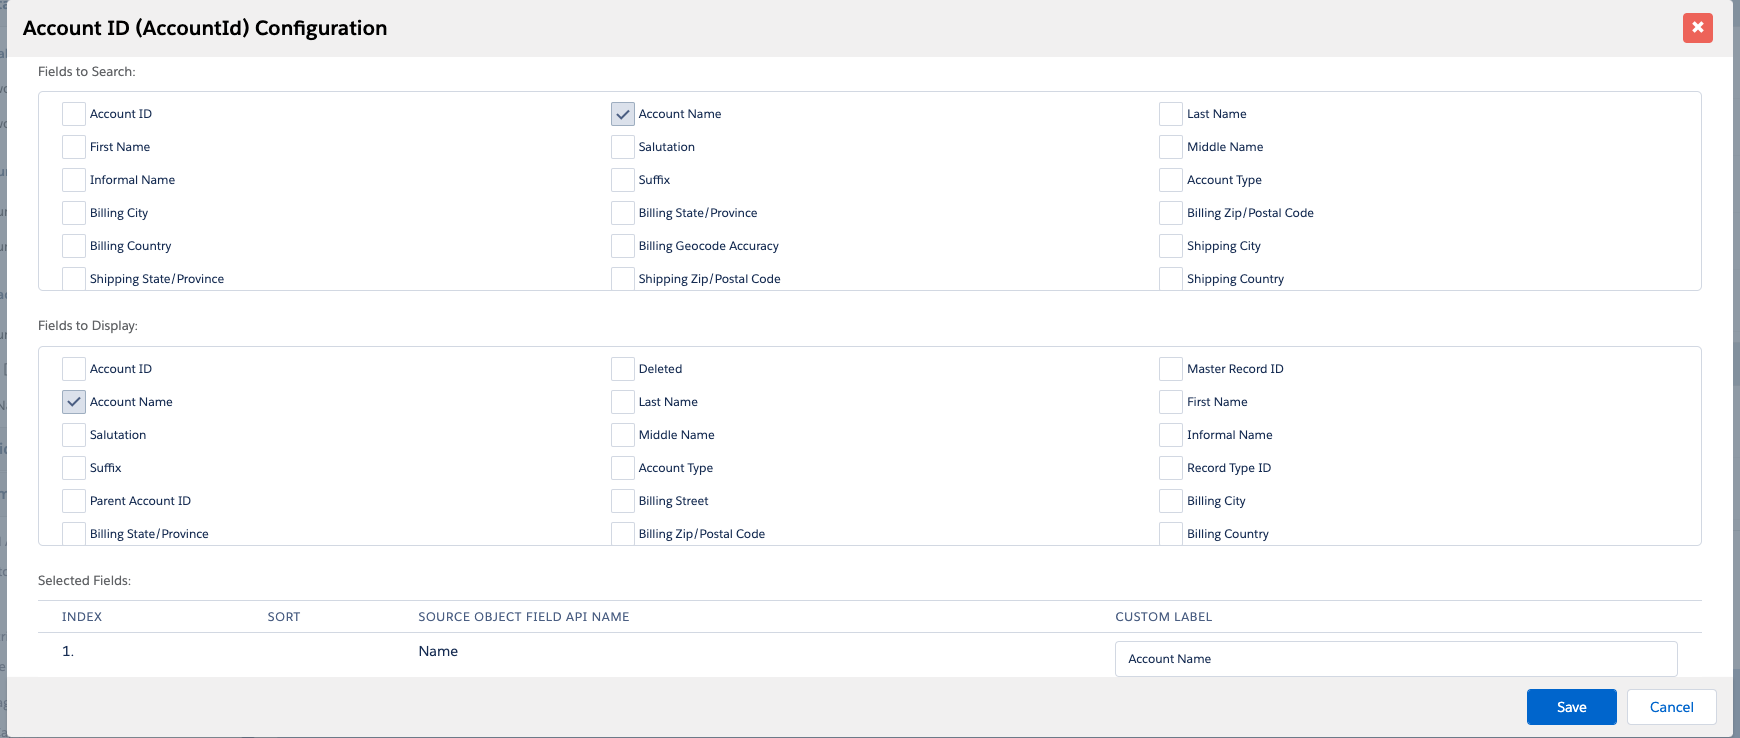
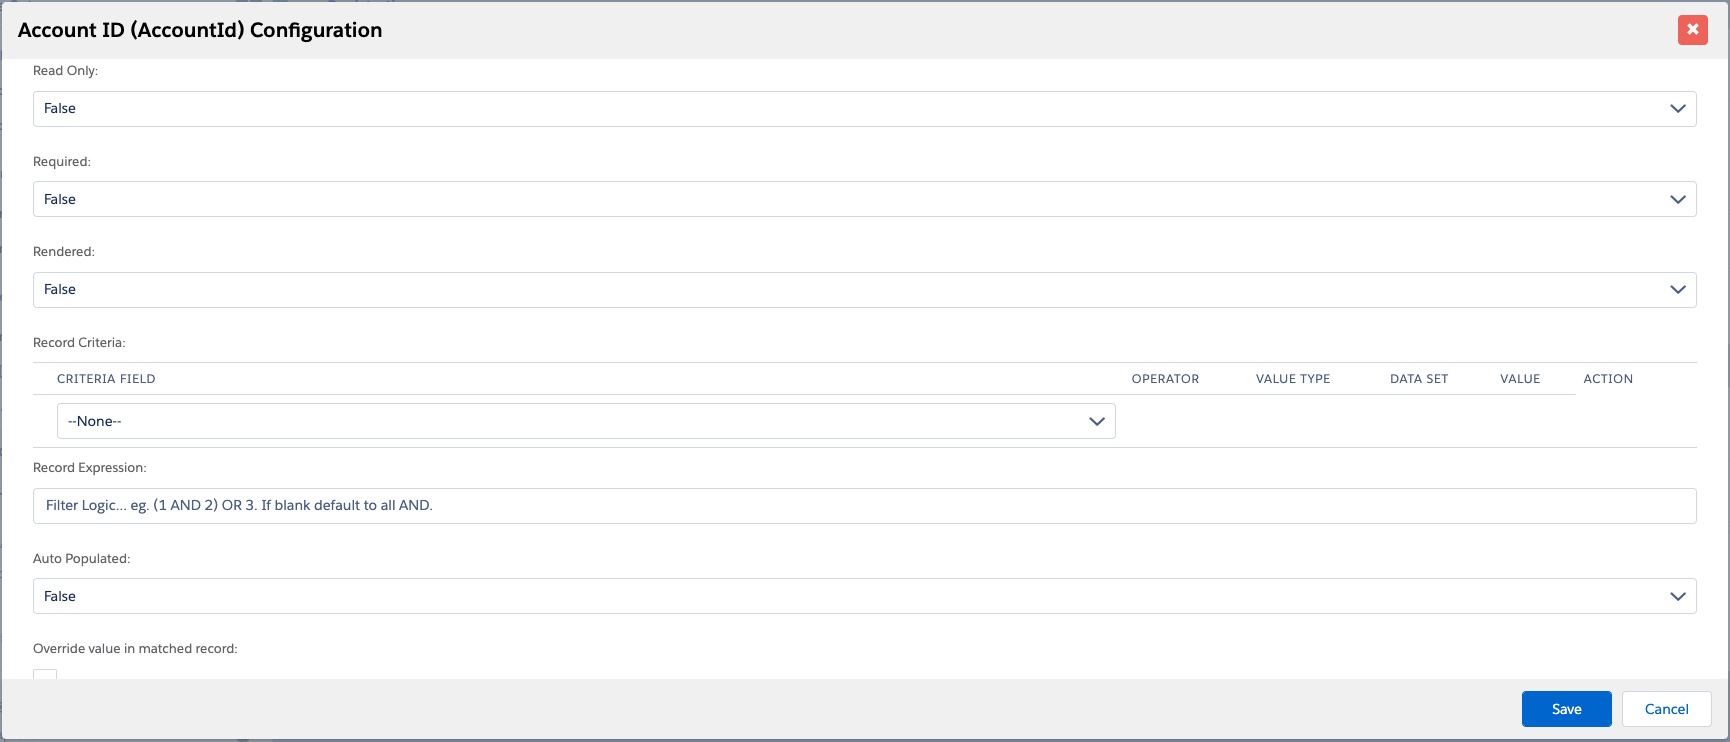
Note:Account ID should e hidden (Rendered = False). - Account Name should be hidden, auto populate condition (Rendered = False). In
auto populated put formula :- Contact.LastName + 'Administrative Account'
- Click on page configuration and set hide navigation to True
- Click on Save All Data
- Your final page should look something like this:
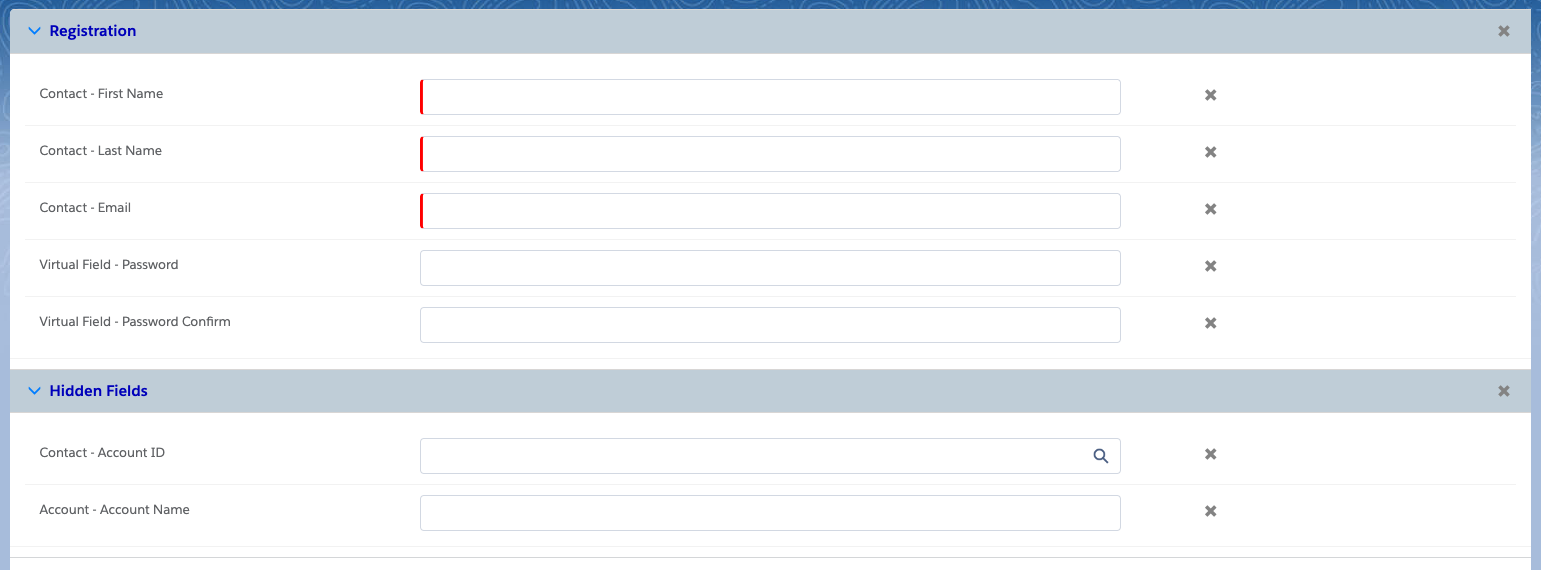
Page Maker - Registration
You will need to map the correct URL on all ENV details pages to successfully redirect to the Page Maker registration page.
https://erxuatsite-developer-edition.na174.force.com/s/login/SelfRegisterHomepage Setup Process
- Widget Record Creation at FormBuilder Admin Panel (Widget Builder DXP)
- Homepage setup in Experience Builder (Community Experience Builder)
Widget Record Creation at FormBuilder Admin Panel (Widget Builder DXP)
In the homepage configuration, you need to create all records related to the homepage using the widget (e.g., Application Status, Social Feed, Apply Now, Contact Info, iFrame, Video, Greeting, etc.).
For this, you will need to follow the below steps:
- Click on the FormBuilder Admin panel
- Click on Widget Builder (DXP)
- Click New
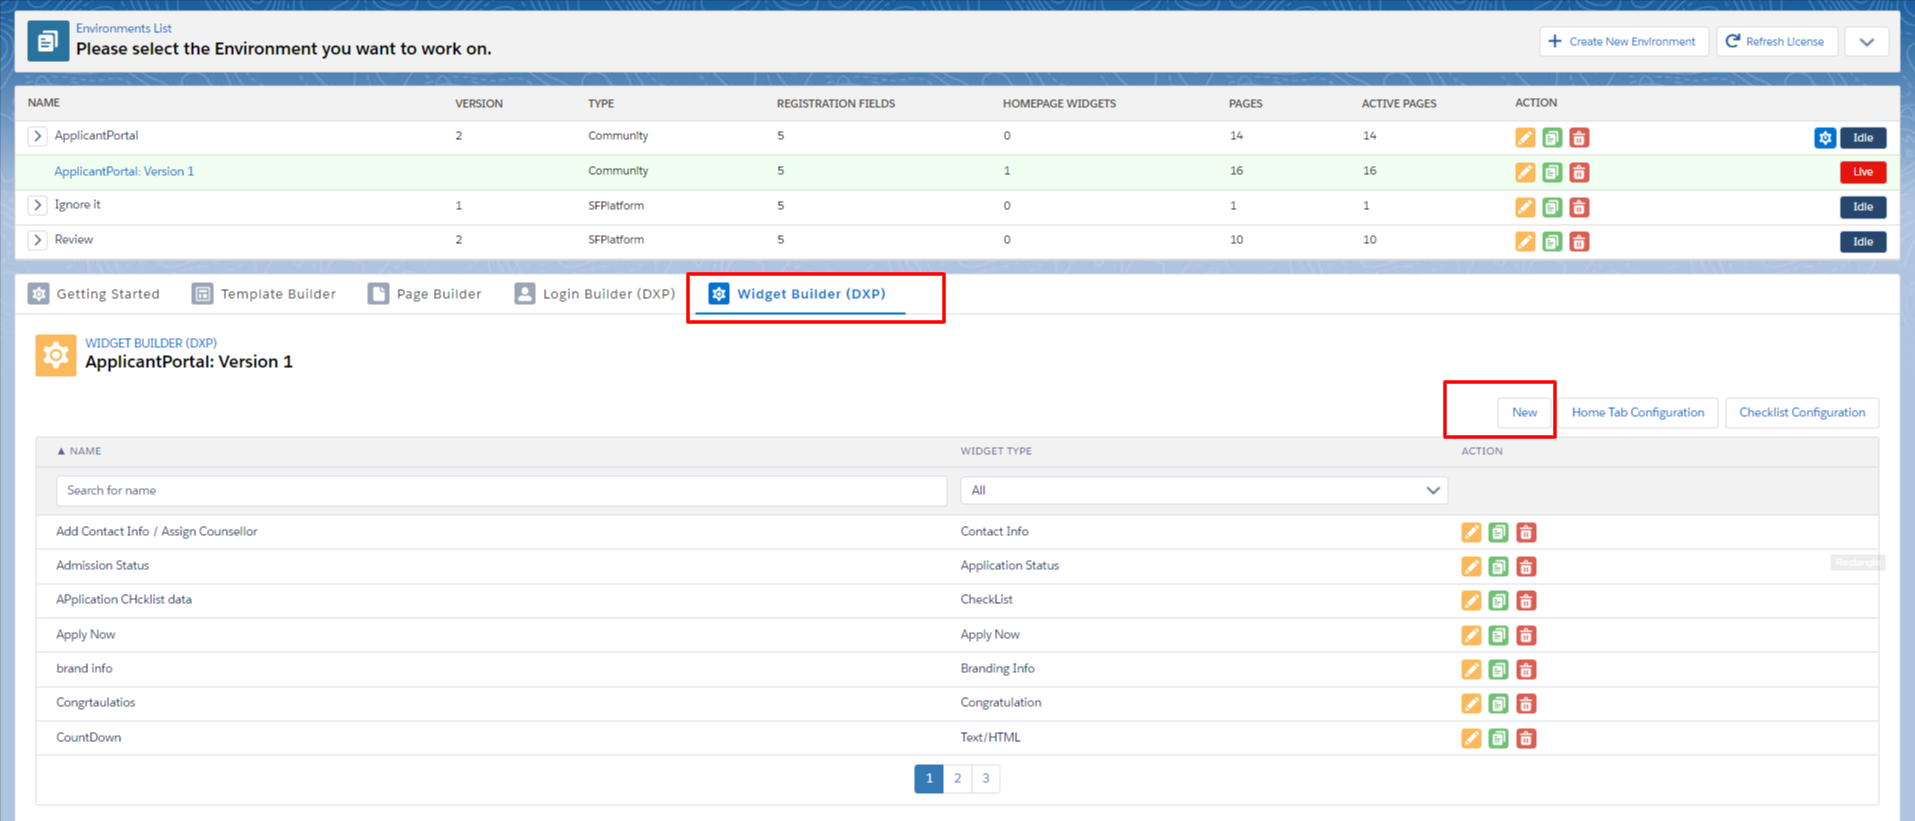
- A popup will be displayed with a picklist of Widgets
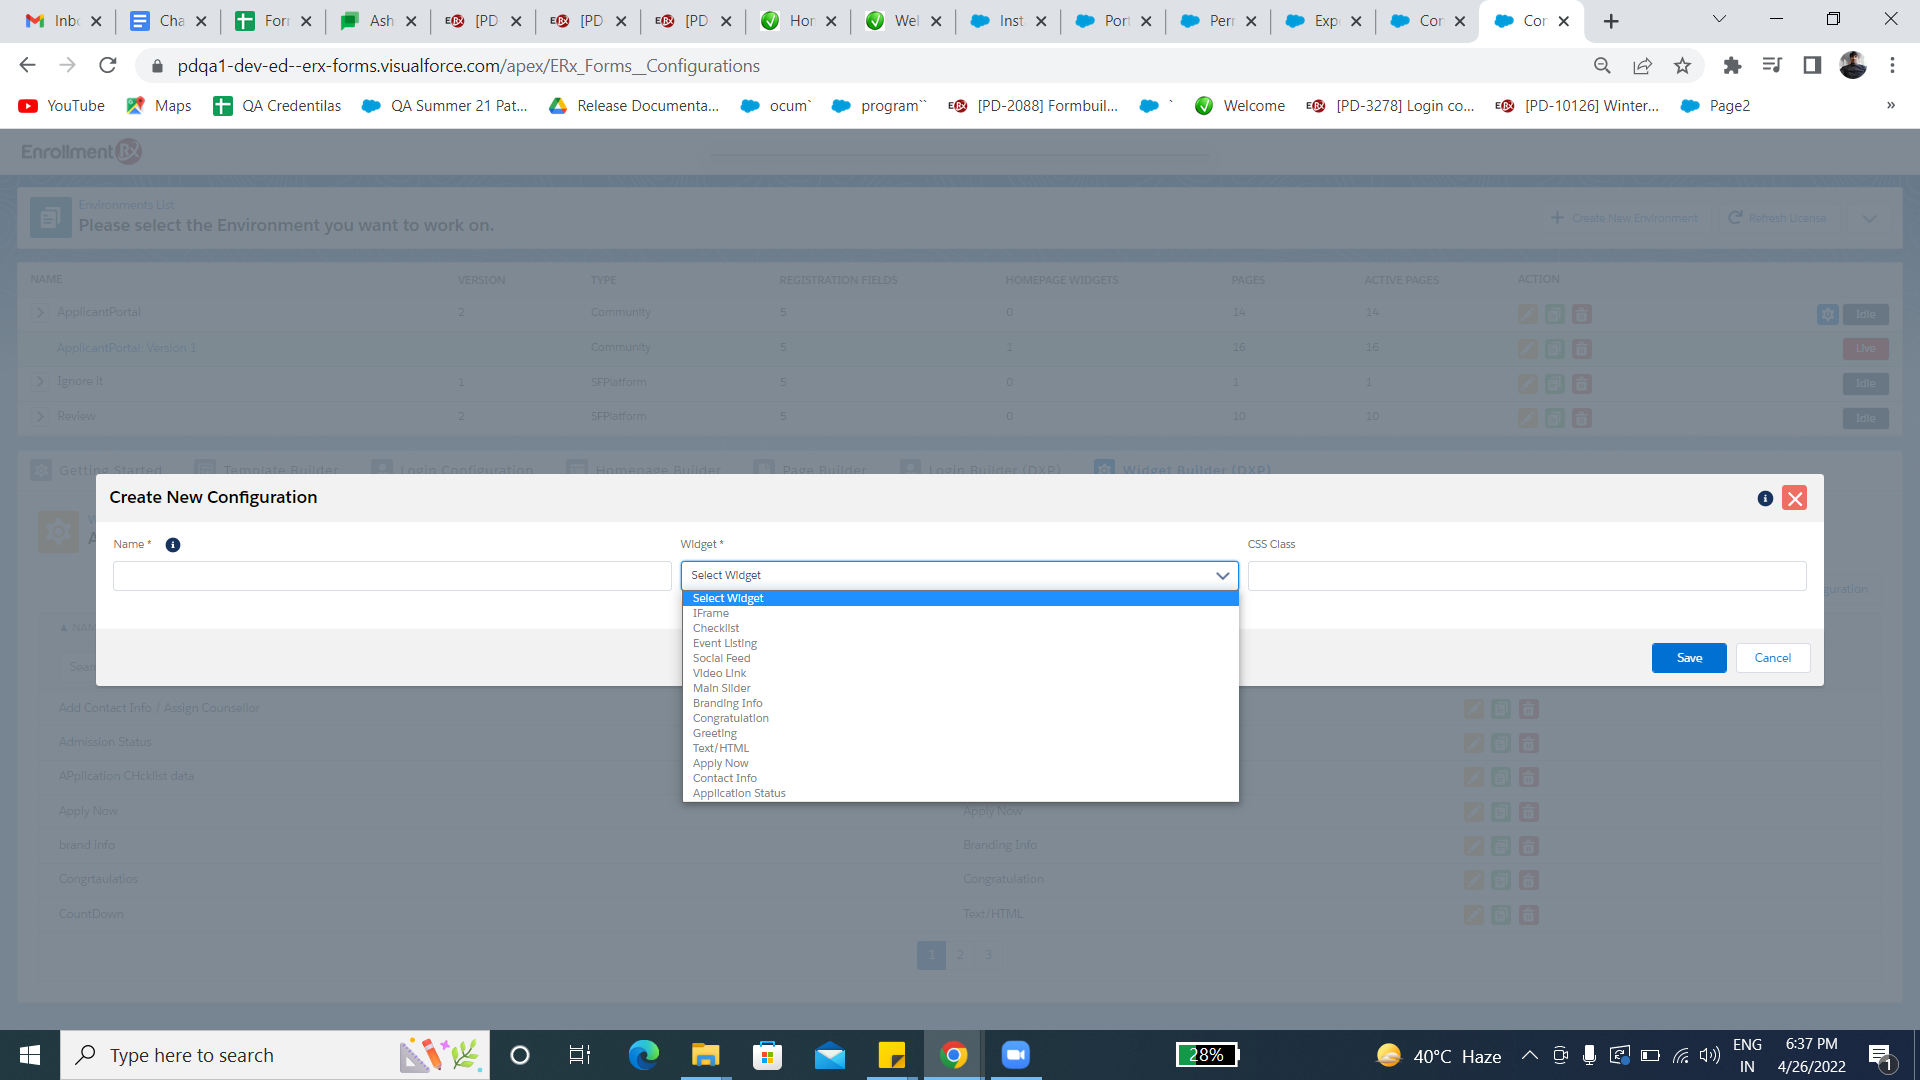
- Select the Widget you would like to create
- Enter details (e.g., Name, Widget Type) and other information, and click Save
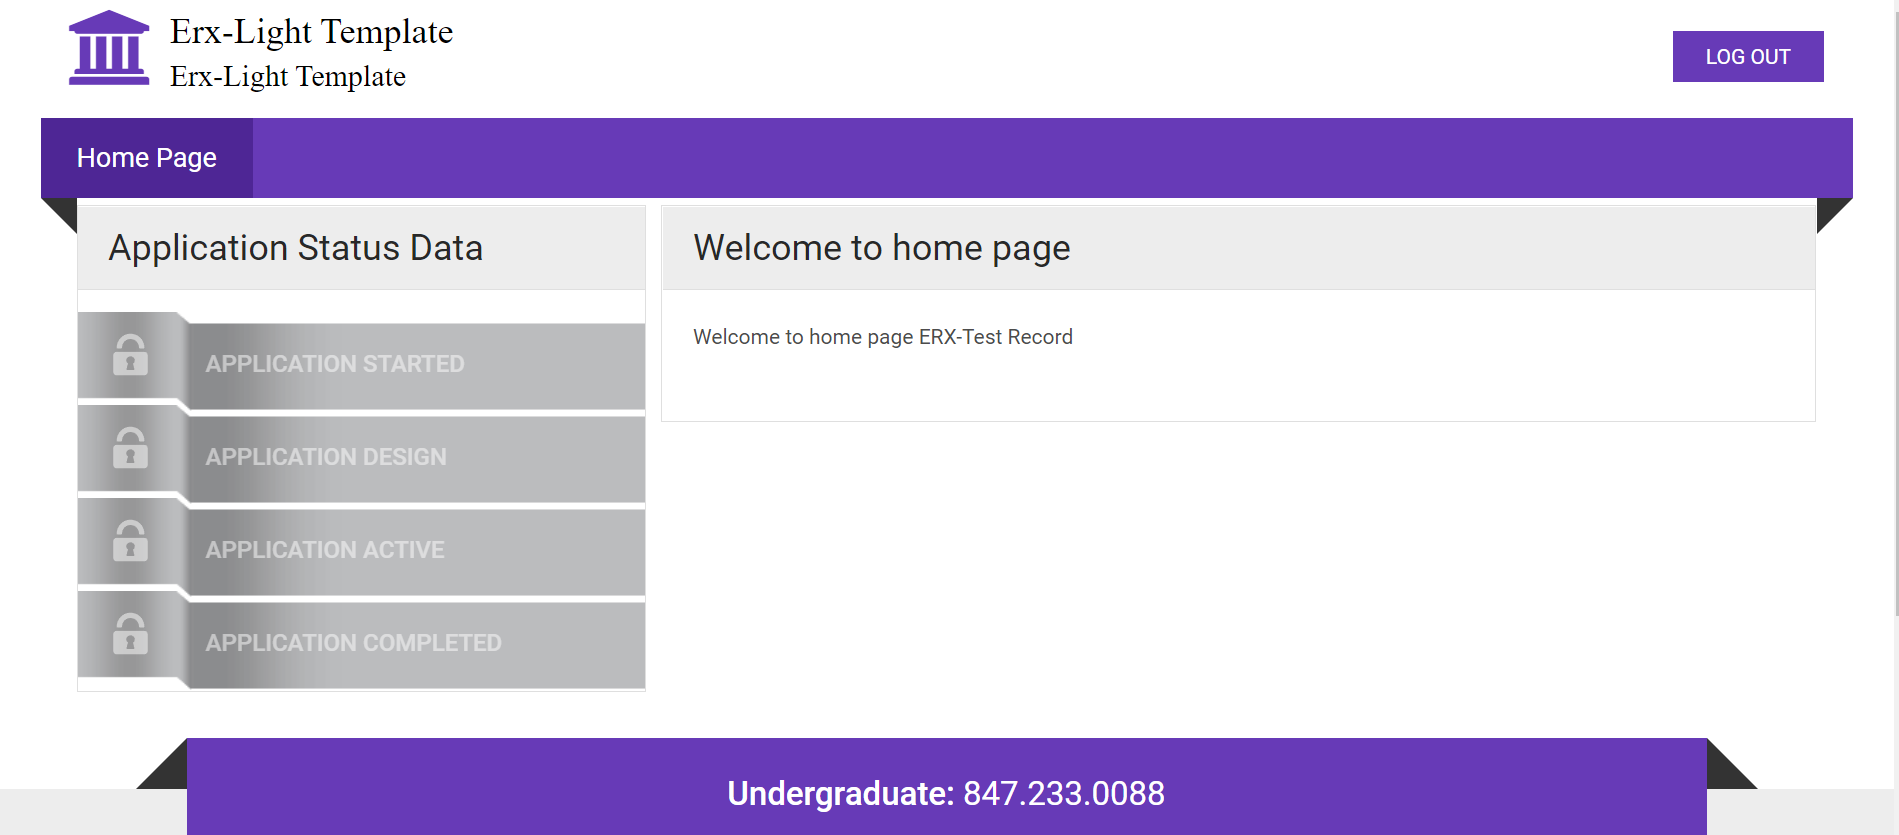
(the below screenshot uses Application Status as an example)
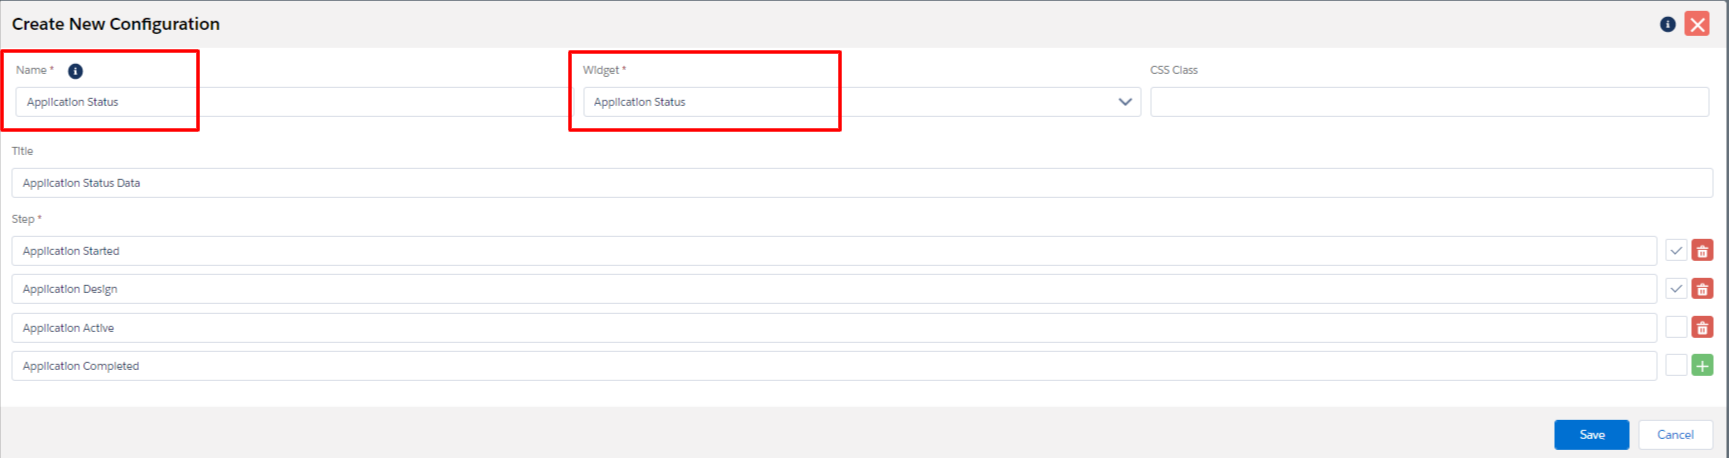
- An Application Status Widget will get created and is editable.
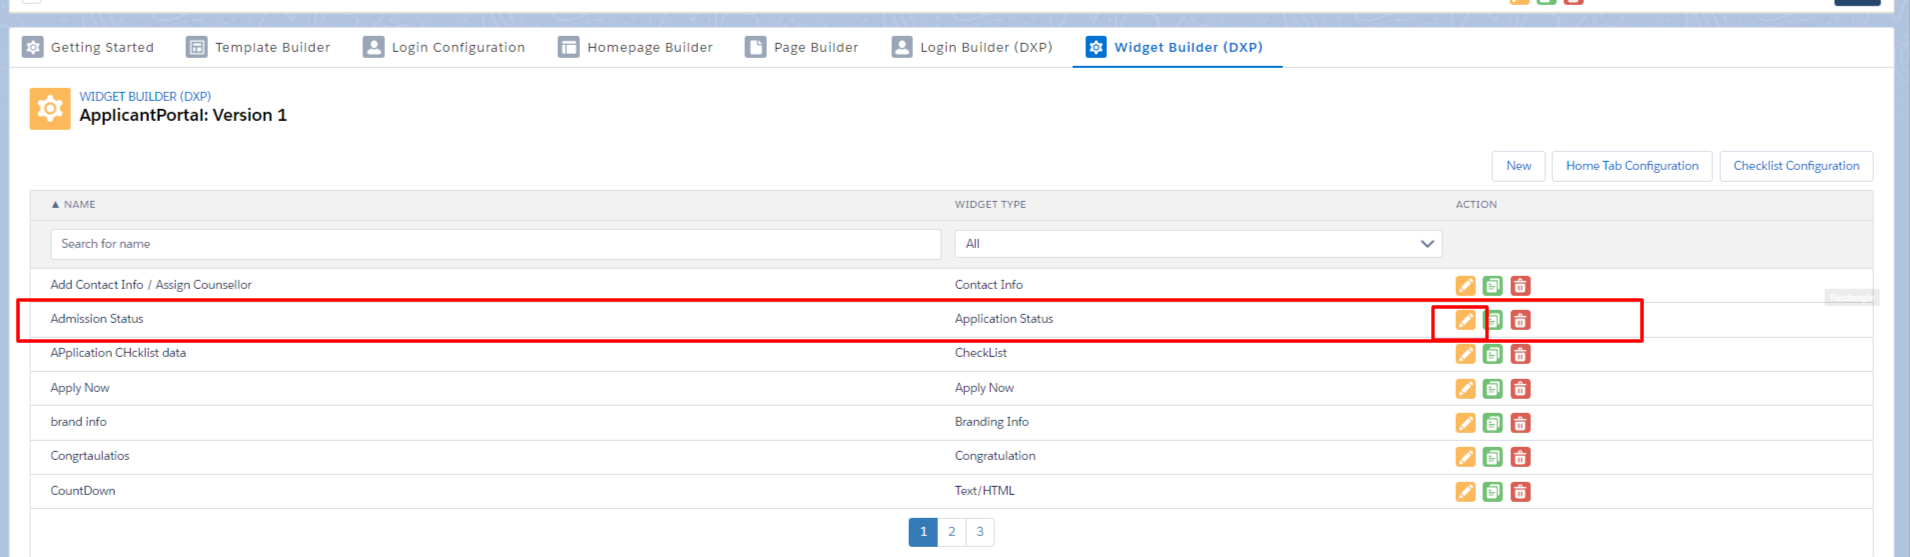
Follow the steps above to create other widgets.
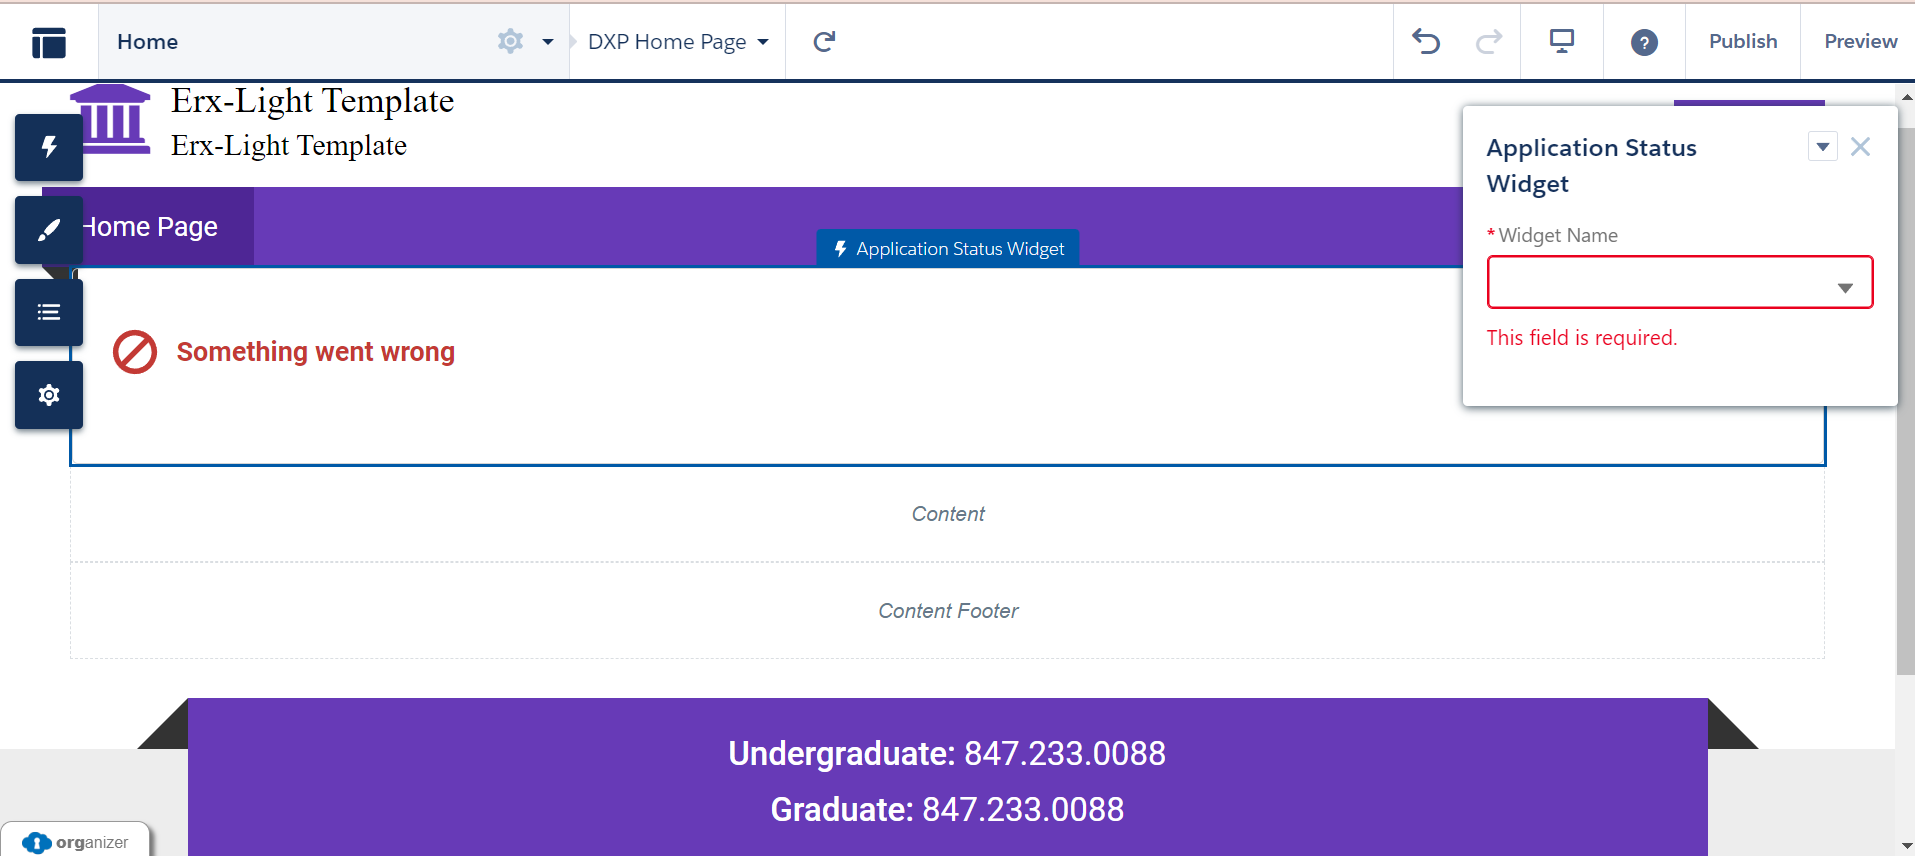
Homepage Setup in Experience Builder (Community Experience Builder)
After creating the Widget, you will need to set it up on Experience Builder in the Community site. Follow the steps below.
- Go to Setup
- Search for "All Sites" in the Quick Find box
- Click the Builder button on the Community site

- In Experience Builder, go to the homepage and change the layout setting
- Click on the Components icon, and drag and drop the Widget (e.g., Application
Status)

After placing the Component, you will need to select the Application Status Widget, which is created in the FormBuilder Admin panel (as mentioned above).
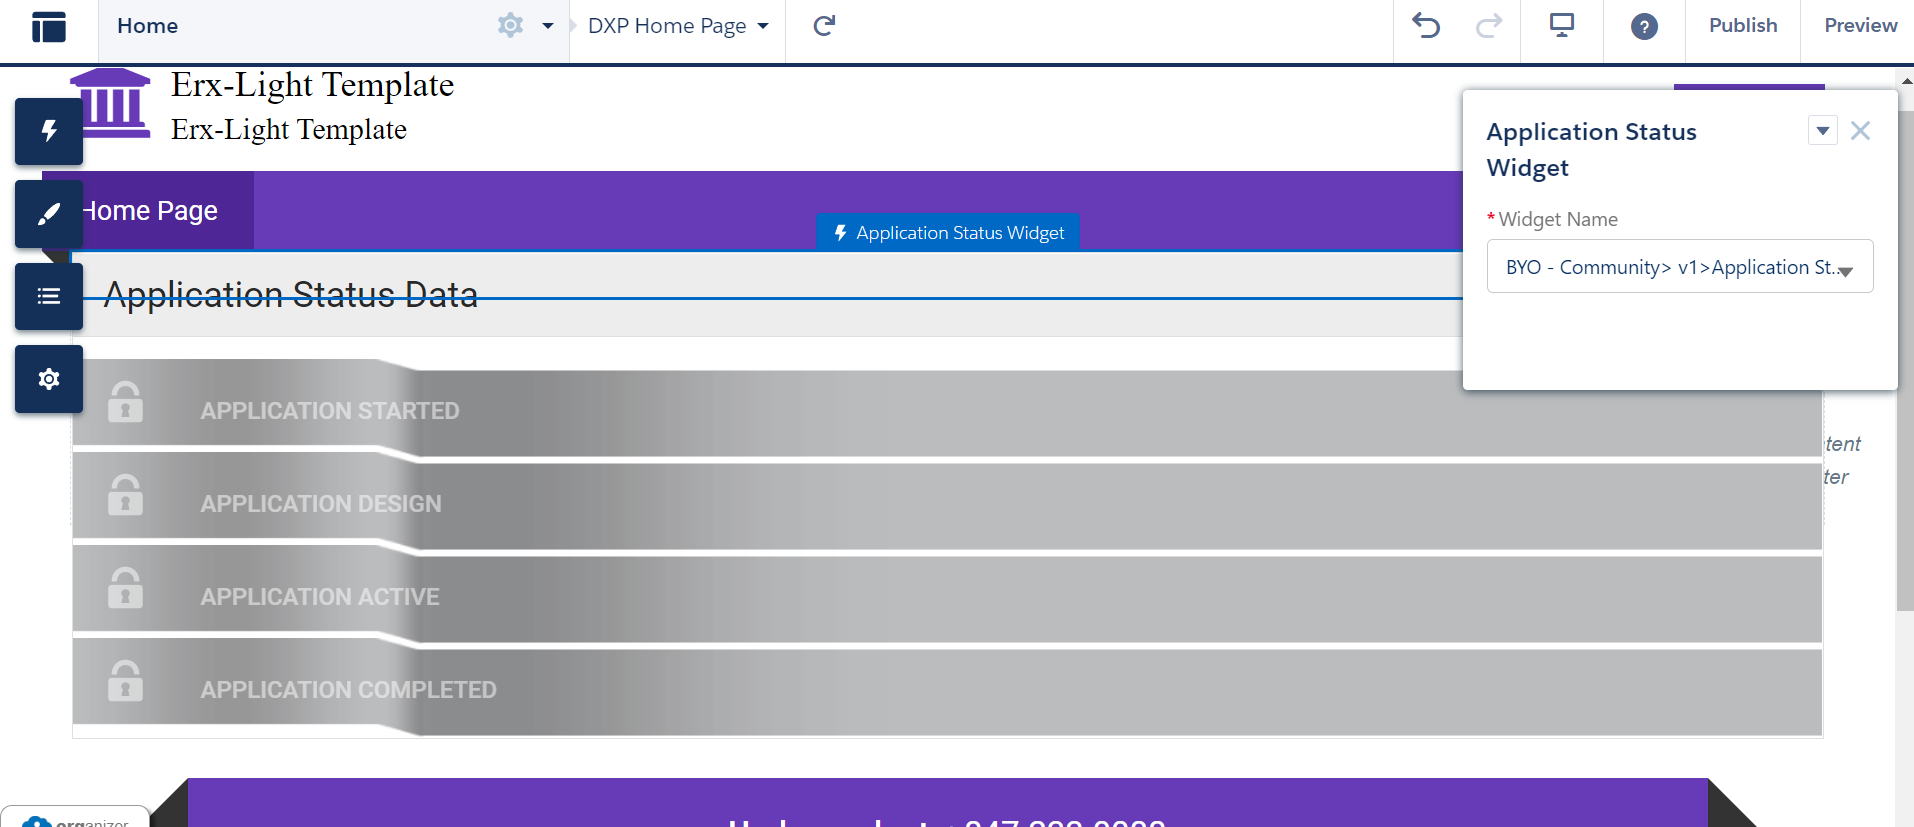
Click Publish to save the changes.
Homepage
Log in to be redirected to the homepage.