Environments in DXP
Overview
This guide will step you through the following:
- Creating a new version of a FormBuilder Rx Community Environment.
- Preparing a Digital Experience Community to go live with the new Community Environment.
- Setting the new Community Environment version to Live.
- Publishing the new Environment components to your Digital Experience Community.
Create a New Version of an Environment
- Click the “New Version” button from the Environments List section of the Admin
Panel.
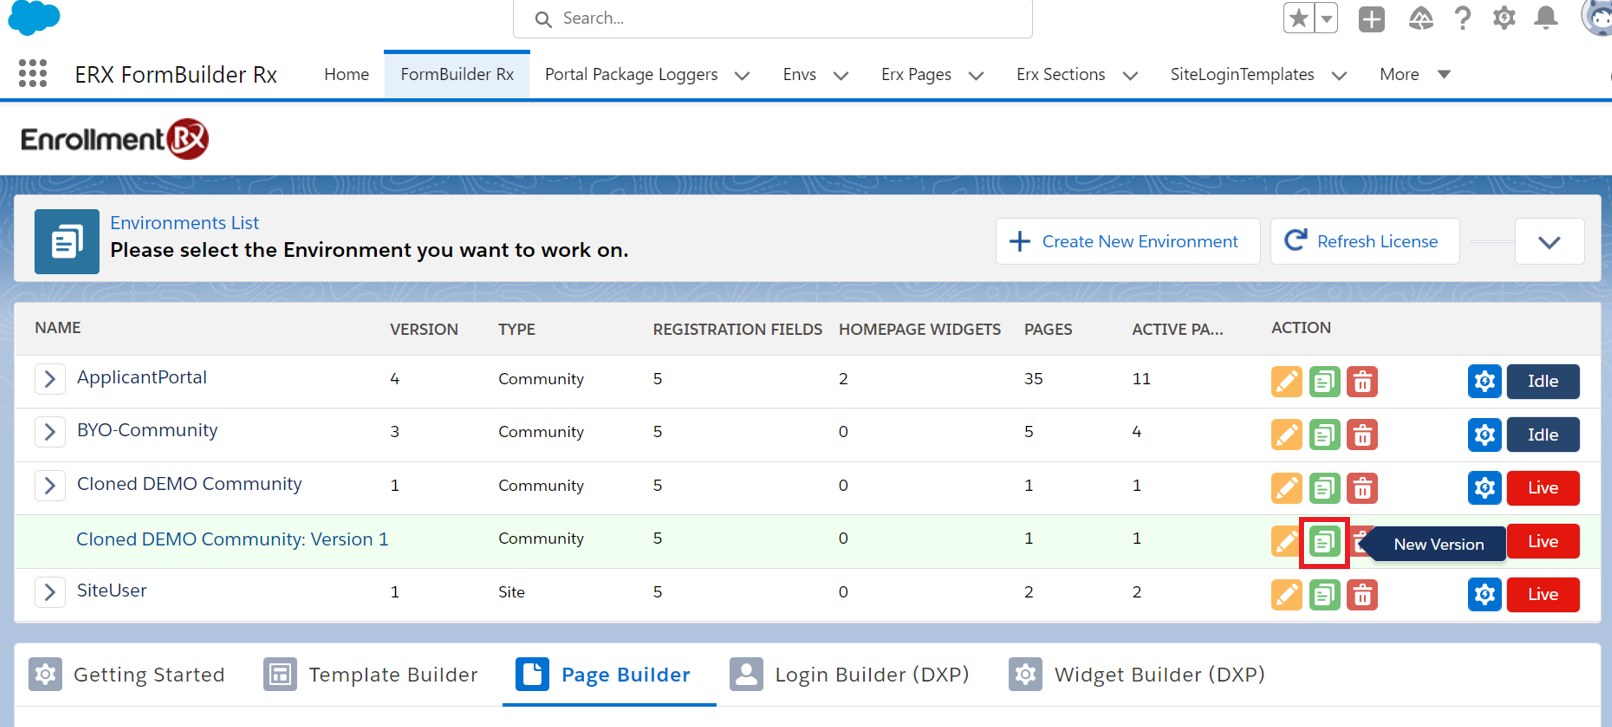
- You will be prompted to select the environment version you are looking to clone
as well as which objects you would like cloned.
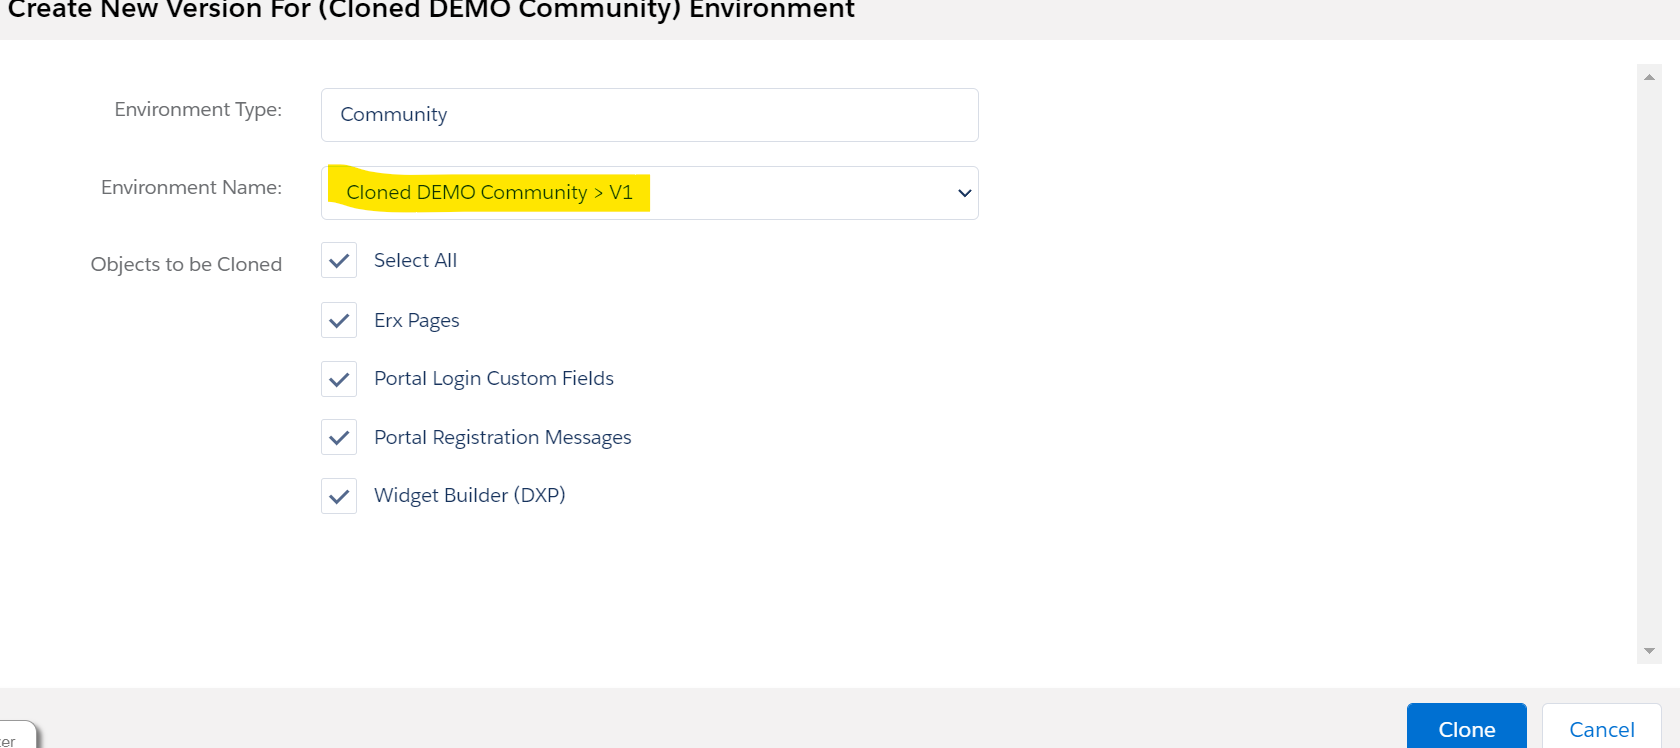
- Click on the Clone button.
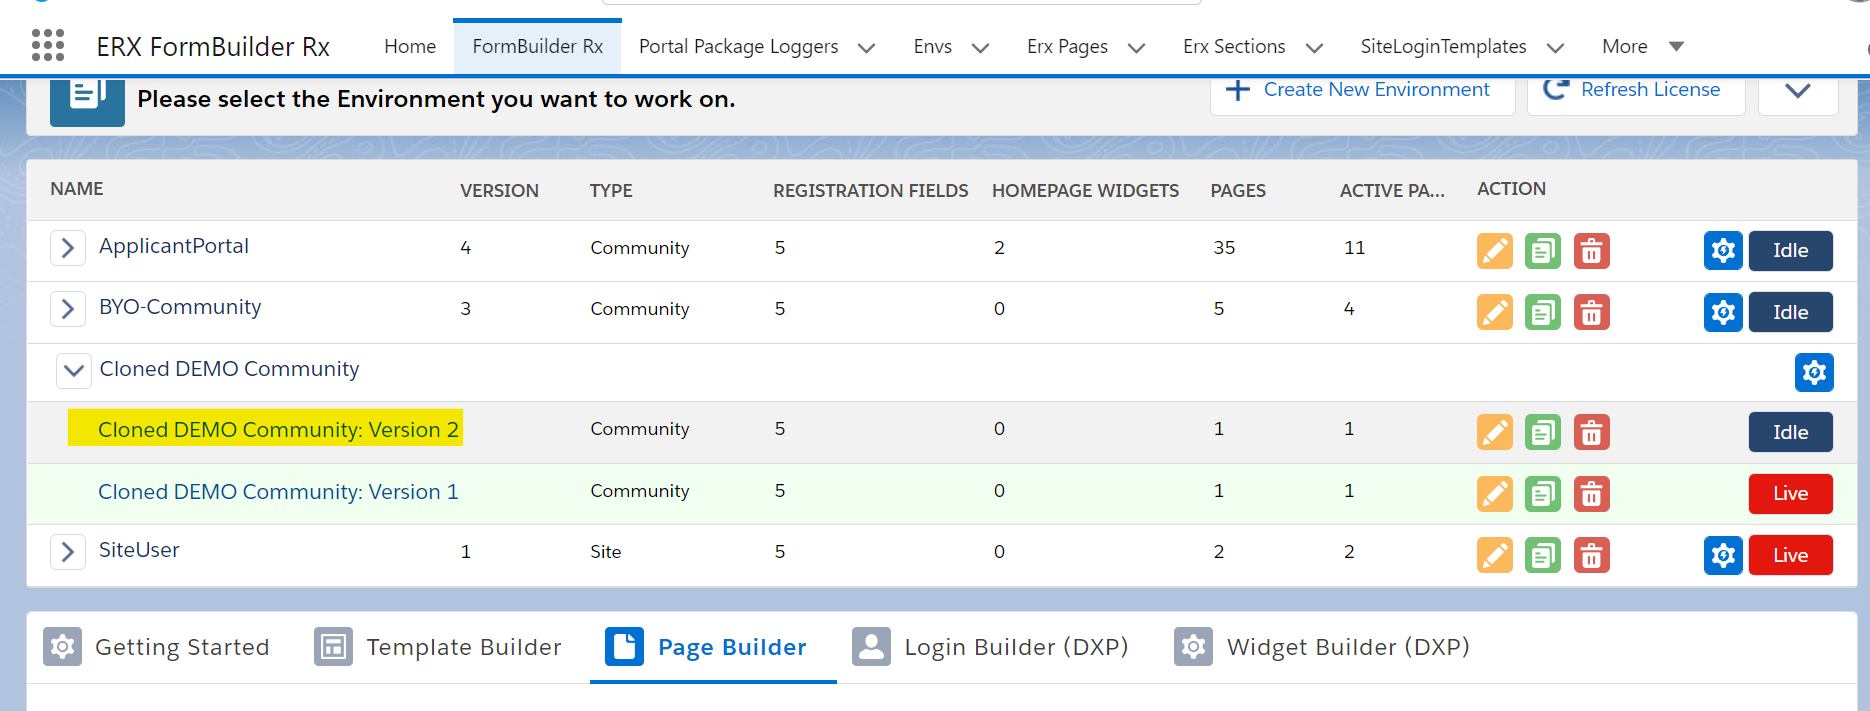
- Once complete, the new cloned version of the environment will be visible with a
new version number (in the below example, Version 1 was cloned and a Version 2
was created).
- The FormBuilder Rx Environment for your Community is now ready to go live. Important:Before setting a new version of a FormBuilder Rx Environment for a Community to Live, there are some steps required in Experience Builder to fully implement a new version. We recommend holding off on step 6 (below) until you are ready to perform the final step from the “Prepare a Digital Experience Community to go Live with a New FormBuilder Rx Environment” section that follows.
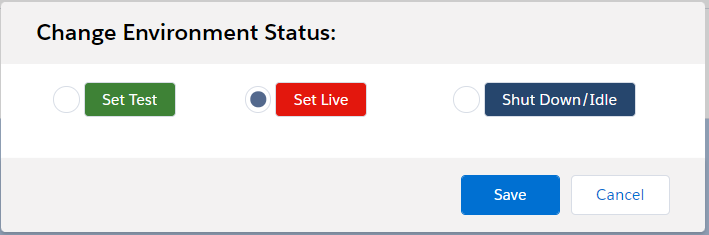
- To set the new FormBuilder Rx Community Environment to Live, click on the Idle
button on the right-hand side of your Environment, select Live, and click Save.
(Don’t see an Idle button? This feature has three states – Idle, Test, and Live.
Clicking the button in any state will open the Change Environment Status
window.)
Prepare a Digital Experience Community to go Live with a New FormBuilder Rx Environment
When a new FormBuilder Rx Community Environment is cloned, new versions of your pages and widgets are created as well. As a result, they need to be configured and mapped into your Digital Experience Community.
Navigate to Experience Builder
- In Salesforce, click and search for "Digital Experiences" in the Quick Find box. Click on "All Sites" when it appears.
- Click on Builder next to the Community you want to update.

Update DXP Components
With a new FormBuilder Rx Community Environment cloned, there are new versions of pages and widgets available for selection in Experience Builder.
- Open the Pages menu and select the Home page.
- On this page, click on a component.
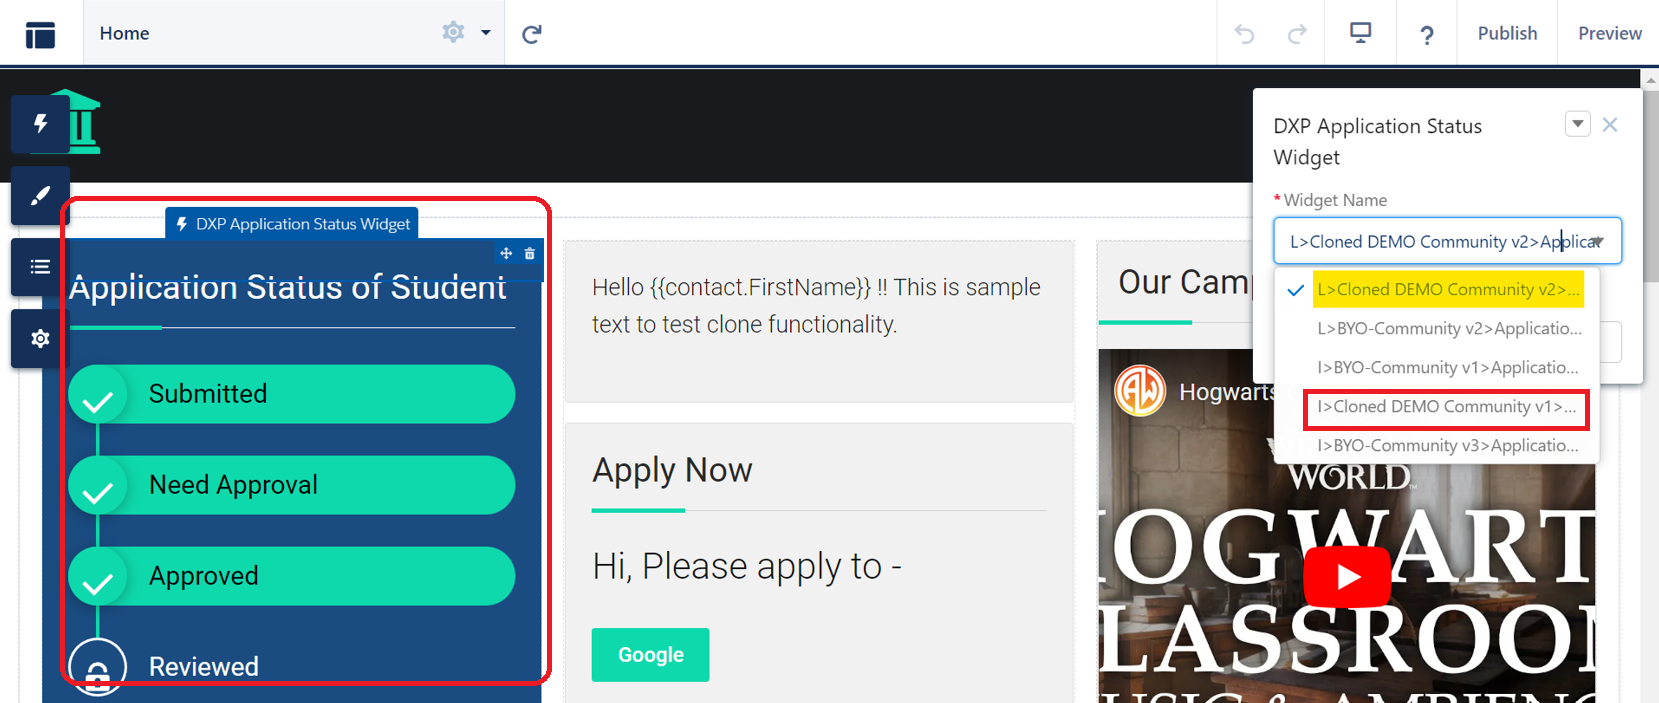
- When you select a DXP Component, a component property manager will pop up,
allowing you to select a widget (or page). Select the desired widget or page to
set to Live.
In the below screenshot, the Application Status widget component from the Version 1 widget has changed to the new Version 2 widget.
Note:This update will need to occur for all DXP components that reference a FormBuilder Rx widget or page. A complete list of DXP components is available below. - Update the DXP Component on the Registration page. This page can be found nested
under the Login Page tree.

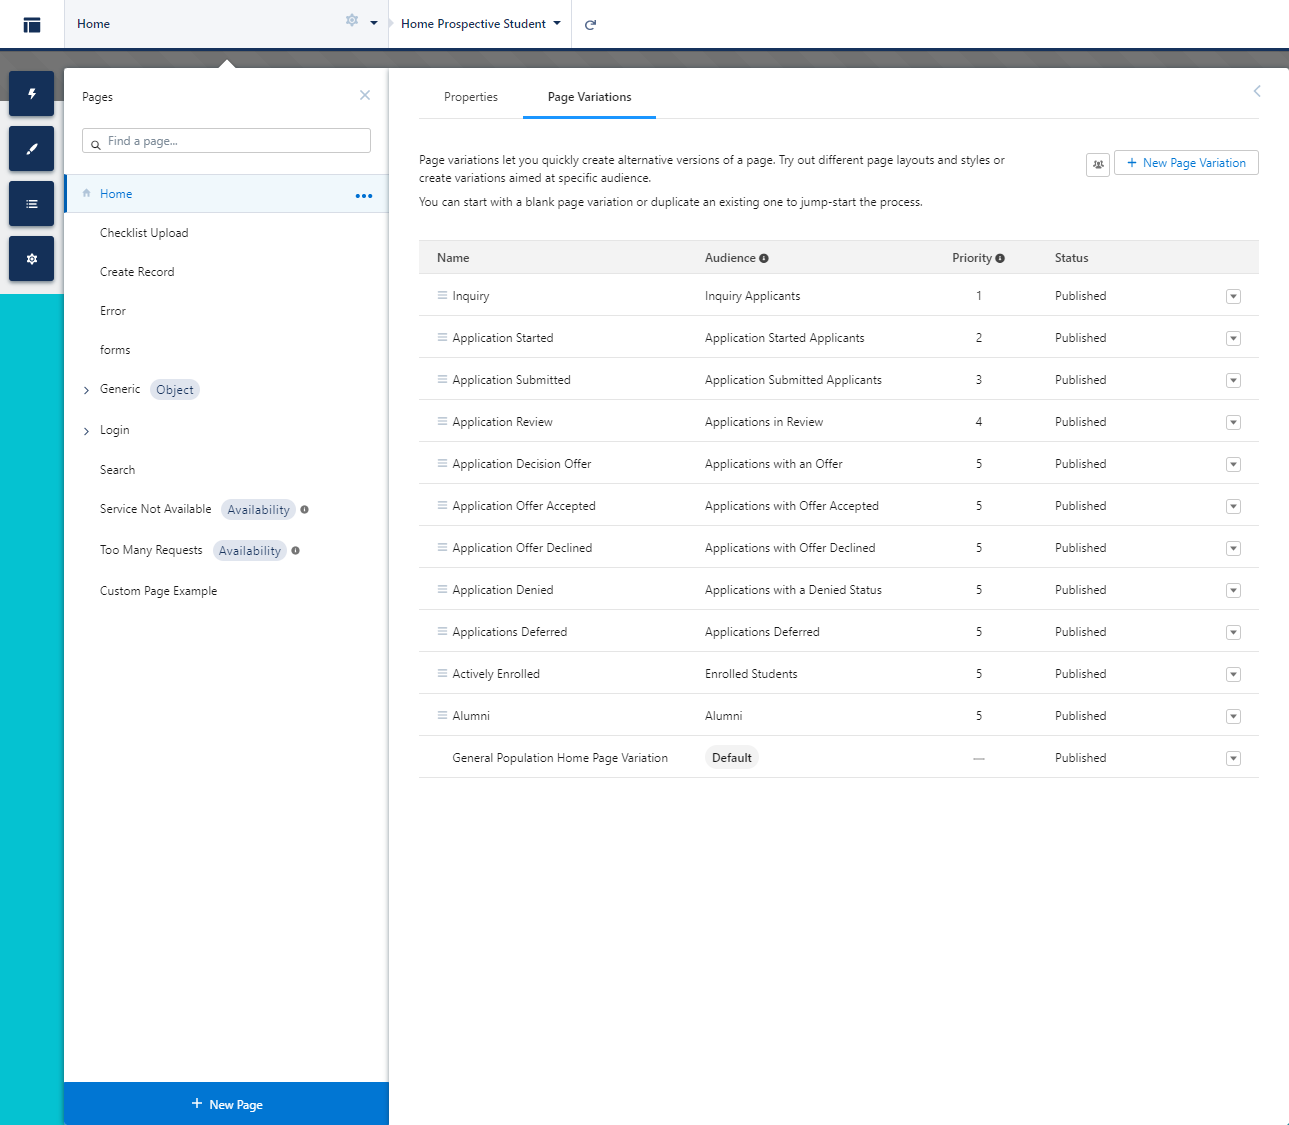
- Be sure to review and update any and all page variations created. Typically,
page variations are built for the Home page but can be built for other pages as
well.
- Review and update DXP Components used on any custom pages. As an example, a page
has been added above called "Custom Page Example." If any custom pages use DXP
Components, those components will need to be updated as well. Important:We recommend following steps 1-6 before you set a new version of your FormBuilder Rx Community Environment to Live
- Click on the Publish button.
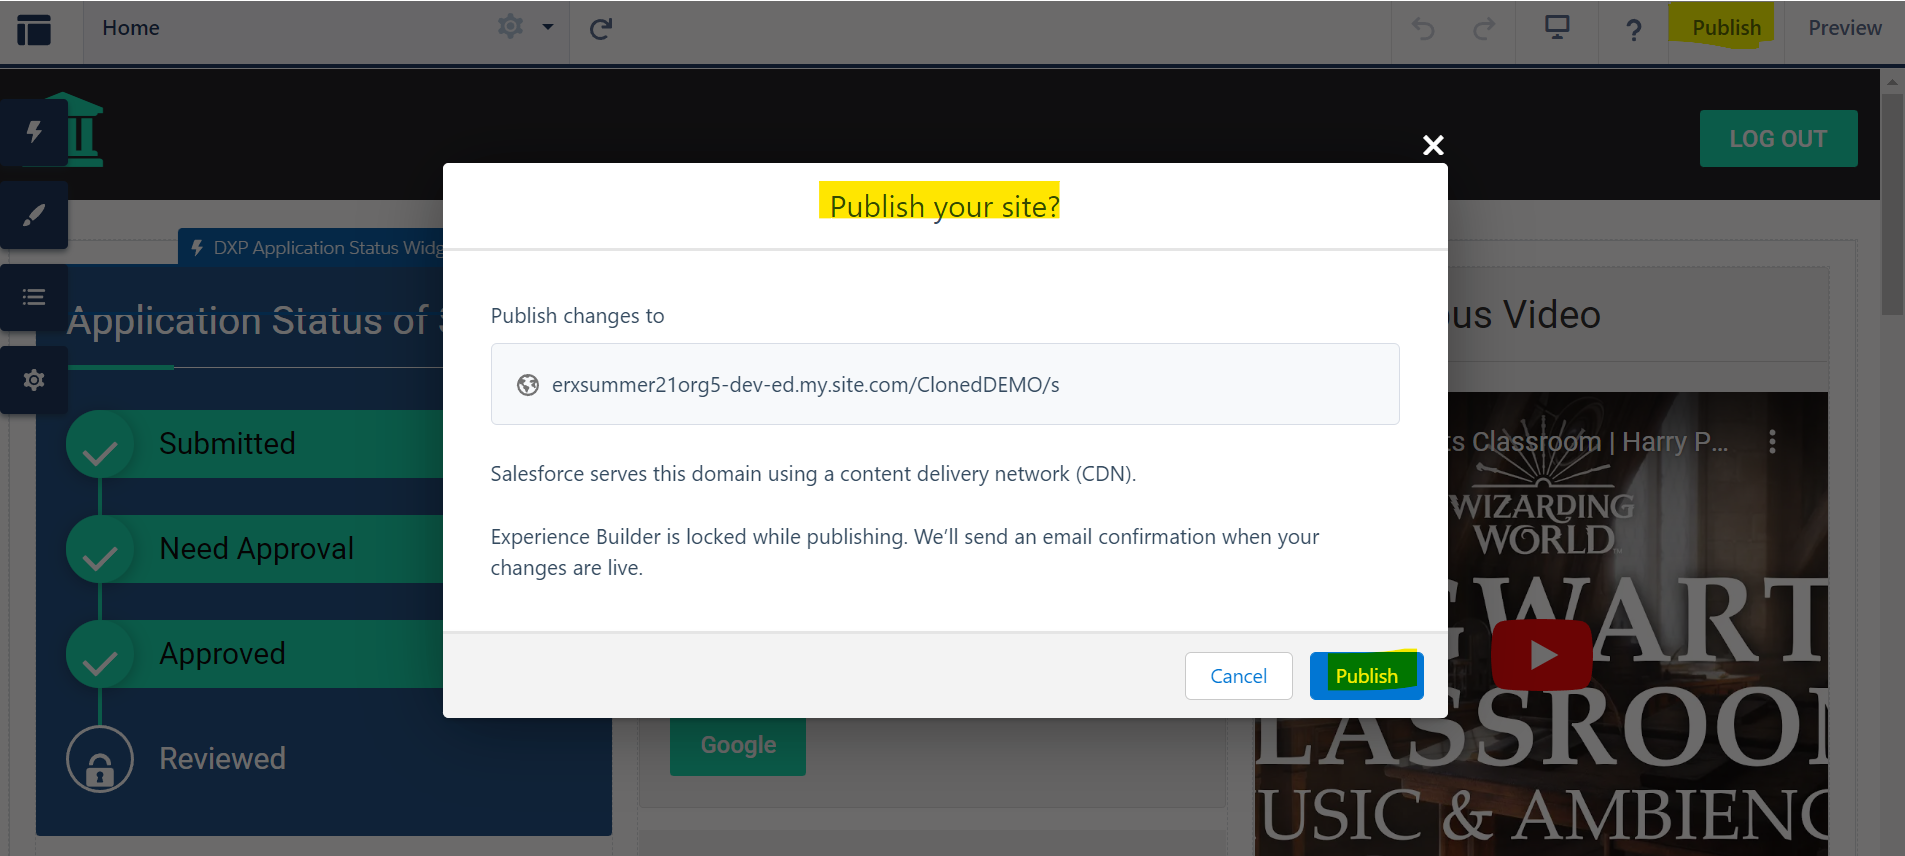
Note:All changes made to a site since the last time it was published are included.
Launch a New FormBuilder Rx Community Environment and simultaneously Publish Digital Experience Updates
Now that a new version of the FormBuilder Rx Community Environment has been created and the necessary updates to the Digital Experience have been set up, you're ready to set the new version Live in FormBuilder Rx and Publish the changes to the Digital Experience.
Because it can take some time to prepare the DXP Components within Experience Builder, we strongly recommend that you hold off on Step 6 from “Create a New Version of an Environment” and Step 7 from “Prepare a Digital Experience Community to Go Live with a New FormBuilder Rx Environment” until both can be completed simultaneously.
When you’re happy with your changes, you can perform the following steps:
- In FormBuilder Rx, set the new Community Environment to Live by clicking on the
Idle or Test button on the right-hand side of the environment
version. Select Live and click Save
- In the Digital Experience of your Lightning Community, click on the Publish
button to apply all of the changes.
Note:All changes made to a site since the last time it was published are included.
DXP Components that Require Version Updates
When a FormBuilder Rx Community Environment version needs to be changed, the following DXP Components will also need to be updated.
DXP ApplicationDXP Application Status WidgetDXP Apply Now WidgetDXP Branding Info WidgetDXP Checklist WidgetDXP Congratulations WidgetDXP Contact Info WidgetDXP Event Listing WidgetDXP iFrame WidgetDXP Main Slider WidgetDXP Social Feed WidgetDXP Text/HTML WidgetDXP Video Link Widget