Manual Requirement Item Object Configuration
Overview
The ERX Core package includes four RIOs: “Education History," “Test Scores," “Recommendations” and “Admissions Documents." In addition, any other custom object that looks up to either the Application or the Contact may be configured as a RIO. These are the steps to make a new RIO:
- Create necessary fields on the chosen object
- Create an Apex Trigger for the object
- Create an entry for the object in the Custom Setting “Requirement Object Configuration”
- Grant users access to and visibility of the new object and its tab
- Disable and hide any retiring RIO
Example: Configuring a new RIO
For example, you might want to make the Education Data Architecture’s object “Test” (API name hed_Test__c) into a RIO and use it in place of the ERx Core standard RIO, “Test Score” (EnrollmentrxRx__Test_Score__c).
Step 1: Create the fields on the new RIO
On the EDA Test object (hed__Test__c), create these fields. You may also, instead, identify existing fields to use in place of these fields, provided they are of the correct data type given in the third column of this table:
| Field Label (suggested) | Field API Name (suggested) | Data Type (mandatory) |
| Allow Upload | ERx_Allow_Upload__c | Checkbox |
| Category* | ERx_Category__c* | Multi-Select Picklist* |
| Date Received | ERx_Date_Received__c | Date |
| Disable Delete | ERx_Disable_Delete__c | Checkbox |
| Displayed Name | ERx_Displayed_Name__c | Text (255) |
| Display Order | ERx_Display_Order__c | Number (3,0) |
| Display to Applicant | ERx_Display_to_Applicant__c | Checkbox |
| Due Date | ERx_Due_Date__c | Date |
| Include in Percent Complete | ERx_Include_in_Percent_Complete__c | Checkbox |
| Instructive Text | ERx_Instructive_Text__c | Rich Text Area |
| Internal Comments | ERx_Internal_Comments__c | Text (255) |
| Item Name | ERx_Item_Name__c | Picklist |
| Item Status | ERx_Item_Status__c or hed_Status__c | Picklist |
| Parent | ERx_Application__c or hed__Contact__c | Lookup (to the parent object, either Application or Contact) |
| Portal Comments | ERx_Portal_Comments__c | Text (255) |
| System Protect | ERx_System_Protect__c | Checkbox |
* Configure the Category multi-select picklist field using the global picklist value set named “Requirement Item Category”. Edit this value set to create categories of items that will go into separate checklist Widgets on FormBuilder Rx’s Homepage.
Step 2: Create an Apex Trigger (and test class) for the new object
You will need to perform this step in a sandbox environment and then deploy the trigger and test class to production using a Change Set
Create the Trigger
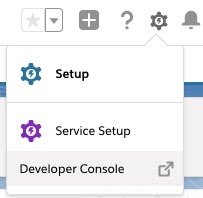
Select “Developer Console” from beneath the gear icon:

In the Developer Consol’s menu, choose and fill in a name for the trigger and choose your new object:
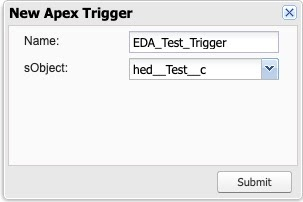
add the following line of code to the object trigger on after insert, after update ,after delete and after undelete event
EnrollmentrxRx.CoreFeatureManager.performTask(EnrollmentrxRx.FEAT_MissingDocumentFieldUpdate.class);
So it looks like this:

Create the Test Class
Select “Developer Console” from beneath the gear icon:
In the Developer Console’s menu, choose and fill in a name for the class and choose your new object:
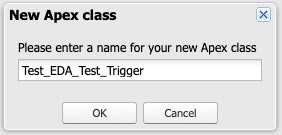
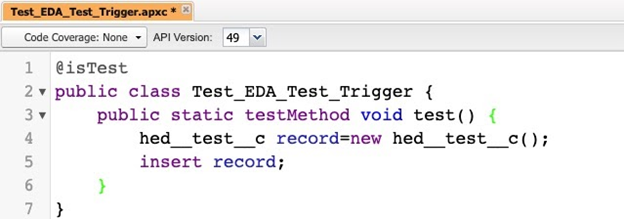
Here is sample code, which you can adapt to your chosen object:
@isTest
public class SObjectLabelTriggerTest {
//replace SObjectLabel with your own sObject's Label
public static testMethod void test() {
SObjectApiName record=new SObjectApiName();
//replace "SObjectApiName" with your own sObject's API Name
//make sure to populate required fields on your SObject (if any)
//for example:
record.RequiredFieldApiName='Sample Value';
//replace "RequiredFieldApiName" with your object's required field’s API name
insert record;
}
  }
So an example for the hed__Test__c object looks like this:
Step 3: Create an entry in the Custom Setting “Requirement Object Configuration”
Go to and click the Manage link beside the custom setting labeled Requirement Object Configuration. You will see a record for each of the standard four RIOs like this:

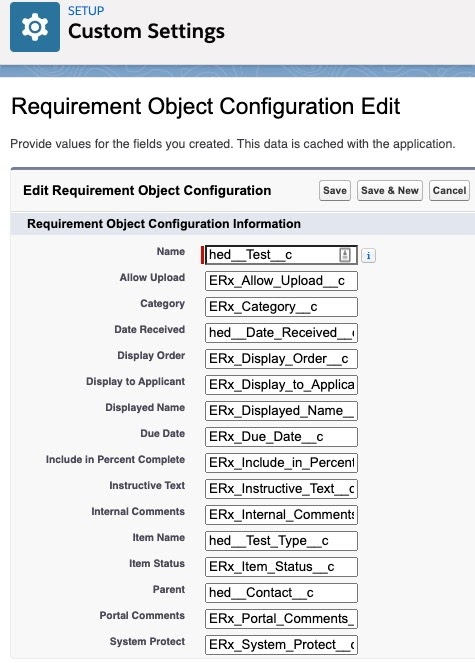
Click the New button to create a record for the new RIO (in this example, the EDA Test object) and configure it by putting the API name of the new RIO into the “Name” field, and putting the API names of the fields into the appropriate slots, like this:
Notes:
- Since the EDA Test object already has a lookup to Contact, a picklist “Test Type” and a “Date Received” field of the correct data types, we use these rather than creating new fields for the “Date Received”, “Parent” and “Item Name” slots.
- If you wish your RIO to look up to the Contact, rather than to the Application, then create a lookup to Contact on the RIO and put the API name of the lookup field into the “Parent” field on the custom setting record. In the case of the EDA Test object, shown in the screenshot, there is already a lookup to the Contact which can be used as the parent, as shown.
- Since the Application is object agnostic, a lookup to Application in the “Parent” field can be a lookup to any object that you have configured to play the role of the Application (See the next section “Application Object Configuration”).
Step 4: Grant users access to and visibility of the new object and its tab
- Edit user profiles or permission sets to grant users whatever access is appropriate to the new object, depending on your business rules
- Create a tab for the new object and put it into the Erx Admissions application
- Put a related list for the new object onto either the Application or the Contact page layout, depending on which of these it looks up to.Step 4: If you are retiring an object, remove it from use and view
Step 5: Disable and hide any retiring RIO
Since, in this example, we are retiring the Enrollment Rx “Test Scores” RIO (API name EnrollmentrxRx__Test_Score__c) and replacing it with the EDA “Test” object, we want to disable and hide the retiring object (e.g. Enrollment Rx Test Scores). To do this:
- Return to the Custom Setting of Step 2, and click the “Del” link beside the entry for the retiring object
 This prevents Core from using the object in any way (e.g., displaying it in the Quick Access Panel, including its records in "Documents Missing," etc.)
 - Hide the retiring object from all users by taking these steps:
- Edit all profiles to
- Take away permission to read the retiring object
- Set to “Hidden” the tab for the retiring object
- Edit the Application’s page layout and remove the related list for the retiring object
- Edit the ERx Application page layout and remove the retiring object’s tab from it
- Edit all profiles to
- Rename the “Test Scores” tab under so you won’t mistake it for a live object in the future. Rename it “ERX Test Scores” or “Obsolete Test Scores” or some such.
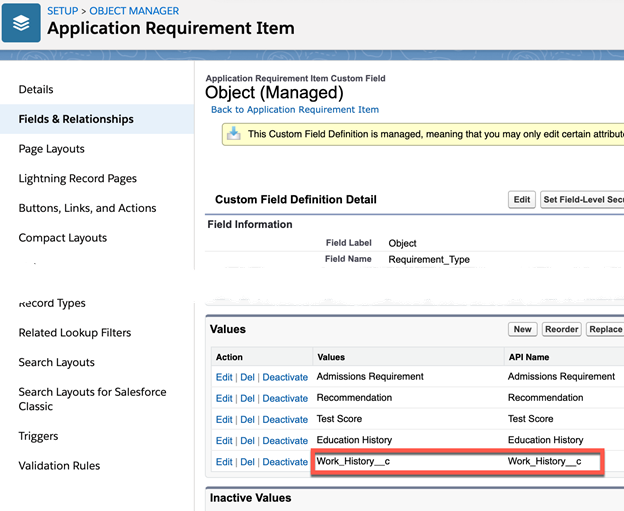
Step 6: Update the “Object” pick-list on the Application Requirement Item object
In order to leverage ERx Core’s “Checklist Requirement” functionality to automatically create checklist item records belonging to your new RIO, we need to add the RIO’s name to the picklist called “Object” on the Application Requirement Item object.
- Go to
- Edit the field “Object” (API name EnrollmentrxRx__Object__c)
- Add your new RIO’s API name to the picklist like this: