Automated Requirement Item Object Configuration
Overview
The ERX Core Summer '21 release features a new UI that automates the configuration of Requirement Item Objects (RIOs). The following instructions are for users who have Summer '21 installed.
If you have Core Winter '21 installed, you'll need to manually configure RIOs. Please see this page for details.
How to Access the RIO Configuration UI
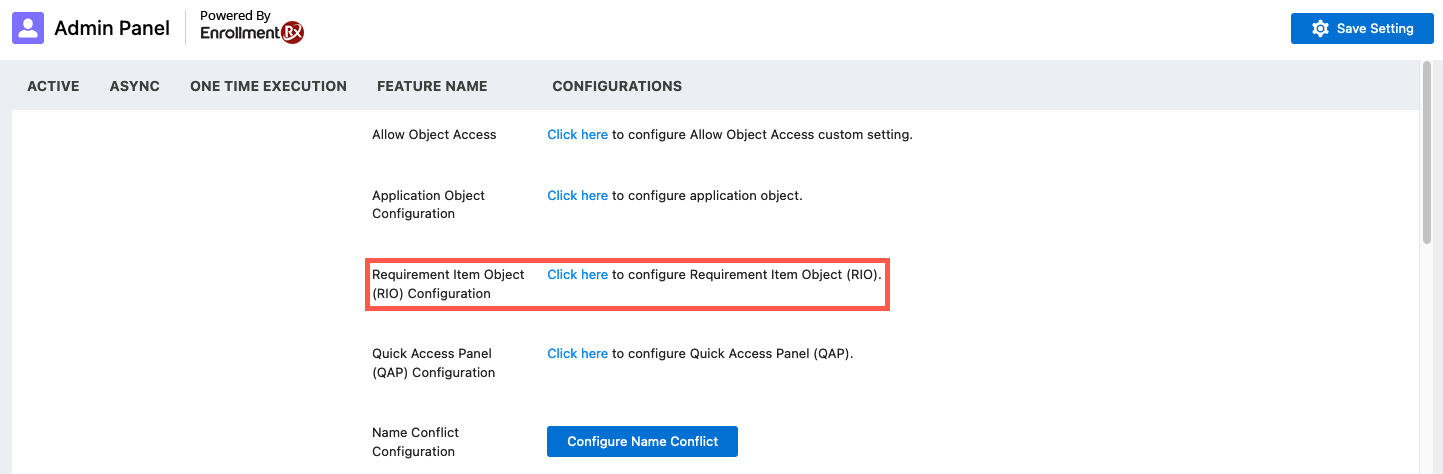
To access the RIO configuration feature, go to the Admin Panel in ERX Core and click the link to configure the Requirement Object.
The RIO Configuration UI
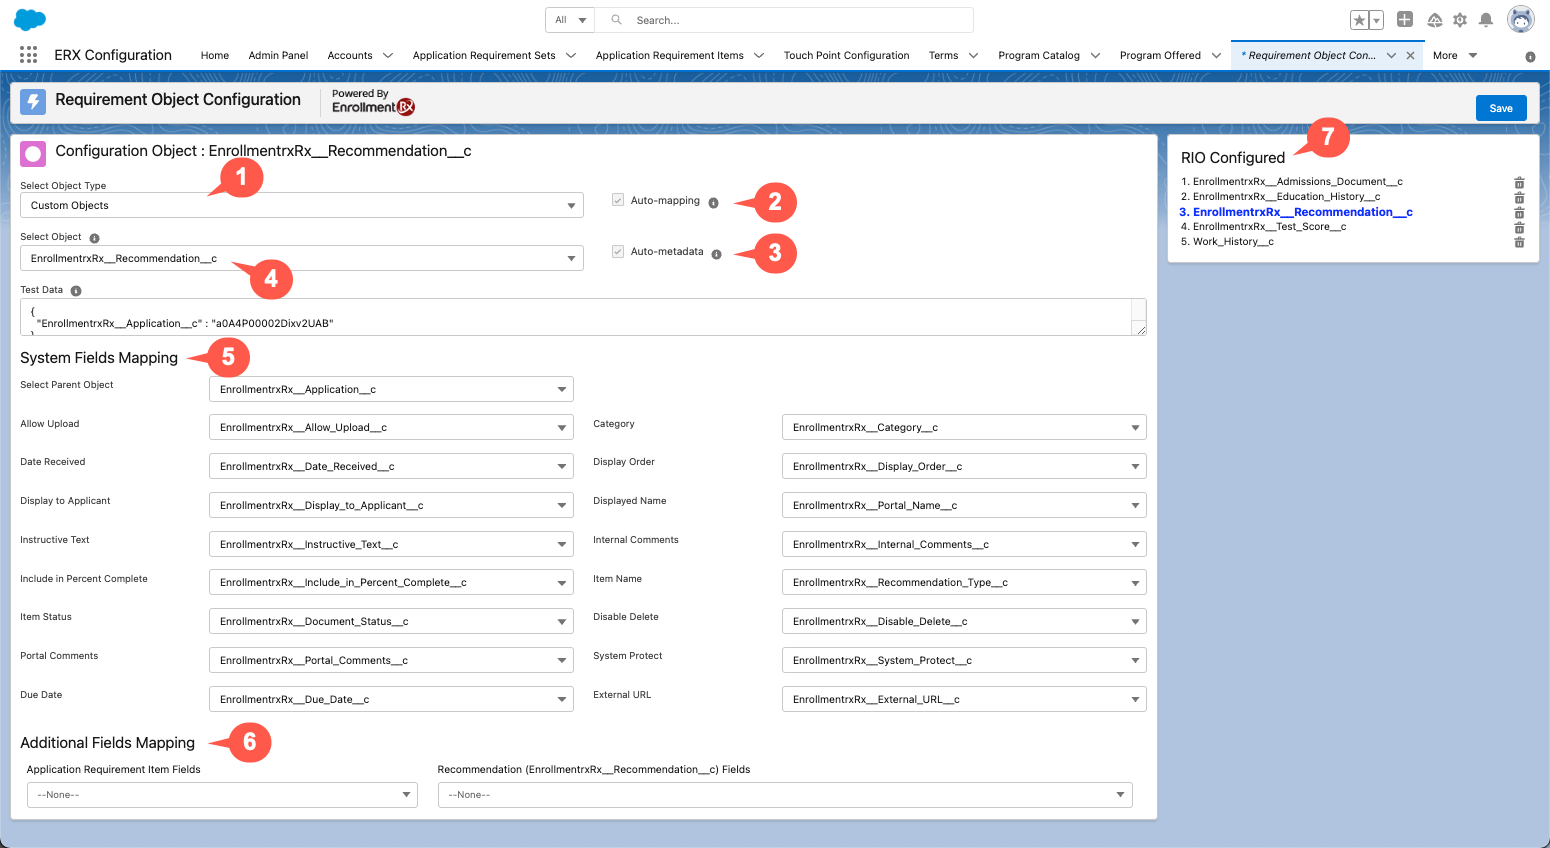
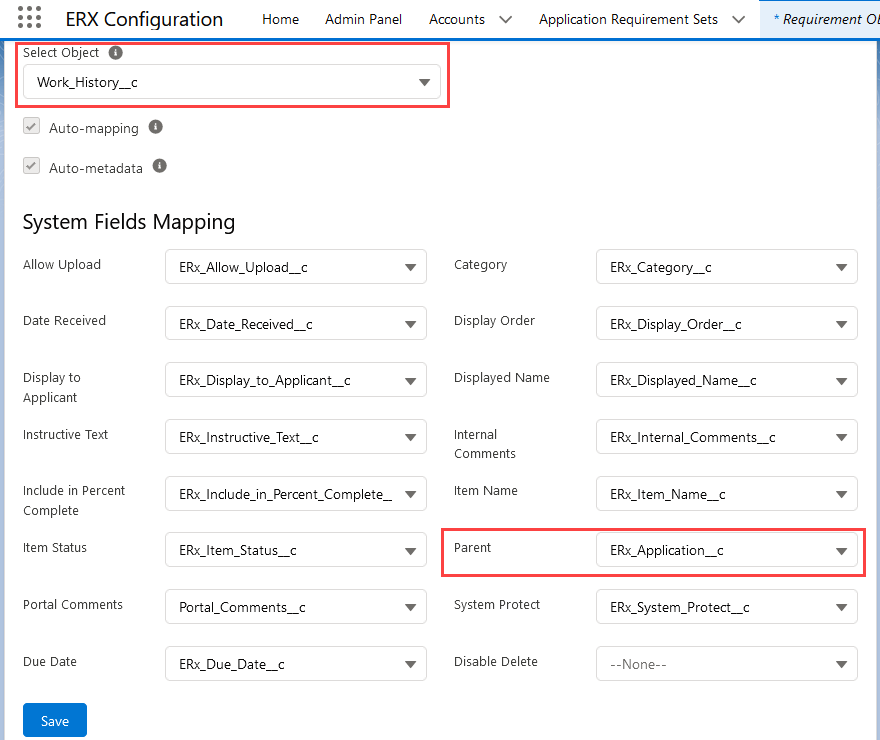
The RIO Configuration UI - Annotations
| Interface Element | Description |
|---|---|
| 1. Select Object Type (Picklist) | Choose from All, Standard, or Custom Objects |
| 2. Auto-mapping (Checkbox) | Check this checkbox to create fields for the selected object. This will:
|
| 3. Auto-metadata (Checkbox) | Checking the Auto-metadata checkbox will create a Trigger for the selected
object. The Trigger naming convention is:
Note: To save the Configuration, either
Auto-mapping or Auto-metadata must be
checked. |
| 4. Select Object (Picklist) | This list changes dynamically depending on the Object Type you select. Choose the object you want to use as a RIO for your Checklist Requirement Items. |
| 5. System Fields Mapping (Picklists) | In this section, you can customize field mapping for the target fields of the selected object. |
| 6. Additional Fields Mapping (Picklists) | Allows you to map custom fields from a Requirement Item configuration to a related RIO record |
| 7. RIO Panel | View all of your configured RIOs at-a-glance in this panel. Note: The currently selected object will be highlighted in
blue text. |
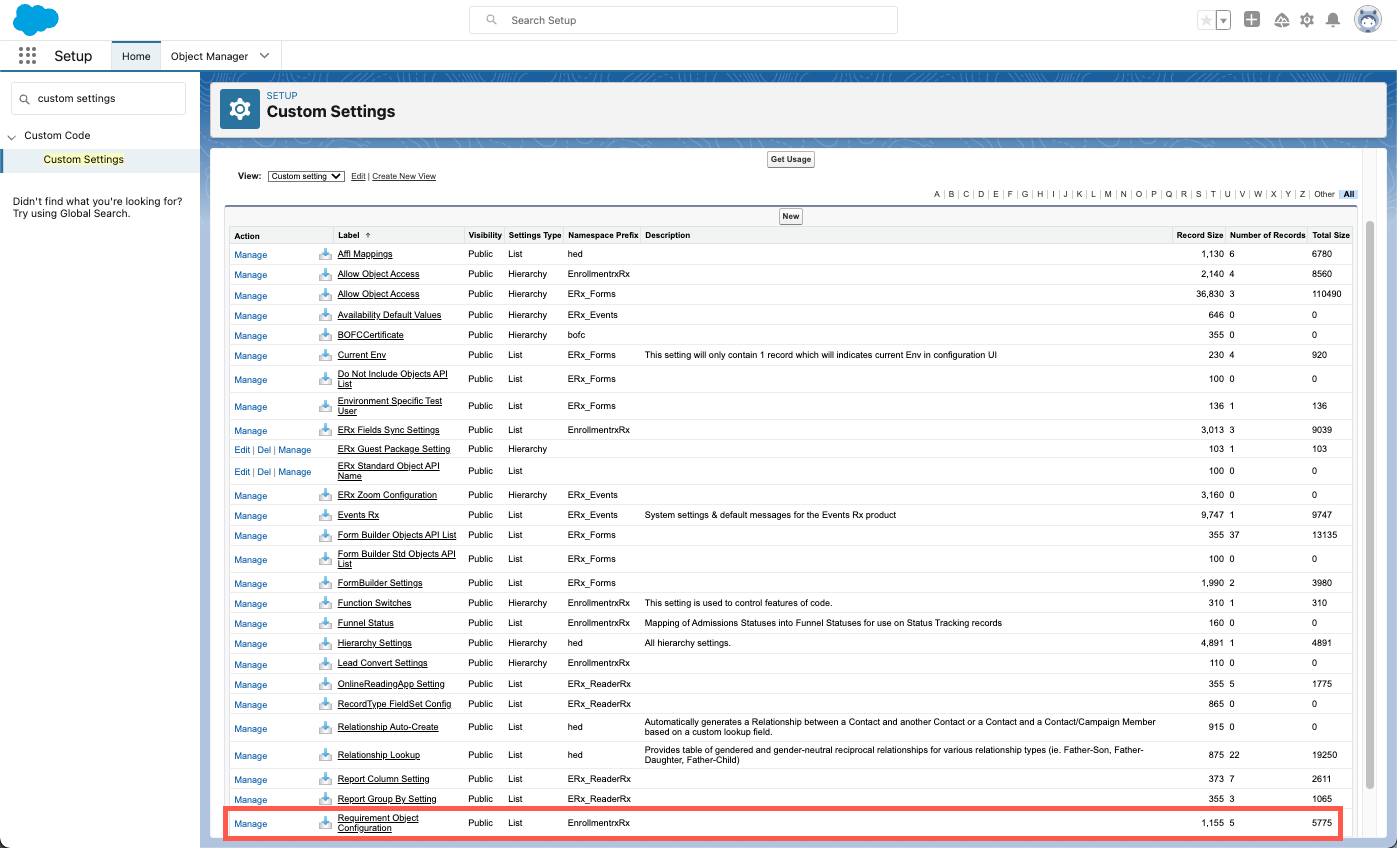
Where to Find Configured RIOs
How to Use this Feature
- Go to the Requirement Object Configuration panel (above) and configure the object you want to use as a RIO.
- Next, navigate to the Application Requirement Sets tab.
- Click the New button to create a new requirement set. (Learn more about creating Application Requirement Sets.)
- Select the RIO you just configured, fill in the required fields, and Save.
- Go to an application, click Edit, and enter the name of the Requirement Set in the Requirement Type field. Click Save.
Your newly configured RIO should now appear in the Quick Access Panel component on the application record.
Limitations of this Feature and Other Considerations
The Auto-metadata and Auto-mapping checkboxes are only accessible on new objects. Although these options appear on already configured objects, they are grayed out.
When an existing object is converted to a RIO, the parent field is automatically
populated with the default Application object
(EnrollmentrxRx__Enrollment_Opportunity__c). If you are using another object as the
Application, you will need to update the parent field to use
the object as a RIO on an application.
EnrollmentrxRx__Admissions_Document__c |
EnrollmentrxRx__Education_History__c |
EnrollmentrxRx__Recommendation__c |
EnrollmentrxRx__Test_Score__c |
EnrollmentrxRx__Application__c instead of
ERx_Application__c. The Auto-metadata and
Auto-mapping options for these objects are checked by default in the custom
configuration UI and not editable.How to Use RIOs on Other Application Objects
- Go to
- Search for the object you want to use as a RIO in the Quick Find box. Click on the object name.
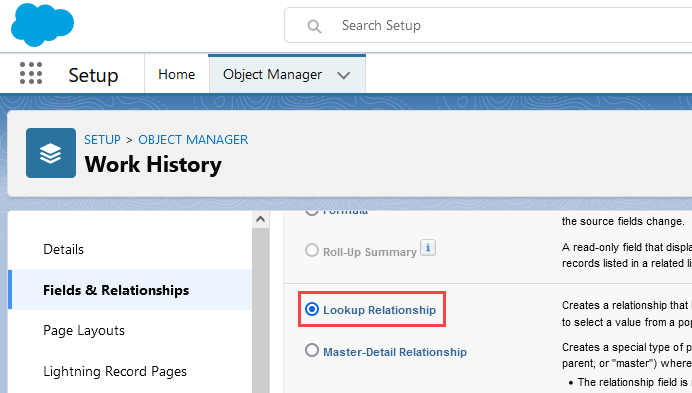
- Navigate to the object's "Fields & Relationships" (left column) and click New
- Under Data Type, select the radio button for Lookup Relationship, then
click Next (the button is located in the bottom right corner of the page)
- On the New Relationship page, select an object from the drop-down list that
you're using as the application, and click Next again

- Fill out the required fields

- After you've filled out the fields, click next three more times (you can leave the default options on those screens) and Save
- Navigate back to the Admin Panel in ERX Core
- Click on the Requirement Object Configuration option
- Select the object, then choose the application object from the above steps from the
dropdown list from the Parent field under System Fields Mapping
- Click Save