Managing Event/Visit Templates
Overview
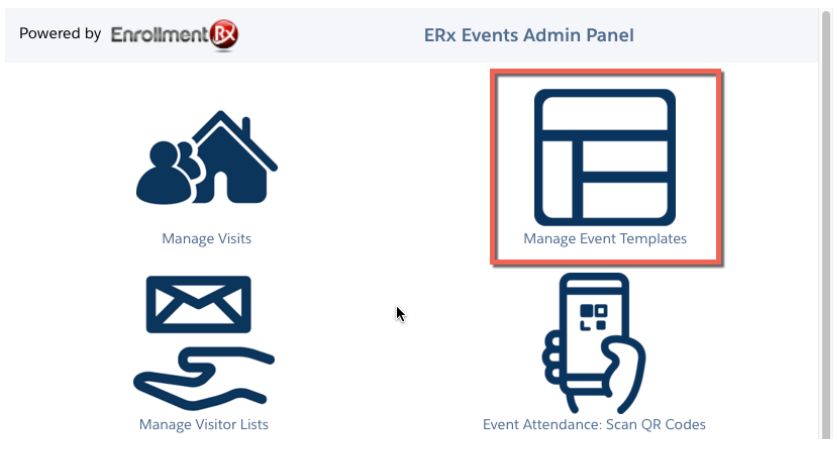
You can create, edit, export, and import templates, and then apply them to any Campaign or Visit Series. To create a template, go to the Events Rx Admin Panel click on the “Manage Event Templates icon.
This opens the Configure Template screen:
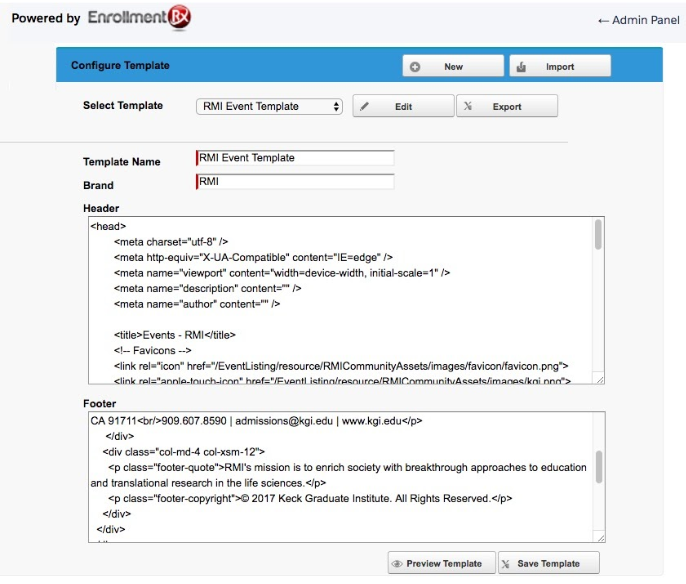
To work on an existing template, choose it from the Select Template drop-down and click the Edit button.
Configure Template Controls
- New: Allows you to create a new template.
- Edit: Select an existing template from the “Select Template” picklist and click Edit. The template name as well as its Header and Footer will pre-populate with the template’s details. You can then edit the values.
- Template Name: Select an existing template from the “Select Template” picklist and click Edit. The template name as well as its Header and Footer will pre-populate with the template’s details. You can then edit the values.
- Brand: Enter a string to use as a value for the “Brand” parameter. When the EventListing page is addressed with a URL containing the parameter, this template will be used.
- Select Type: Either build your own template, or choose the “ERx Template” which will populate a template of modern design on which you can control the branding.
- Export: Allows you to download the selected template as an XML file.
- Import: Allows you to import an XML file to use as a template.
- Preview: Shows a preview of the template.
ERx Configurable Template
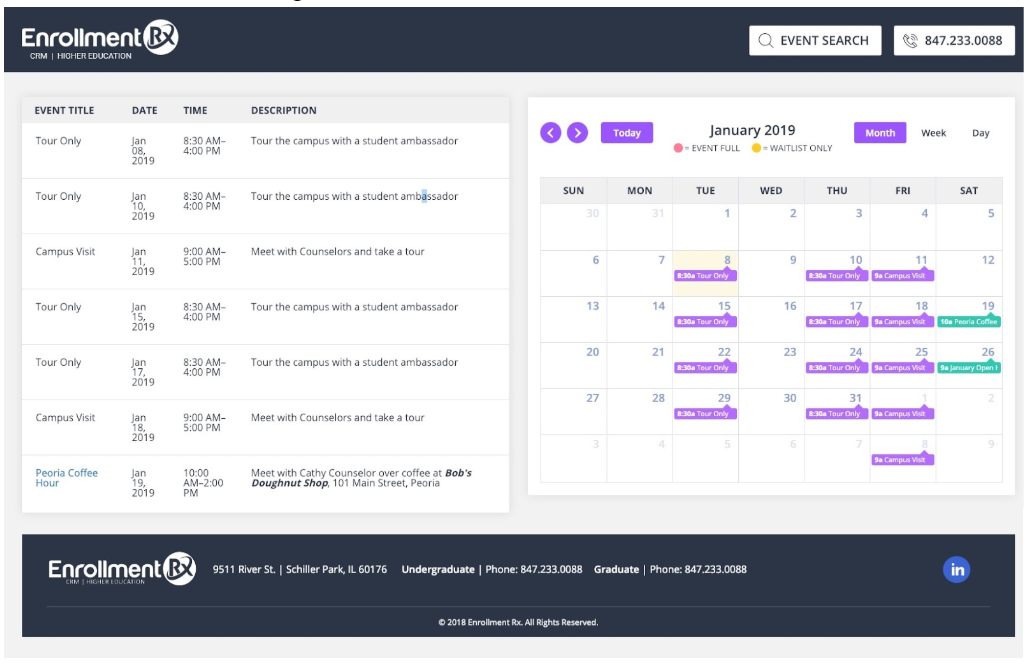
Events Rx comes with a built-in template of modern design that you can configure to match your brand.
The ERx Configurable Template, as it comes pre-configured, looks like this, but you can change the logo, font and all of the colors, using “clicks, not code,” as shown below.
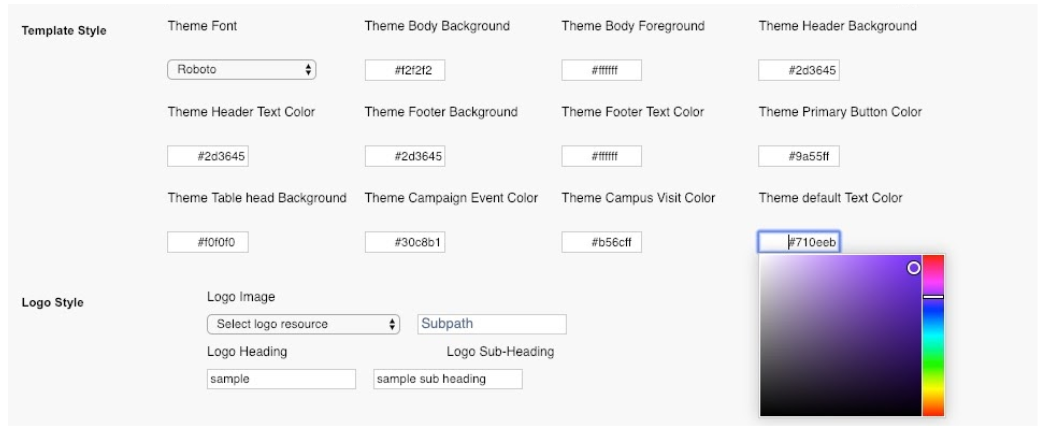
| Control Label | Description |
| Theme Font | Controls font of header/footer, calendar and individual Event Listing registration pages |
| Theme Body Background | Controls body background color of calendar and individual Event Listing registration pages |
| Theme Body Foreground | Controls color of calendar, event listings and registration section of Campus Campaign pages, implements color in body background of Visit registration pages |
| Theme Header Background | Controls header background color |
| Theme Header Text Color | Controls header text color |
| Theme Footer Background | Controls footer background color |
| Theme Footer Text Color | Controls footer text color |
| Theme Primary Button Color | Controls button colors in calendar header and on registration pages |
| Theme Table Head Background | Controls color of header bar on Event Listing table and Event Listing calendar |
| Theme Campaign Event Color | Controls color of campaign listing on Event Listing calendar |
| Theme Campus Visit Color | Controls color of visit listing on Event Listing calendar |
| Theme Default Text Color | Controls text color on Event listing page and individual Event Listing registration pages; controls hover color of Event Listings on the calendar |
*Events Rx uses this Custom Setting to implement additional style controls. These include:
- Designating the template for the Event Listing page
- Event Full circle and text color
- Event Waitlist circle and text color
2. To use your logo, load it as a “Public” Static Resource () and then select it in the Logo Image dropdown. If it’s in a .zip archive, add the subpath to the logo within the .zip. If you want to insert a Heading and Subheading to the right of your logo, enter them in the Logo Heading and Logo Sub-Heading fields.
Adding Custom Text to the ERx Template
You can insert custom text or instructions below the template header and above the calendar listing. Follow these steps:
- Navigate to the and click the Manage Event Templates icon. This will open the Configure Template screen.
- Whether you edit an existing template or create a new one, the Type should be ERx Template.
- To add custom text below the header and above the calendar listing, copy and
paste the following HTML with your custom text under
</header>and above<section class="mid_temp">
<div style="padding-left: 2%;">YOUR CUSTOM OR INSTRUCTIONAL TEXT HERE</div>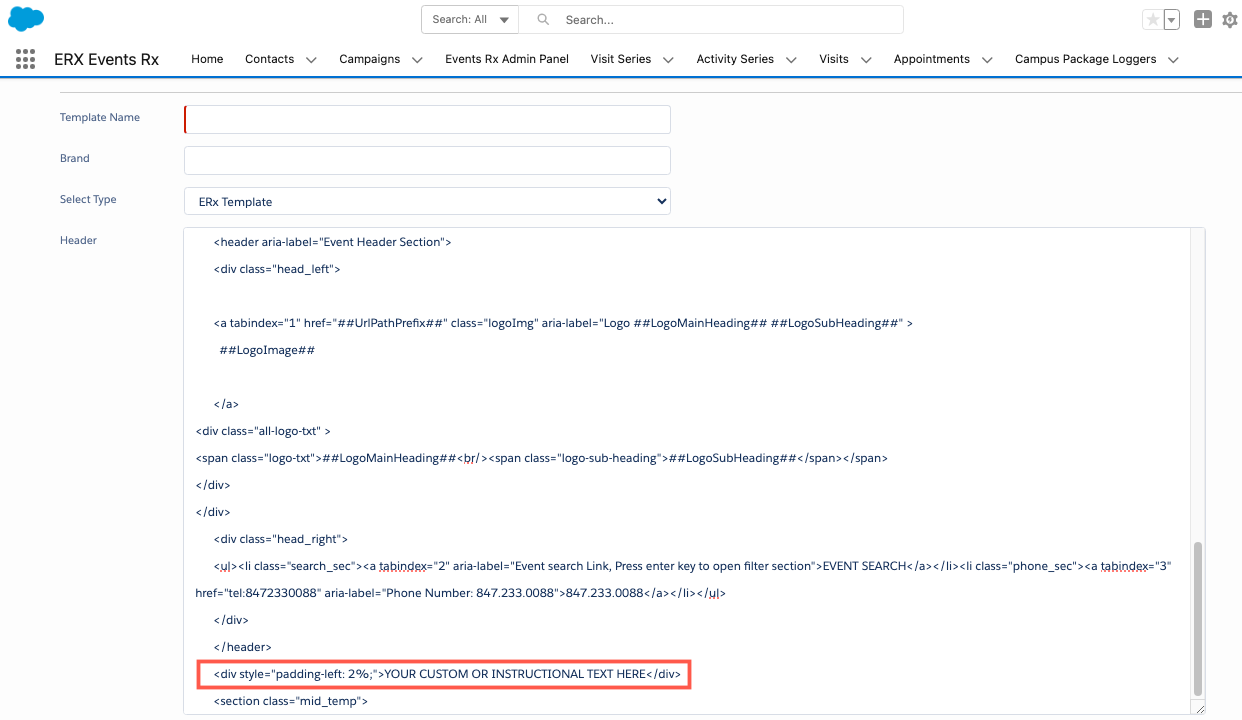
Deleting Templates
The "Select Template" picklist is generated dynamically from the Documents stored in a Documents folder called "Campus Package Template." You can control what appears in the picklist by deleting Documents from the "Campus Package Template" folder or moving them to a different folder.