Appendix III: Configure Zoom
Before You Begin
- You will need to follow the below steps in Salesforce Classic mode.
- You must have administrator-level permissions in Zoom and be logged in to your admin account to complete this configuration.
- This is an initial setup process that you need to do only once before using Zoom with Events Rx.
Configuring the Zoom OAuth App
Section 1: Create the app
- Head over to the Zoom App Marketplace, where you will create and configure the OAuth app.
- Sign in to your Zoom admin account (or sign up for a new account if this is your first time using Zoom).
- After signing in, select "Build App" from the "Develop" drop-down menu in the upper
right corner of the page.

Note:If you are not logged in, you will see "View App Types" here instead of "Build App." - On the Choose your app type page, click the Create button in the
OAuth box.

- The Create an OAuth app dialog will appear. Enter a name for your app (it can
be anything you choose with a 50-character limit), and select Account-level
app for the app type.
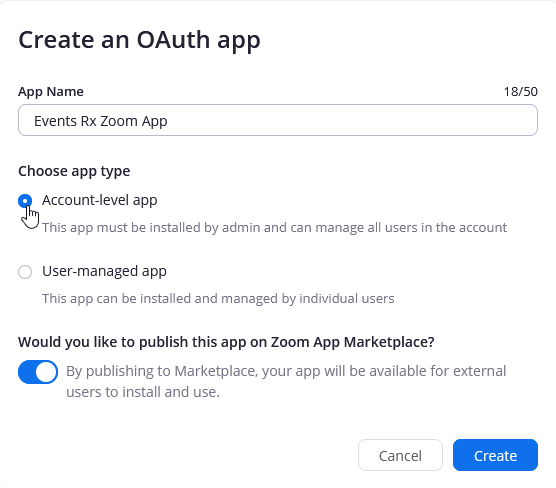
Tip:To enable this functionality for multiple Zoom users, select the User-managed app option instead. - Click Create. This will take you to your app's main page and settings.
Section 2. Configure Redirect and Whitelist URLs
Remember:
Make sure you're in Salesforce Classic mode to complete this
setup.
- First, you'll need a portion of a Visualforce URL for use in some of the
OAuth app settings. To copy the URL, navigate to Events Rx and click on the
Events Rx Admin Panel.

- From the Events Rx Admin Panel page, go to the browser address bar and copy
the URL up to and including visualforce.com. Exclude the forward slash (/).

- Go back to the Zoom OAuth app. Note:In Zoom, be sure you are on the App Credentials page in the app you just created.

- Paste the Visualforce URL into the field under Redirect URL for OAuth in the
Development section at the top, and append
/apex/erx_events__ERxCreateZoomMeetingdirectly after visualforce.com.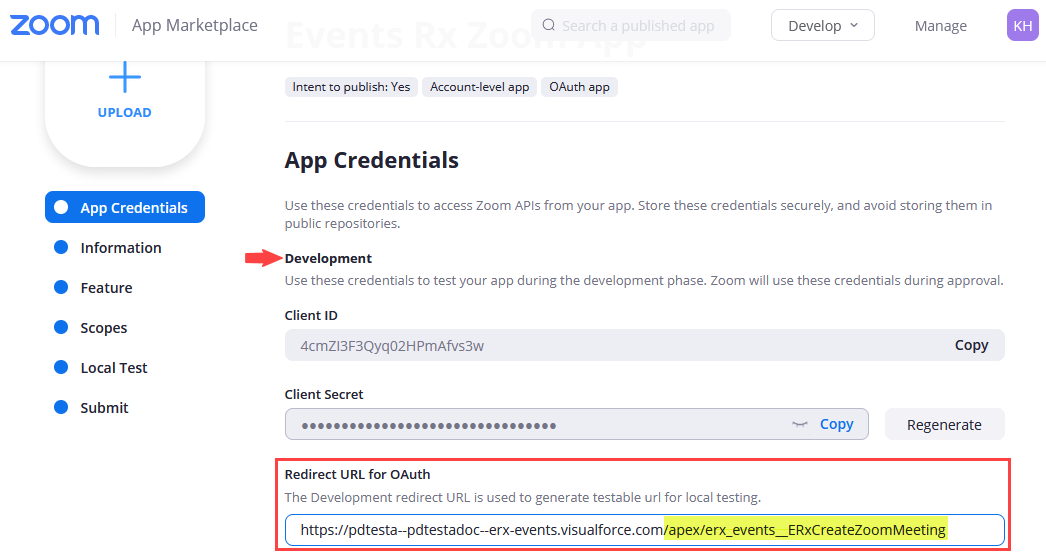
Note:The first portion of your URL, up to and including visualforce.com, is unique to your org and will be different from the above example. The appended portion,/apex/erx_events__ERxCreateZoomMeeting, is boilerplate and can be copied and pasted. - Next, you will add four different URLs to the fields under Add Whitelist
URLs. (As mentioned above, the first part of the domain will be unique to your
org.) On the Zoom App Credentials page, scroll down for the Whitelist URL section.

- Instructions for entering the four URLs:
- The first URL is your org's domain, which ends with my.salesforce.com
and not visualforce.com. Log in to your Salesforce org (if you're not
already logged in), navigate to Events Rx, and click the Home tab. In the
browser address bar, copy the URL up to and including salesforce.com.
Exclude the forward slash (/).

- Paste this portion of the URL into the first Whitelist field on the Zoom App
Credentials page. Example:

- Click the gray "Add a new one" button to create a new field. Paste your
Salesforce domain URL again, but this time Append
/redirectURLto the end. Example:
- Click "Add a new one," and in the third field paste the first portion of
your mysalesforce domain. Now append
/authat the end.
- Stay on this page and scroll up to the Redirect URL for OAuth field.
Copy the entire visualforce.com domain that you added earlier
(including
/apex/erx_events__ERxCreateZoomMeeting). - Scroll back down to the Whitelist section, add one more new field, and paste the URL
there. (In the example below, note that a small portion of the URL is cut
off due to field length, but it is there in its entirety.)

- The first URL is your org's domain, which ends with my.salesforce.com
and not visualforce.com. Log in to your Salesforce org (if you're not
already logged in), navigate to Events Rx, and click the Home tab. In the
browser address bar, copy the URL up to and including salesforce.com.
Exclude the forward slash (/).
Section 3. Add Events Rx Custom Settings
Attention:
In the steps below, be sure to use Development Credentials and
not Production Credentials, or you may see an Invalid Redirect
error.
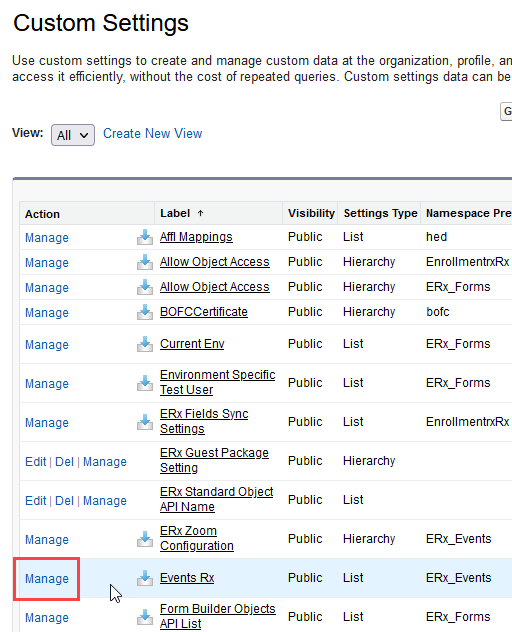
- In Events Rx, go to and click Manage next to Events Rx.
- On the Manage Custom Setting page, click DEFAULTS.

- On the Events Rx Detail page, click the Edit button and scroll down to the
Zoom Client Id and Zoom Client Secret fields.

- The data you need for both of these fields is located on the Zoom App Credentials
page. Return to that page, scroll up to the Development section and
locate the Client ID and Client Secret fields.
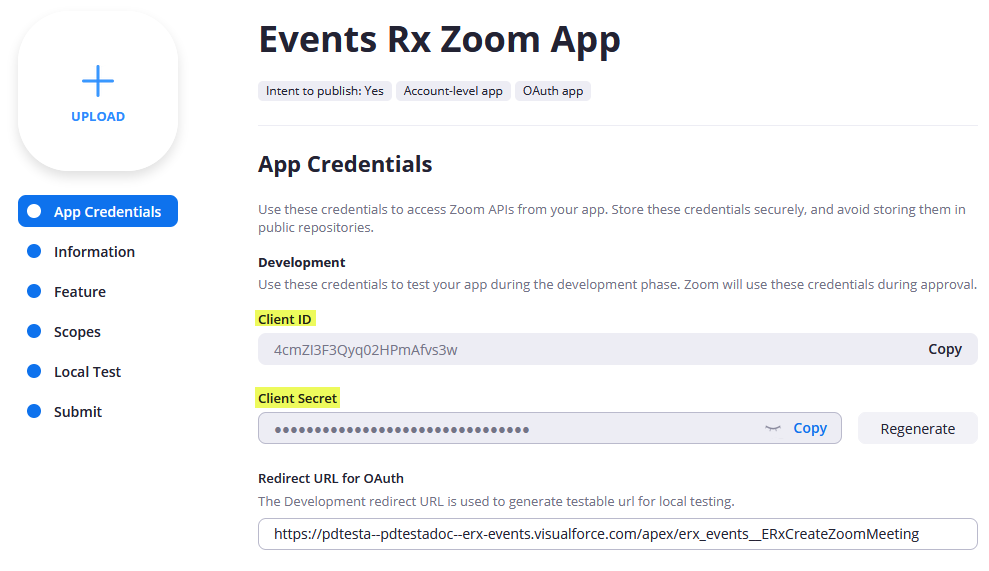
- Copy each field and paste the data into the respective fields on the Events Rx
Custom Setting Detail page, and save the custom setting (the Save button is
at the top of the page).

Section 4. Additional Zoom Settings
After you're done entering the Zoom Client ID and Client Secret in Events Rx, return to the Zoom App Credentials page.
- Click the Continue button. This takes you to the Information page where you can enter a description for your app, contact info, company name, etc. After you've filled out this page, click Continue again to go to the Add Features page.
- Turn on the Event Subscriptions toggle and then click the Add new event
subscription button that appears dynamically.
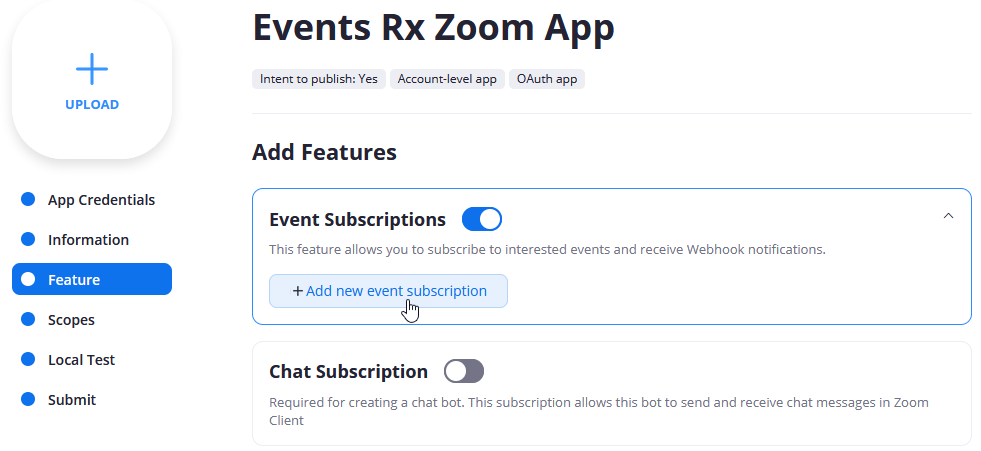
- Clicking the button opens a new set of fields on the page. Scroll down to the Add
events button and click on it.
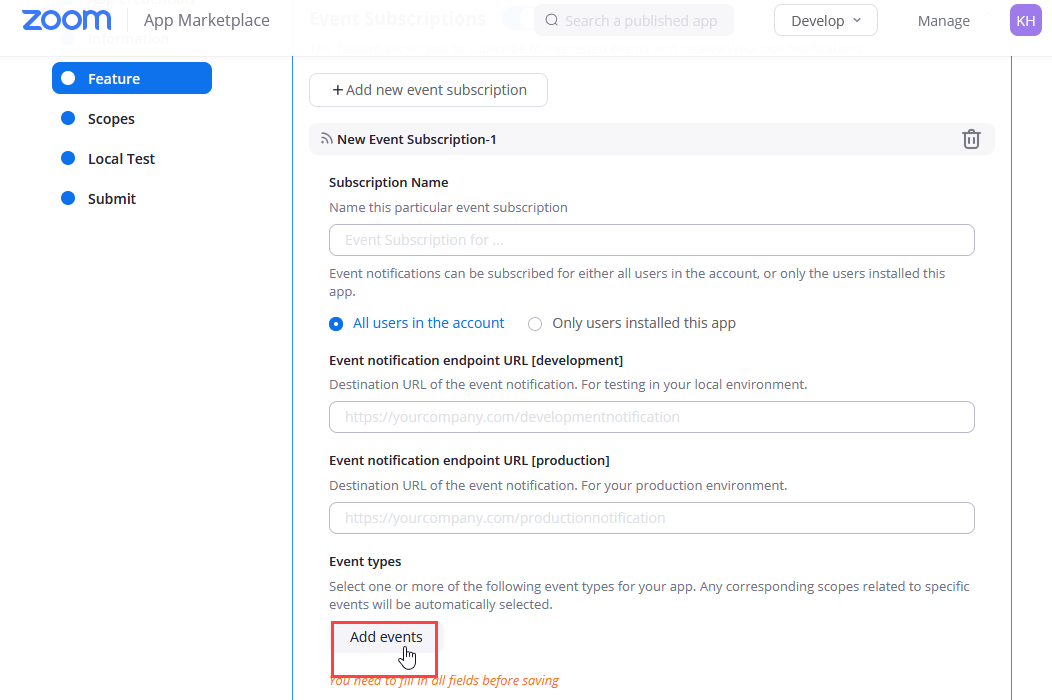
- A window pops up where you'll configure a few more settings. In the Meeting
section, select these three options (the first option is at the top of the list;
scroll down a bit for the second two):
- Start Meeting
- Meeting has been created
- Meeting has been updated

- Click Done.
- Back on the Add Features page, click Continue and "leave without saving" when prompted.
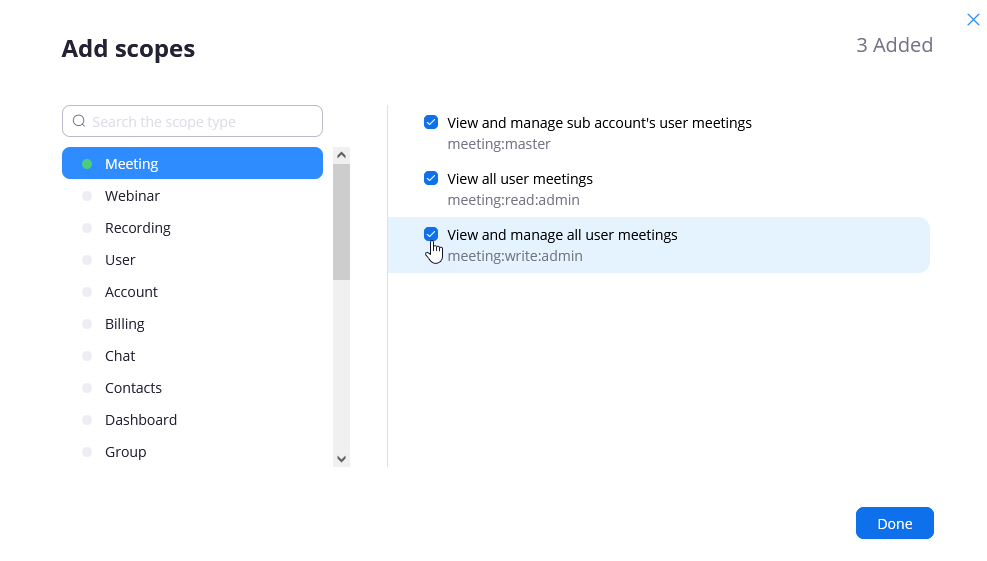
- On the Scopes page, click the Add Scopes button.

- In the Add Scopes Dialog in the Meeting section, select all three
options in the right pane.
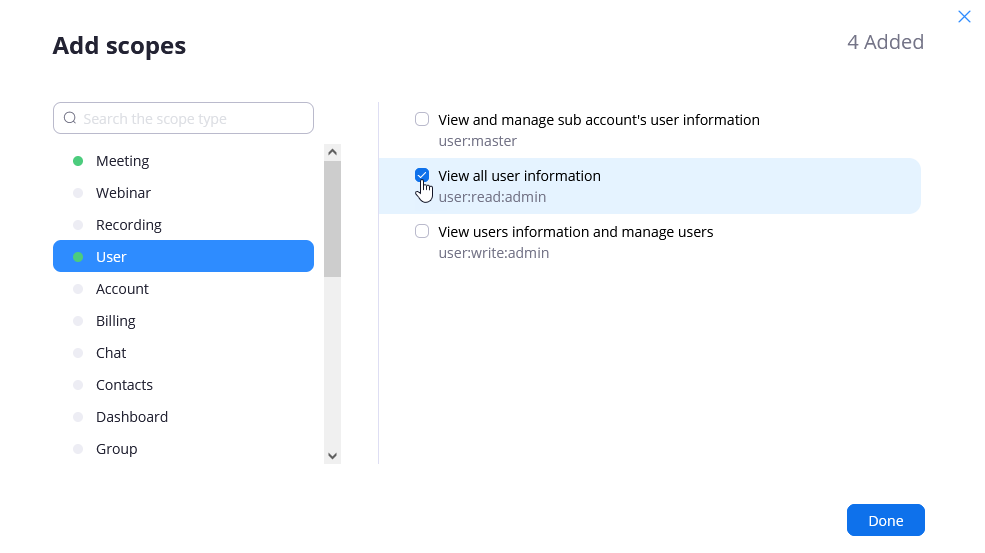
- In the User section, check the box for View all user information.
- Finally in Account, check the boxes for the first two options in the right
pane.

- Click Done.
- Click Continue. Note:You do not need to submit the Zoom App or perform any other steps after clicking Continue.
You are now ready to start using Zoom integration with Events Rx. Learn more here: Zoom for Campaigns, Visit Series and Activity Series.