Creating Community Users
Overview
There are three ways to create Community users:
- Register a new user through the Community self-registration page.
- Use the Enable Customer User button on the Contact.
- Mass create and email users using the Create User with Profile field on the Contact.
Create a New User by Registering
Using your Community’s self-registration page is the preferred method, because in one
step it creates a user — either for an existing Contact if one exists that
matches the data entered on the Registration screen, or for a new Contact —
and it simultaneously assigns the user to the Profile associated with your Community
and the Permission Set ERxFB_Community, which gives the user
appropriate access to FormBuilder components.
Manually Create a New User
ERxFB_Community.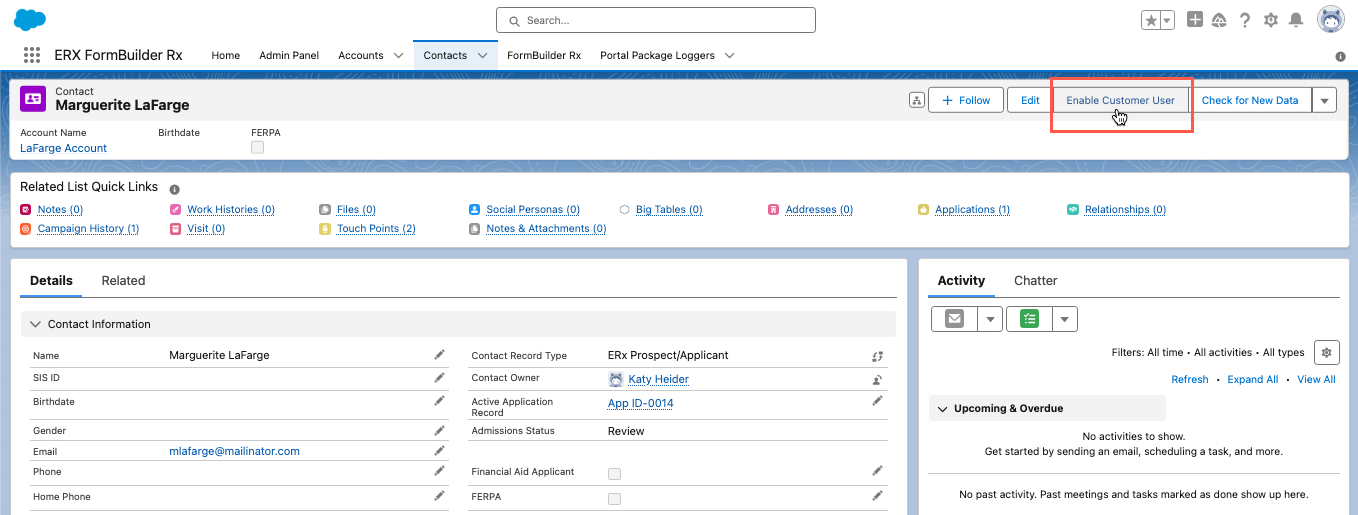
- On the Contact record, click the button Enable Customer User. This will create a user record and open it for editing.
- In the New User dialog that opens, select the User License and Profile for your
Community:
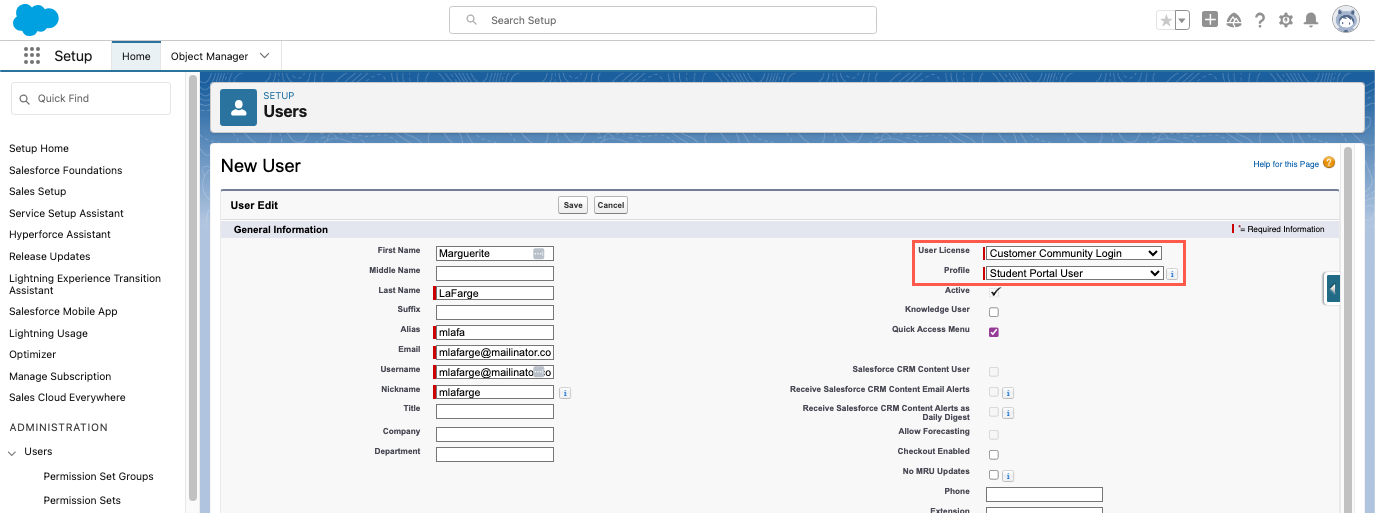
This must be the same profile that you configured under All Sites in Digital Experiences as shown here: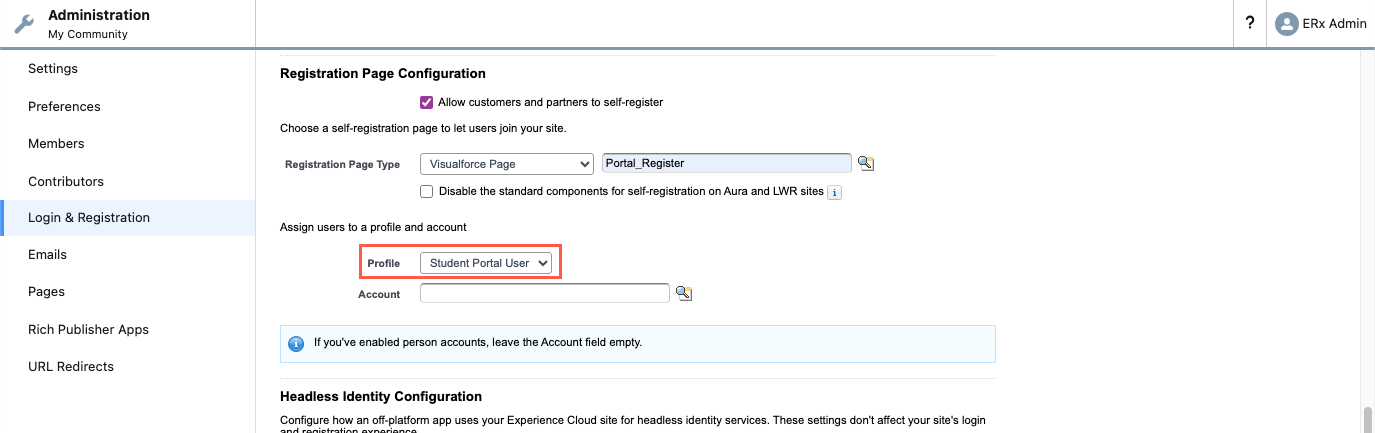
- Click Save to create the user.
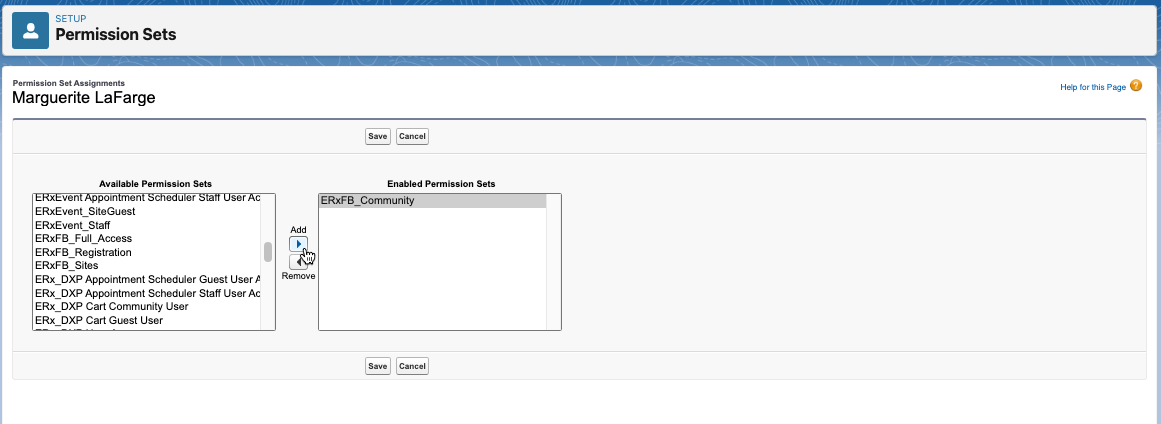
- Click the link at the top of user detail page called “Permission Set
Assignments”, then click “Edit Assignments” like this:

- Then move the “ERxFB_Community” Permission Set from the left window to the right
and save:
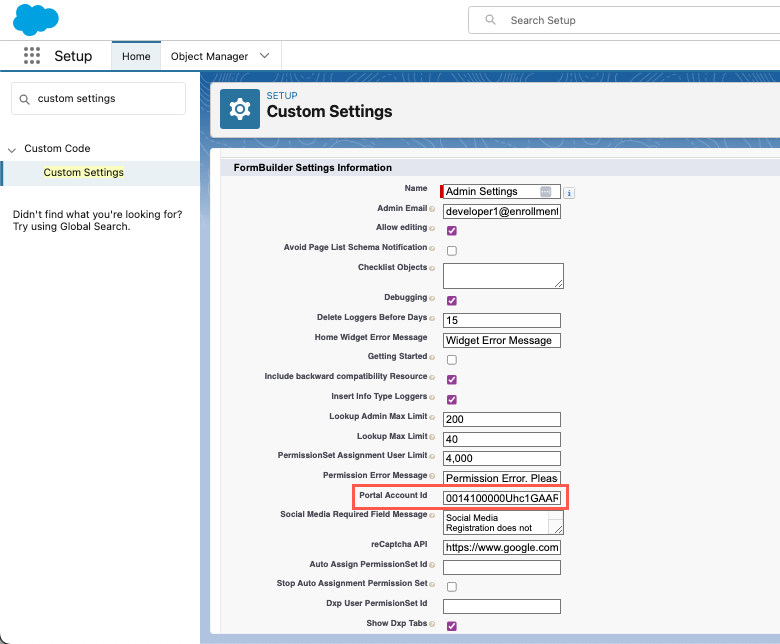
Mass Create Users
Use this method to mass create users for Contacts and email them the credentialing email associated with your Community. The picklist field on the Contact called “Create User with Profile” automatically creates community users for contacts and sends them the Community’s credentialing email.
ERxFB_Community, so you will need to click the “Assign
Permission Set to Existing users” button immediately after you create users to
assign them the Permission Set.When the name of a Community Profile is selected from this picklist, ERX FormBuilder creates for the Contact a portal user having this profile.
Configuring the “Create User with Profile” Picklist