Create a Salesforce Platform Environment
Use the Onboarding Wizard to Build a Salesforce Platform Environment
- Navigate to the FormBuilder Rx tab and click the Start with FormBuilder Rx
Wizard button.

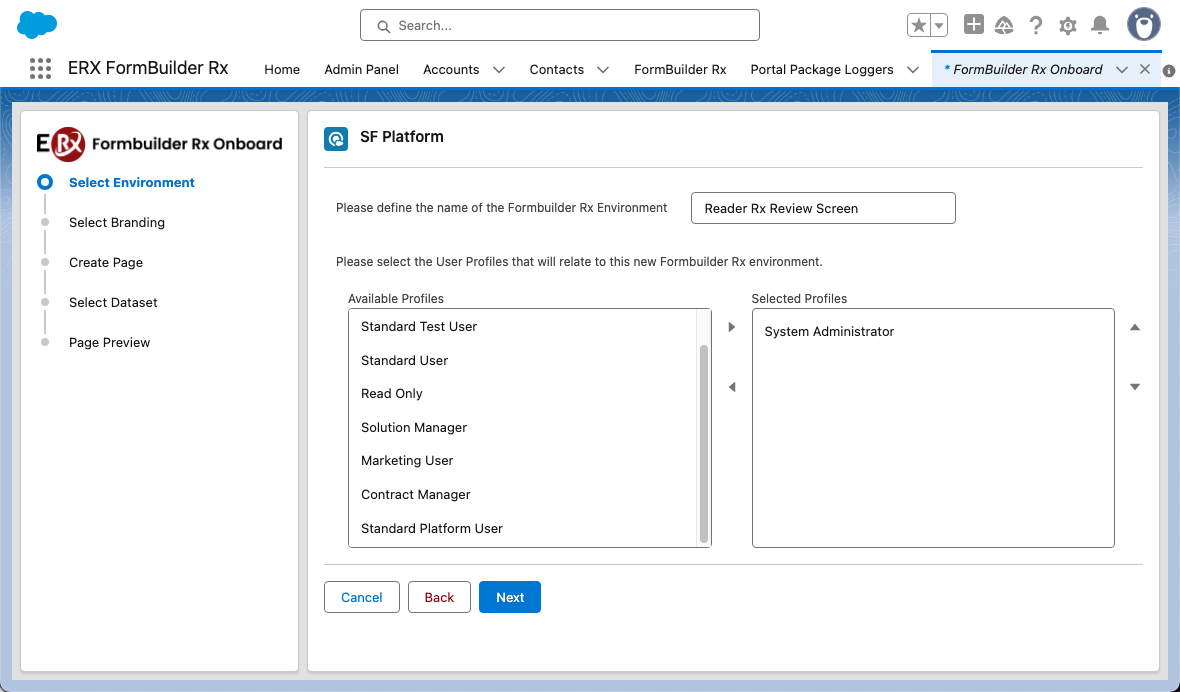
- You'll be redirected to the Onboarding Wizard to select an environment.

Tip:After completing each step in the wizard, the left side panel will indicate your progress. - Enter a name for the environment and choose a profile. Click Next.
- This will step you forward to select branding for the environment.
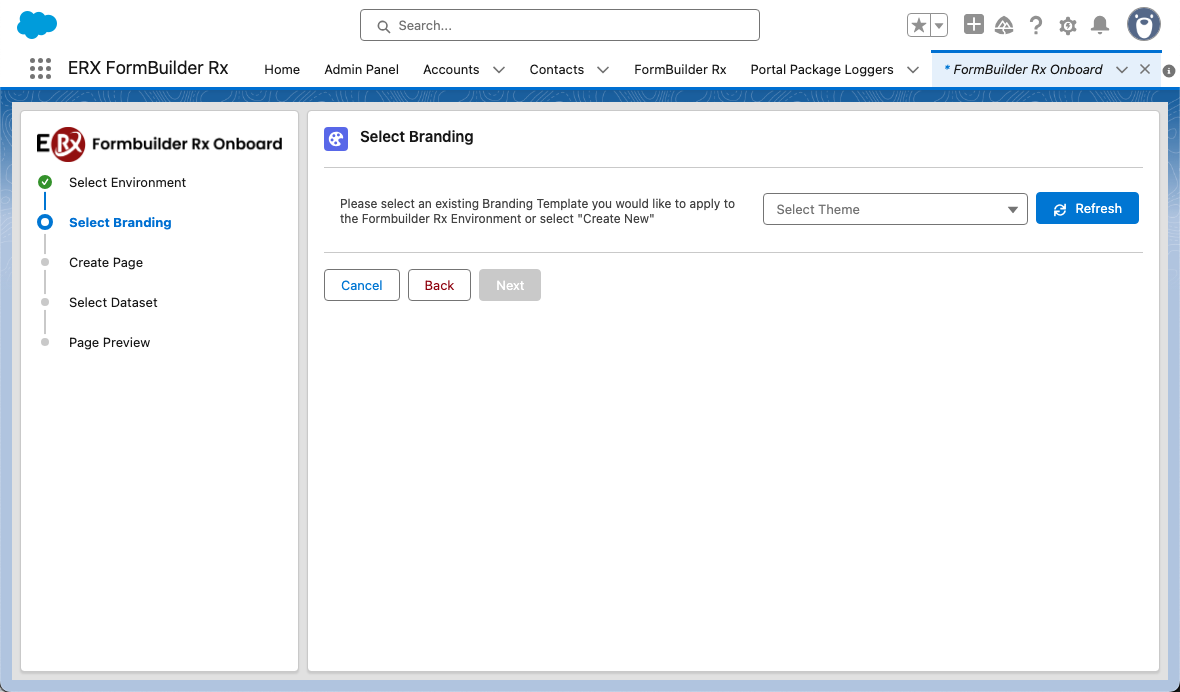
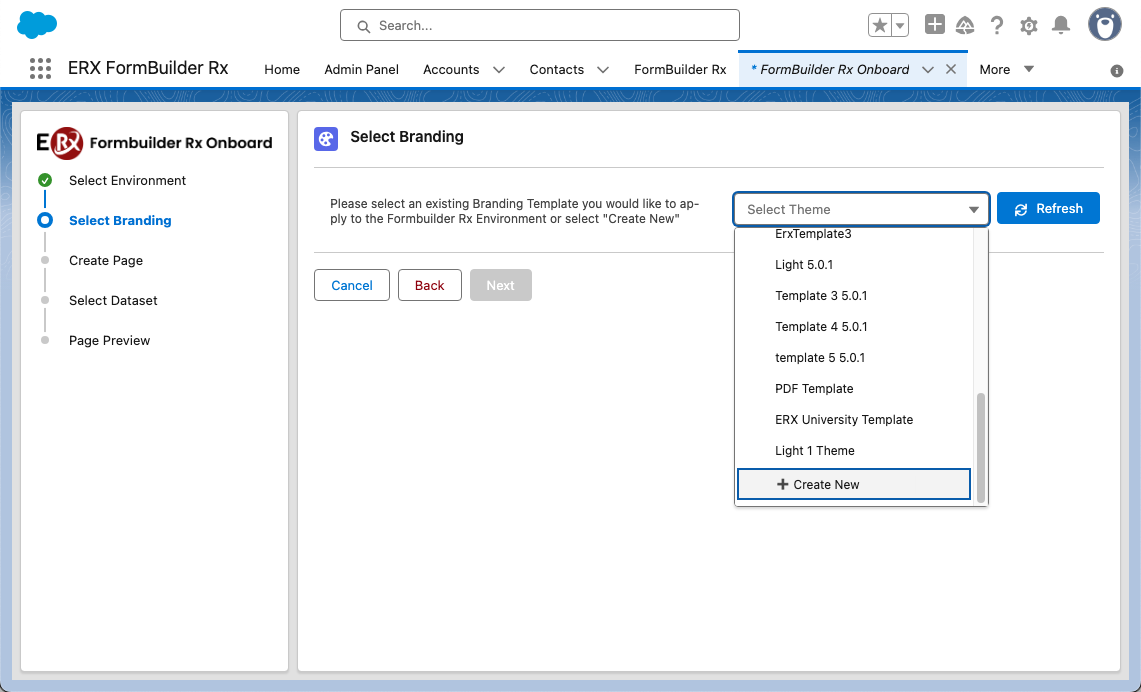
- On the Select Branding screen, scroll down in the Select Theme dropdown list to the
Create New option. (You can also choose an existing theme or template.)
After you make a selection the Next button will become clickable.
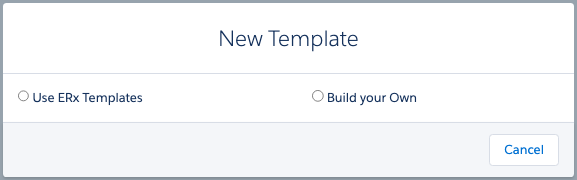
- After clicking Next, the below popup appears on the screen. Use a FormBuilder
Rx out-of-the-box template or build your own. Your selection will automatically
launch the New Template popup.
- Fill in the details in the New Template popup and Save.
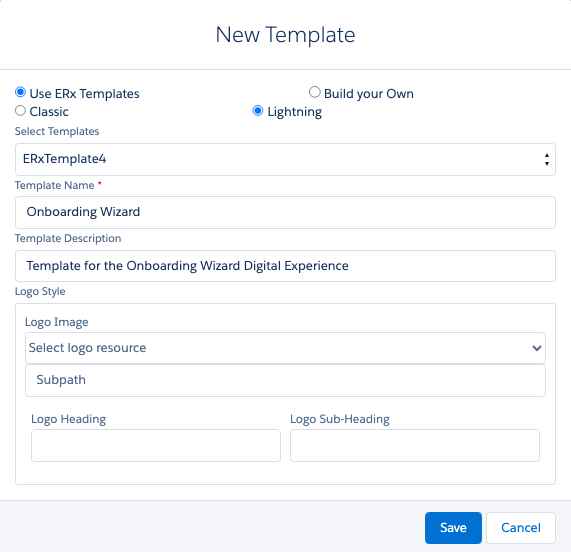
You'll see a confirmation message and can close the tab/window.
- Return to the Onboarding Wizard (it may be open in a previous tab) and click
Refresh. Select the newly created theme from the dropdown list.

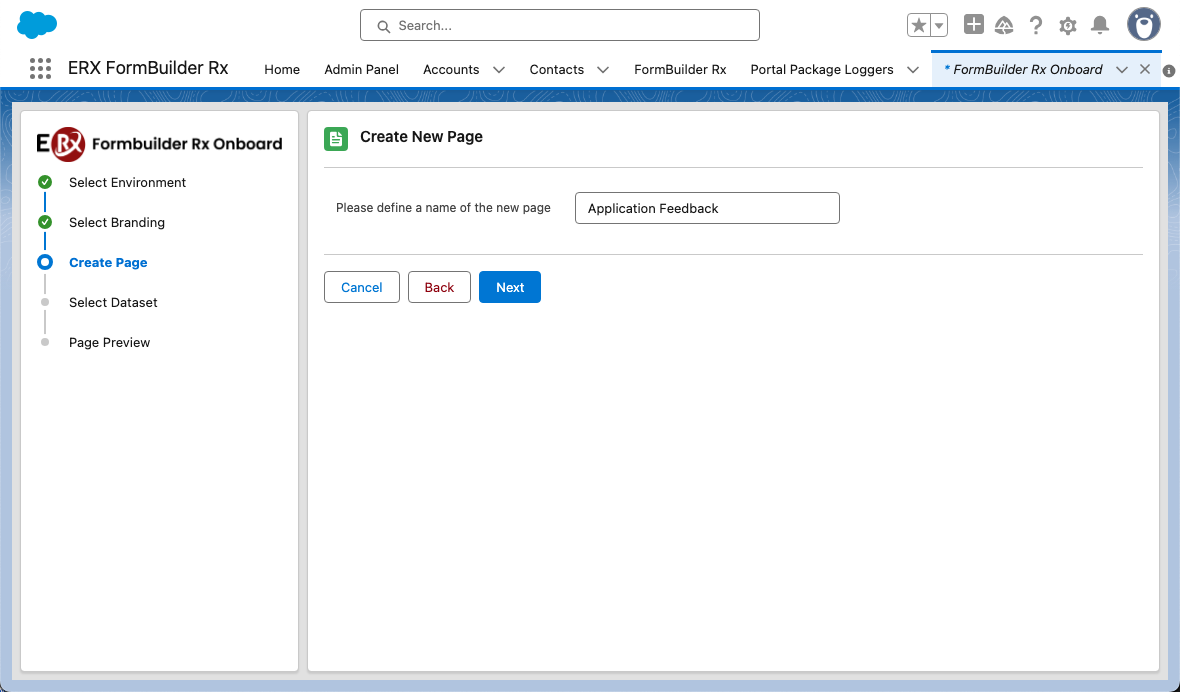
- On the next screen you'll create a new page for the environment. Enter a name for
the page and click Next.
- Select a primary data set for the page. First, choose a Salesforce object from the
dropdown (e.g., Contact) and enter a name for the data set. Then, check the boxes
for the fields you want to display.
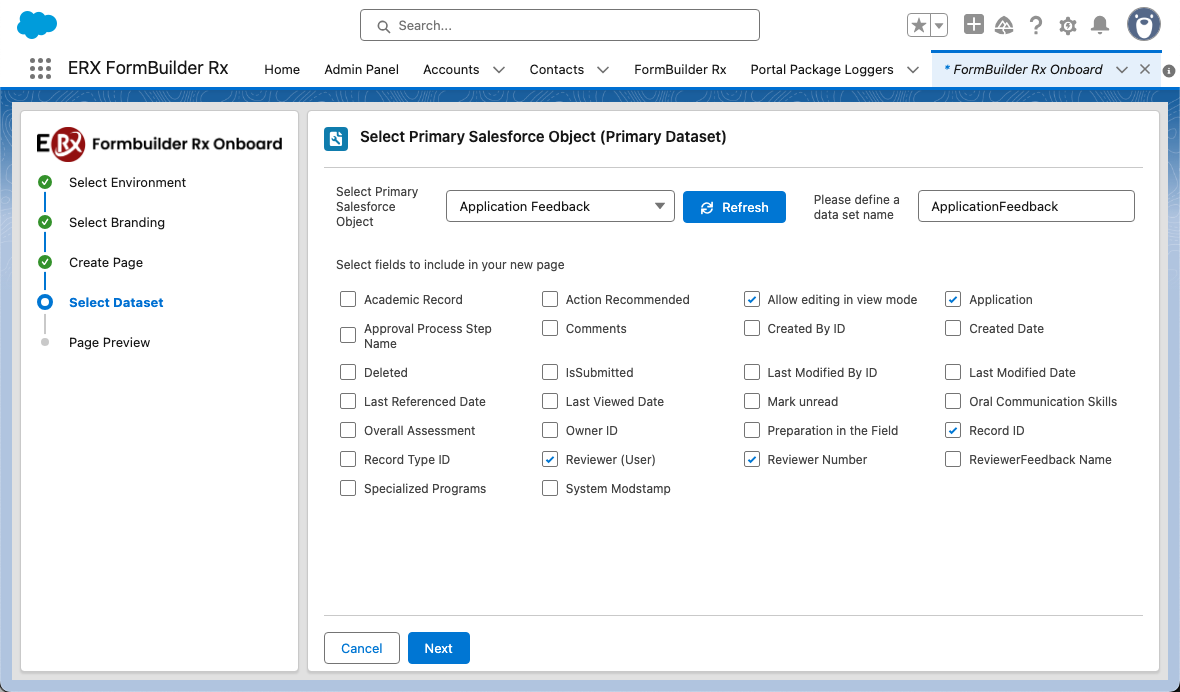
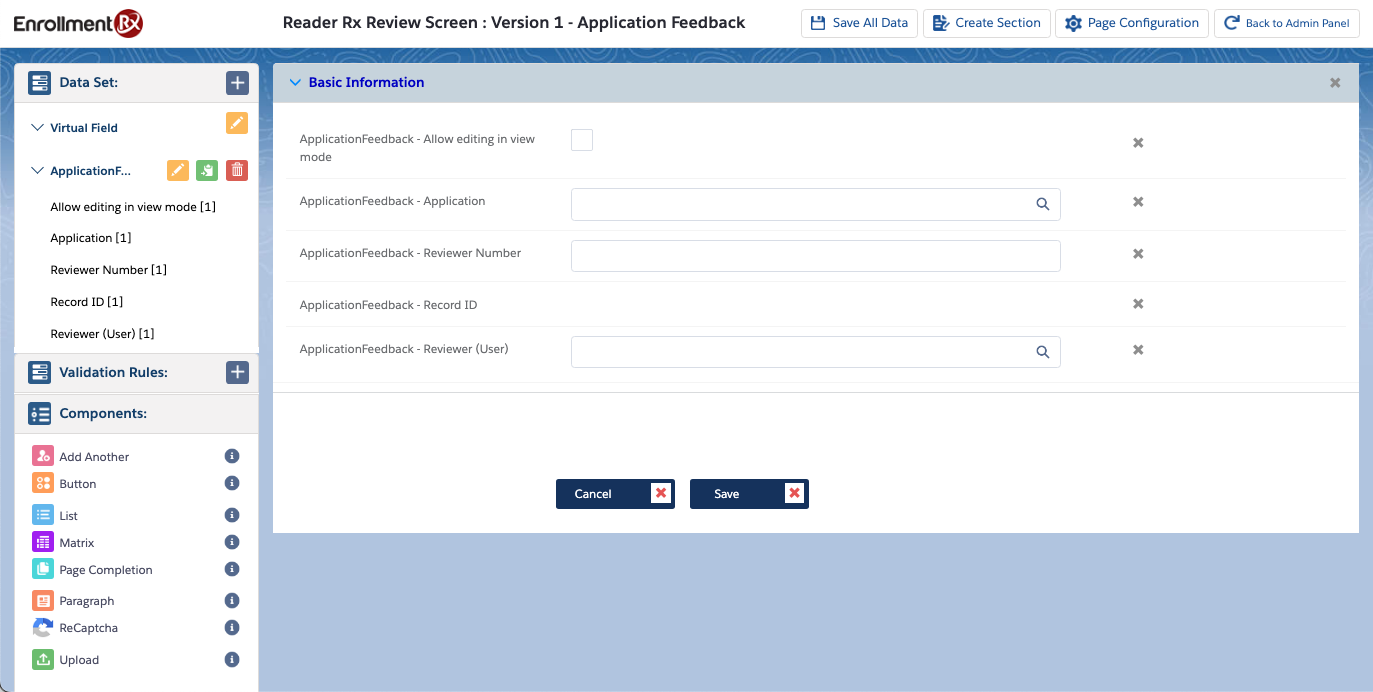
Note:This is just a simple page setup. You can set up field order, rendering and record display criteria by clicking the Go to Advance Page Setup button, which is available on the Page Preview screen (see the final steps, below). - Click Next to go to the Page Preview screen.
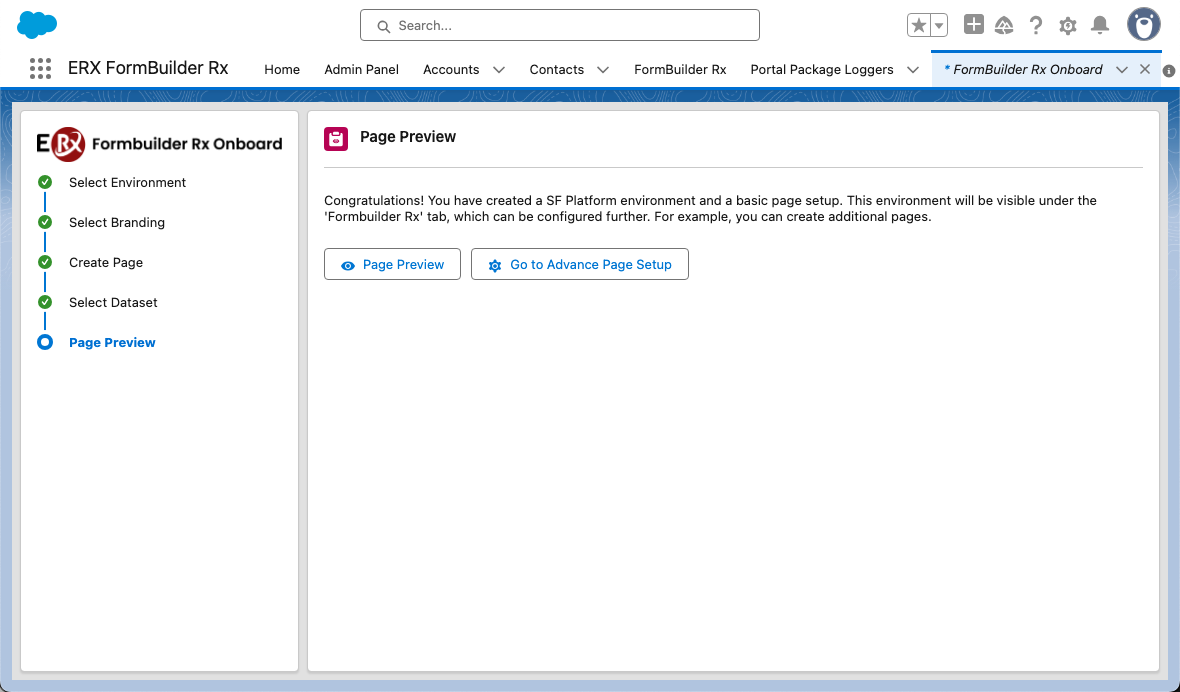
- The Page Preview button launches the end user version of the page in a new
tab or window.
- Clicking Go to Advance Page Setup on the Page Preview screen will open the
Page Builder configuration page, where you can continue configuring pages for your
community.