Upgrade and Sandbox Testing Instructions
Level of Expertise Required for Upgrade
Basic Salesforce Admin skills
Estimated Time Required for Upgrade
| 10 minutes | Install upgrade |
| 10 minutes | Prepare Sandbox for testing |
| 30 minutes | Test portal and sites |
Preparing a New or Refreshed Sandbox for Testing
It is very important that you upgrade a sandbox and test before upgrading your production environment.
After you create or refresh a sandbox, you will need to tweak each FormBuilder Environment to make it reference the sandbox’s Site Domain or Community Domain, rather than the production org’s. You will also need to replace the production domain with the sandbox domain in any formula fields that link to sites pages, (which you may have, e.g., on the Recommendation object). Follow these steps:
- Set all of your Environments to Idle status:
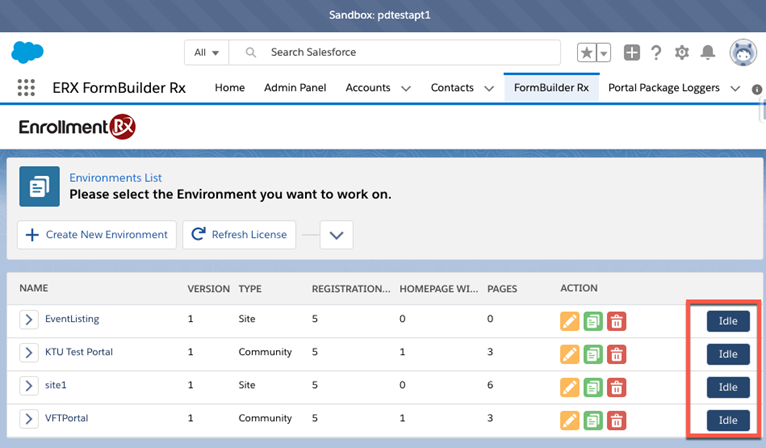
- Note the “TYPE” column: If the TYPE is “Site”, then we need to replace the Site Domain; if it is “Community”, then we need to replace the Community Domain.
For TYPE = Site
- Substitute the Sandbox’s Site Domain for the production org’s domain in each of
the Environment settings.
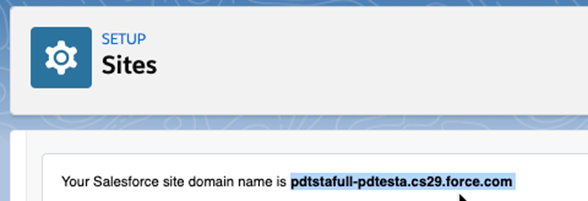
- In the new sandbox, go to and copy the sandbox Site domain
name like this:
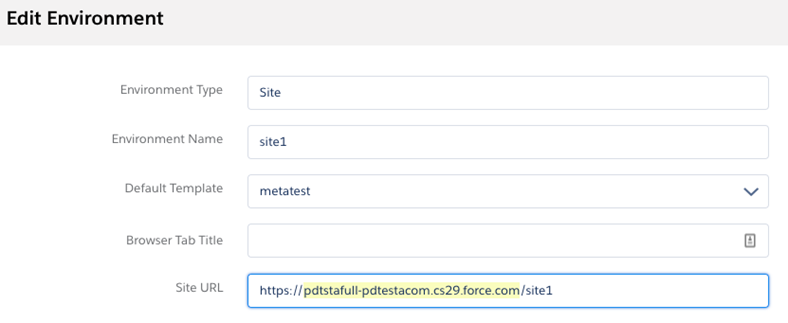
- For Each FormBuilder Environment of Type = “Site”, click the Edit button
(the yellow one with the pencil icon) and locate the “Site URL” as shown here:
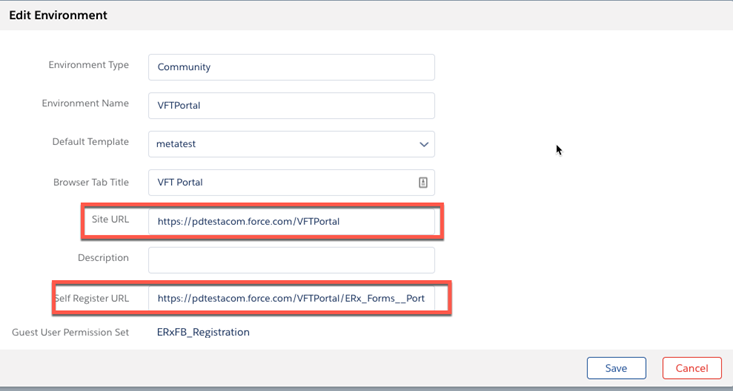
- Paste the new sandbox site domain in place of the old production domain in
each of these URLs—it goes between the double slashes (“//”) and the first single slash (“/”) like this:
- In the new sandbox, go to and copy the sandbox Site domain
name like this:
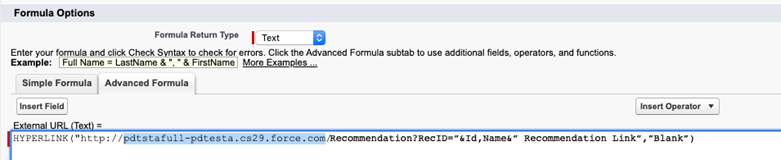
- If you have created formula fields that link to FormBuilder sites, such as a
Recommendation Site, then edit those formulas and replace the production domain
with the sandbox domain as shown in these two screenshots:
Field with production domain

Edit it and substitute the sandbox domain like this:
For TYPE = Community
- If you are working with a Community, you will need to replace the Community
Domain in the “Site URL” and “Self Register URL” with the Community’s domain.
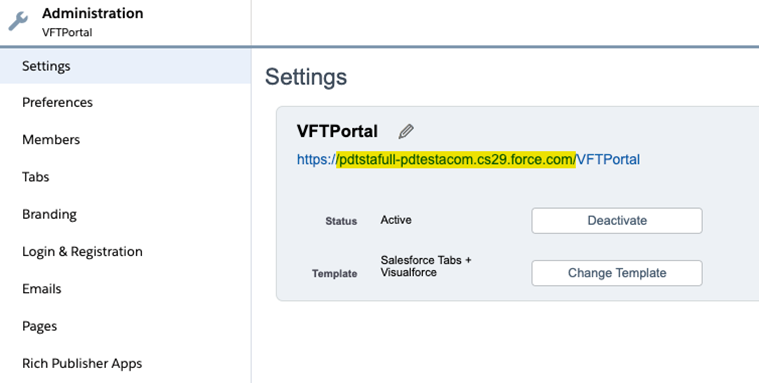
- Go to , click "Workspace" beside your Community's name, click
"Administration" and copy your Community domain like this:
- Substitute the Community domain for the production community’s domain in the
“Site URL” and the “Self Register URL” like this:
- Go to , click "Workspace" beside your Community's name, click
"Administration" and copy your Community domain like this:
Miscellaneous Links that Need Updating
Update any quick links you may have created on the Home page, by substituting the sandbox domain for the production domain. For example, you may have on your home page links to:
- EventListing
- RFI form(s)
- Portal Registration
- Portal Login
Upgrade Instructions
Version 5.12.19, released December 15, 2021
Sandbox: https://test.salesforce.com/packaging/installPackage.apexp?p0=04t1R000000kY6B
Production: https://login.salesforce.com/packaging/installPackage.apexp?p0=04t1R000000kY6B
If you are already logged in to the target org, the Install/Upgrade screen will appear immediately; if not, it will appear after you log in.
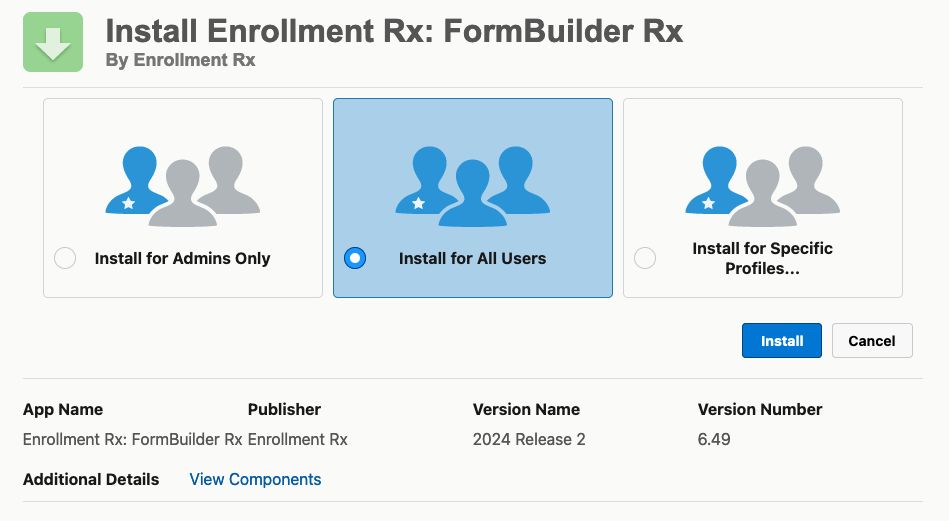
Choose “Install for All Users” before clicking the “Install” or “Upgrade” button, like this:
Post-Upgrade Instructions
No post-upgrade steps are needed for this release.
What to Test
After you install into your sandbox, you should test your Community and Sites pages that have been built with FormBuilder.
For Communities (Application Portals):
- Check your templates’ appearance on all pages
- Register as a new portal user
- Complete an application from start to finish
- Log out
- Log in as a full Salesforce user and check the Contact, Application, and all its child records to make sure they were updated with the information you entered on the portal
For Sites:
- Check your templates’ appearance on all pages
- Complete a Site form
- Check the record(s) created on the back end
Report any issues to Enrollment Rx by creating a ticket in JIRA helpdesk.
If you have a custom Visualforce page that ceases to work:
- Edit the Visualforce page by going to
- Click the “Version Settings” tab
- Change the Version of the Package to 5.0, like this:

Reference Information
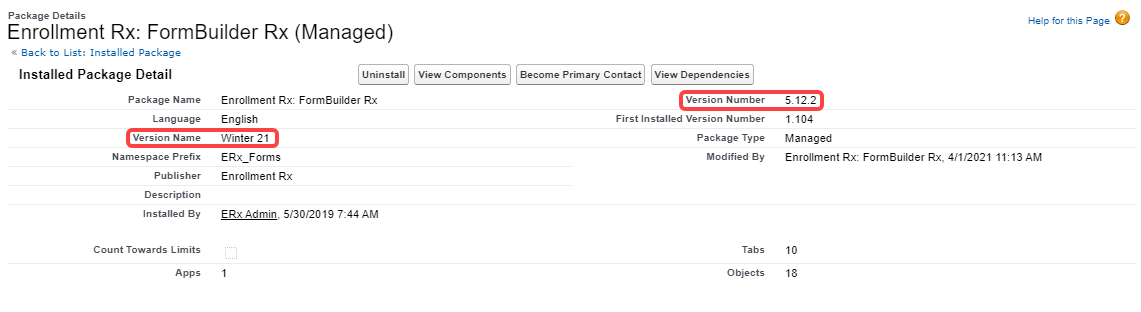
What Version Do You Currently Have Installed?
- Go to
- Click on the name of the Enrollment Rx: FormBuilder Rx package:
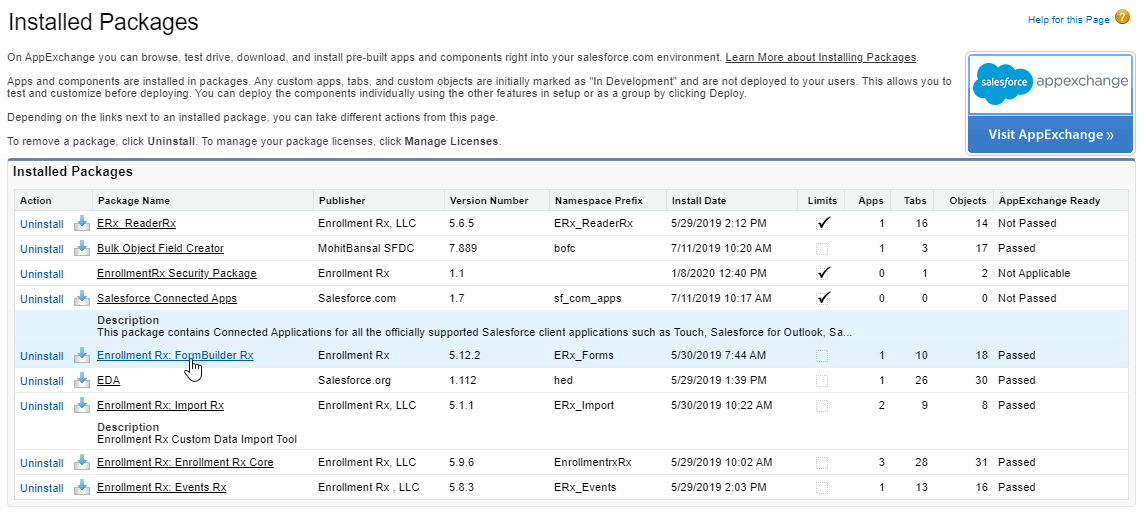
- The details page will open showing the Version name and number: