Implementation
Before DXP: Original Implementation Steps
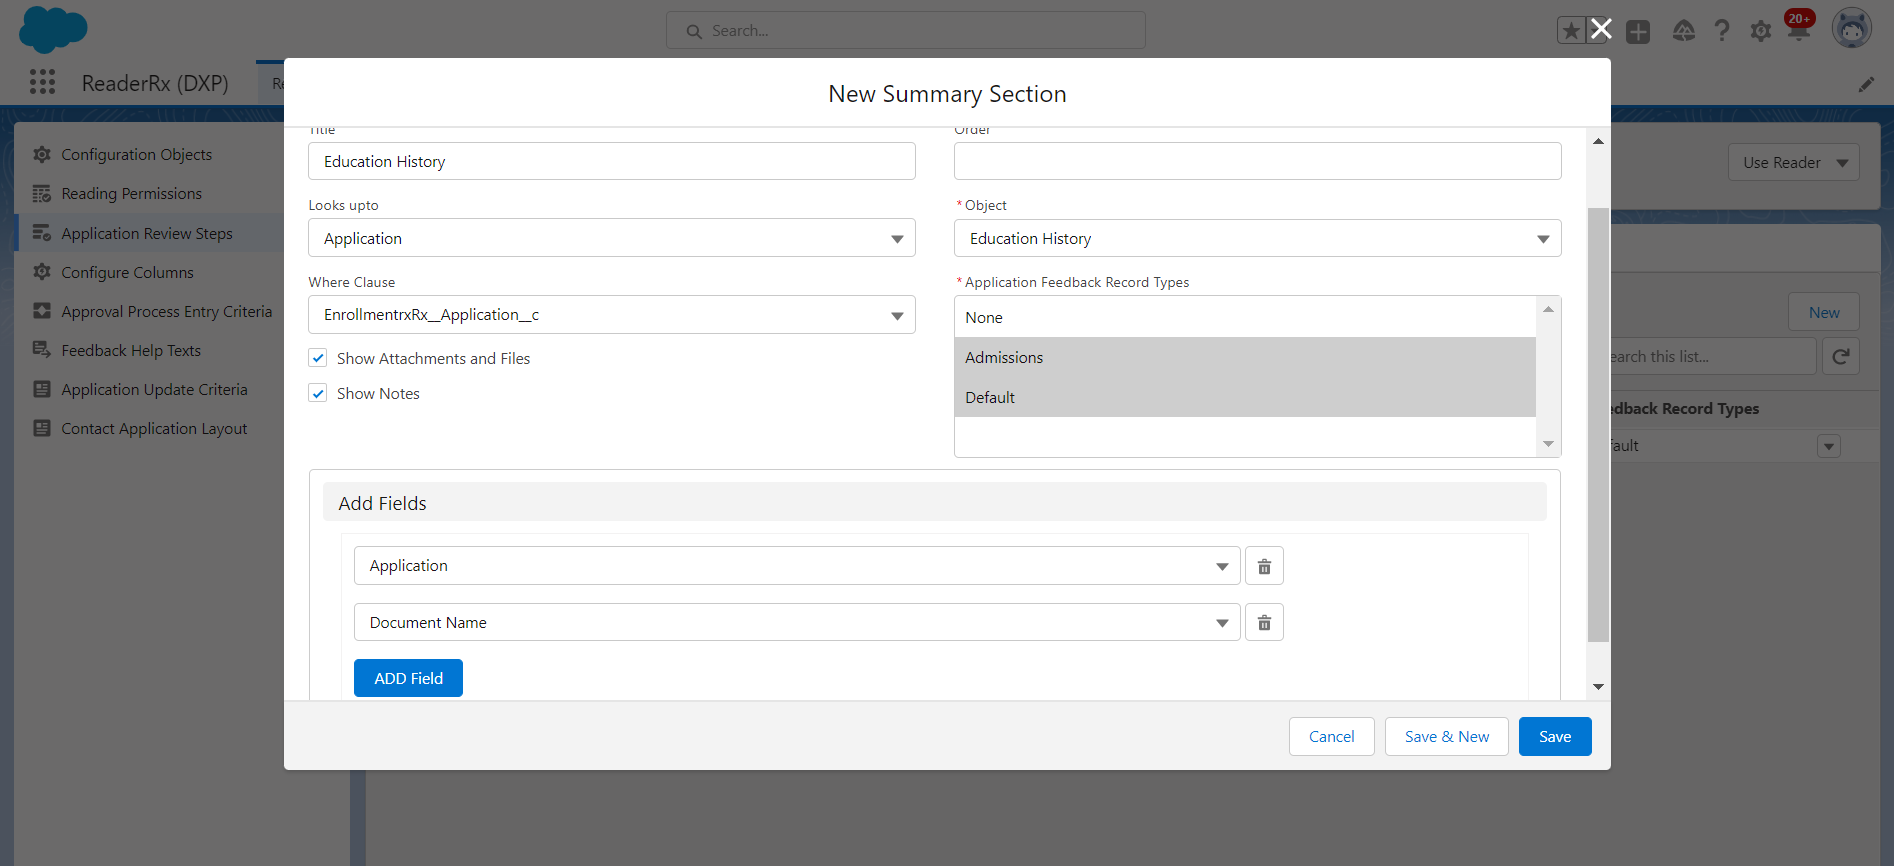
In Reader Rx, to create the Summary Section, you navigate to the Summary Section tab and click the New button.
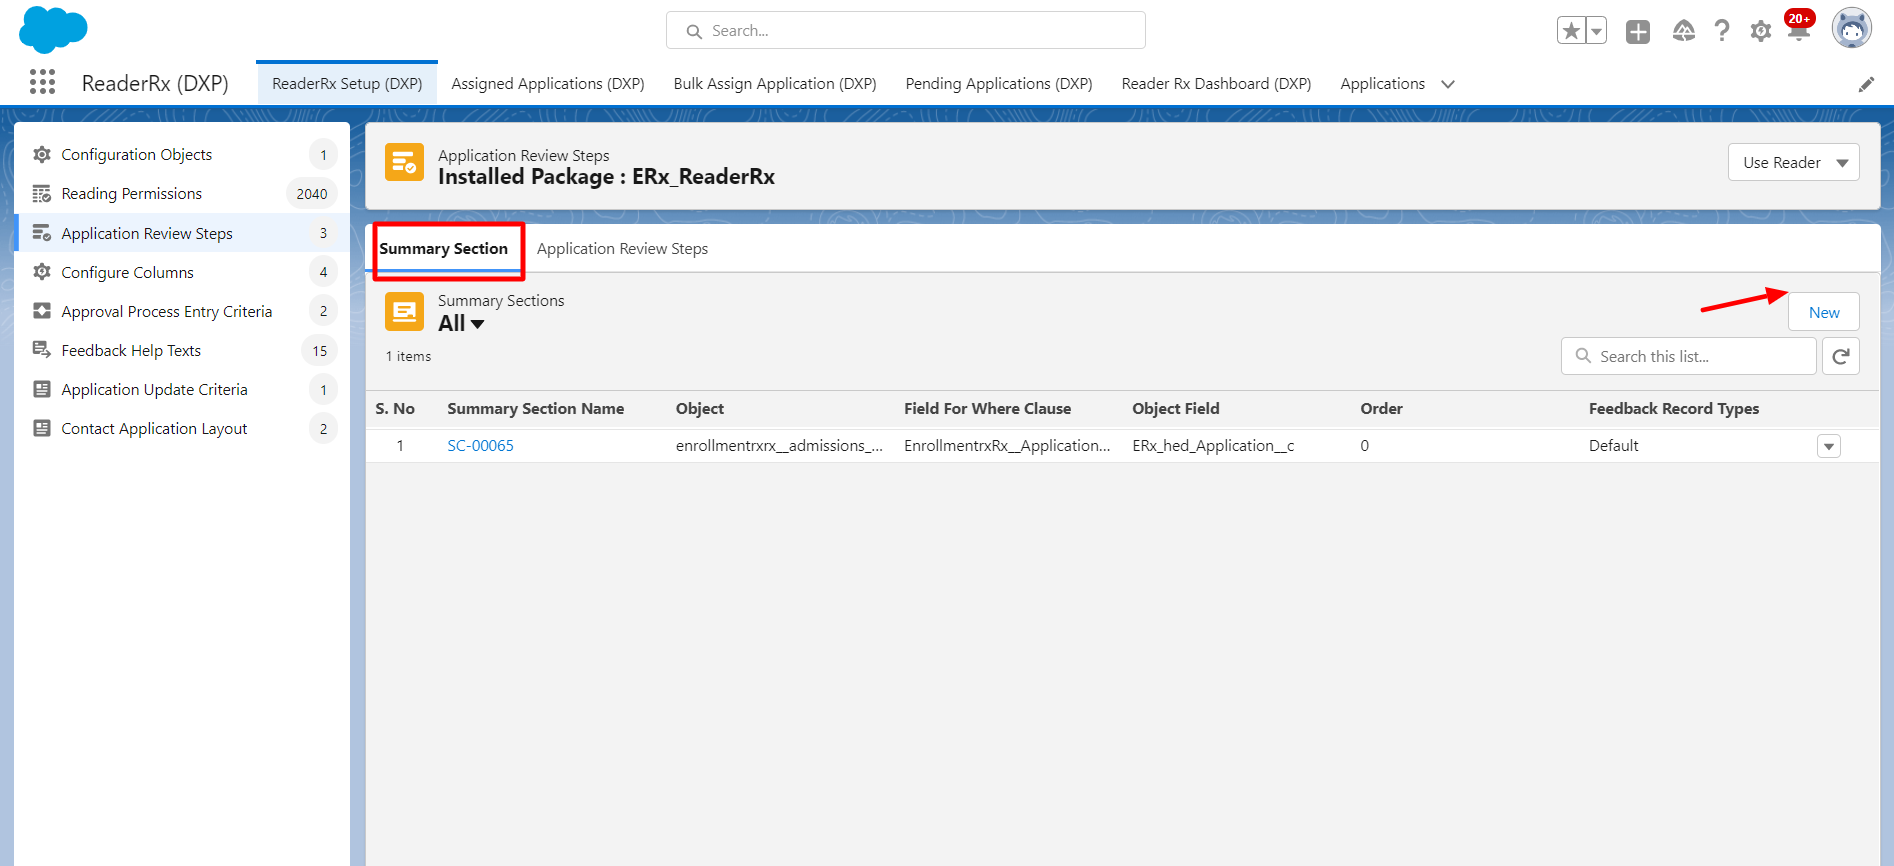
After clicking the Save button, a record is created in the Summary Section for the Education History object.
You can create records for different objects, then navigate to the Review Screen and click on the Summary Step.

New Implementation Steps on the FormBuilder Review Screen
To create this Summary Section on the FormBuilder Rx Review Screen, follow the below steps.
- Create one page in the FormBuilder Rx environment of your choice and select page type
as "New." Configure the page as follows:
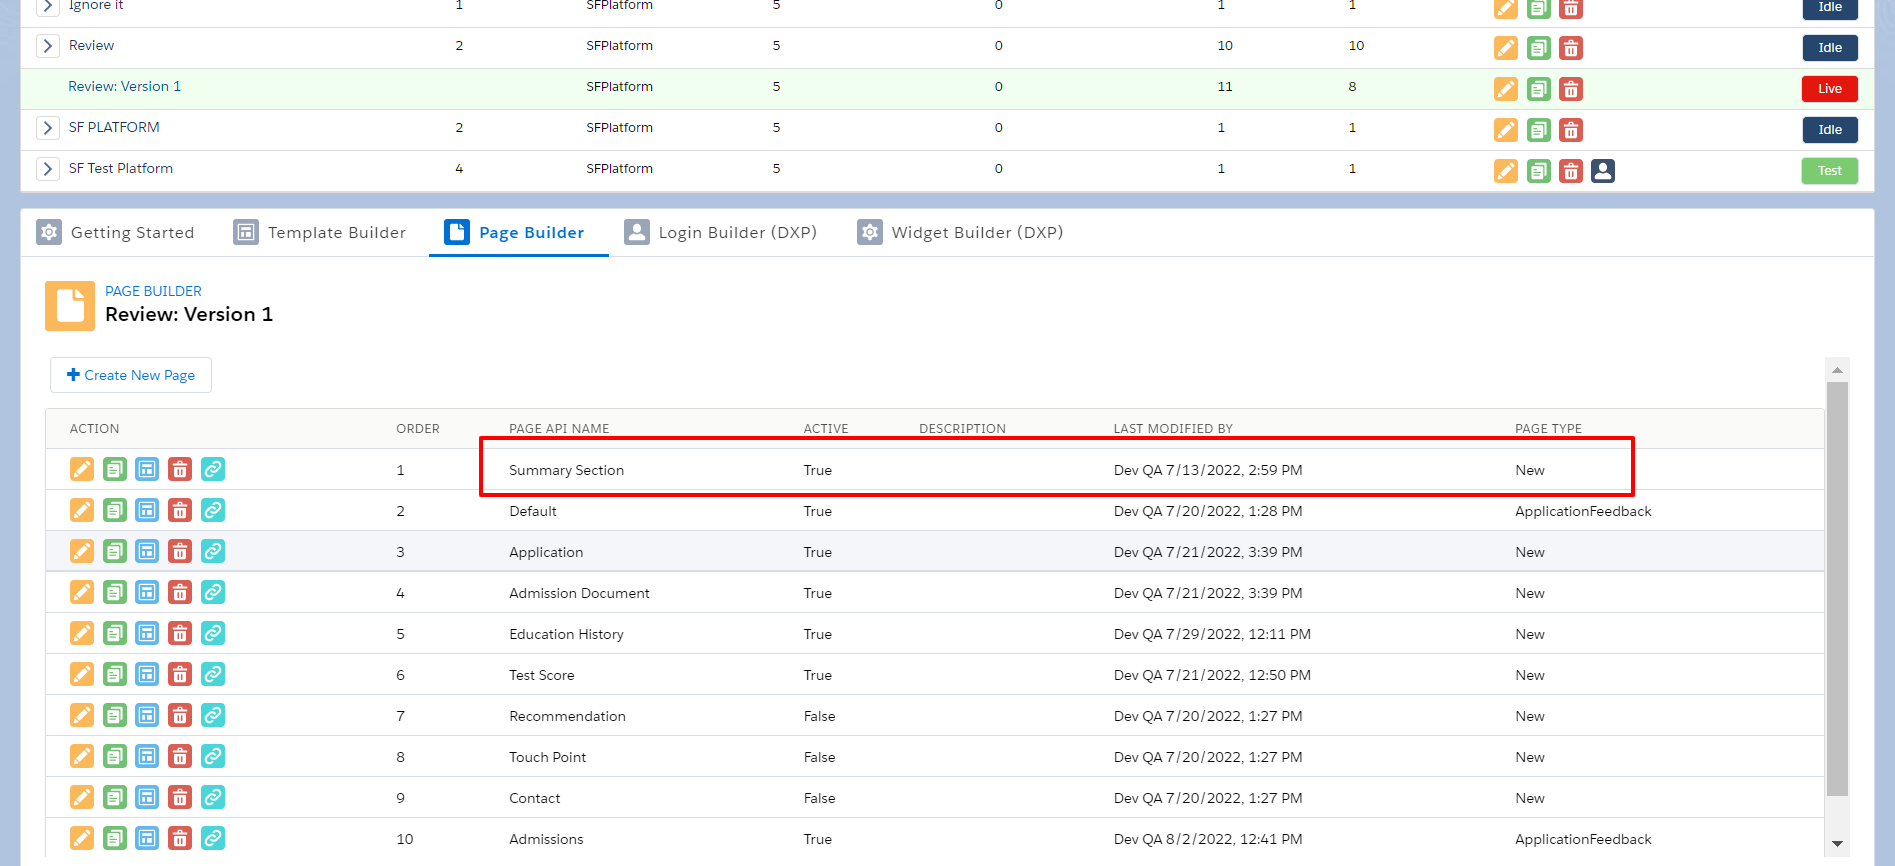
- Create a different Data Set for different objects. Also create different sections for
those objects.
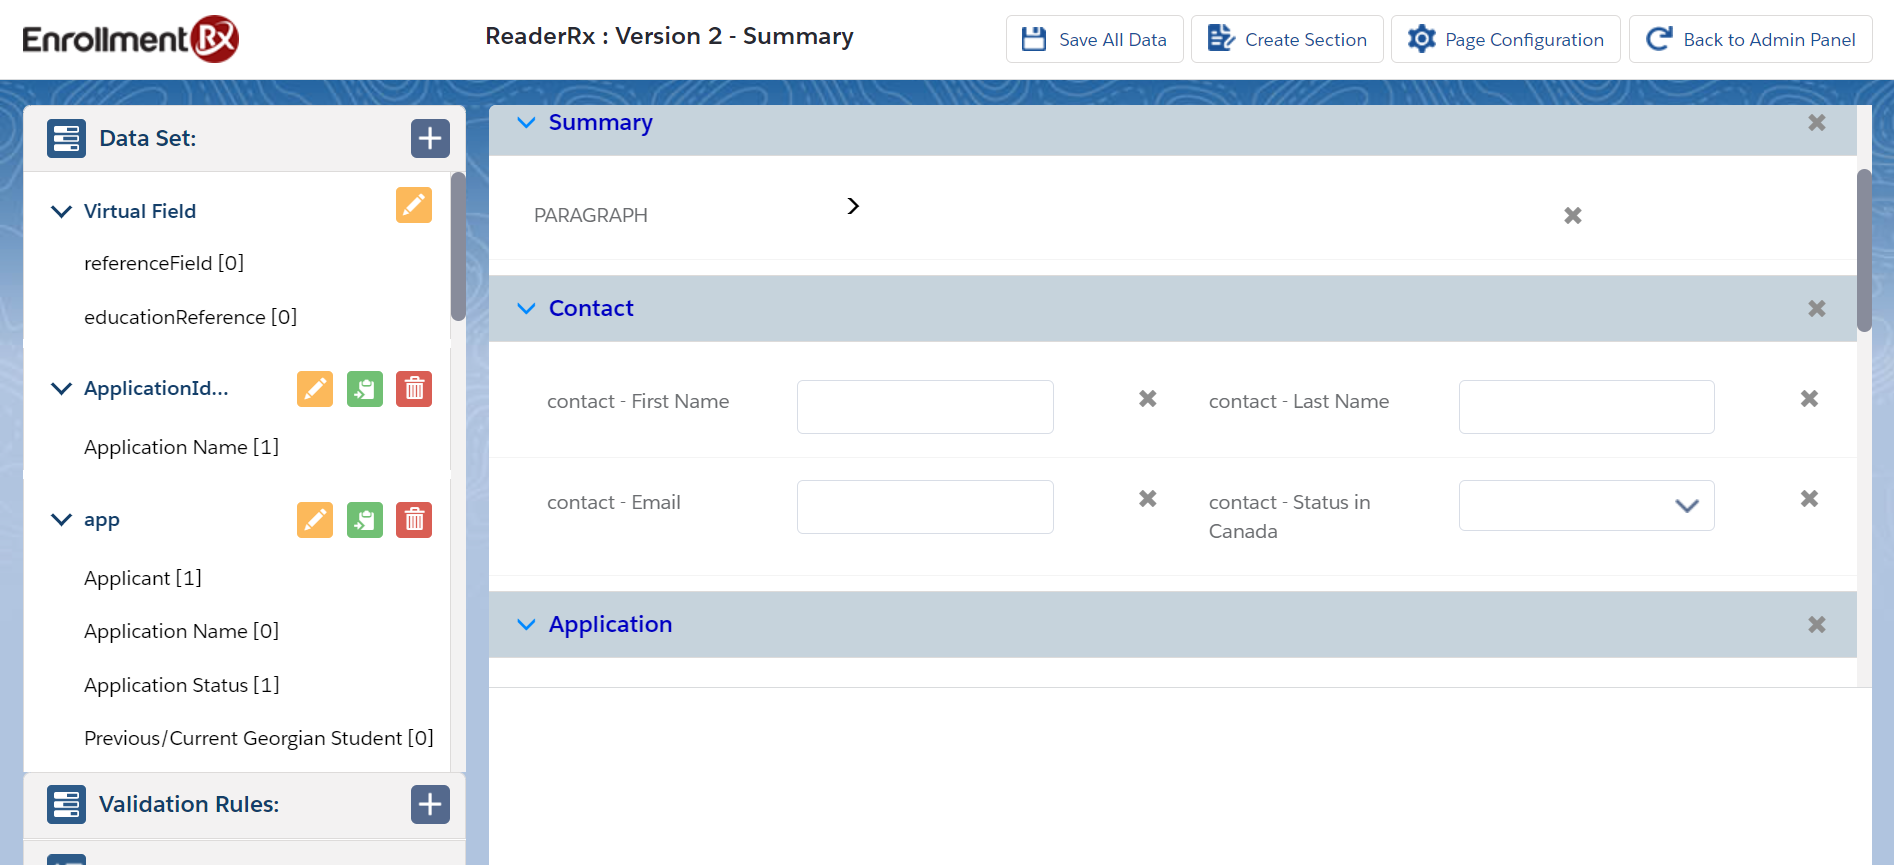
- Drag and drop fields into the section according to the Data Set and click the Save All
Data button when you're done. Next, navigate to the FormBuilder Rx Review Screen and click
on the Summary Page.

Steps to Configure Other Pages
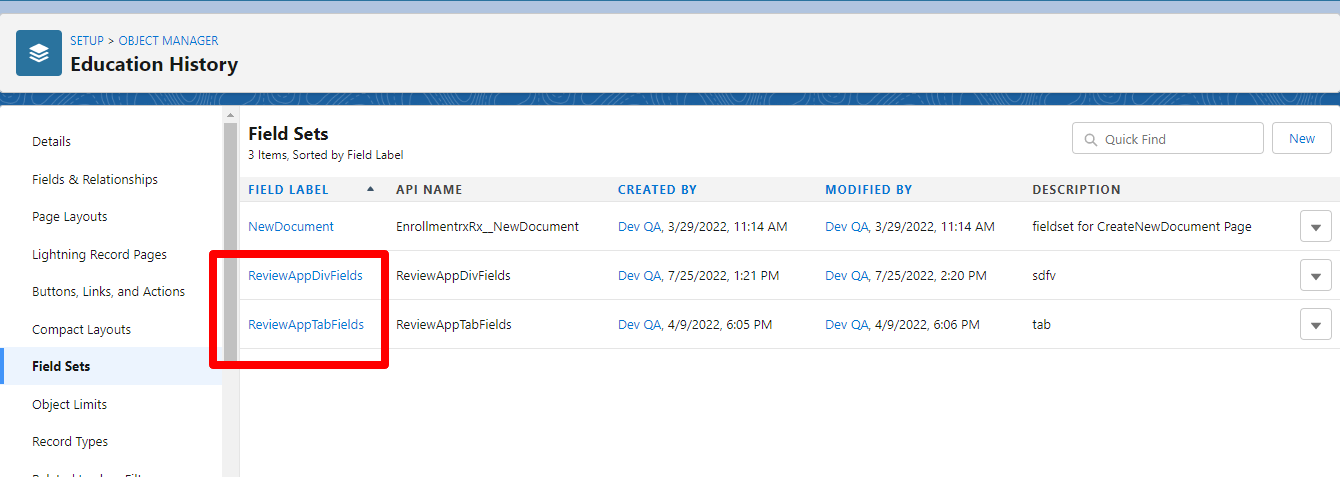
Original Implementation Steps for Tab and Div on the Review Screen
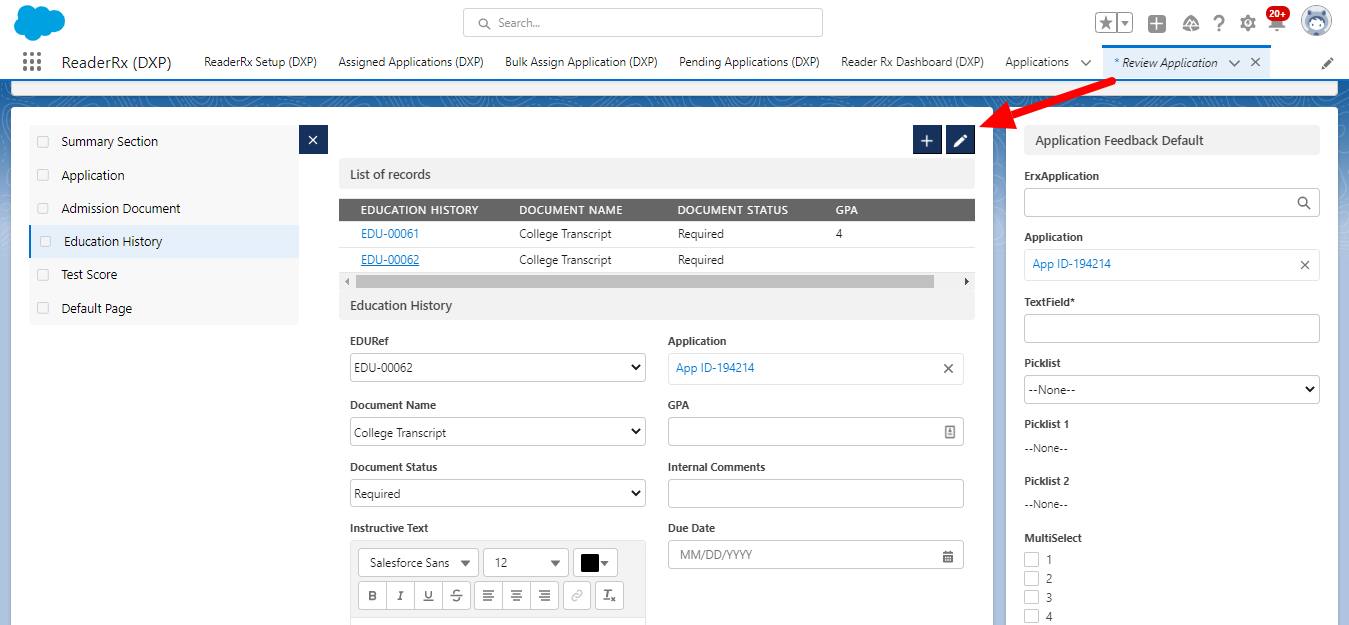
To show the Tab and Div field sets, you create both field sets on the related object. Below is an example for the Education History object.
New Implementation Steps for Adding Tab and Div Field Sets to the Review Screen Using FormBuilder Rx
To achieve this using FormBuilder Rx, you'll need to use the List Component and follow the instructions below.
- Create two data sets:
- One to use for the List Component as a tab.
- A second one to use for the Details section.
- Create one reference type Virtual Field
- Create two sections:
- One to use for the List Component as a tab.
- A second one to use for the Details section.
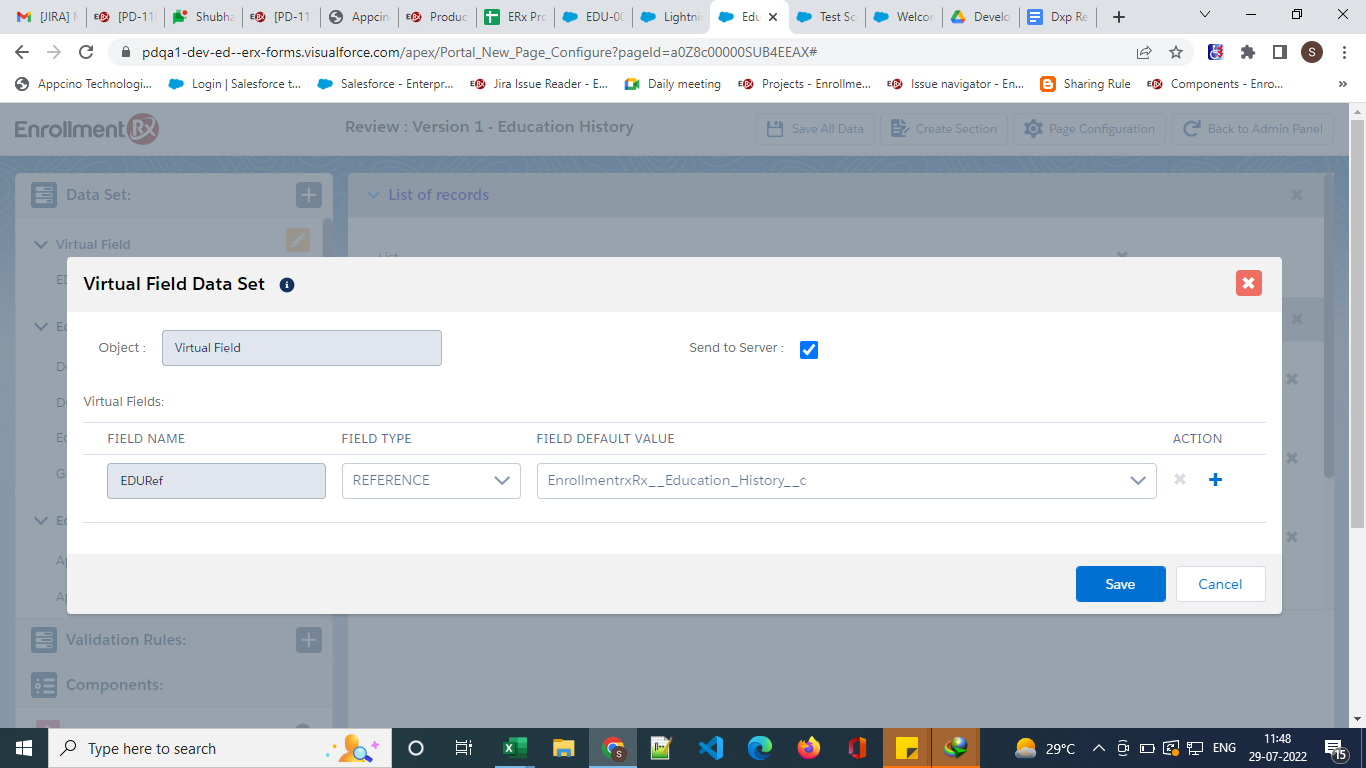
- Steps to create the Virtual Field:
- Navigate to Page Configuration
- Click on the Add/Edit button of the Virtual Field on the Data Set section
- Create a Reference Type of the field for the Education History object
- Data Set creation & configuration: After creating a page, create two Data Sets on your object (e.g., Education History)
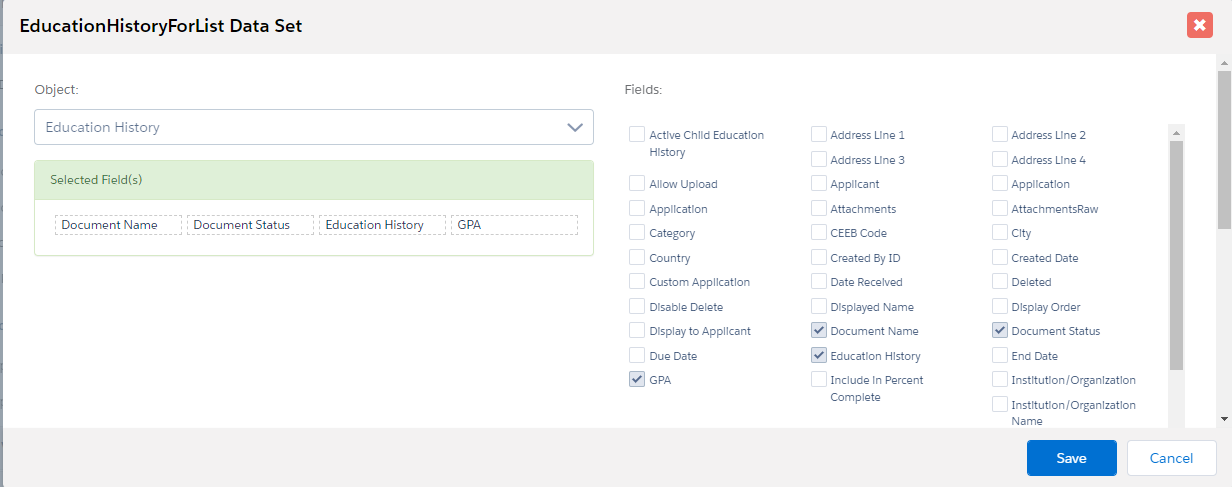
- Steps to create the first Data Set (this will work as the Tab field
set)
- Click on the (+) sign to create a Data Set
- Select Education History as the object
- Select required fields (e.g., Education History, Document Name, Document
Status)
- Set the record criteria as below:

- Save the record.
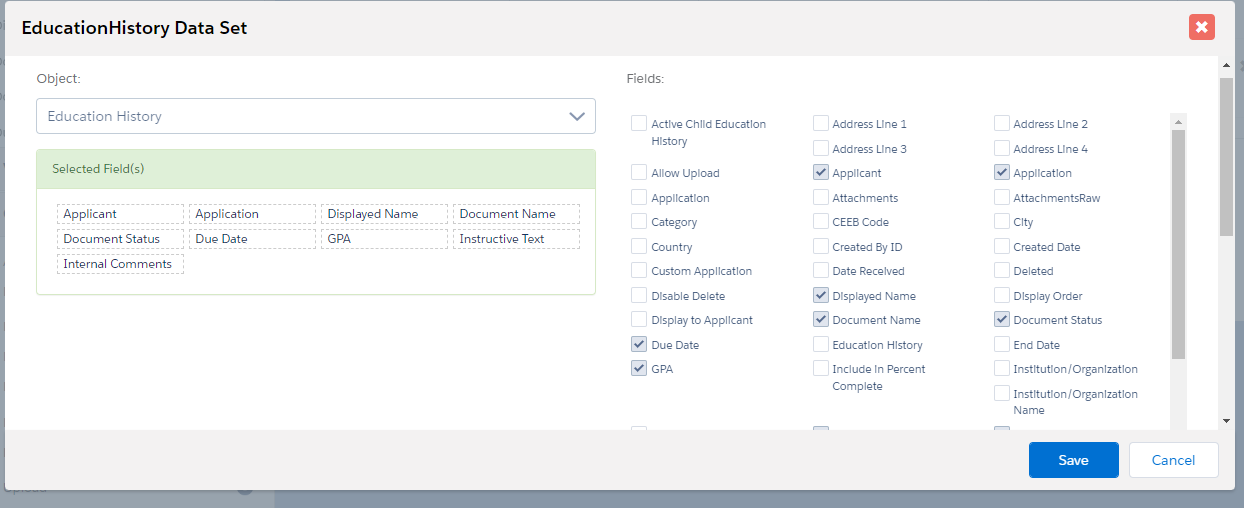
- Steps to create a second Data Set (this will work as the Div field set)
- Click on the (+) sign to create a Data Set
- Select Education History as the object
- Select the required fields:
- Set the record criteria as below:

- Save the record.
- Section creation & configuration: Create two sections. In the first one, you'll need to drop in the List Component. For the second section, you'll need to add second Data Set fields that will work as the Div Field Set.
- Steps to create the first section:
- Click on the Create Section button
- Give any name to the section:

- Click Save
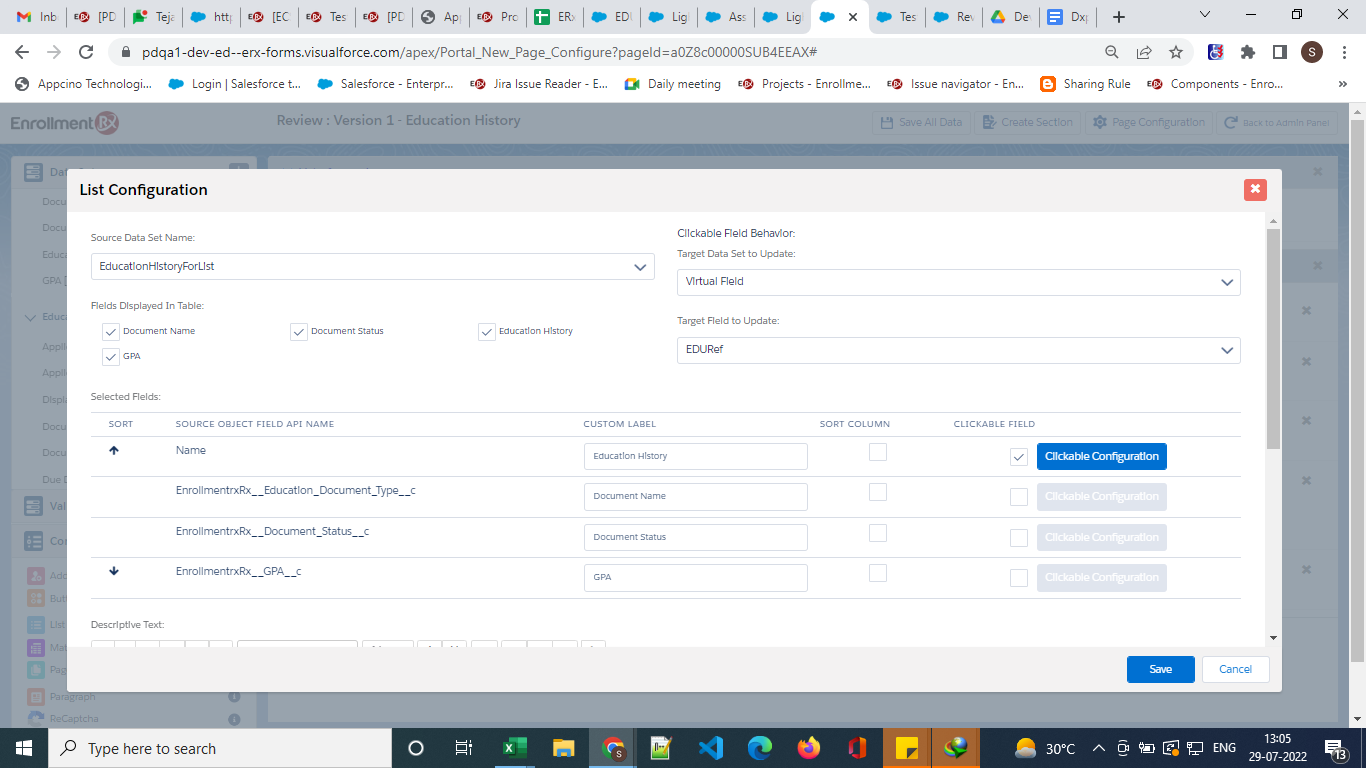
- Drop the List Component on this section and on the List Component, and apply
the following configuration:
- Steps to create the second section:
- Click on the Create Section button
- Give any name to the section:
- Click Save.
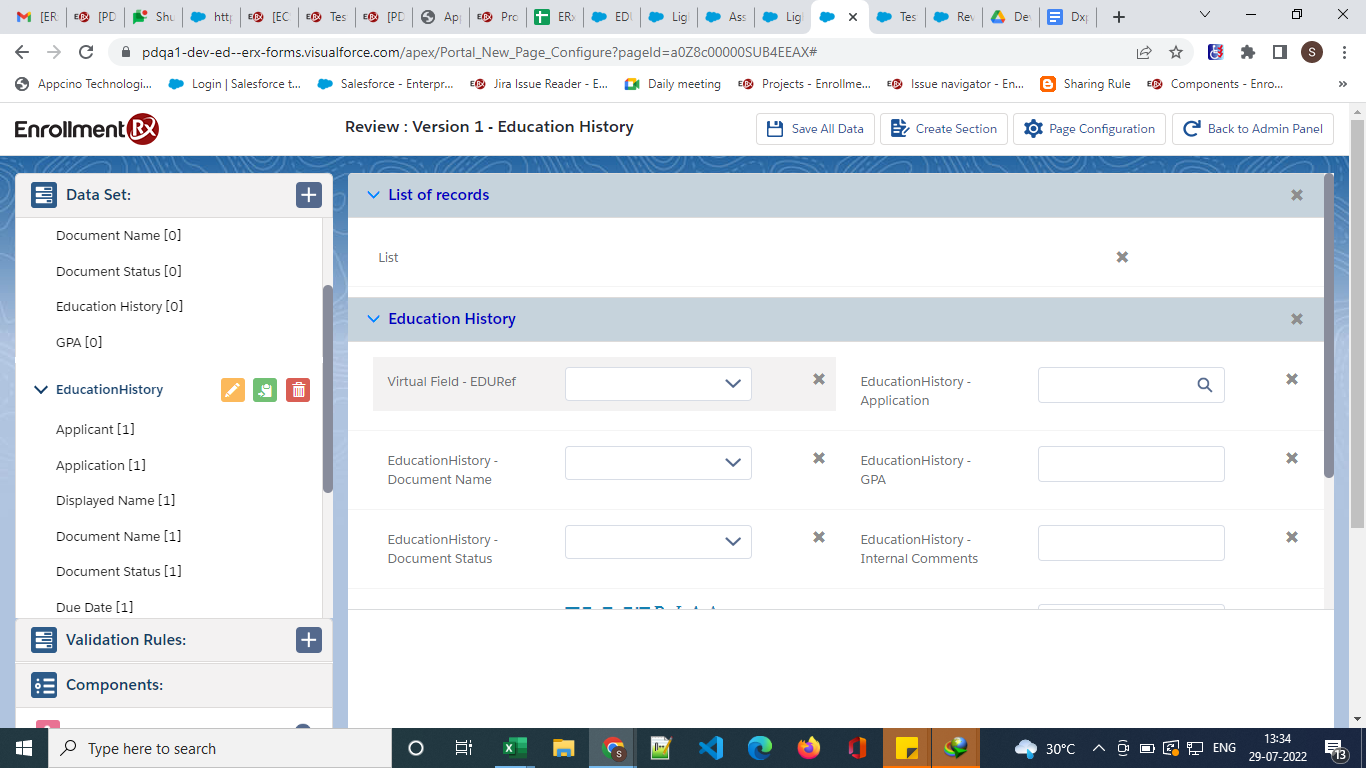
- In this section, drop virtual fields and second Data Set fields:
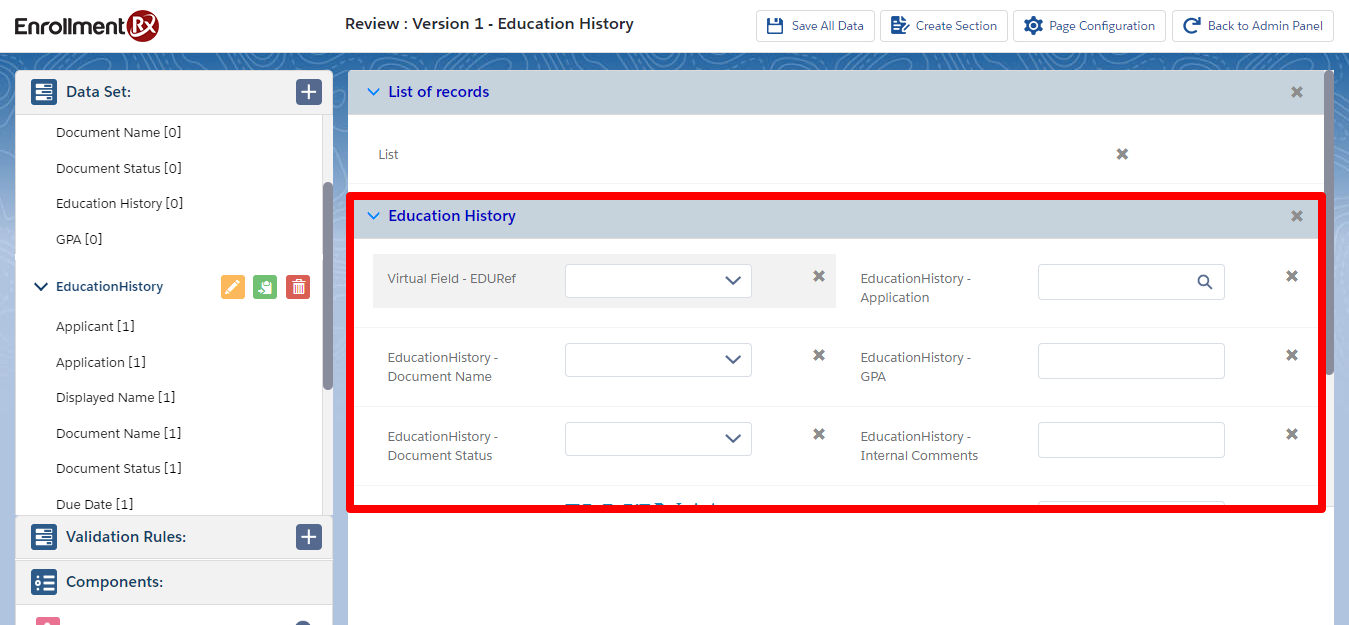
- Double click on the Virtual Field and configure as follows:


- Click Save.
- Steps to create the first section:
- Steps to create the first Data Set (this will work as the Tab field
set)
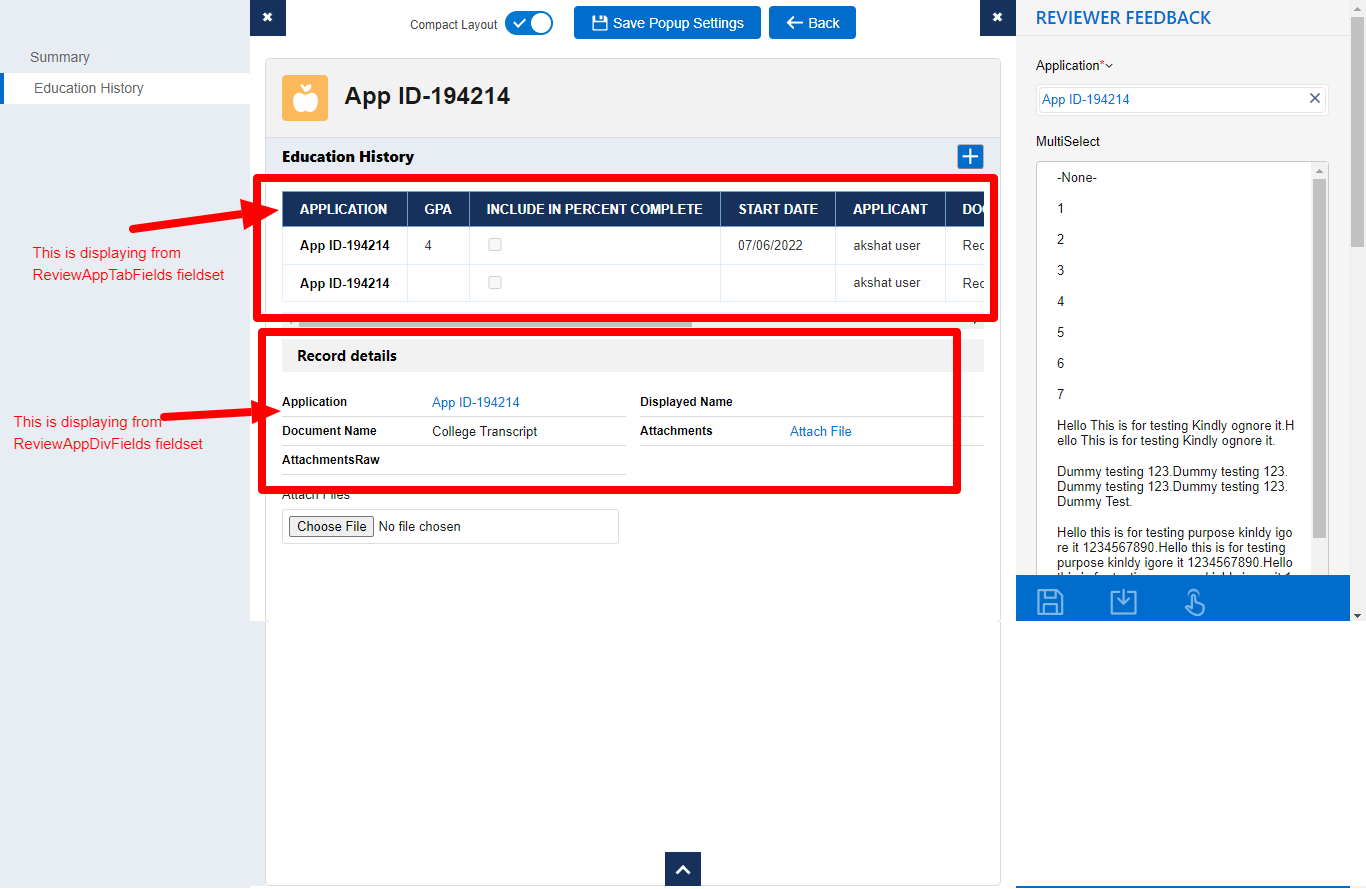
Final outcome on the Review Screen:

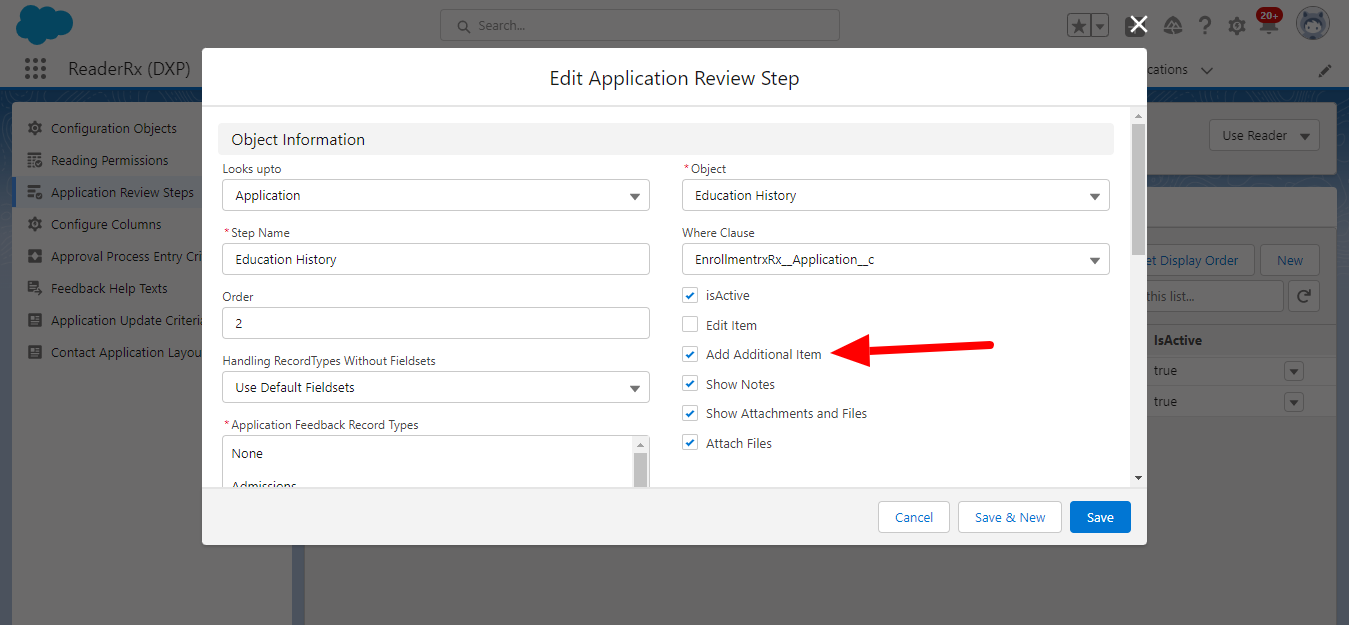
Steps to Enable Add Record Feature from Review Screen
Original Implementation to Enable Add Record Feature
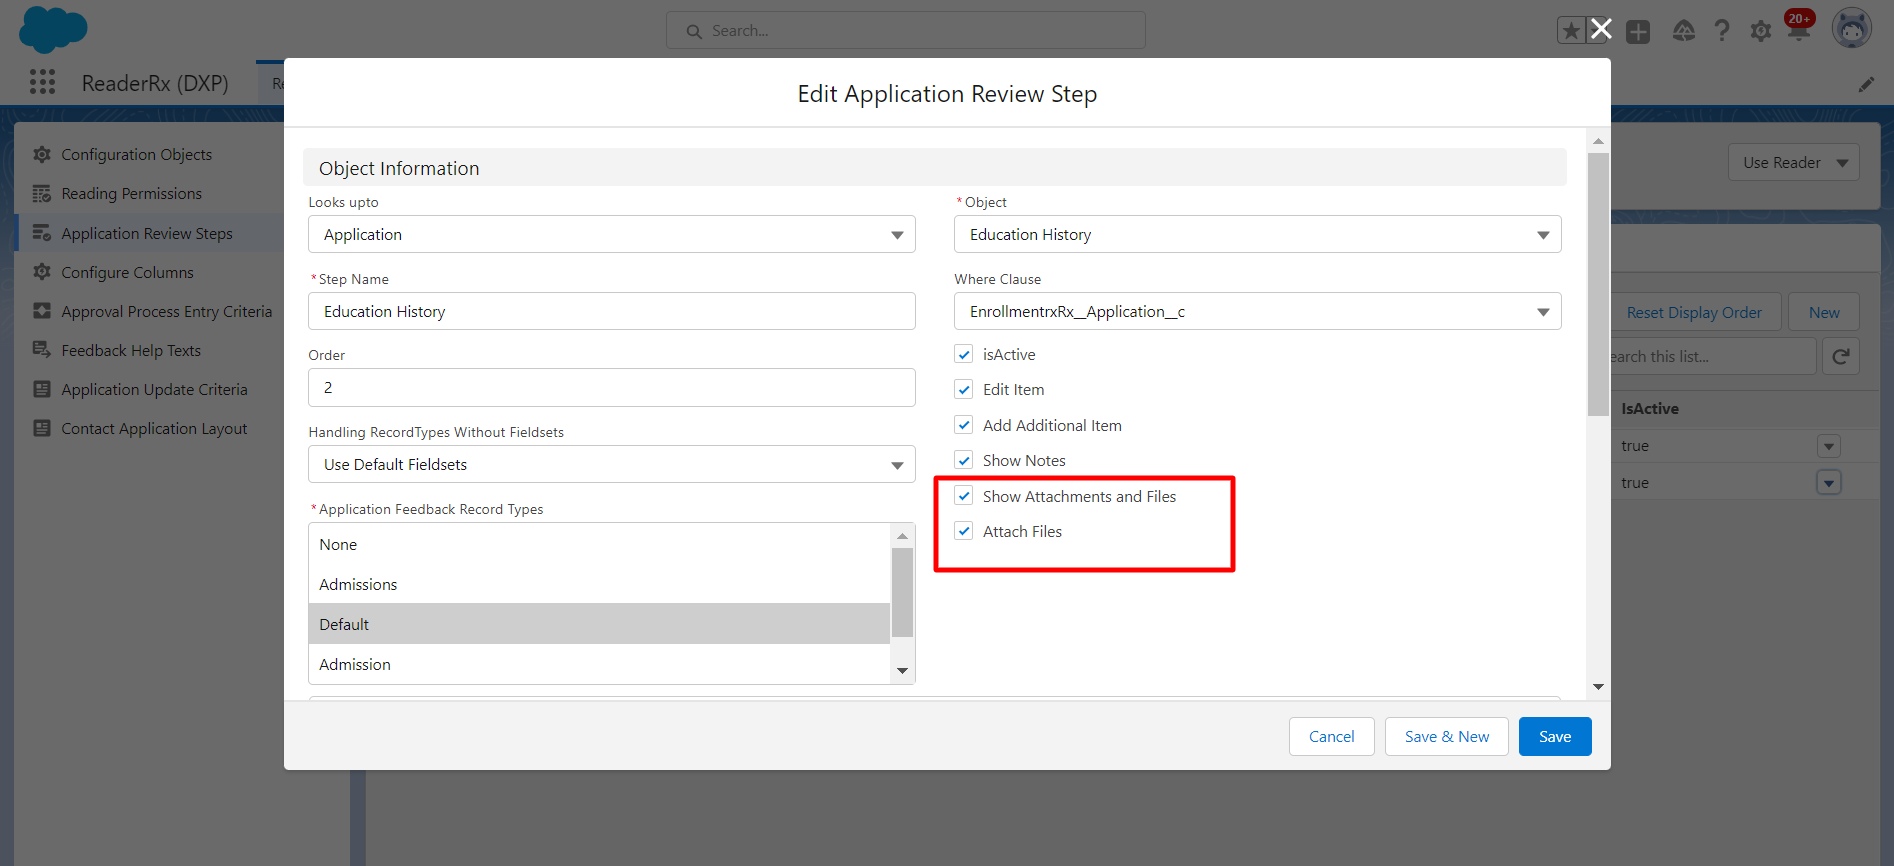
To enable the Add New Record feature for the Review Screen, click the “Add additional item” checkbox permission from the Application Review Step record.
New Implementation on the FormBuilder Rx Review Screen
To implement the Add New Record Feature from the Review Screen in FormBuilder Rx, follow the below configuration.
- Create a Virtual Field named IsCreateAllowed:
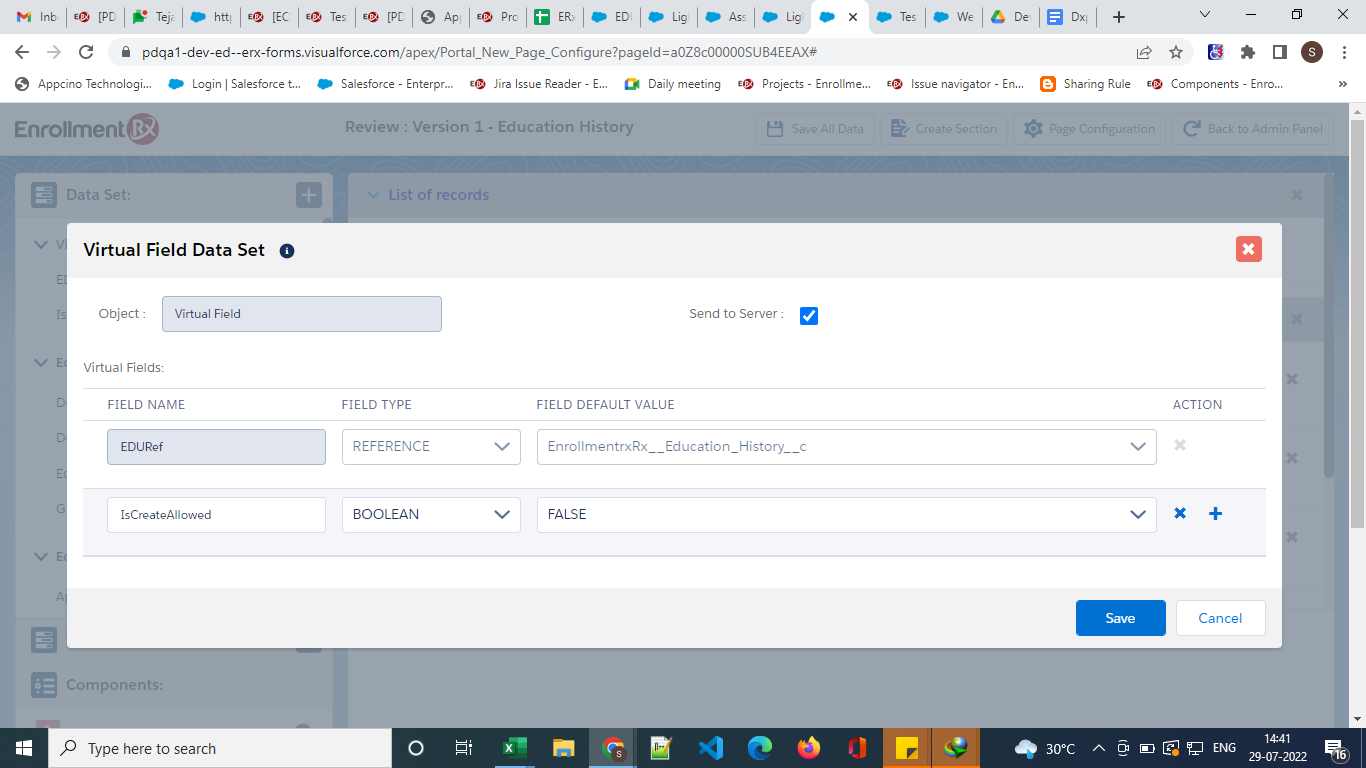
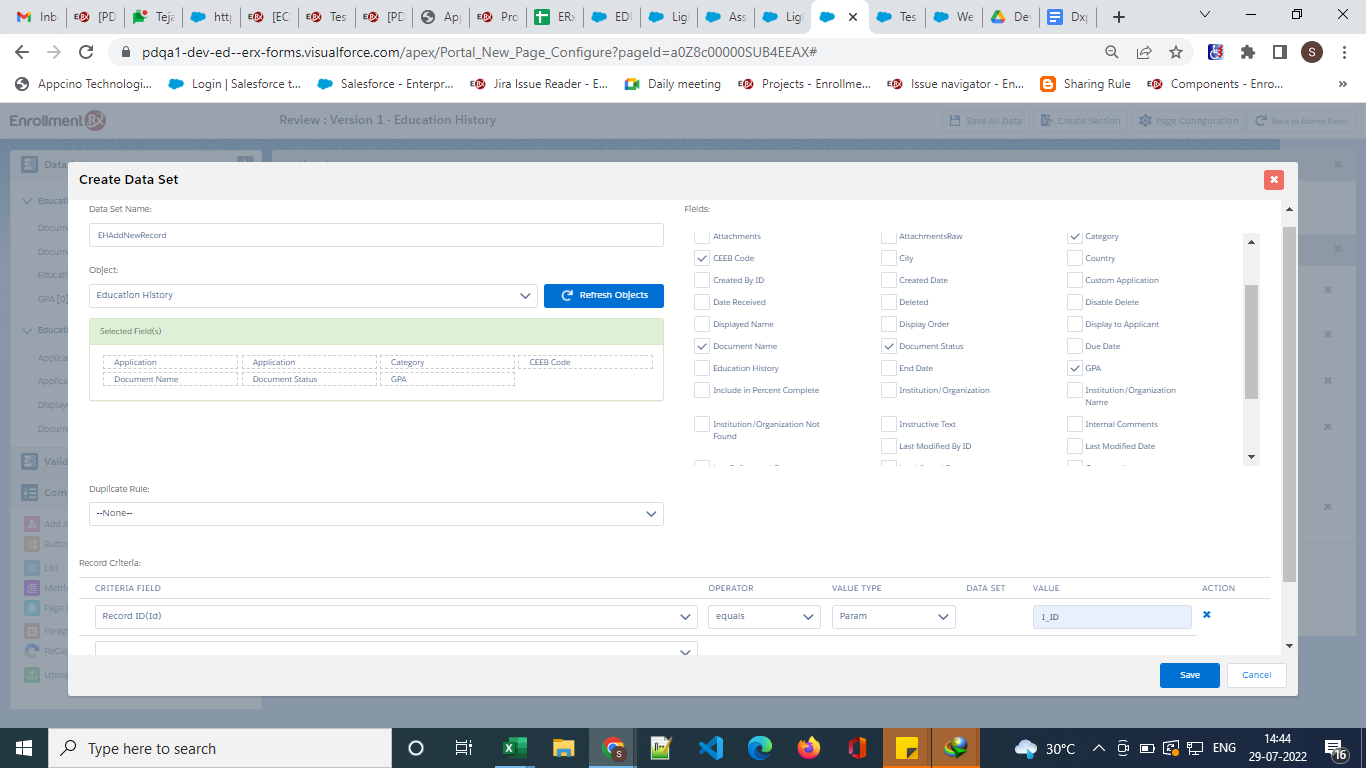
- Create a Data Set named EHAddNewRecord with the following configuration:
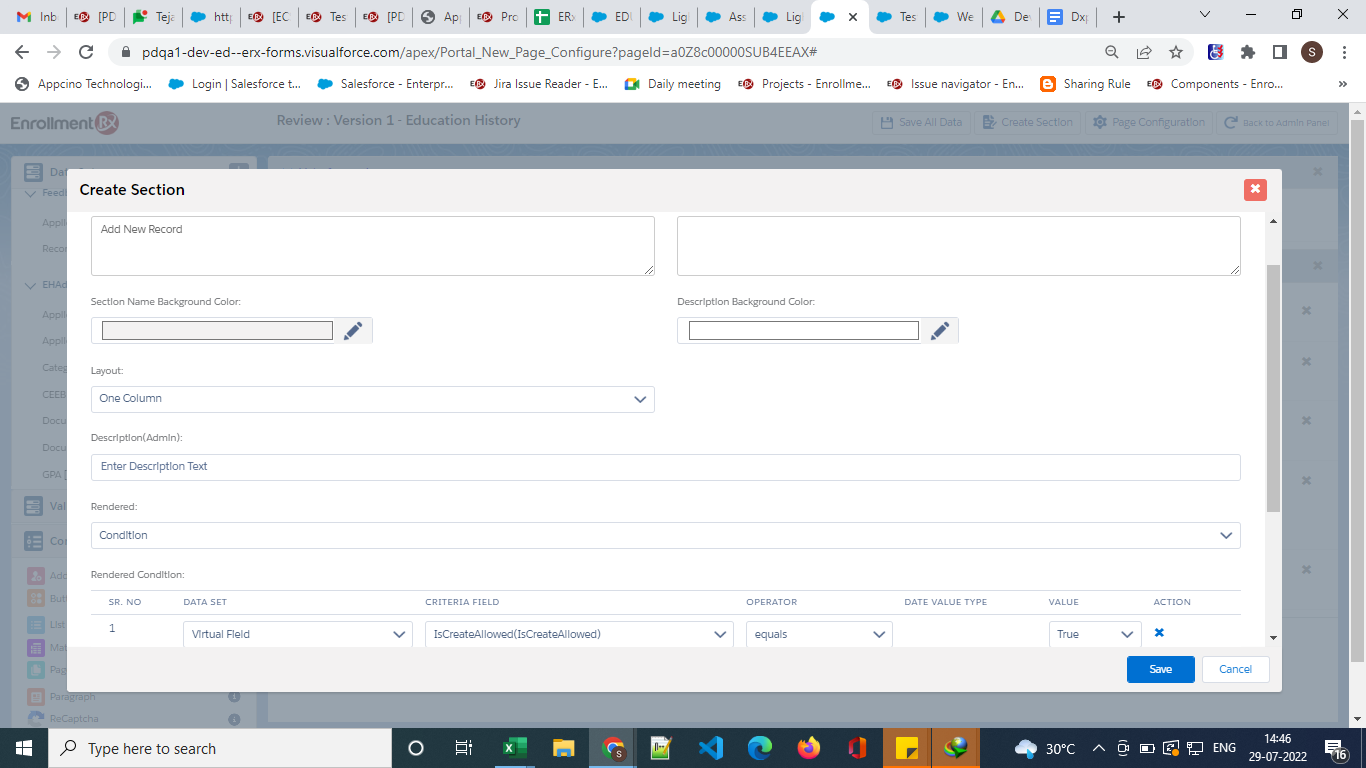
- Create a Section configured like the below:
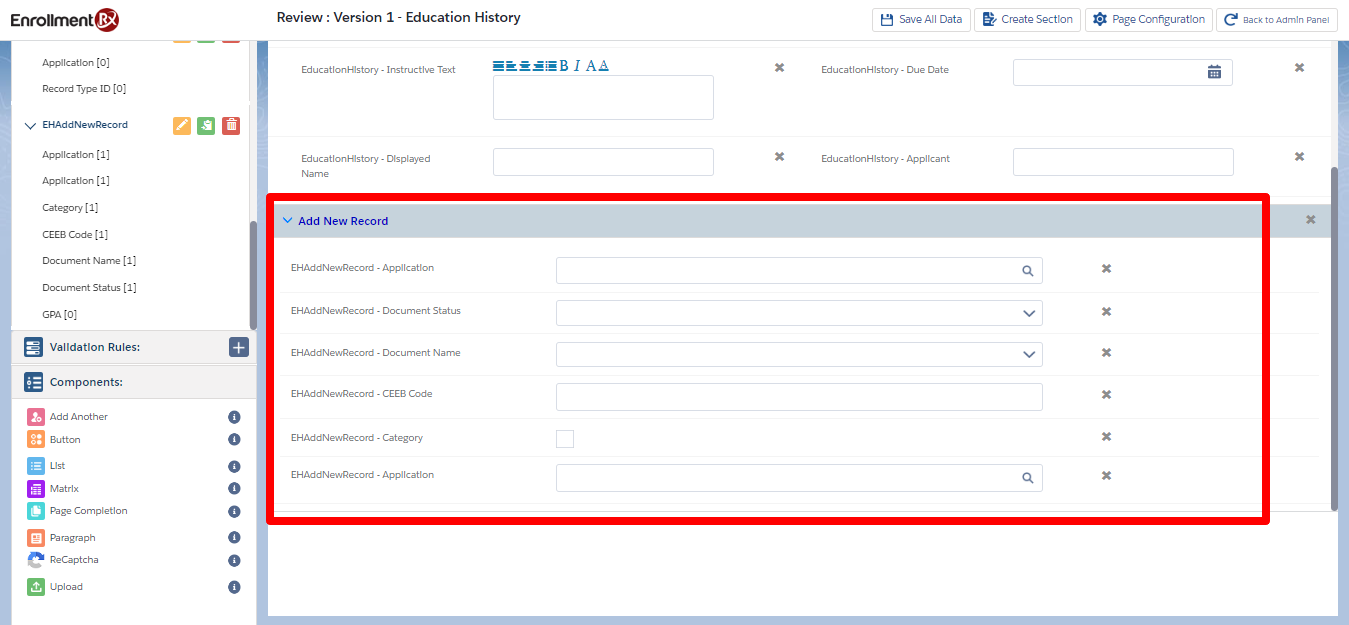
- Drop fields of the Data Set named EHAddNewRecord on this section:
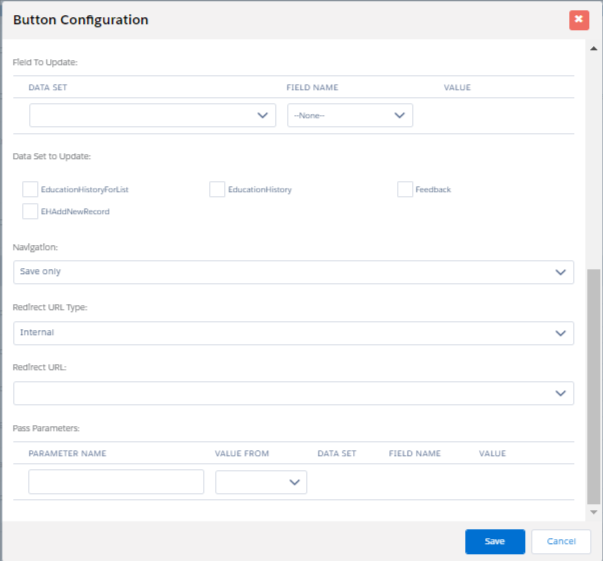
- Create and add two buttons on this page as follows:
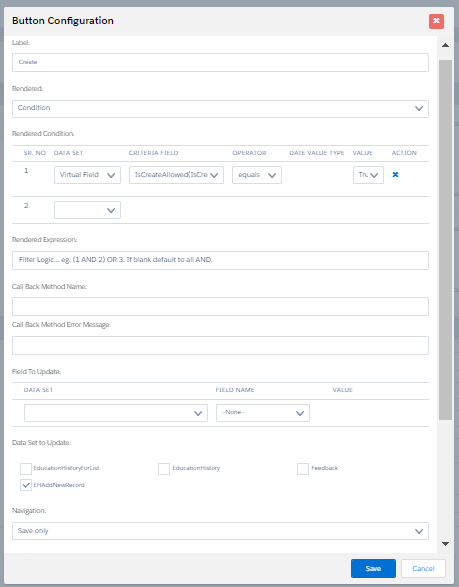
- Create button configuration:
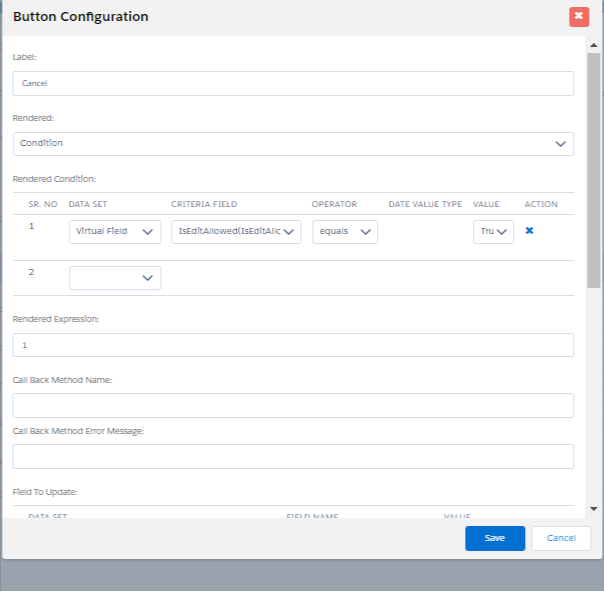
- Cancel button configuration:
- Create button configuration:
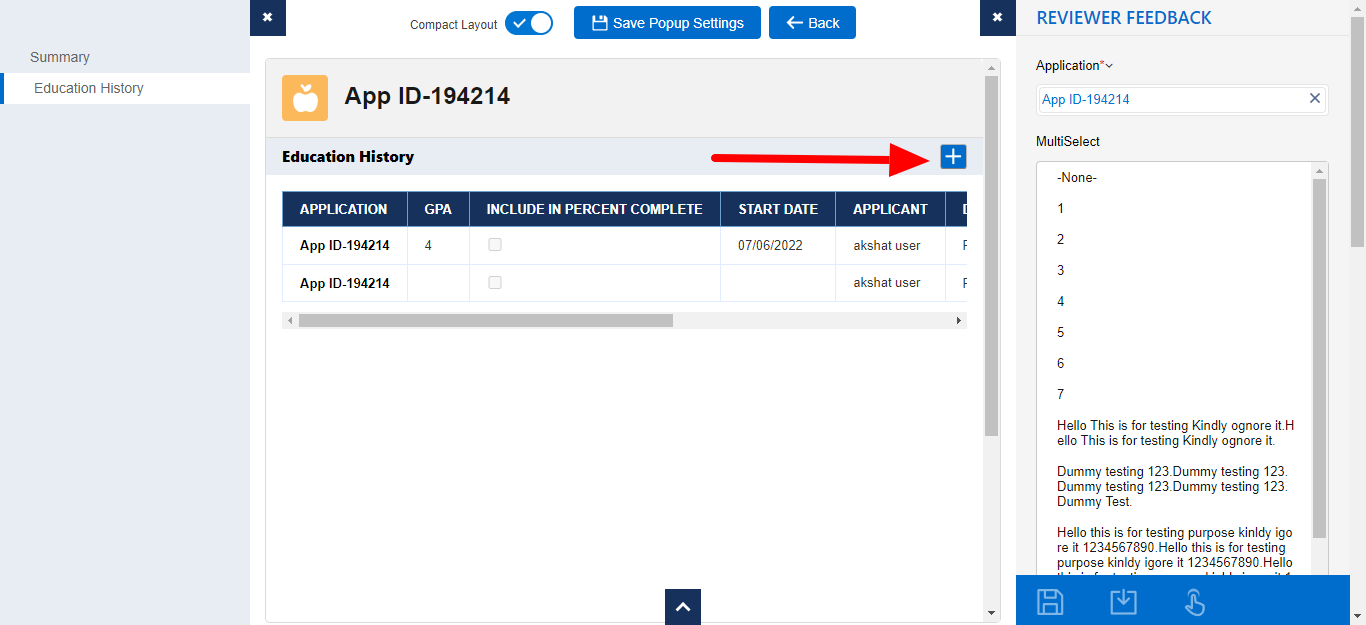
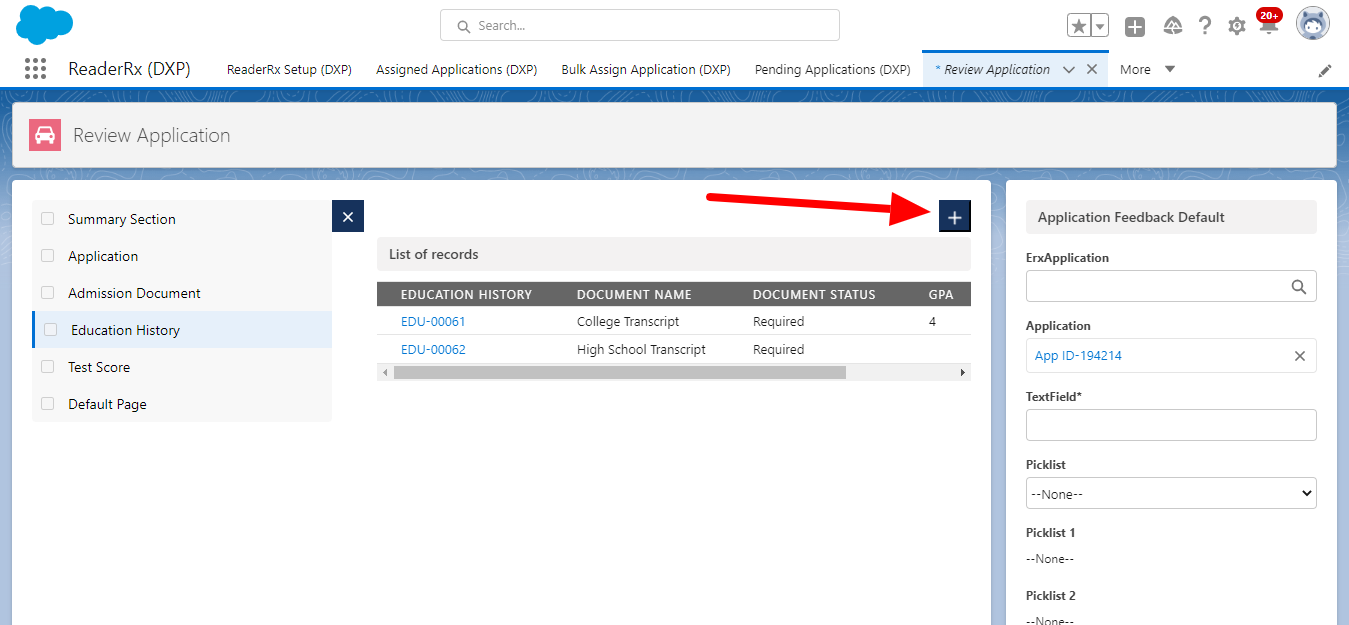
- Final outcome on the Review Screen: The (+) button wil be visible on the Review
Page:
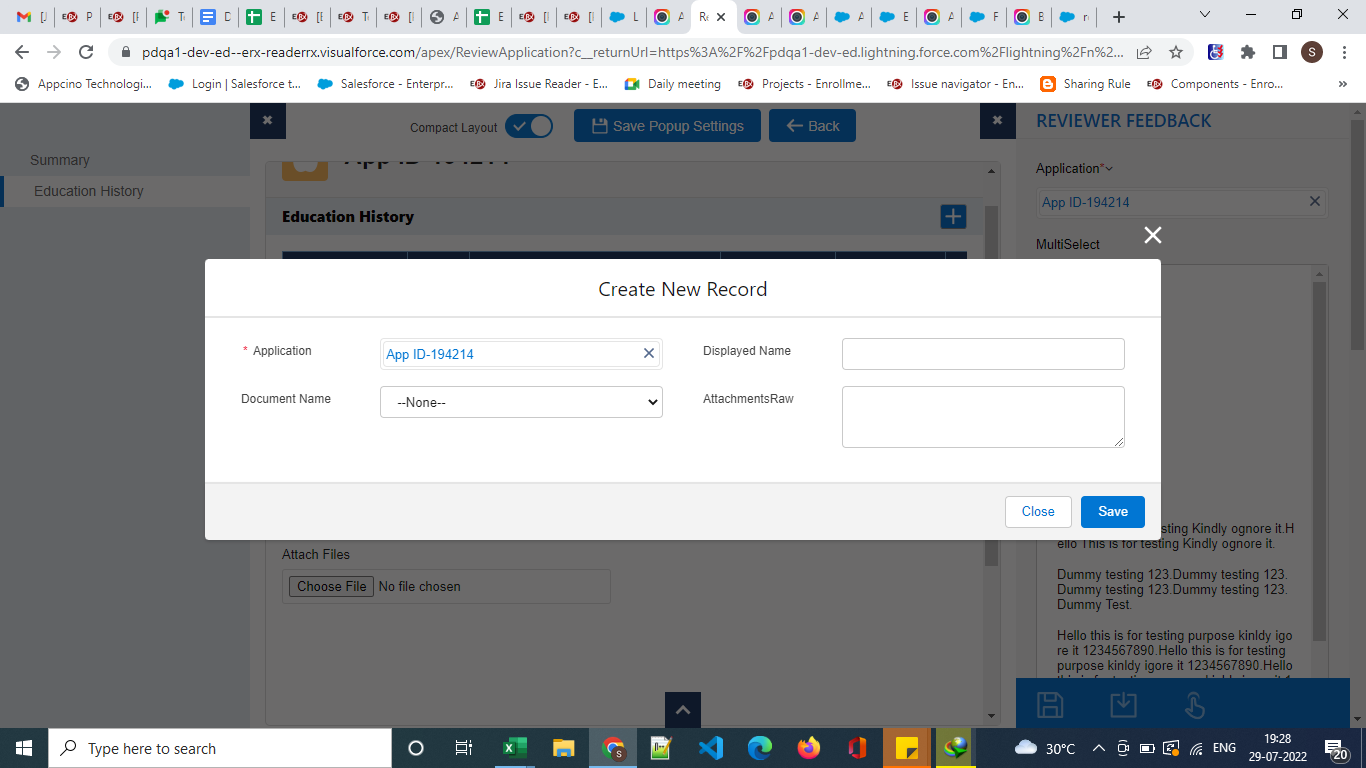
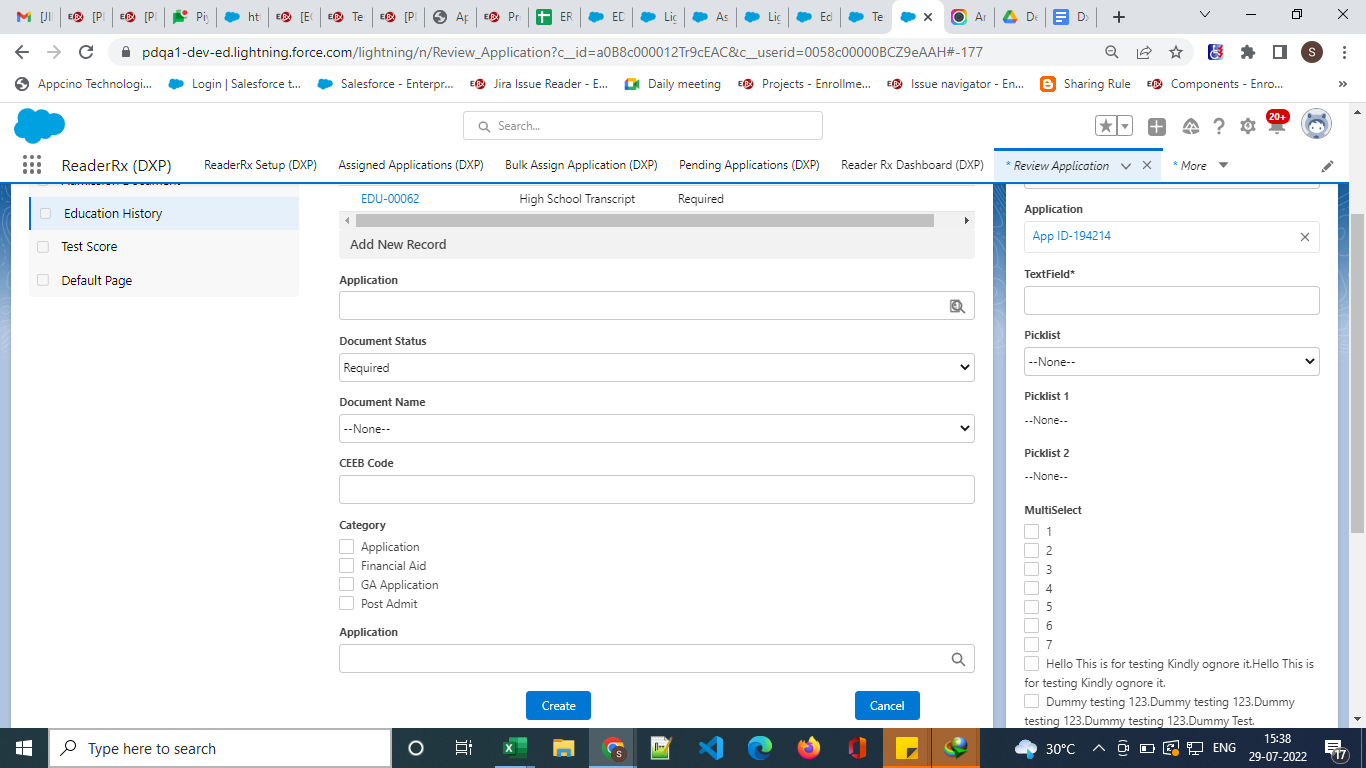
- When you click on the (+) button, a new section to create a new Record will appear on
the page:
Steps to Enable Edit Record Feature from Review Screen
Original Implementation
To enable the Edit Record feature from the Review Screen, check the "Edit Item" checkbox on the Application Review Step Record.
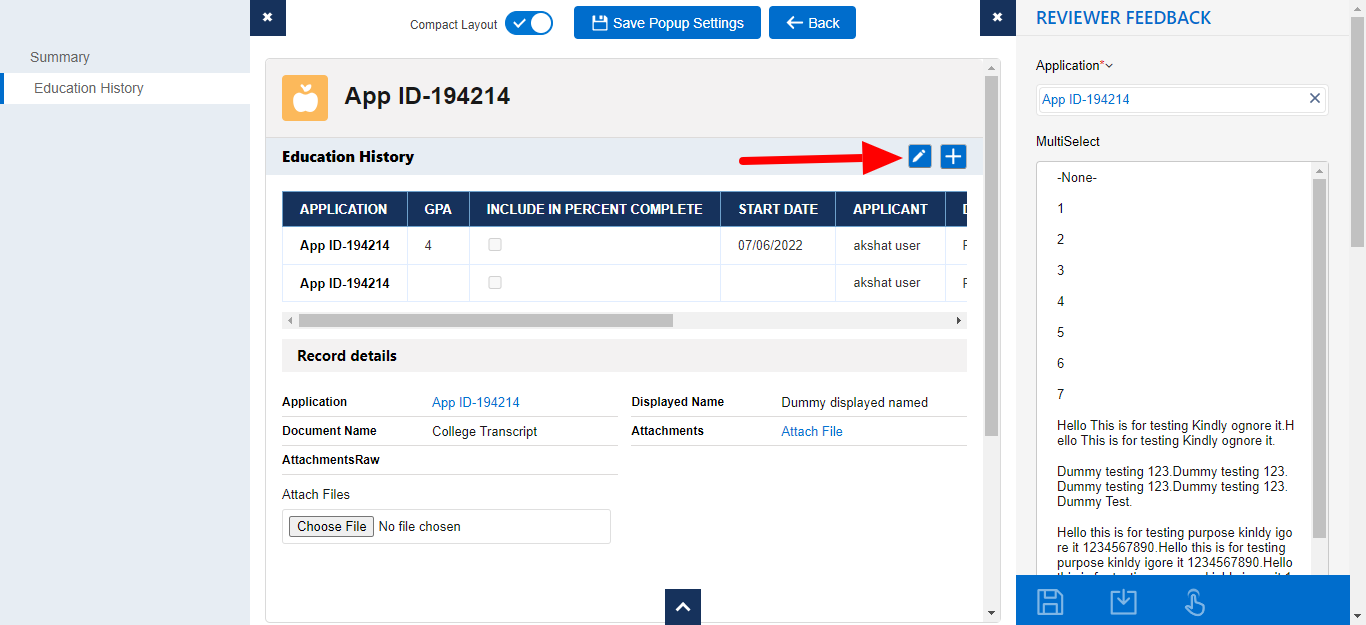
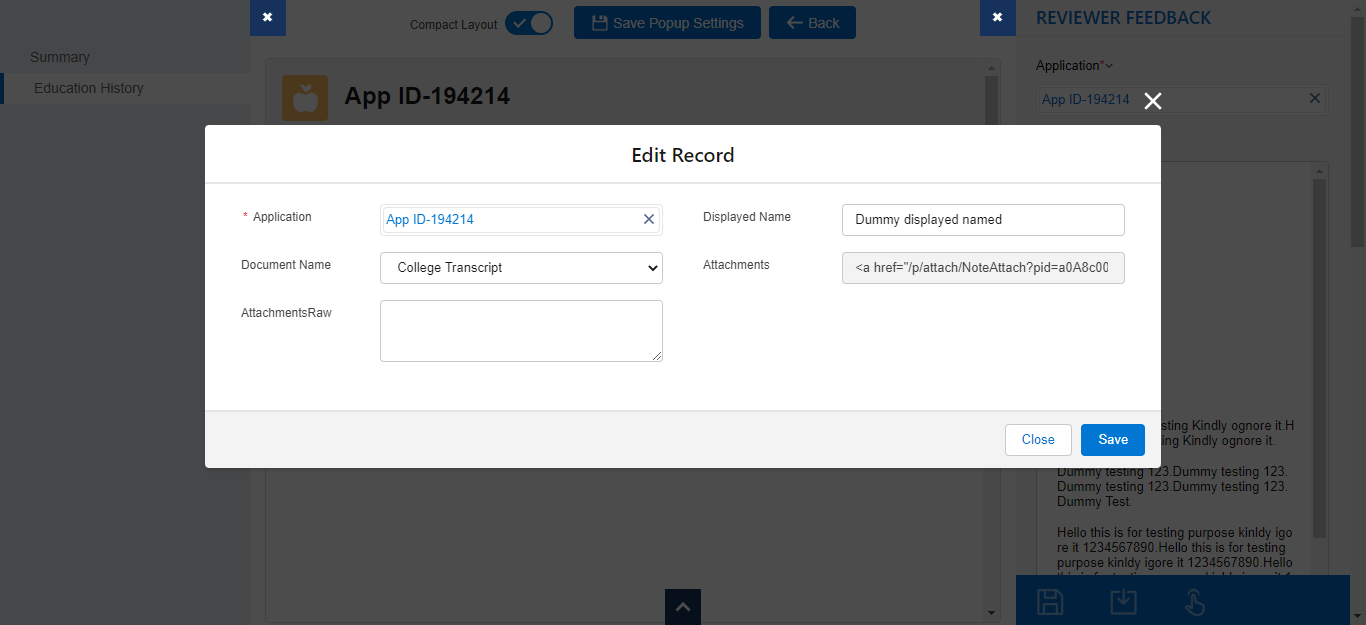
New Implementation on the FormBuilder Rx Review Screen
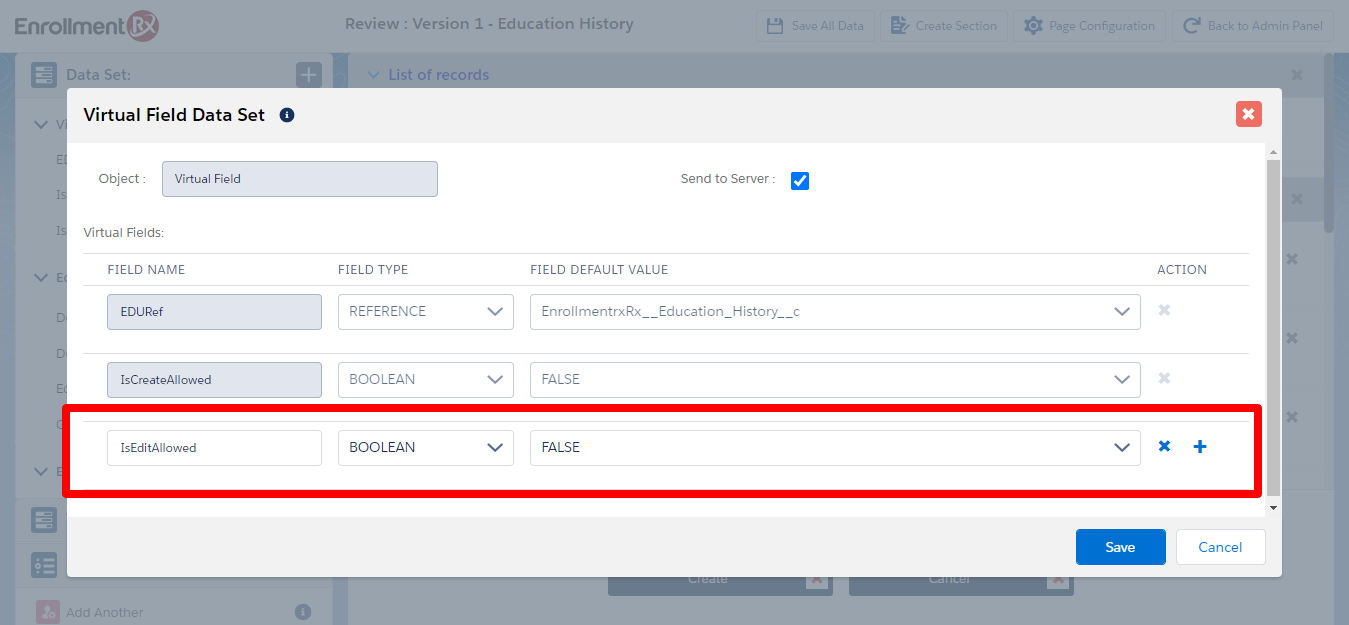
To implement the Edit Item feature on the FormBuilder Rx review screen, you'll need to follow the steps below.
- Create a Virtual Field named IsEditAllowed:
- Create two buttons, configured as follows:
- Update configuration
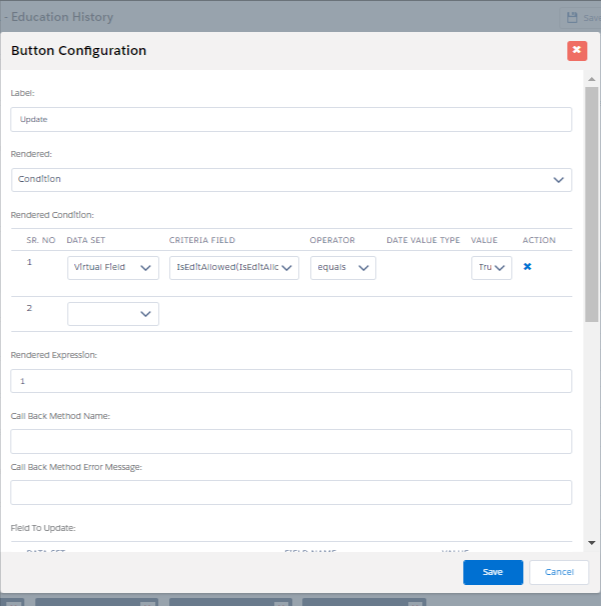
- Cancel configuration
- Update configuration
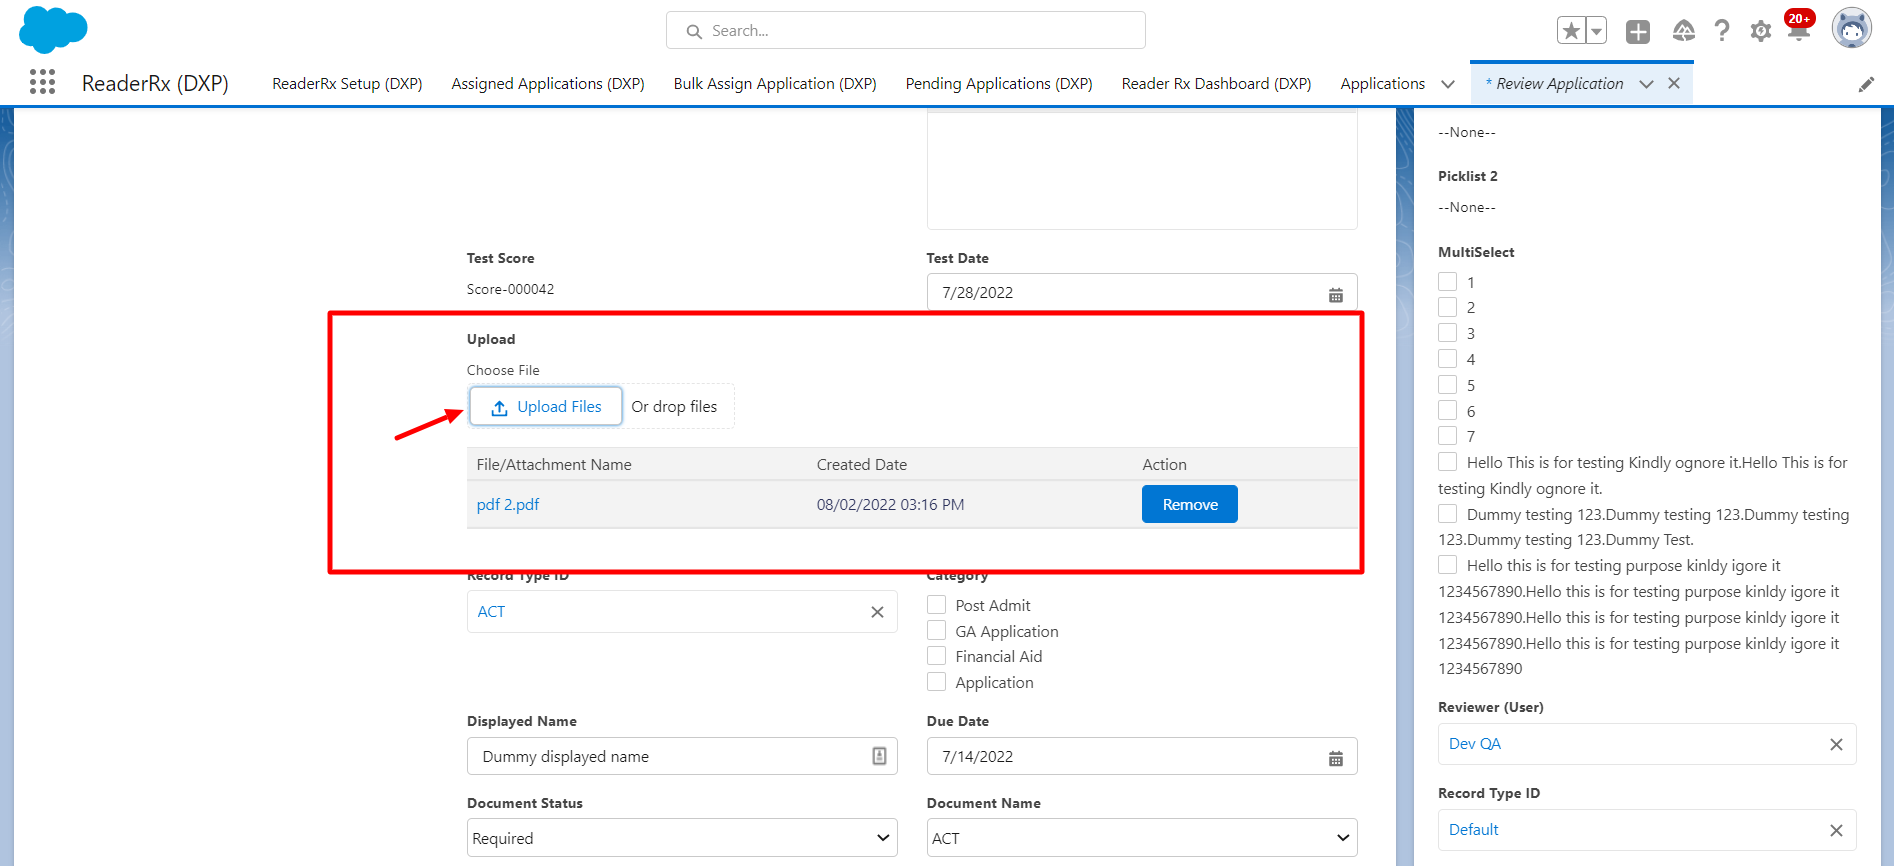
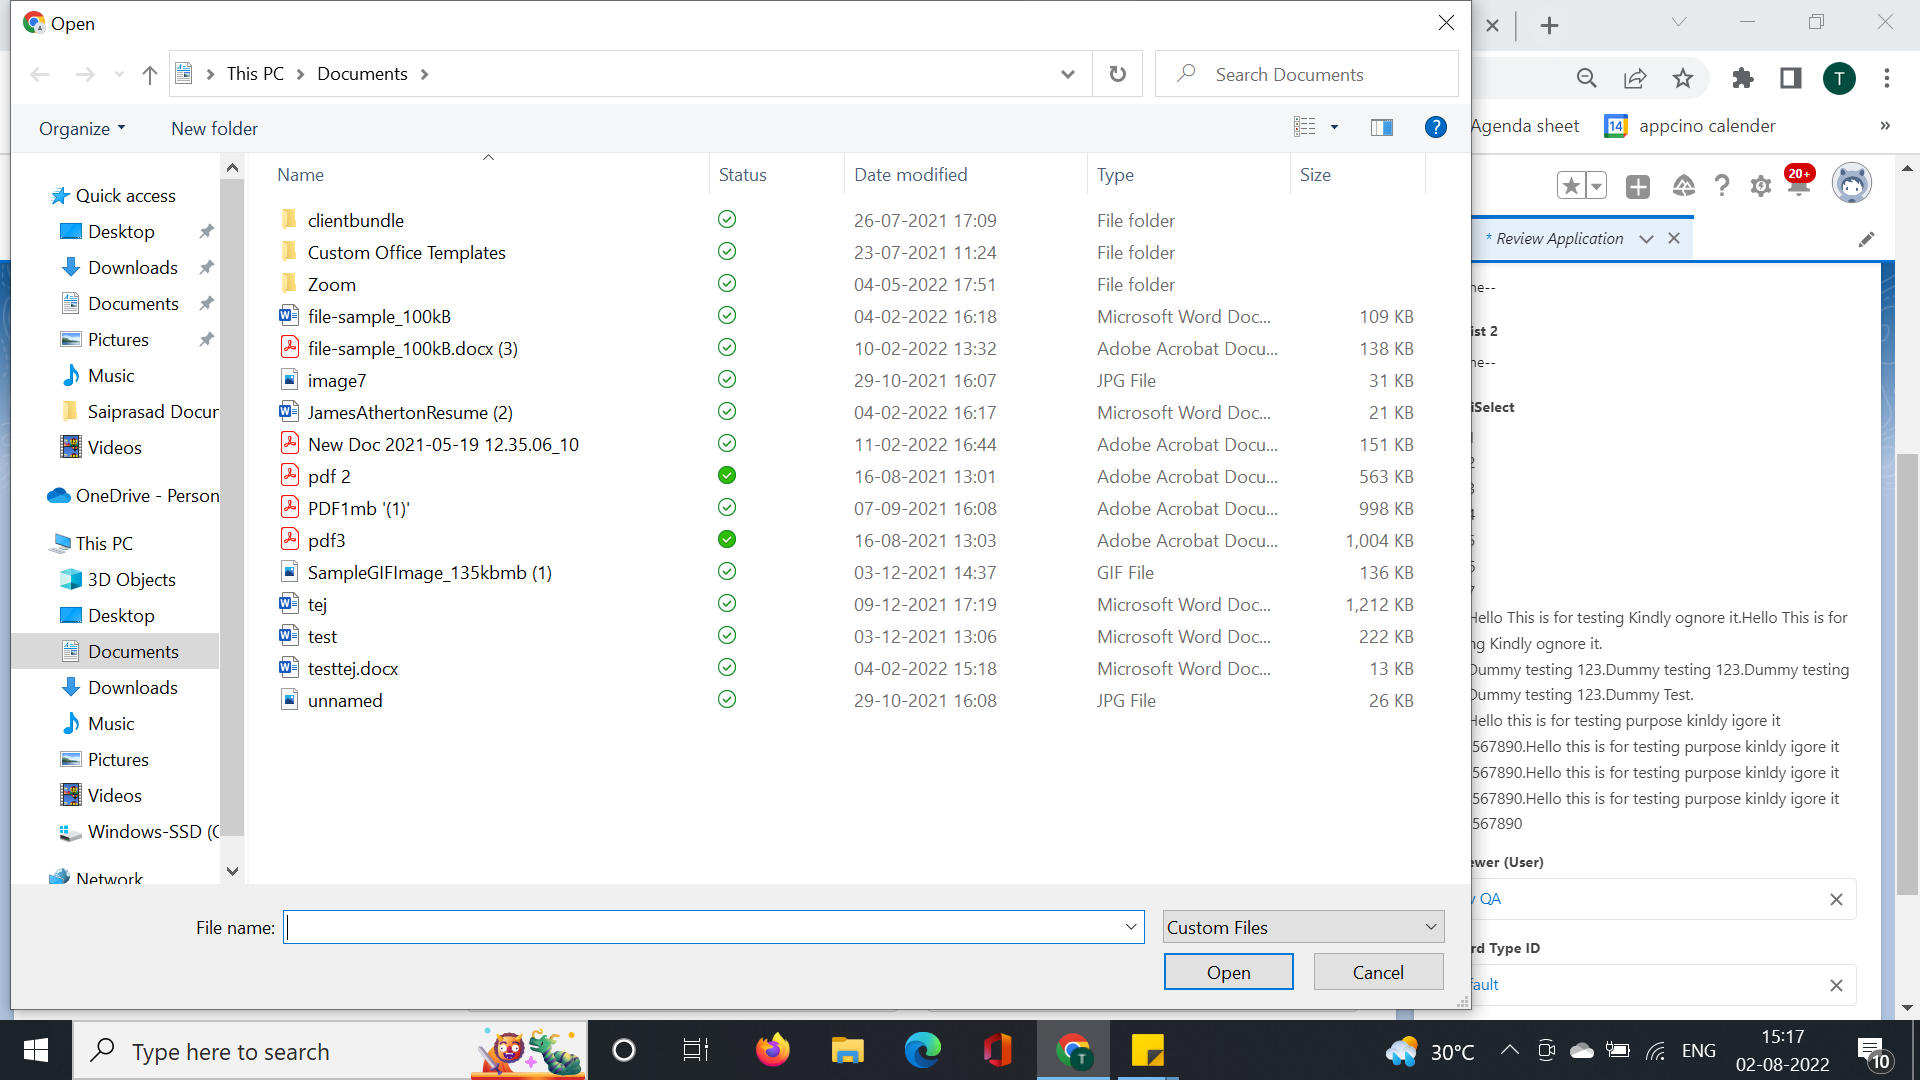
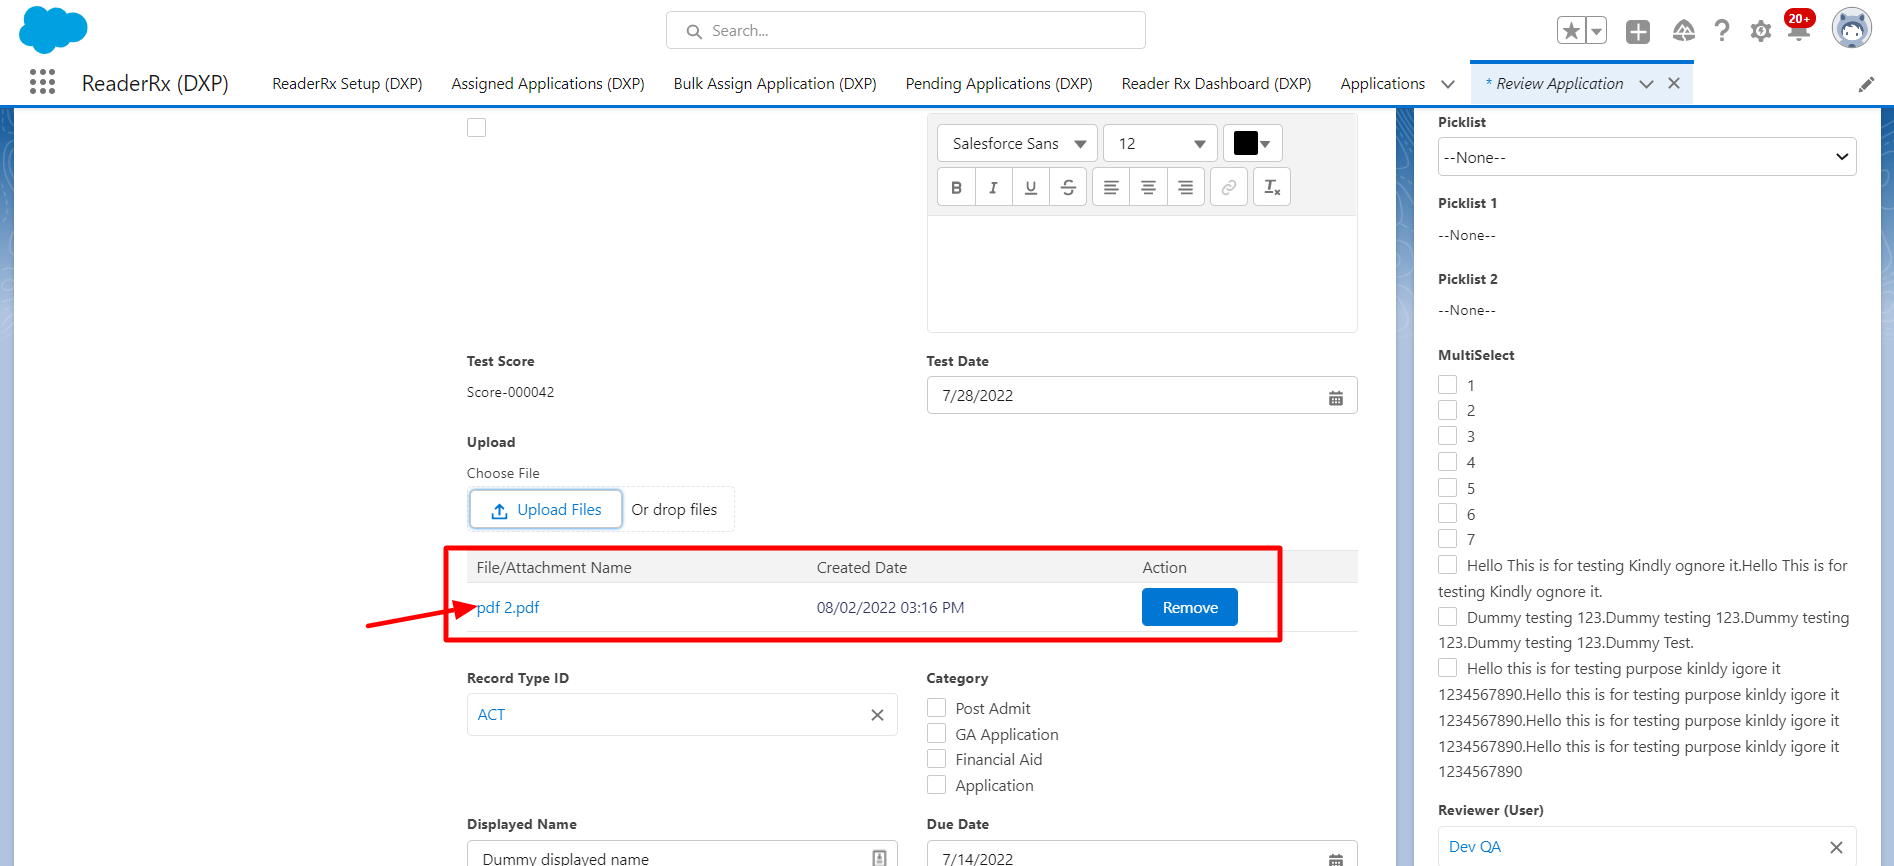
Steps to Upload and View Files from Review Screen
Original Implementation
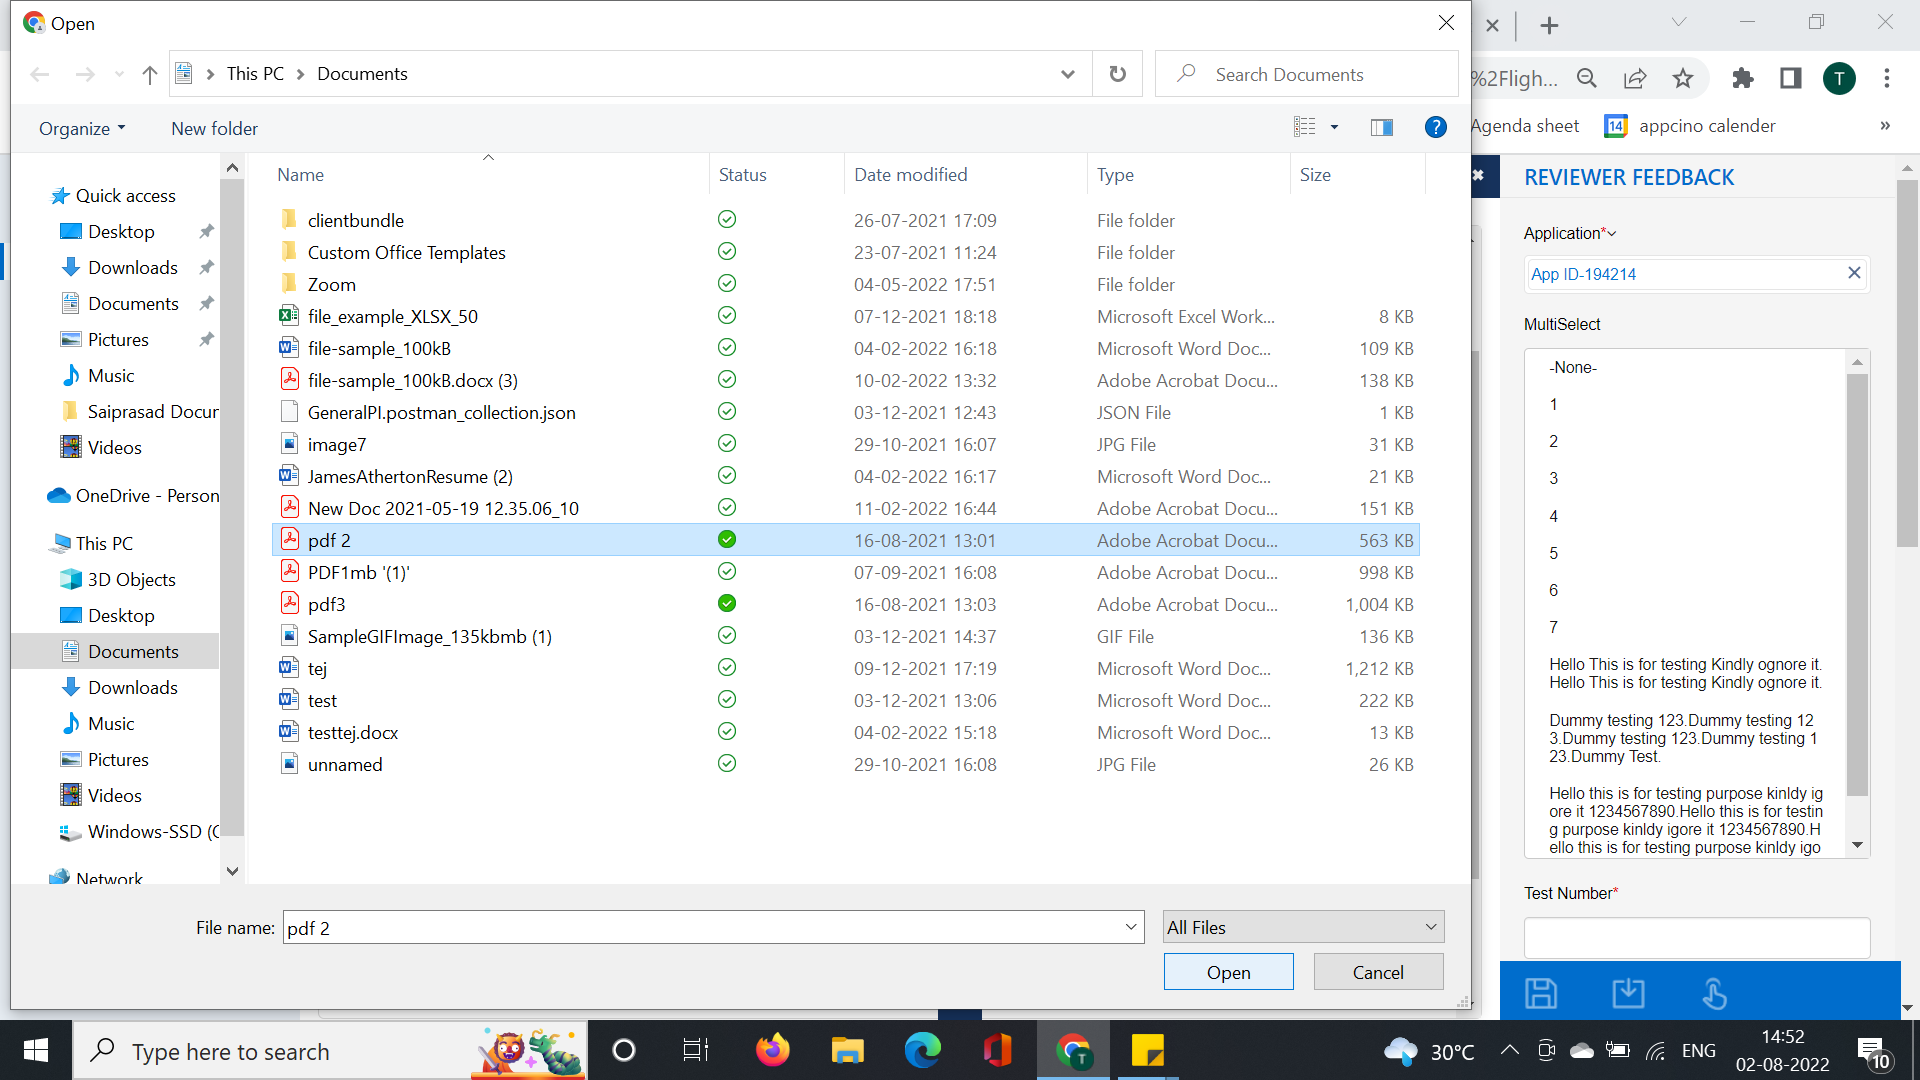
New Implementation on the FormBuilder Rx Review Screen
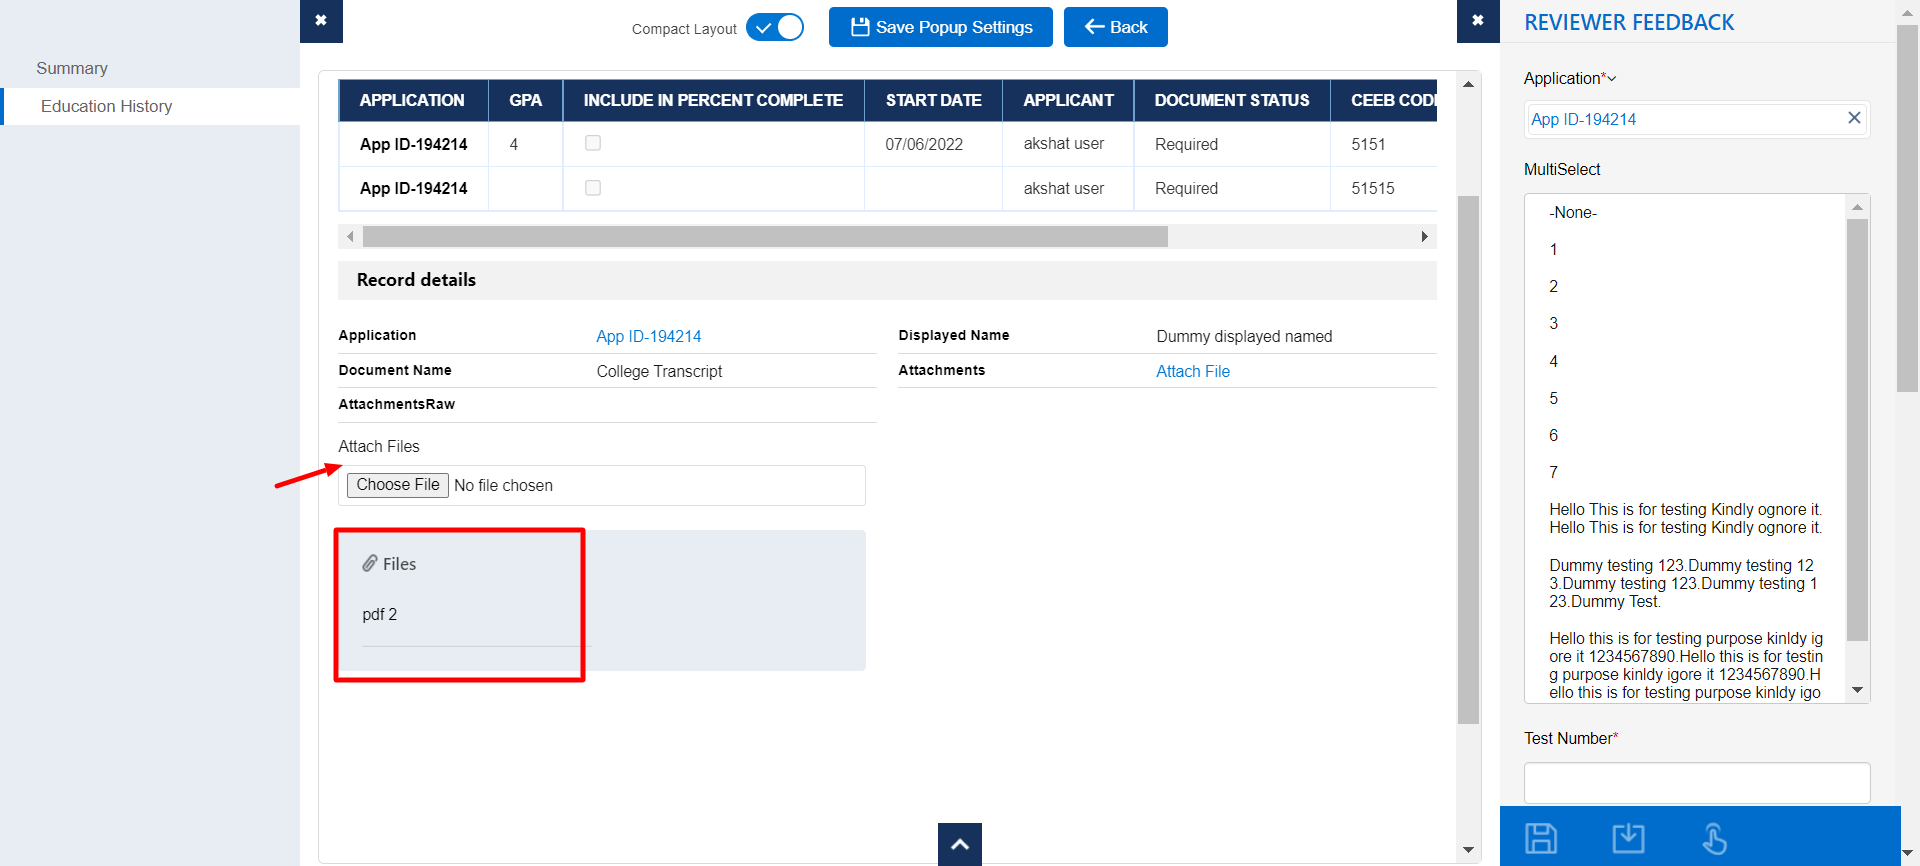
To configure the upload file feature on the FormBuilder Rx Review Screen, follow the below steps.
- Create a page for the Application Review Step
- Drag and drop the Upload component onto the Detail section.
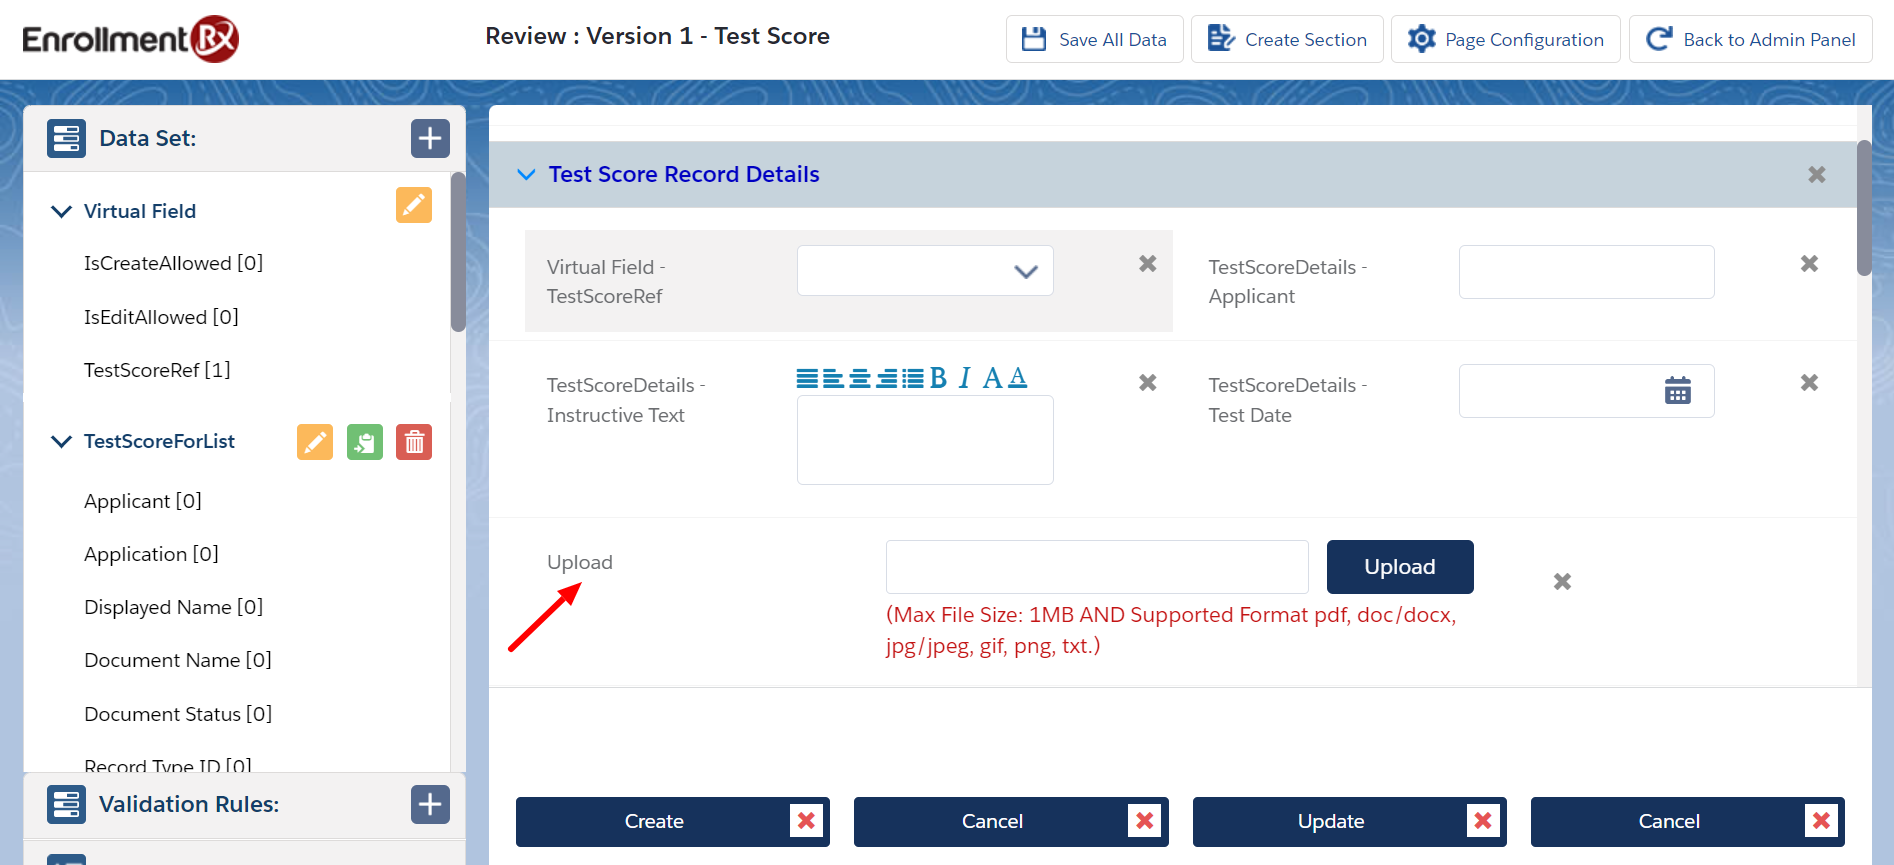
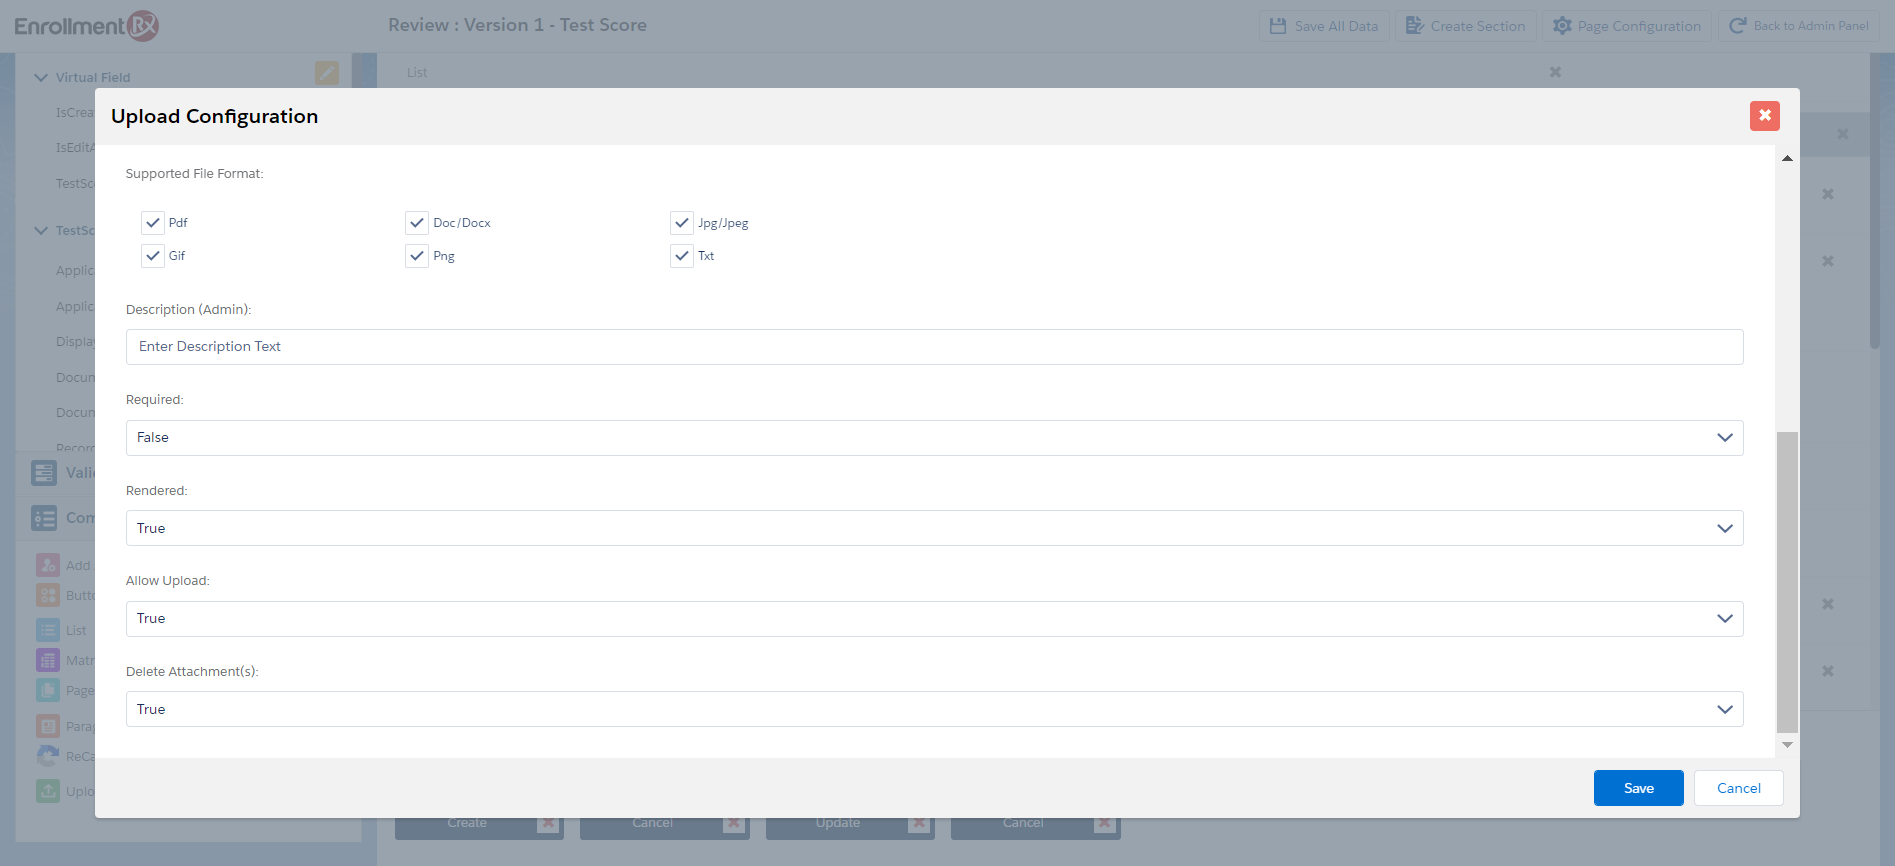
- Double click on the Upload component. The Upload Configuration window will appear.
Configure the compoenent according to your requirements.

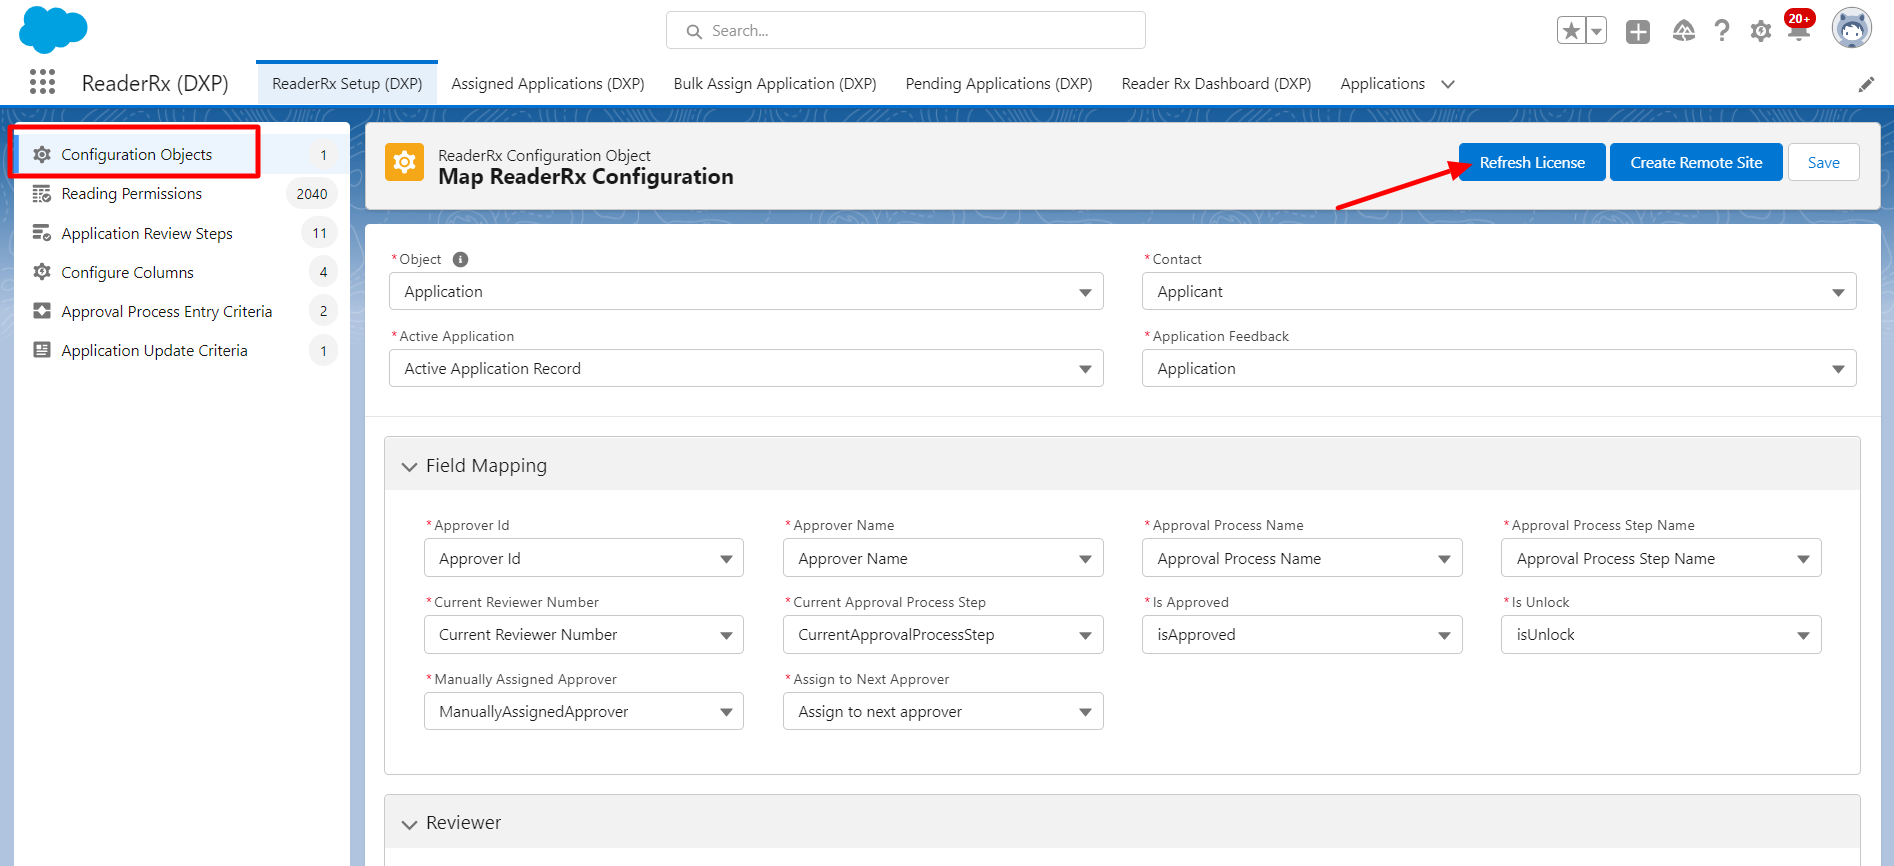
Steps for Document Annotation from the Review Screen
Original Implementation
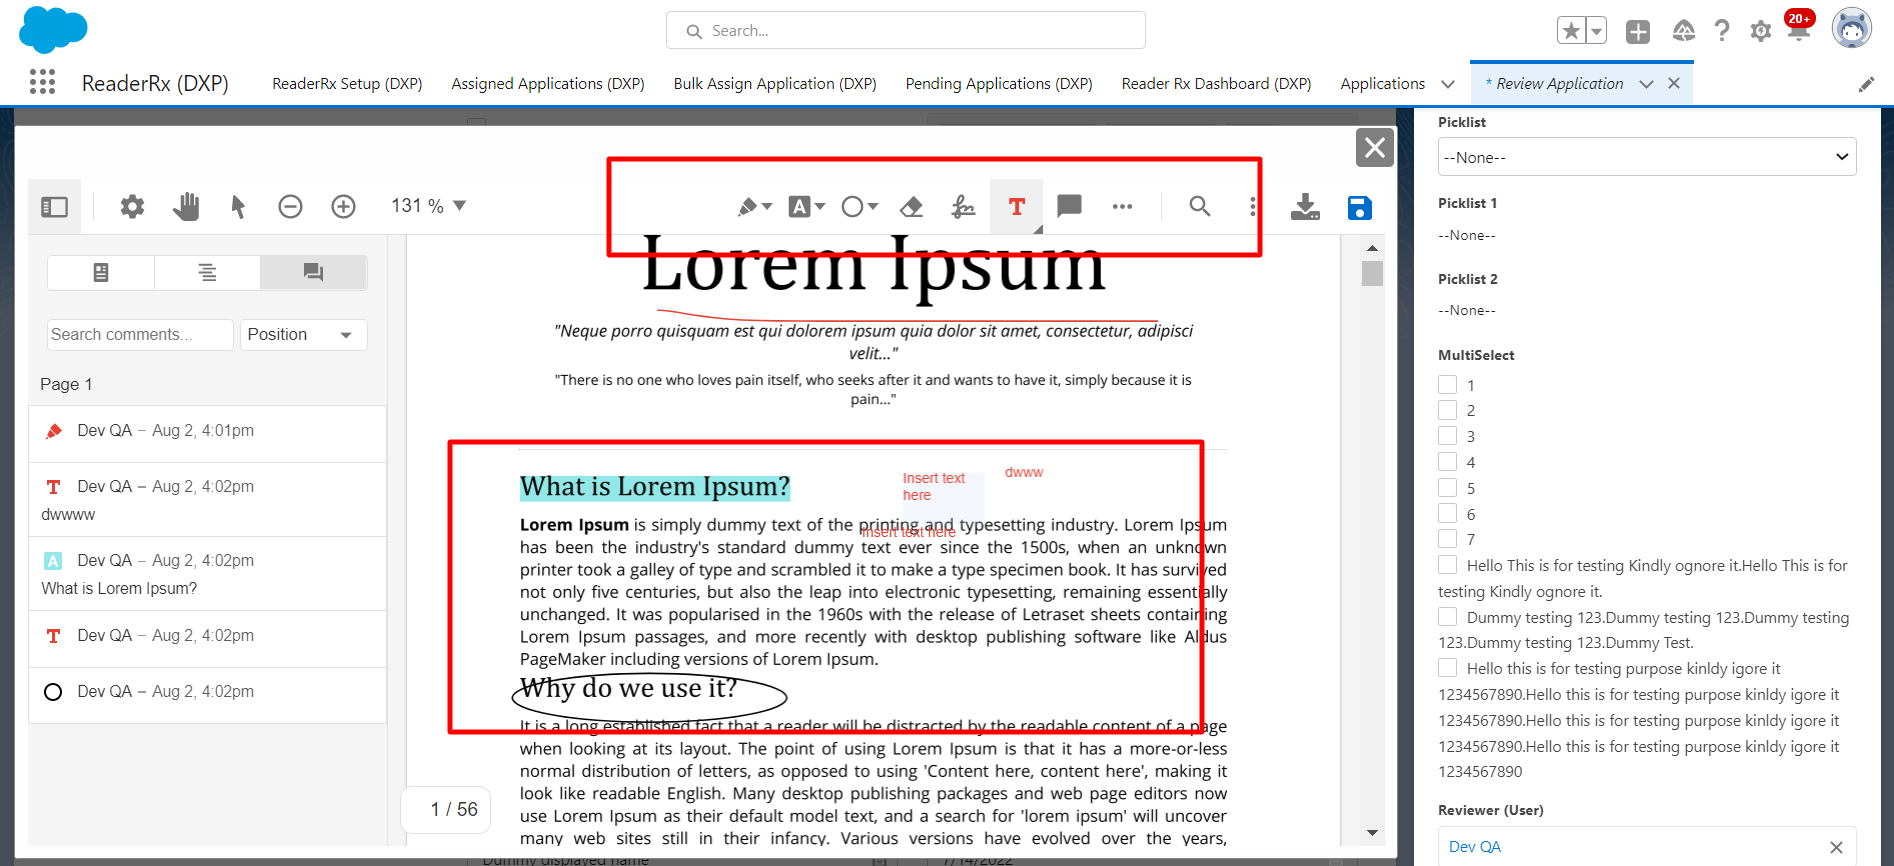
To annotate documents, use the PDFTron feature on the Review Screen. To enable the PDFTron license, click on “Refresh License” button from “Configuration Object” component on Reader Rx Setup tab.
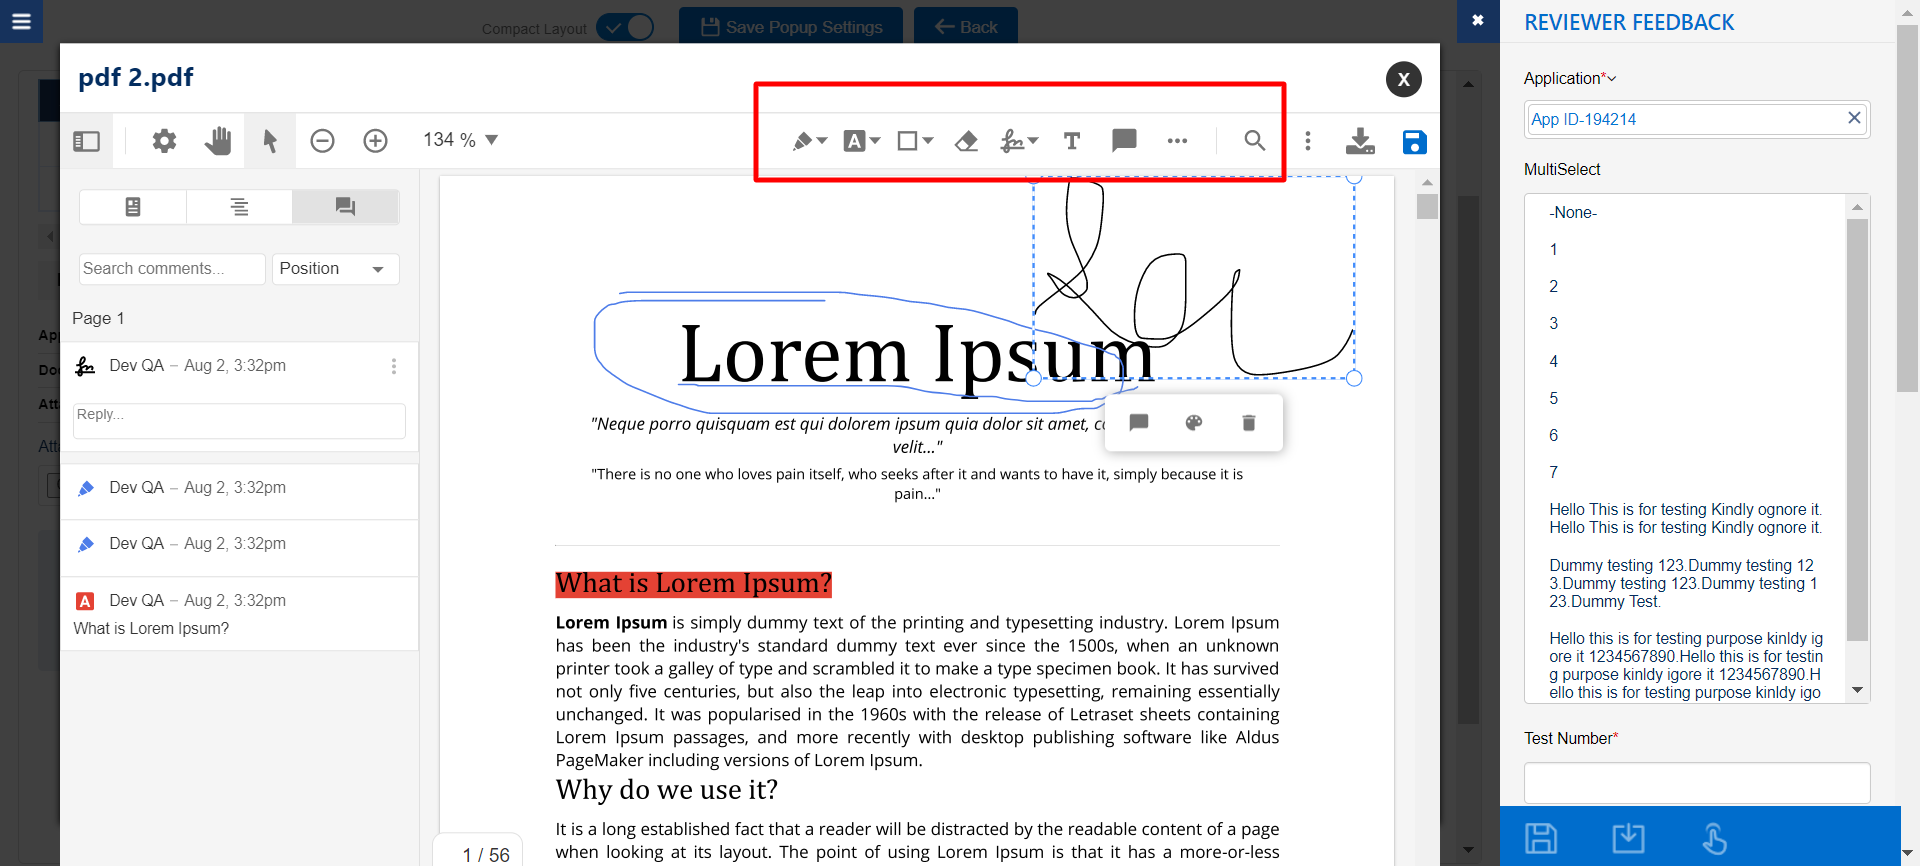
New Implementation on the FormBuilder Rx Review Screen
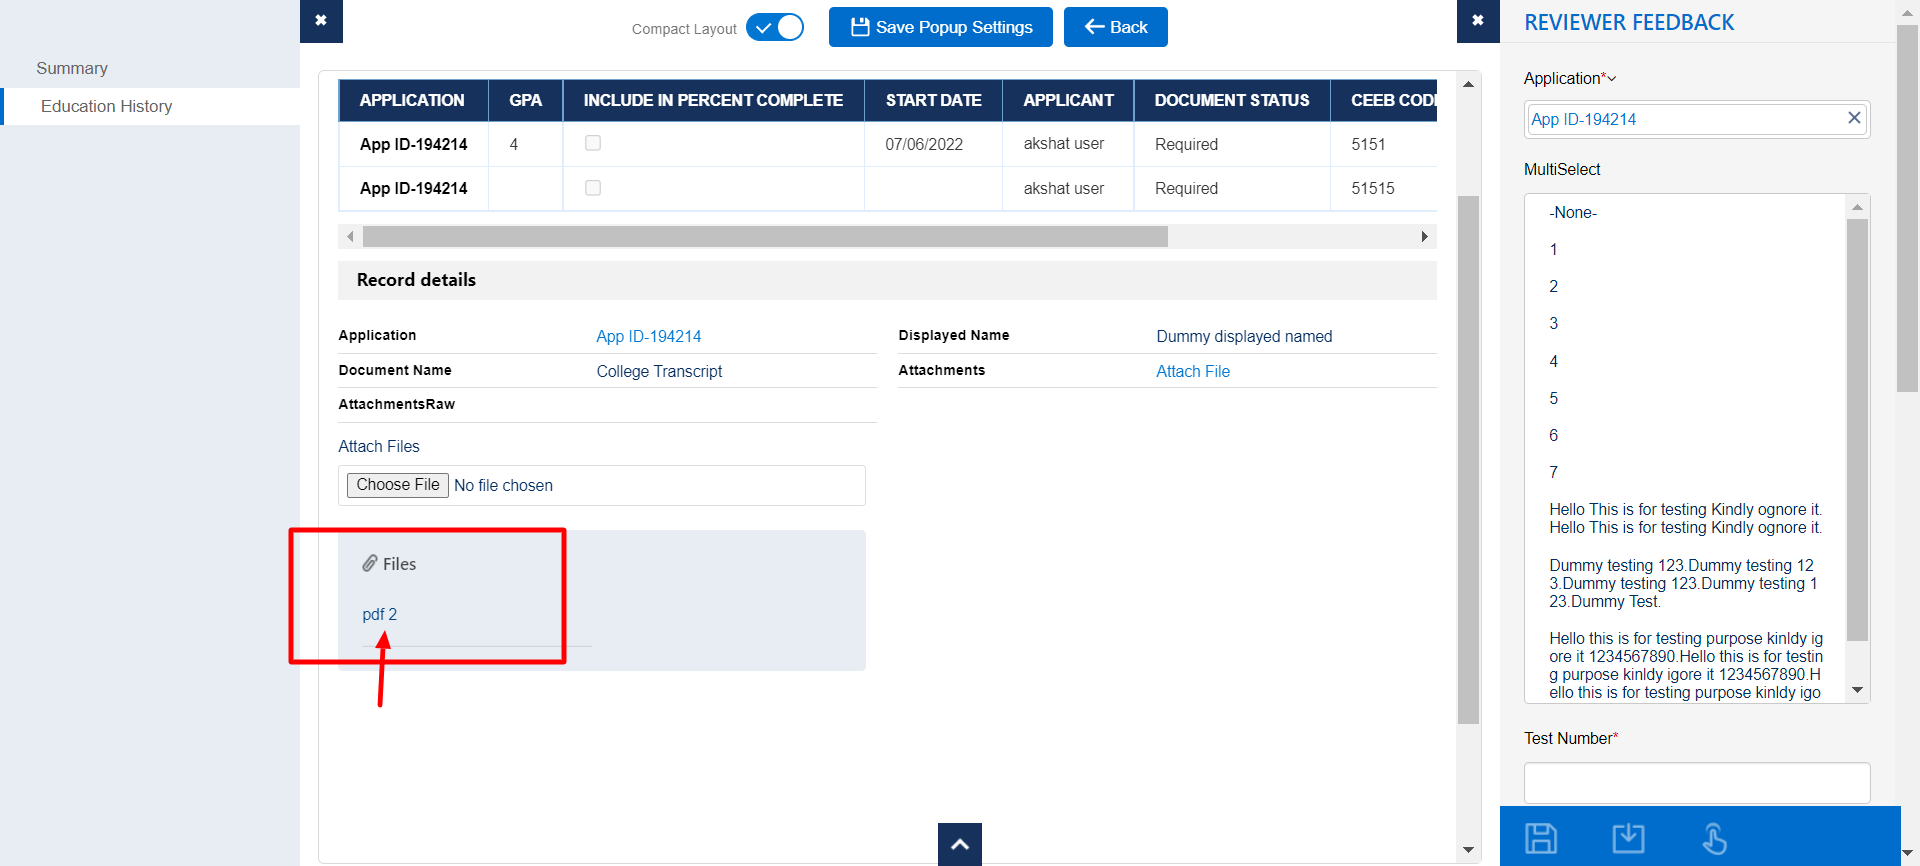
To achieve this PDFTron functionality on the FormBuilder Rx Review Screen, follow the below steps.
- To enable the PDFTron license, click the "Refresh License" button from the
Configuration Object component of the Reader Rx setup tab.Note:The PDFTron license must be enabled via the LMA.
- Create a page for the Application Review Step.
- Drag and drop the Upload component into the Detail section.
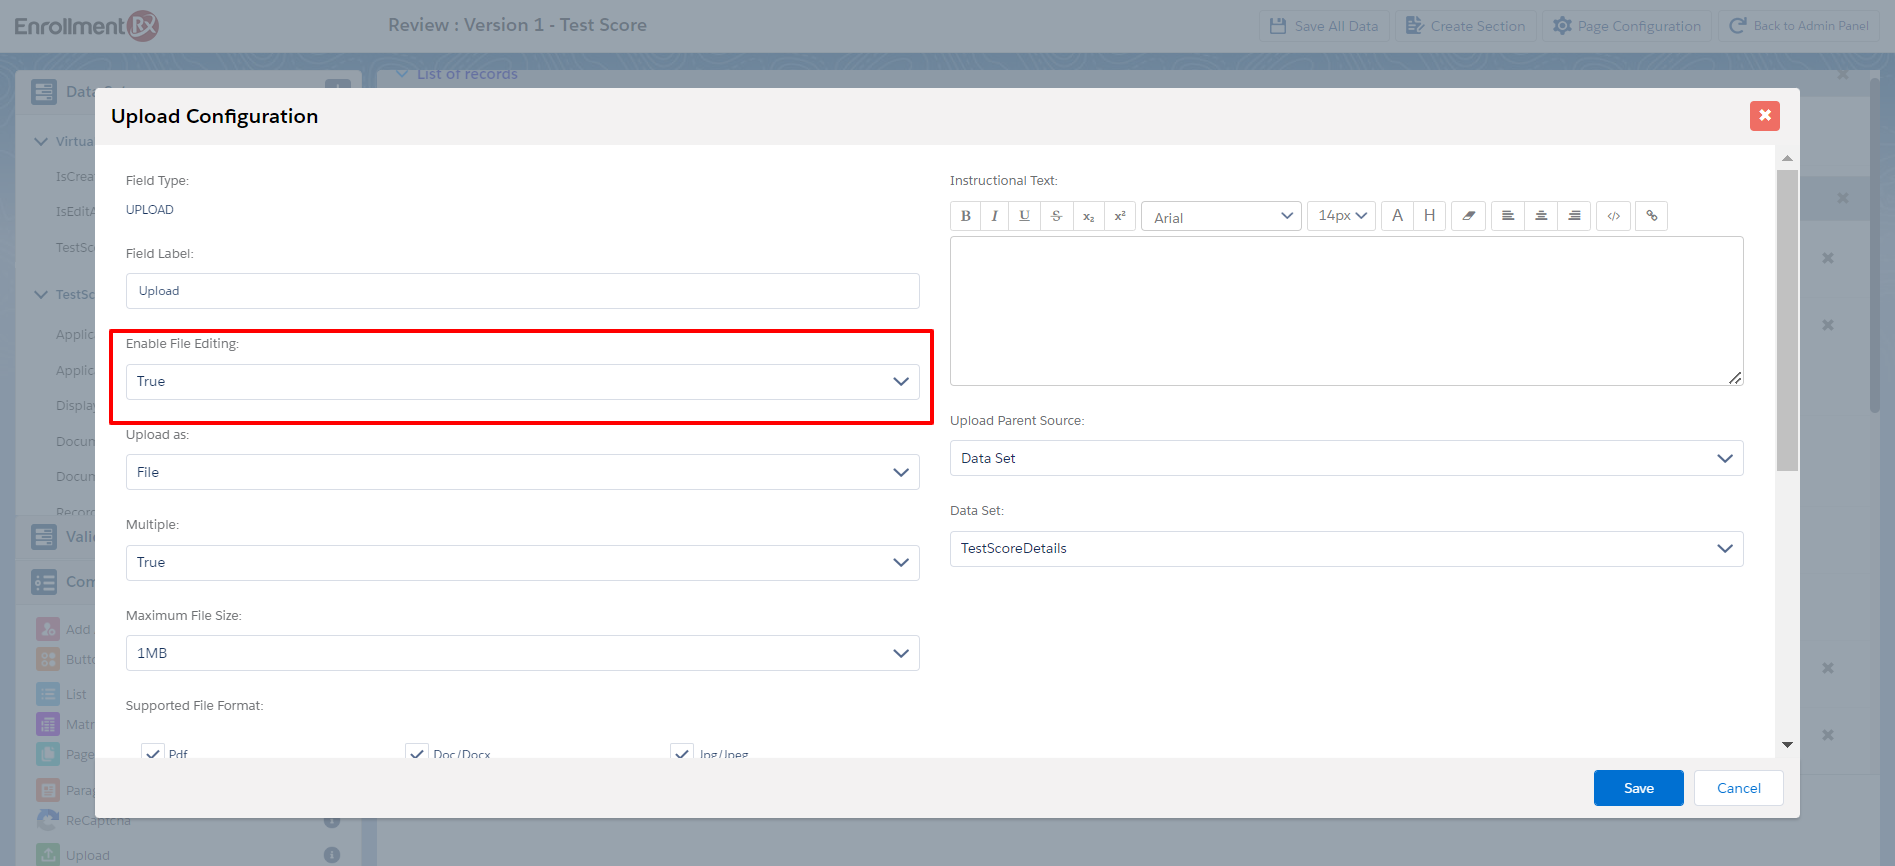
- Double click on the Upload component and configure as follows.
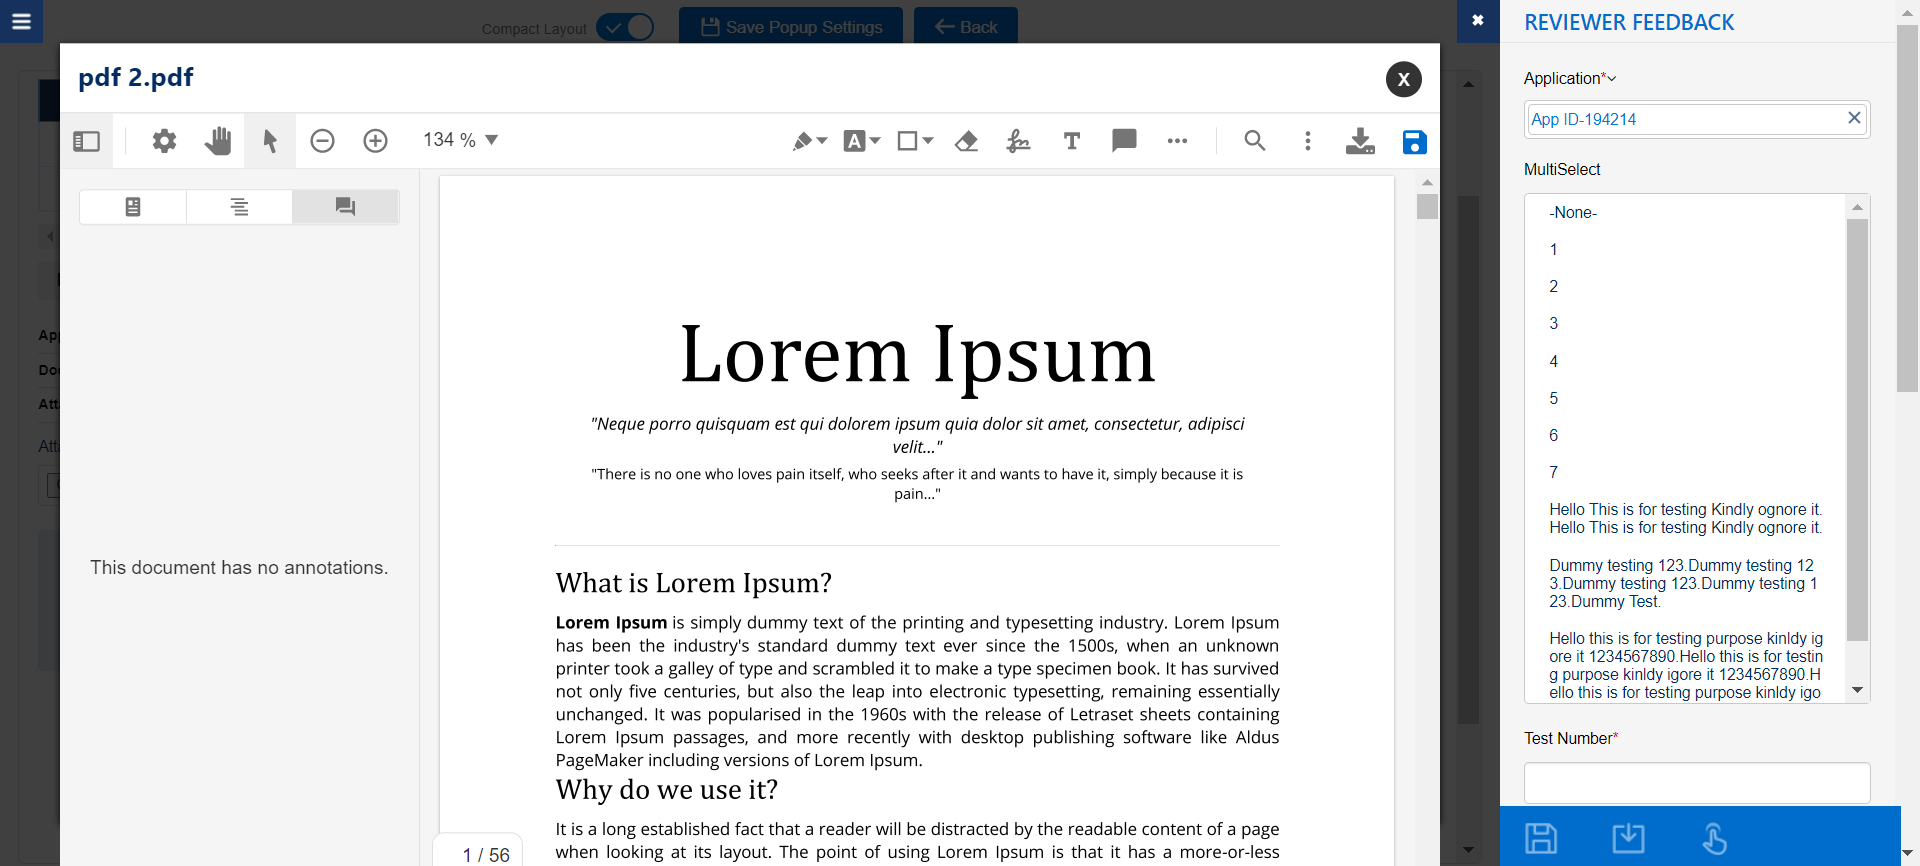
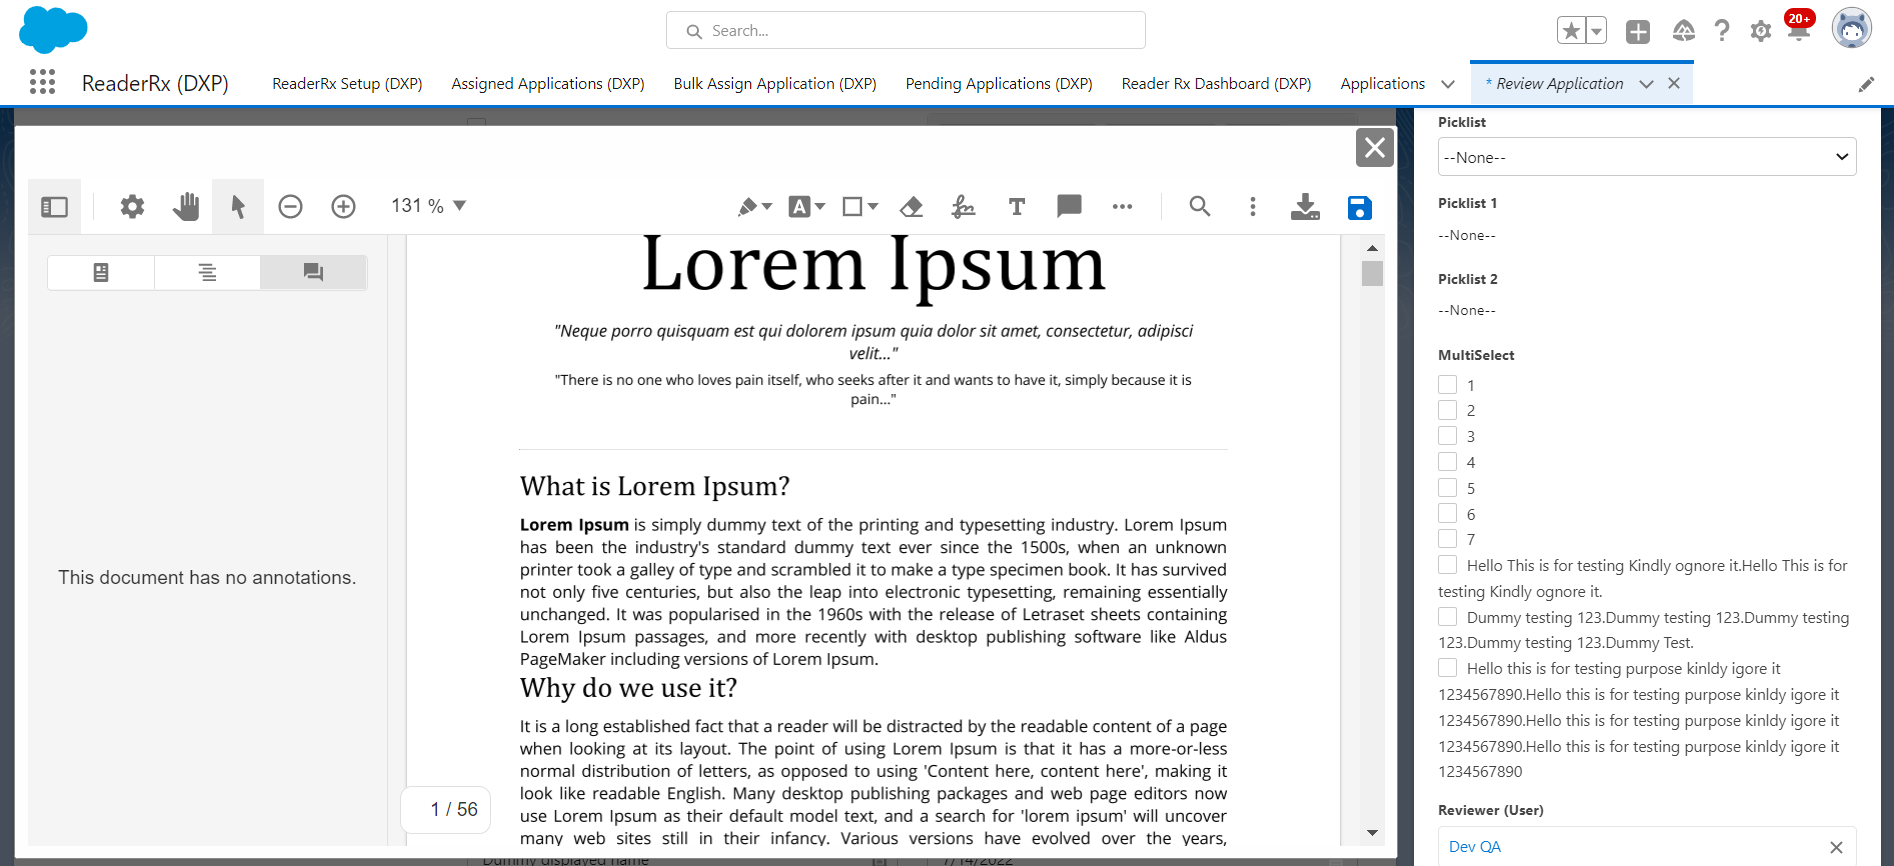
- Set the "Enable File Editing" field value to true. If this field value is false, then
after clicking on the attached filename, the file will get downloaded instead of opened
for annotation.
Steps to Configure the Feedback Record Type Page
Original Implementation
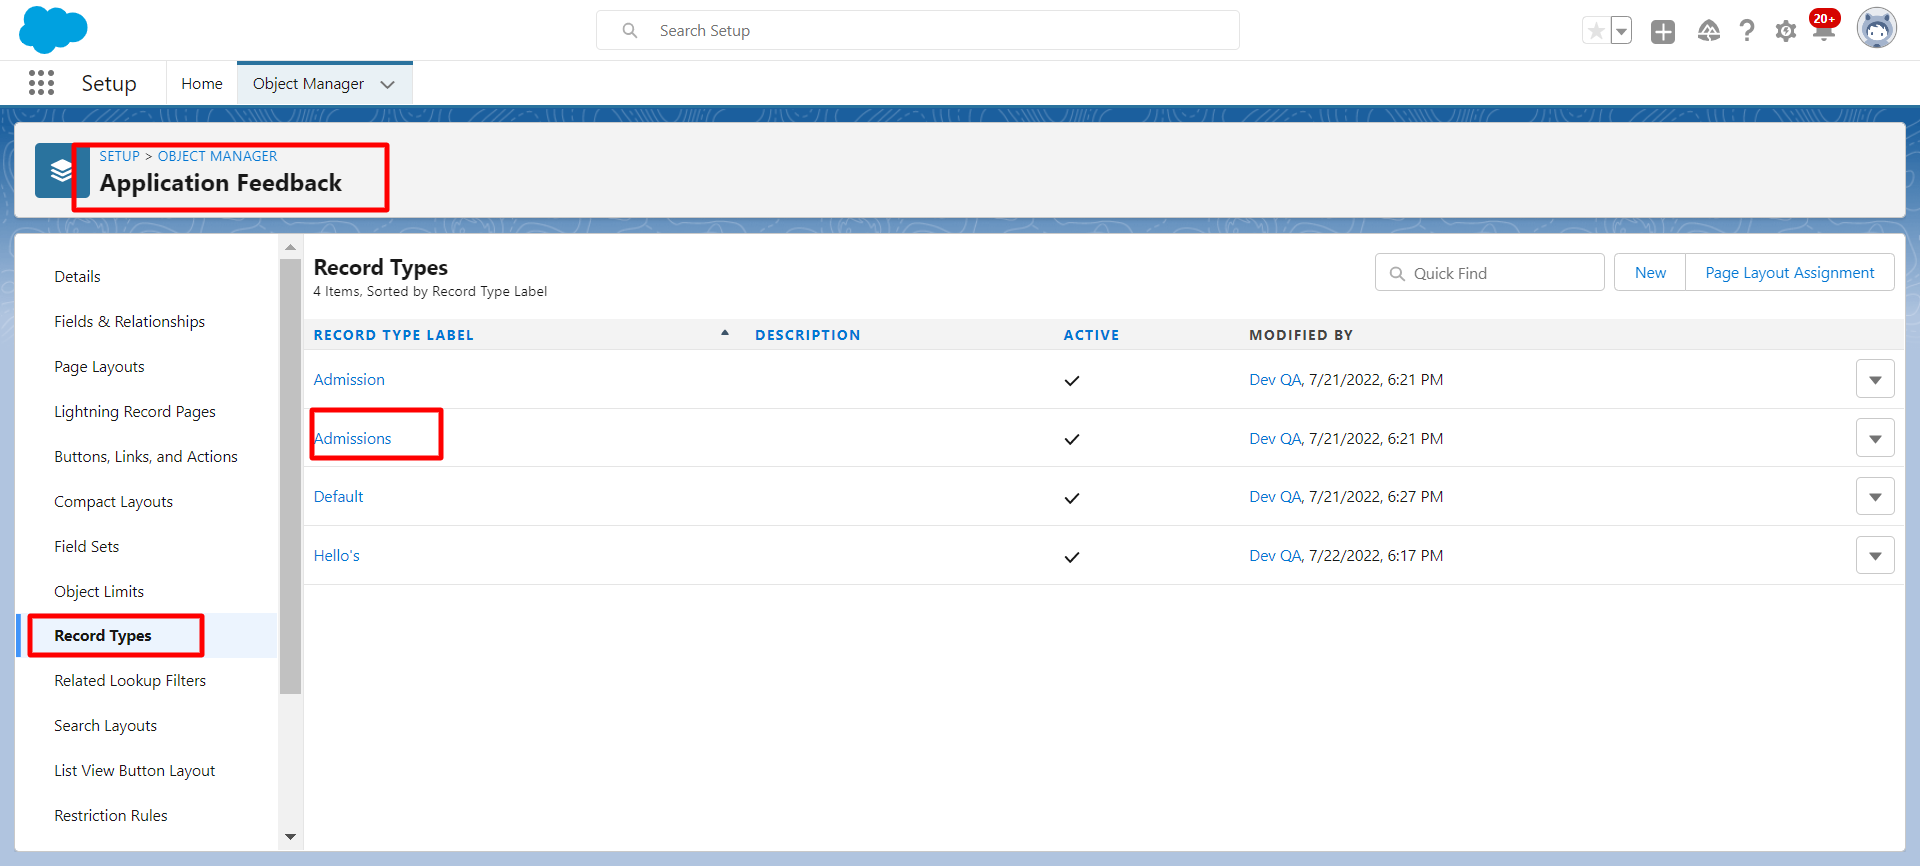
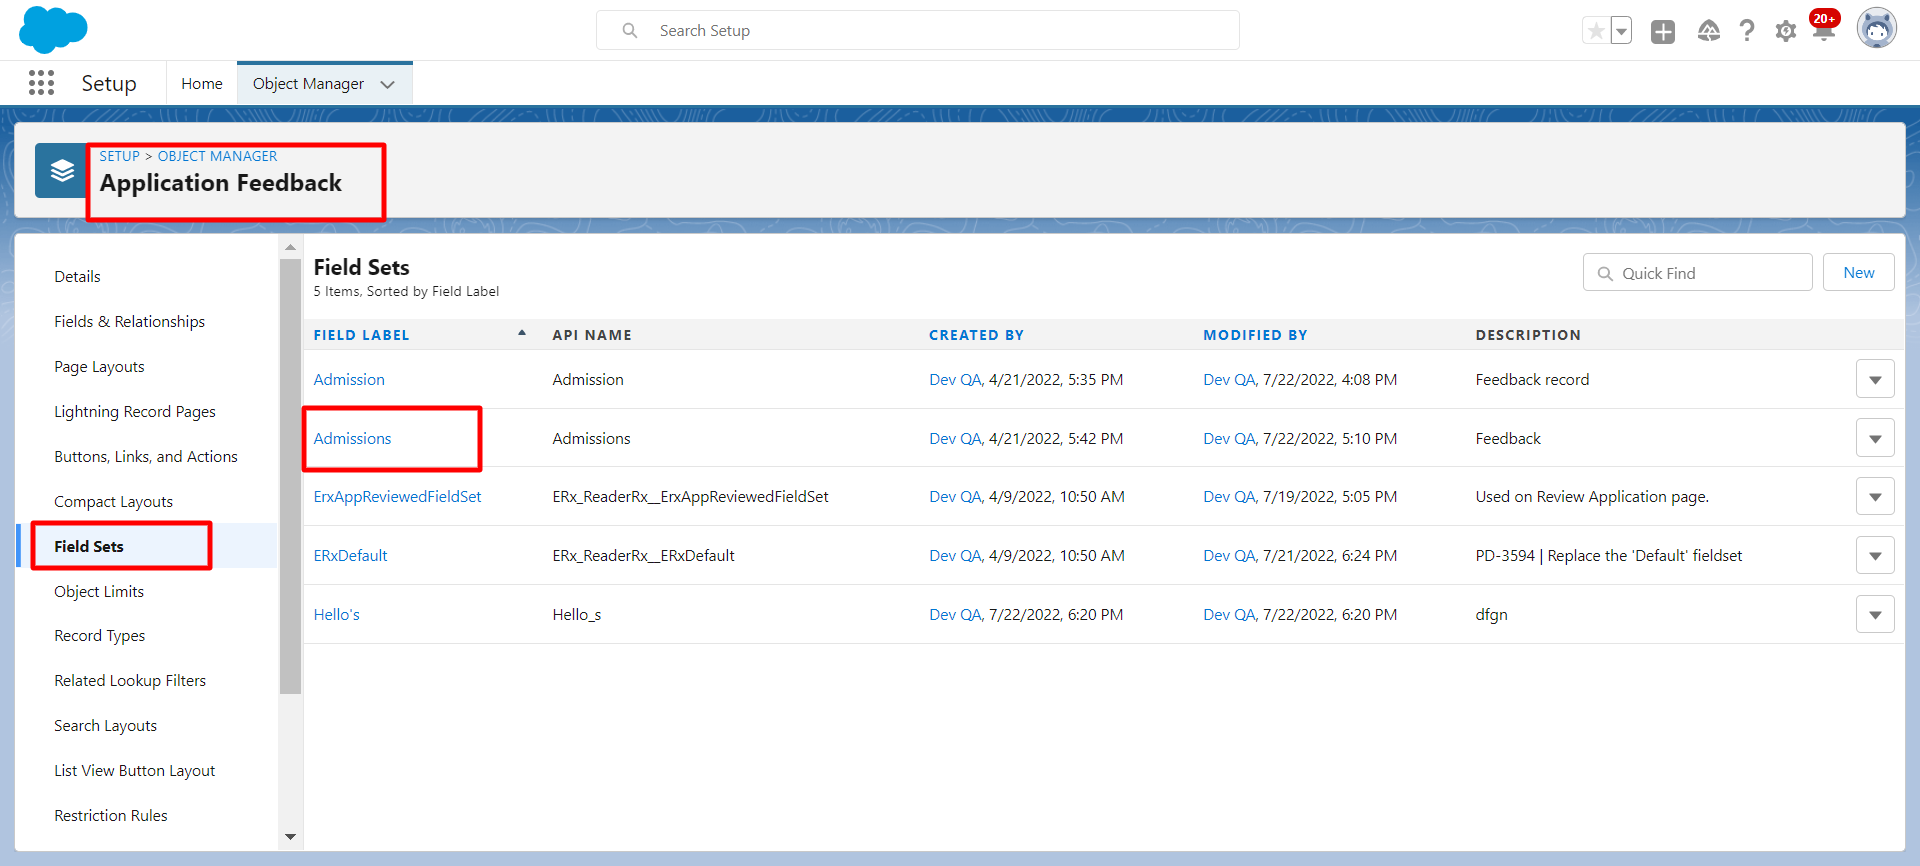
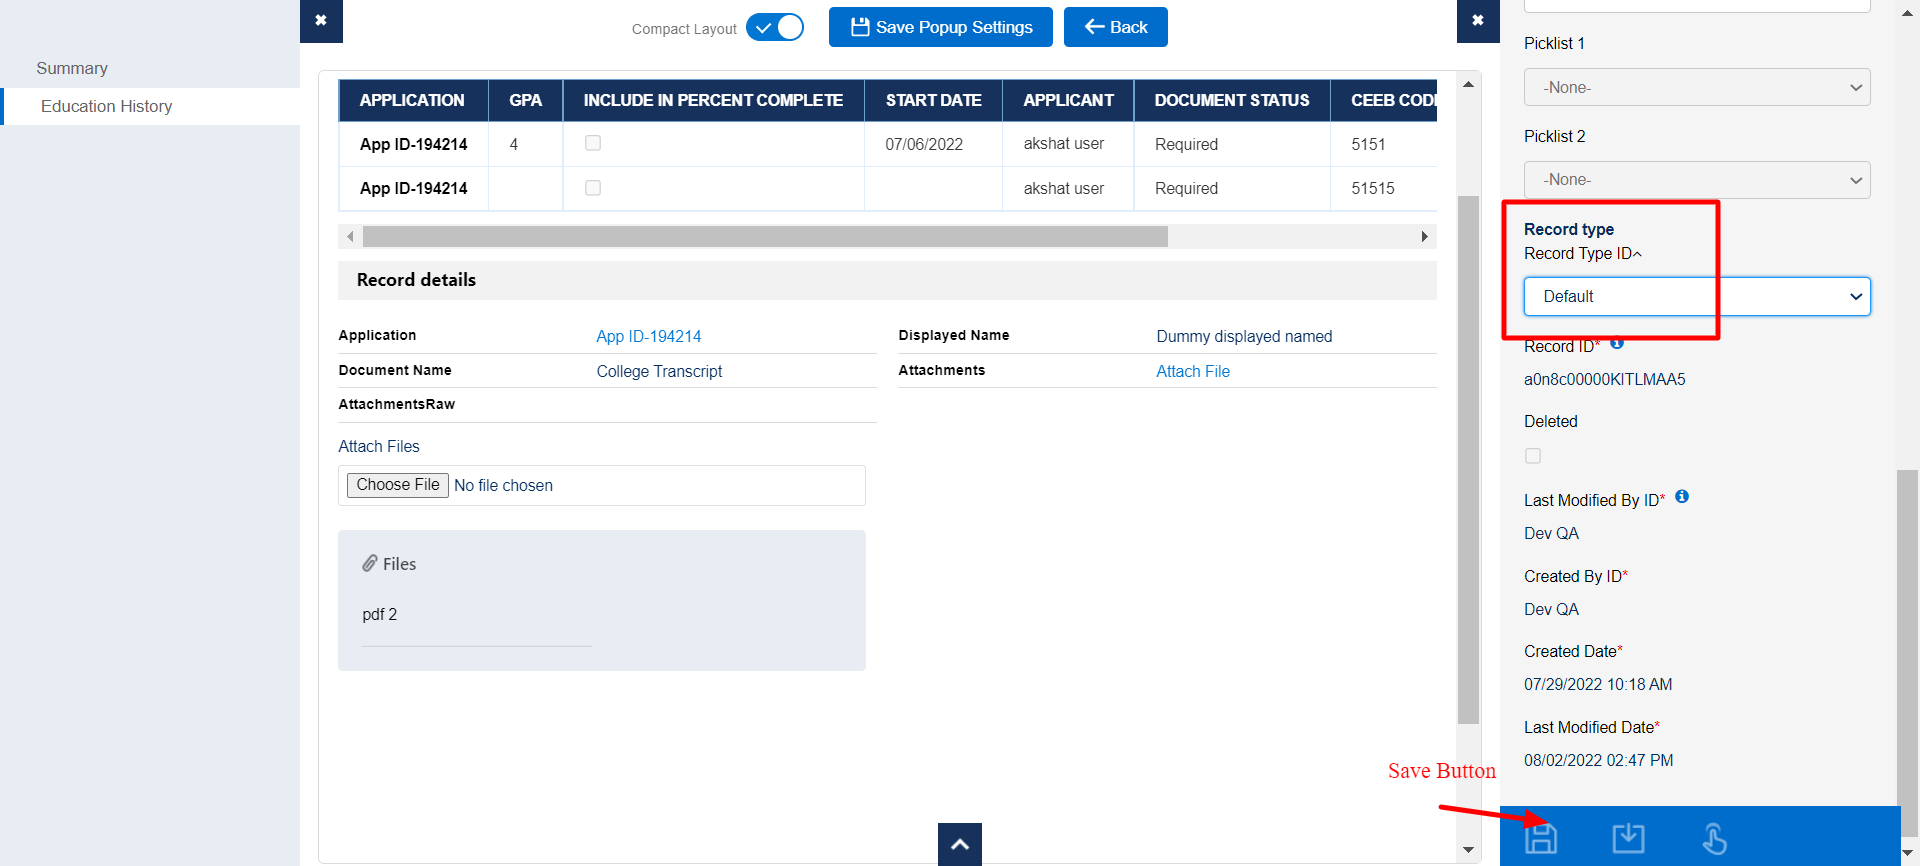
Create two field sets in the Review Step object according to the Feedback record type.
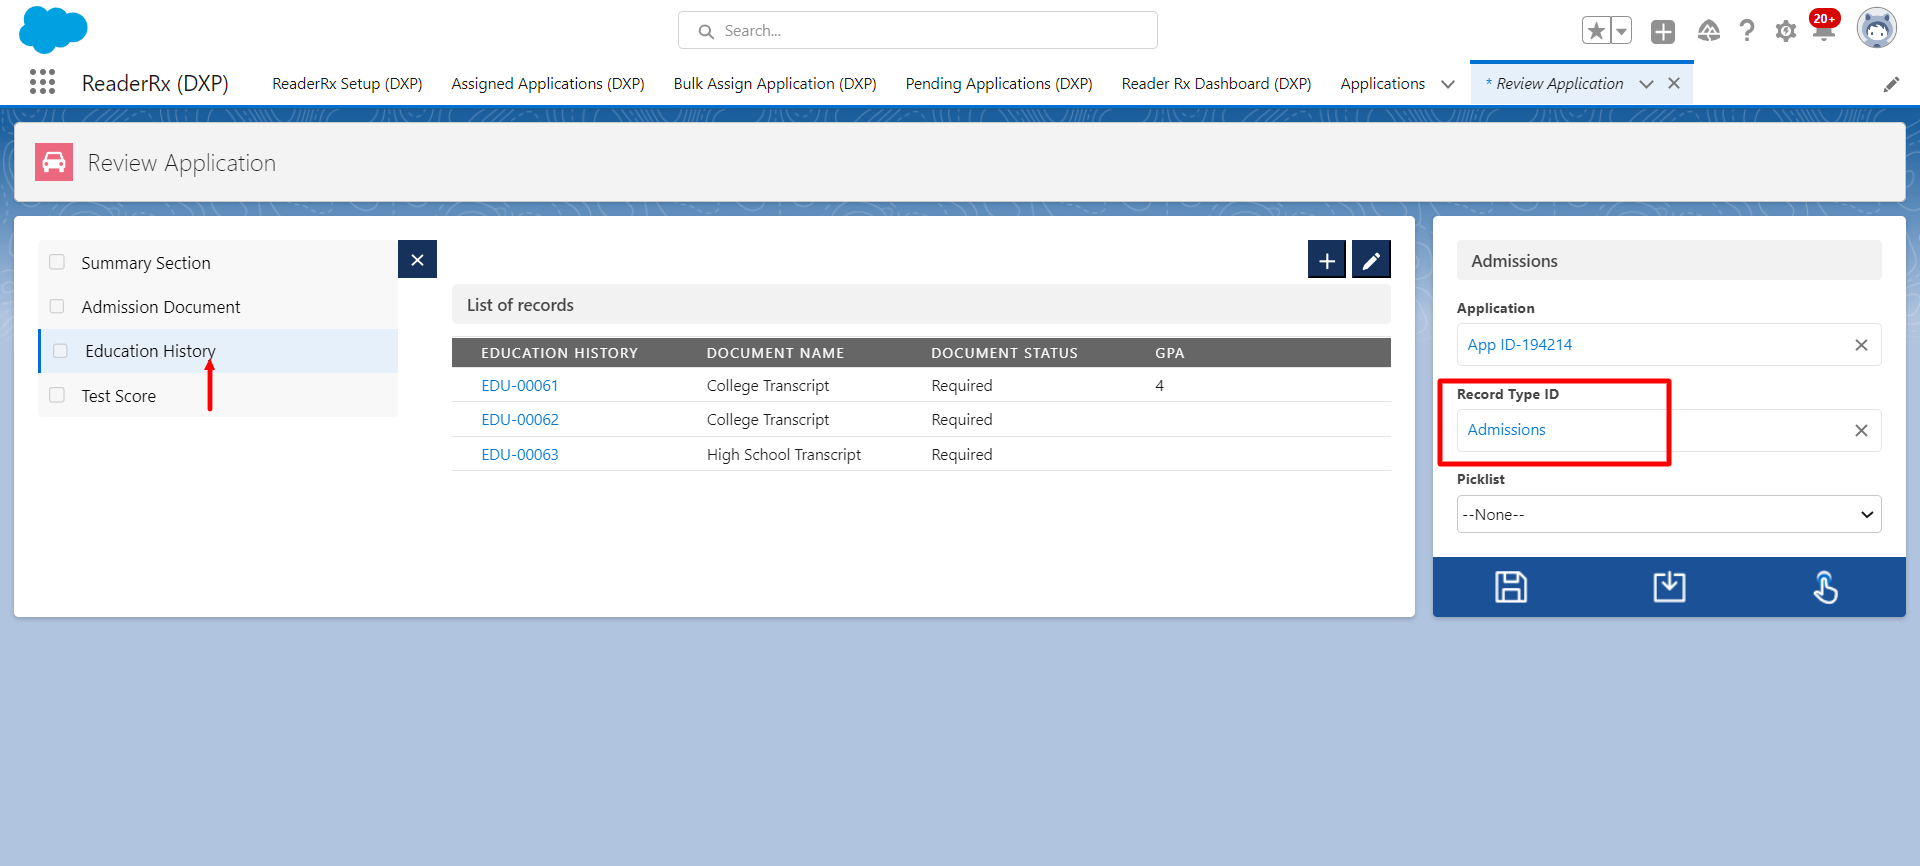
Navigate to the review screen and change the feedback record type from "Default" to "Admissions" and click the Save button.
New Implementation on the FormBuilder Rx Review Screen
To achieve this same functionality on the FormBuilder Rx review screen, follow the below steps.
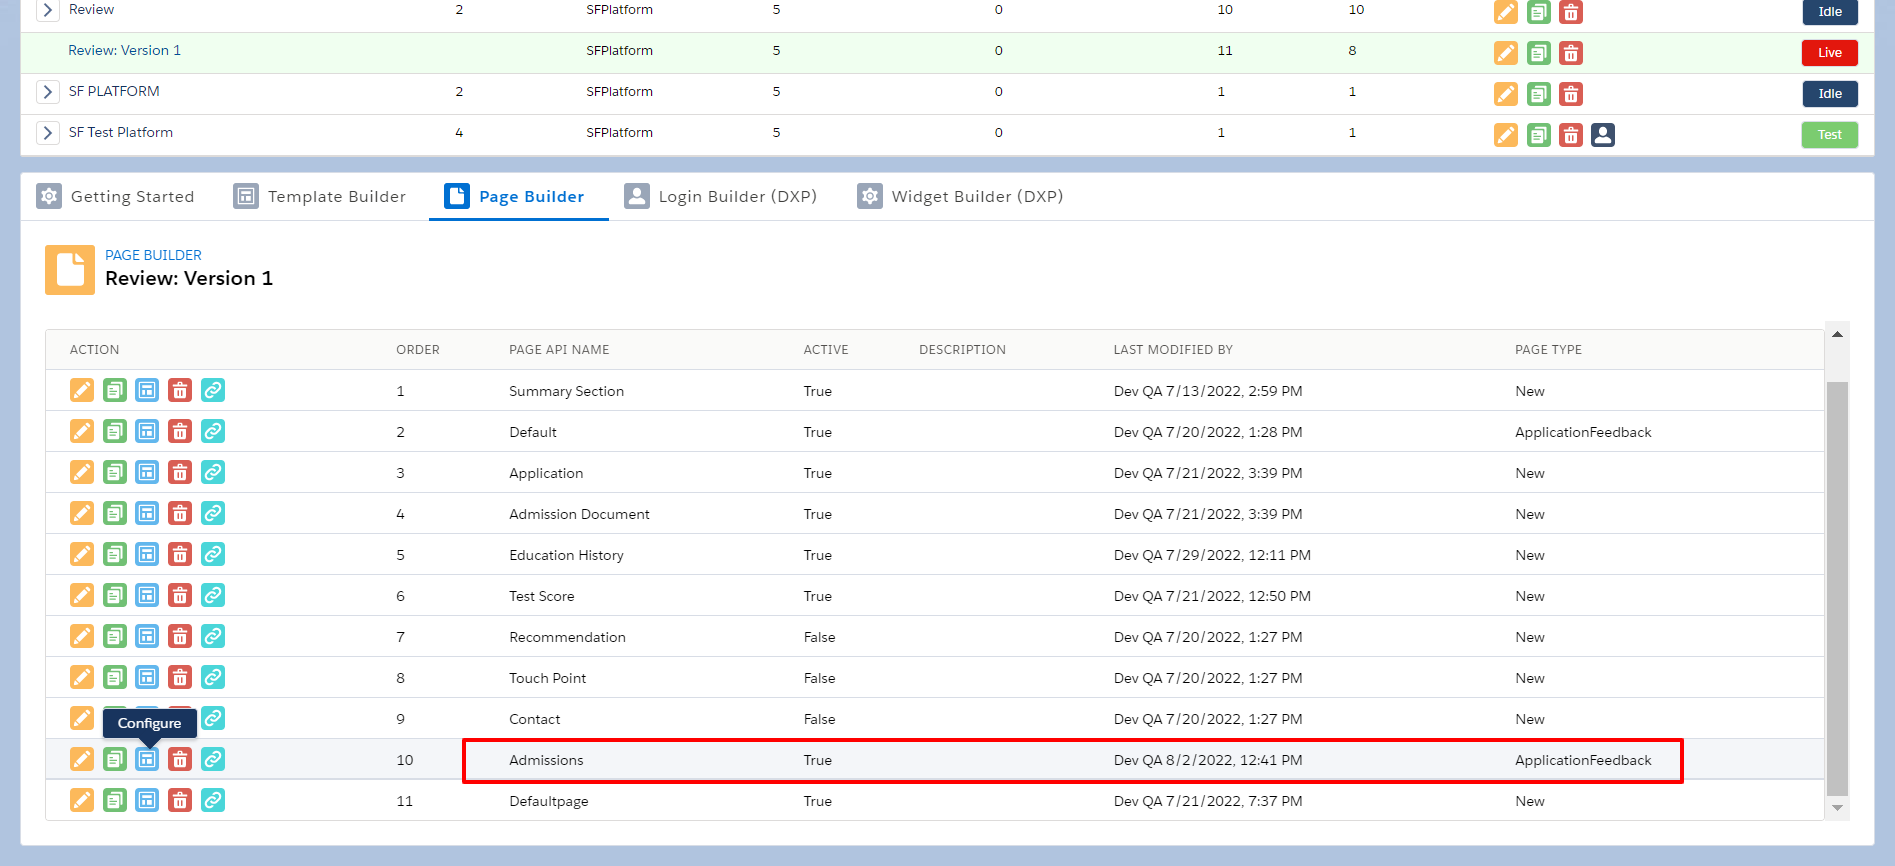
- Create a new page in your desired FormBuilder Rx environment. Select the page type as
"Application Feedback" and configure the page as follows:
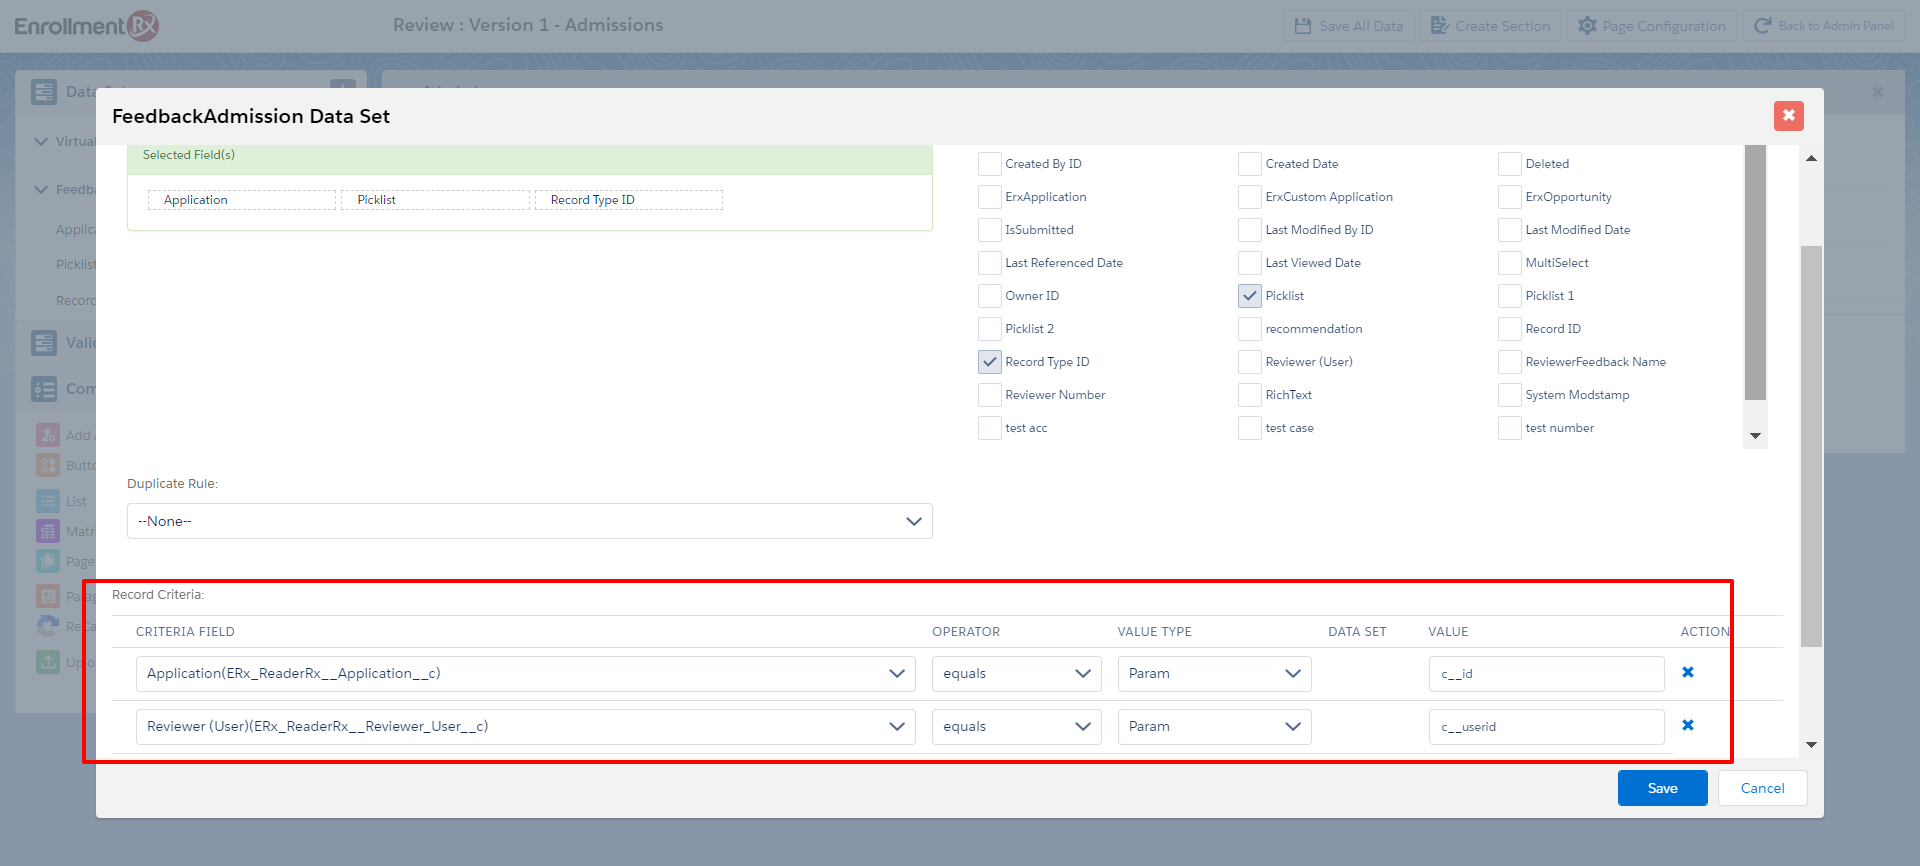
- Create a Data Set for an Application Feedback object and set Record Criteria as
below:
- Create the section and drag and drop the fields:
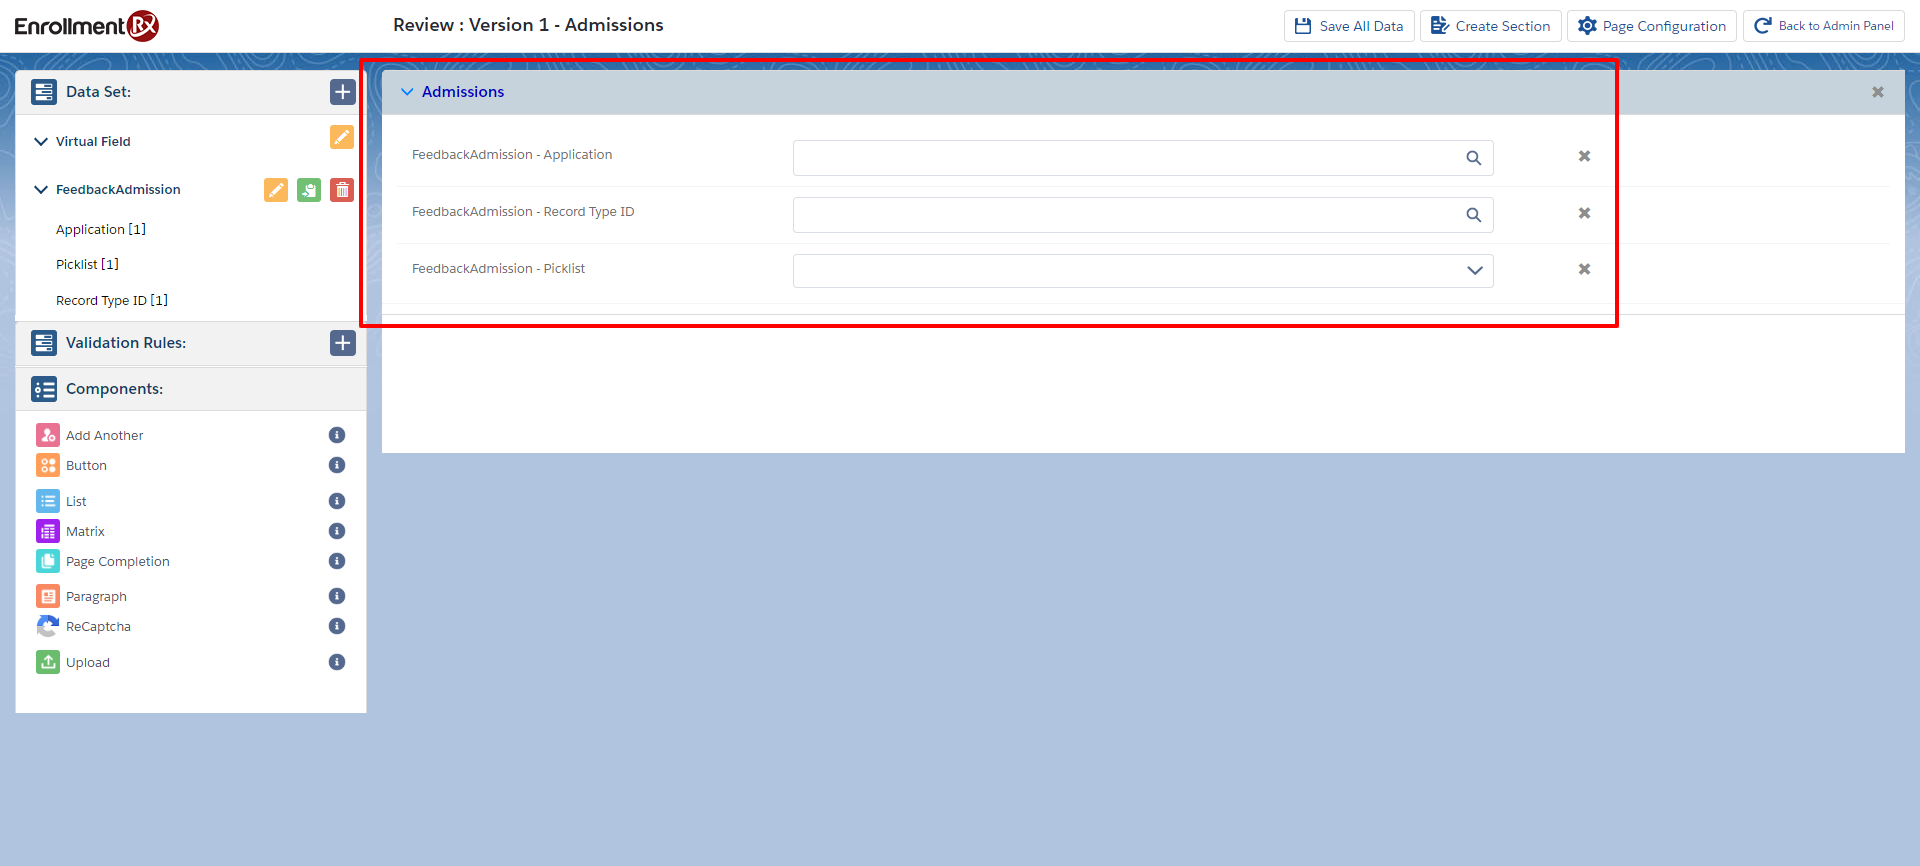
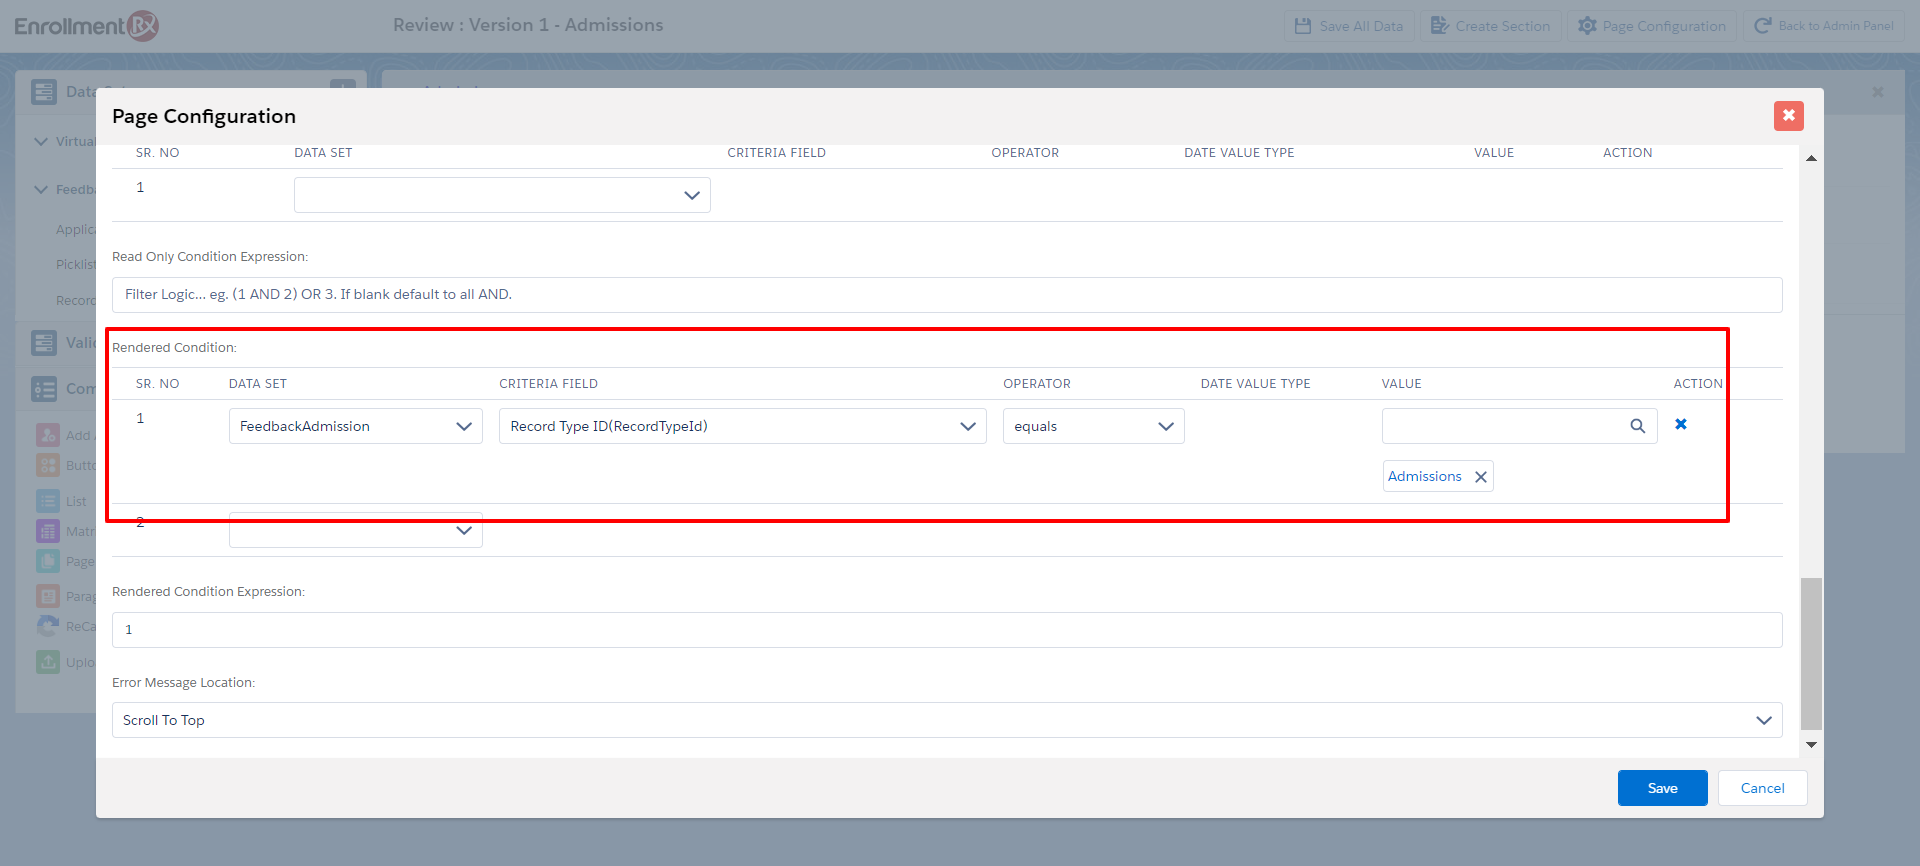
- Set a rendered criteria condition for the page from the Page Configuration
window:
- Click on Save All Data
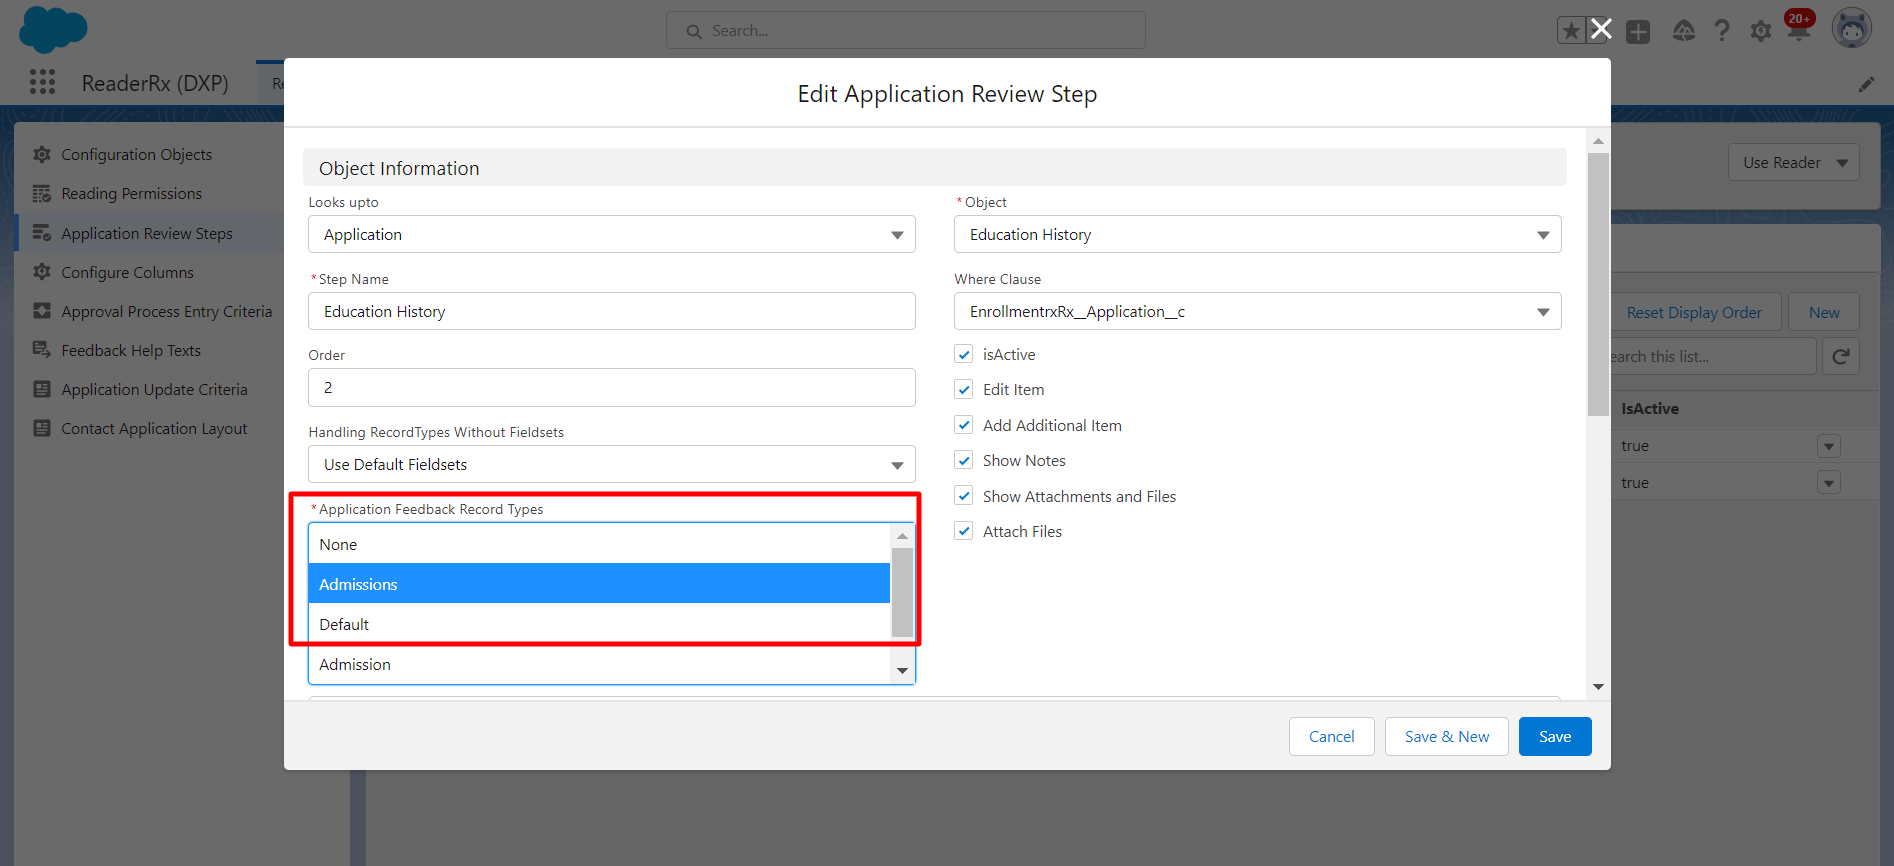
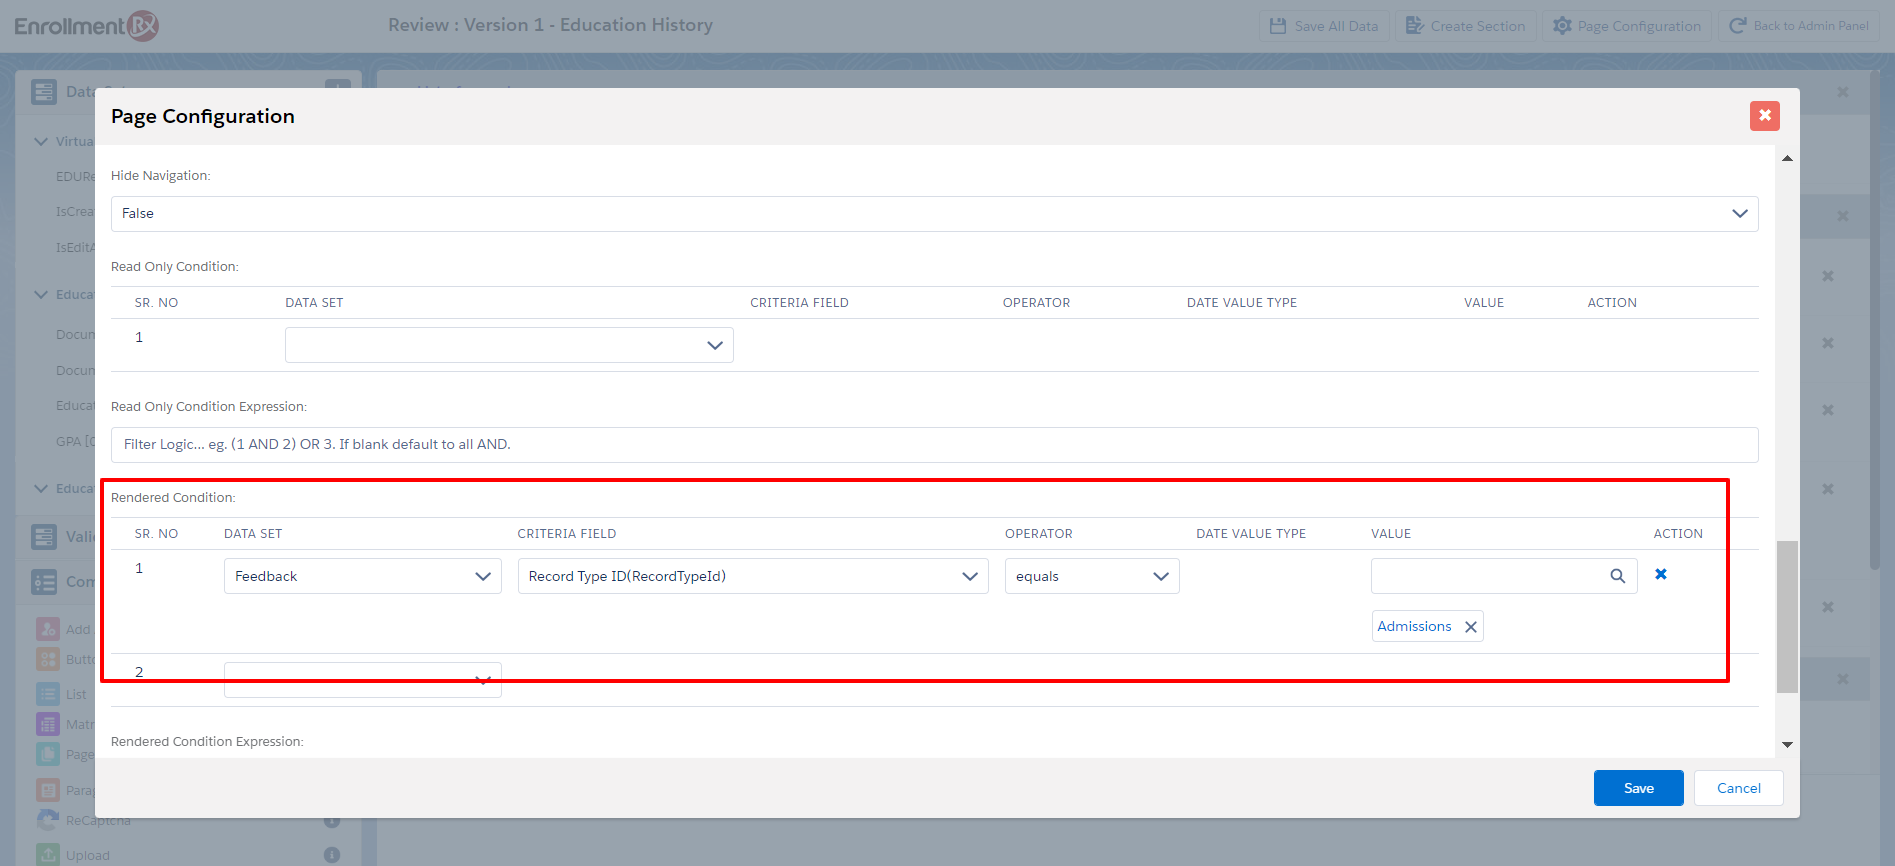
- Now set rendered criteria for the Application Review Step pages, which you will want to show according to the Feedback Record Type.
- For example, the Education History page should be visible when the Feedback Record
Type is Admissions:
- Click Save All Data
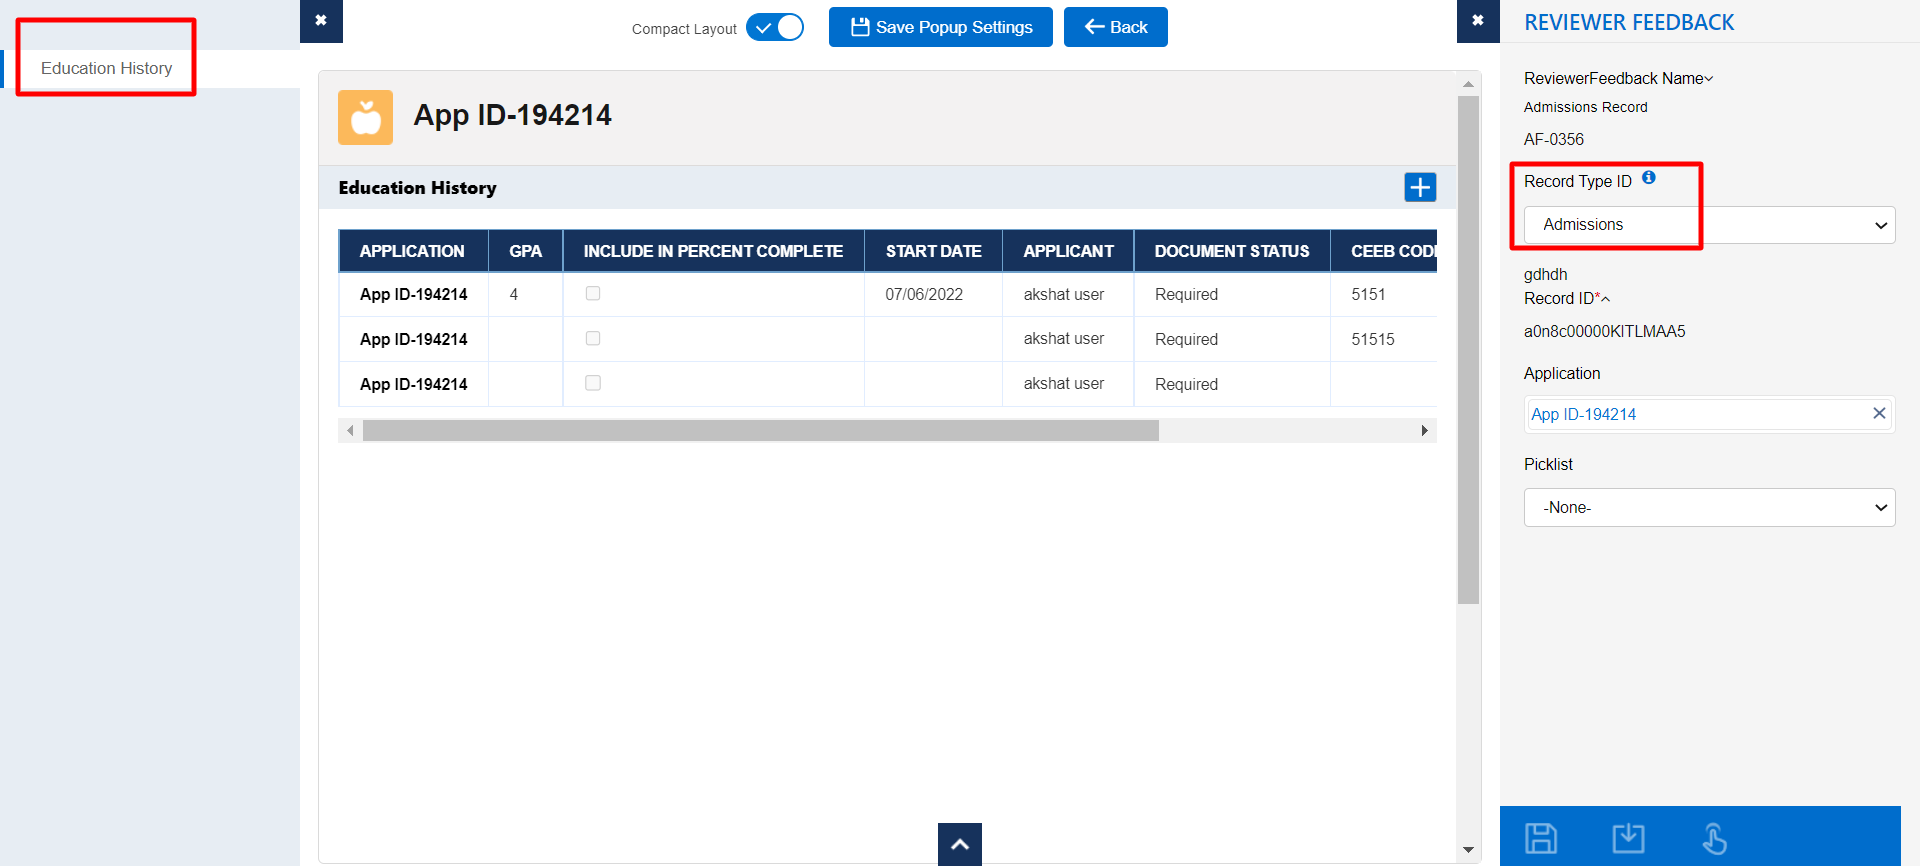
- Navigate to the FormBuilder Review Screen and change the Feedback Record Type from
"Default" to "Admissions" and click the Save button.
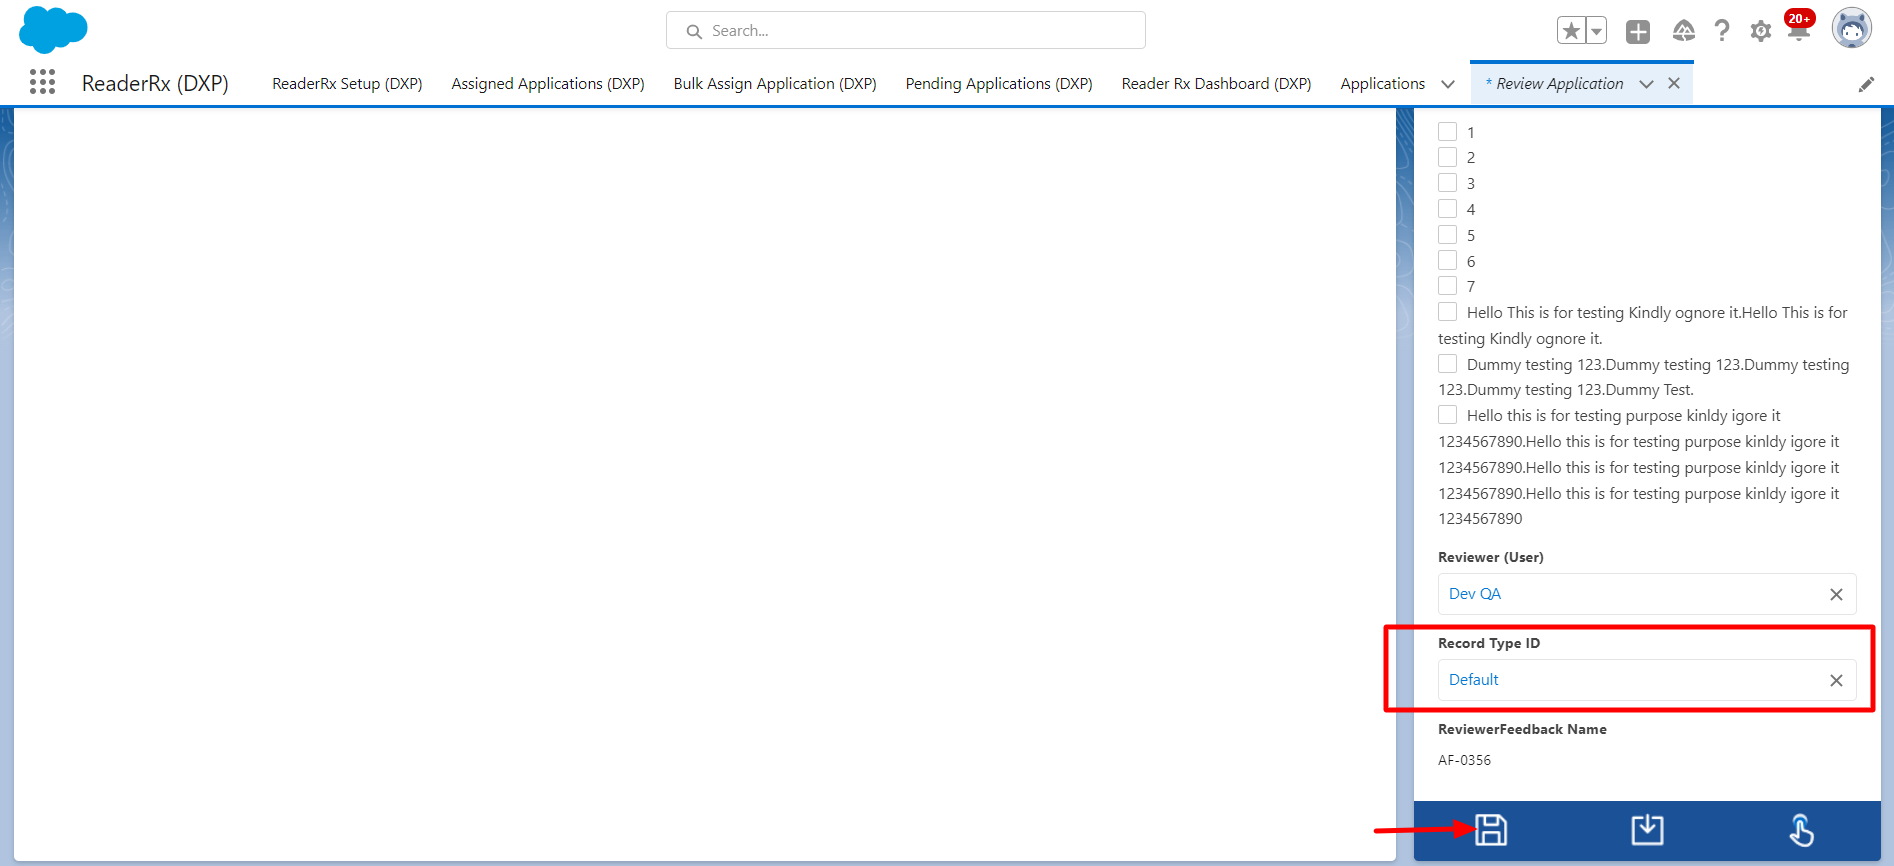
- Click the Review icon for the same Application: