Summer 2019 Upgrade and Sandbox Testing Instructions
Level of Expertise Needed
Very basic Salesforce System Admin skills
Estimated Time Required for Upgrade
About 30 minutes total, broken down as follows:
- Enable Notes if you have not already done so (5 minutes)
- Install the update (10 minutes)
- Prepare a New or Refreshed Sandbox for testing (5 minutes)
- Update Approval Process Step Names (5 minutes)
- Give User Profiles access to new field (5 minutes)
Installation Links
Version 1.59.9
For Sandbox Testing Only: https://test.salesforce.com/packaging/installPackage.apexp?p0=04t2L000000Y0Bv
Production: https://login.salesforce.com/packaging/installPackage.apexp?p0=04t2L000000Y0Bv
Installation Instructions
Click here for Installation Instructions.
Preparing a New or Refreshed Sandbox for Testing
After you create or refresh a sandbox, you will need to tweak the Remote Site.
Create or Update Remote Site
- If you are in the Lighting Experience, exit it and enter Classic Mode. This only works in Classic.
- Enter the ERX Reader Rx application
- Click the “Application Review Steps” tab
- Copy the first portion of the URL in your browser’s address bar, like this:
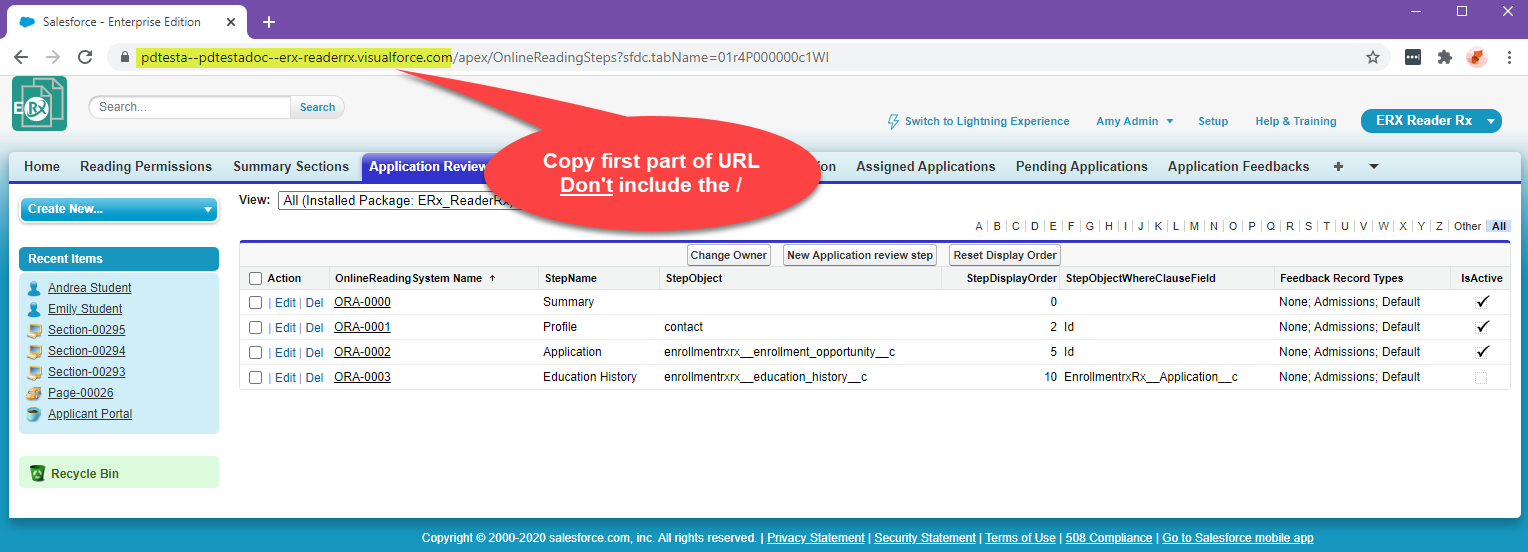
- Go to and look for a remote site named MetaDataAPIRemoteSite (if there isn't one, create it by clicking the New button). Paste the first portion of the URL you copied into the field Remote Site URL, like this:

- When you are finished creating or updating the remote site, you can switch back to Lightning Experience.
Steps needed for continued function of Reader Rx
Enable Notes before you install
Reader Rx works with Salesforce’s Notes feature, which must be enabled before you install:
- Go to and check the Enable Notes checkbox
Update Approval Process Step Names
In order to solve a problem where the Current Approval Process Step did not always show the correct number, we have instituted a naming convention for Approval Process Steps that puts the number of the step into its name, at the end, in parenthesis; for example Admissions Counselor Review (Step 1).
We have created a button that will automatically update your approval process step names to conform to the new convention. To use the button follow this step:
- Be sure to complete the instructions above to Update the Remote Site, since this is needed for the new button to work.
- Navigate to the Bulk Assign Applications tab
- Scroll to the bottom, where you will see a button called Update Approval Process Steps
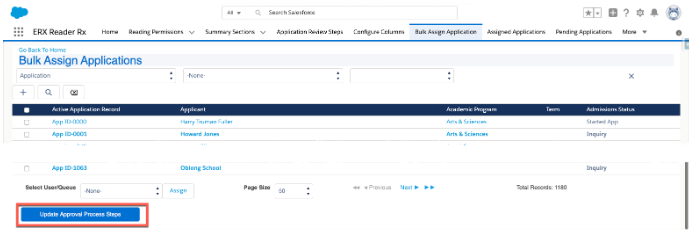
- Click the button
Give User Profiles Access to New Field
If you selected For All Users when you installed the update, then the following should already be done for you but if you selected Install for Admins Only, then you will need to make sure your internal users have access to a new field called Show Notes (ERx_ReaderRx__Show_Notes__c), which has been added to the Summary Section object.
- Go to
- Click on the name of the “Show Notes” field
- Click the button “Set Field-Level Security”
- Give visibility of this field to all the profiles used by your Reviewers
What to test for
After you install into your sandbox, you should test reviewing an application from start to finish. If you have more than one Approval Process, be sure to test them all.