Upgrade, Post-Upgrade, and Sandbox Testing Instructions
Level of Expertise Needed
Basic Salesforce Admin skills
Estimated Time Required for Upgrade
About 30 minutes total, broken down as follows:
- 5 minutes — Prepare a New or Refreshed Sandbox for testing
- 10 minutes — Install the update in Sandbox
- 5 minutes — Update field on Application Review Steps: Handling RecordTypes Without Fieldsets, setting it to Use Default Fieldsets
- Time depends on complexity — Replace Process Builders with Application Update Criteria
Preparing a New or Refreshed Sandbox for Testing
After you create or refresh a Sandbox, you will need to tweak the Remote Site.
Create or Update Remote Site
- If you are in the Lighting Experience, exit it and enter Classic Mode. This only works in Classic.
- Enter the ERX Reader Rx application
- Click the Application Review Steps tab
- Copy the first portion of the URL in your browser’s address bar, like this:
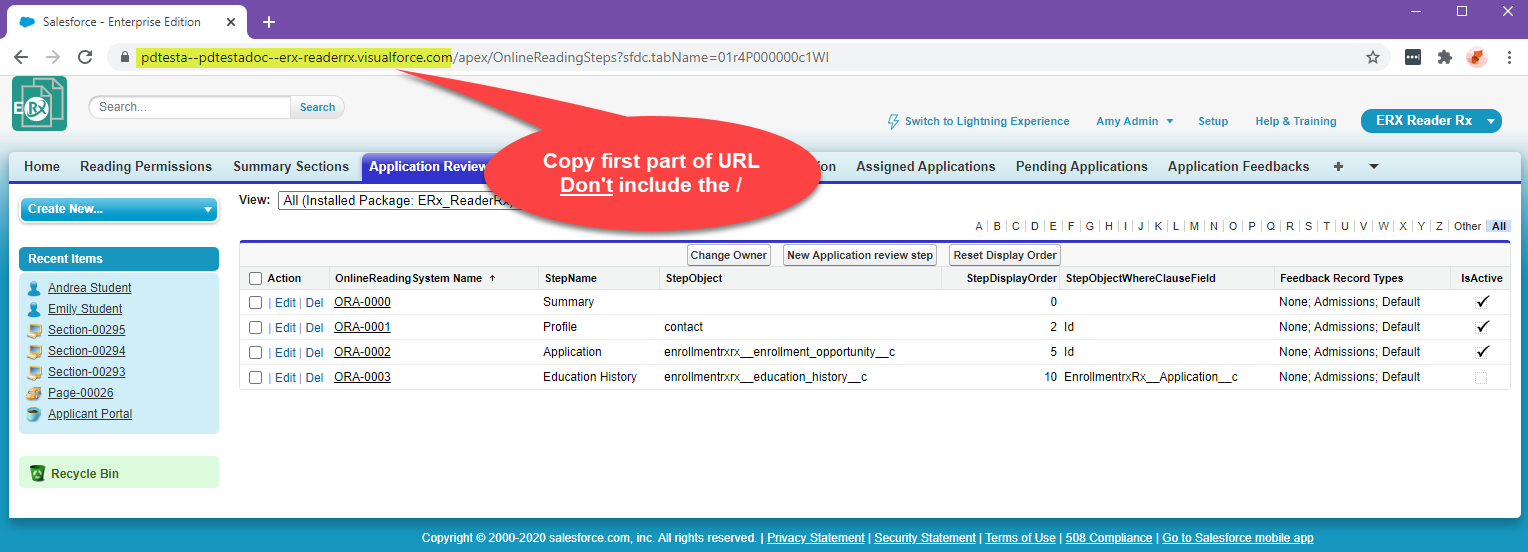
- Go to and look for a remote site named MetaDataAPIRemoteSite (if there isn't one, create it by clicking the New button). Paste the first portion of the URL you copied into the field Remote Site URL, like this:

- When you are finished creating or updating the remote site, you can switch back to Lightning Experience.
Upgrade Instructions
Version 5.7.1, released June 3, 2021
Sandbox:
https://test.salesforce.com/packaging/installPackage.apexp?p0=04t2L000000Y0Tu
Production: https://login.salesforce.com/packaging/installPackage.apexp?p0=04t2L000000Y0Tu
You start the installation process by either clicking the URL or pasting it into your browser’s address bar. If you are logged out of all Salesforce orgs, you will be asked to log in to the org into which you wish to install the application. If you are already logged in to the org, the installation screen will appear immediately.
If you are already logged in to the target org, the Install/Upgrade screen will appear immediately; if not, it will appear after you log in.
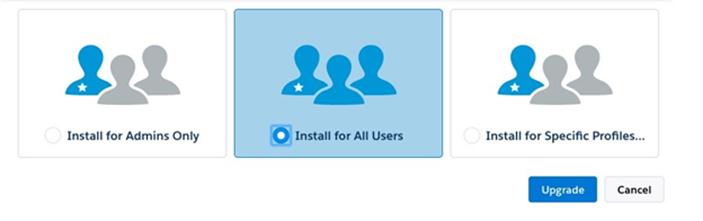
Choose “Install for All Users” before clicking the “Install” or “Upgrade” button, like this:
Post-Upgrade Instructions
Execute these two Steps (Step A and Step B) after upgrading, in order to enable Reader Rx to continue to function properly.
Step A: Add new Reading Permissions value : “Generate PDF”
In Winter '21, a new permission “Generate PDF” controls display of the “Generate PDF” button in the Reader experience:

So you will need to add the value "Generate PDF" to the "Granted Permissions" picklist on the "Reading Permissions" object.
Follow these instructions:
1. Go to and click the New button.
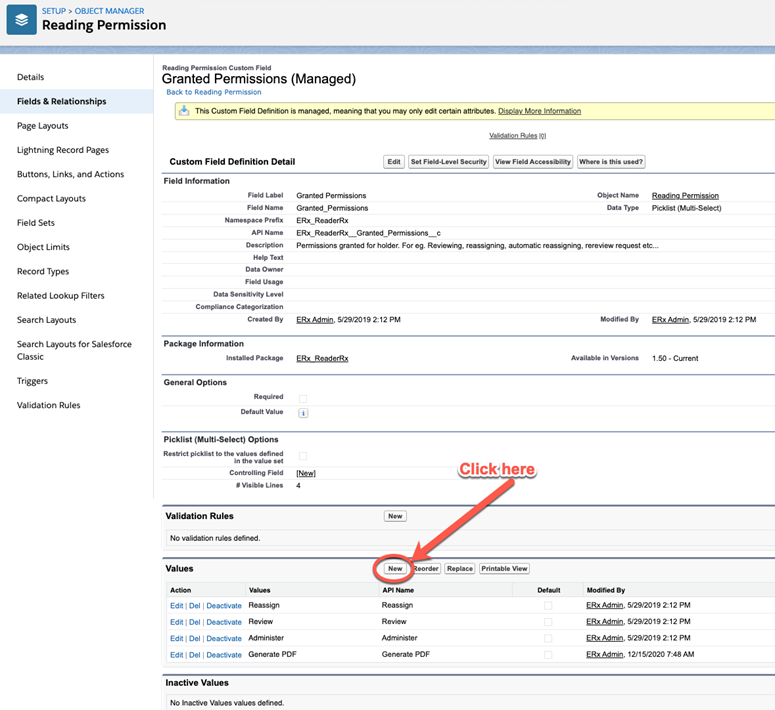
2. Add value "Generate PDF"
3. Go to and assign the new "Generate PDF" permission to all users who need it.
Step B: Give yourself (the System Admin) access to the Configuration Object Visualforce page
In the past, if you clicked on the ReaderRx Configuration Object tab then you also needed to click on the Edit button of the Default record. The following steps will make the Configuration Object Visualforce page open with a single click:
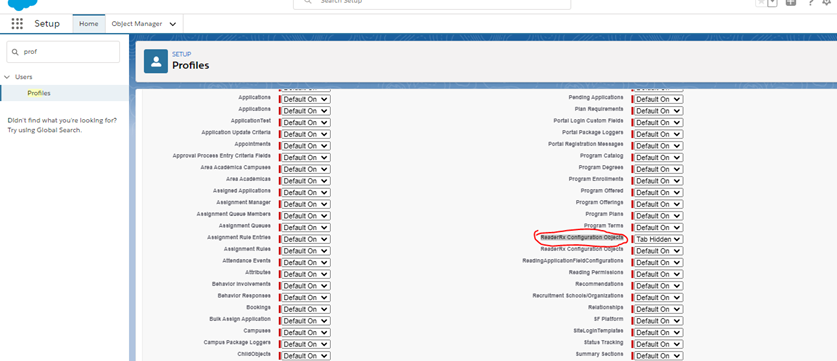
1. Go to your (the System Admin’s) profile. From Setup, search Profile (e.g., System Administrator)
2. Select Tab Hidden for the first ReaderRx Configuration Object & click Save
3. Go to
4. Click on the Edit button for the ERX Reader Rx app
5. Use the arrows to move Reader Rx Configuration Object from Available Tabs to Selected Tabs & click on the Save button
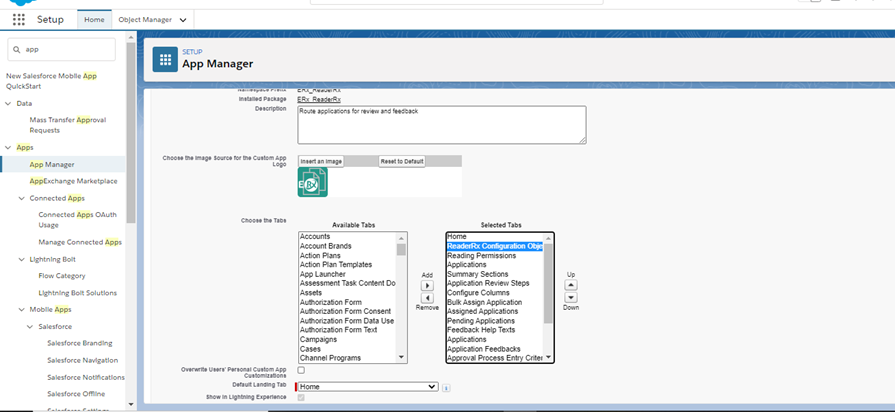
6. Now click on the ReaderRx Configuration Object either from Classic or Lightning Experience
You should see the Visualforce page:
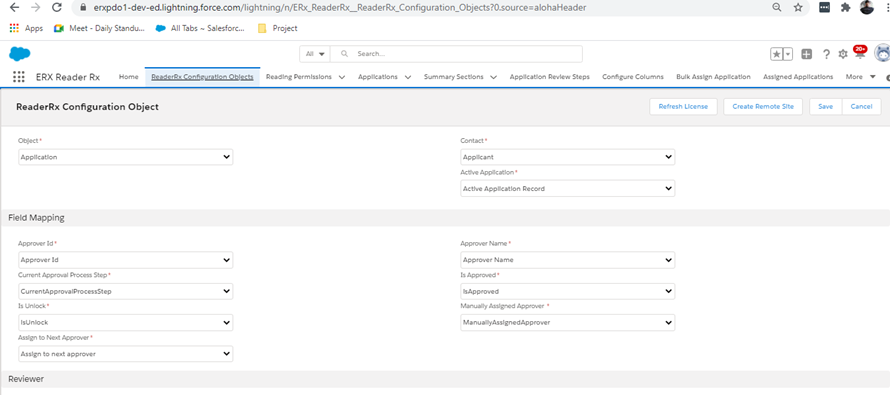
This page configures the object model of Reader Rx. If you are using an Application object other than ERX Core’s Application object, you can configure it here.
What to Test
After you install into your Sandbox environment, you should test reviewing an application from start to finish. If you have more than one Approval Process, be sure to test them all.
Reference Information
What Version Do You Currently Have Installed?
- Go to
- Click on the name of the Enrollment Rx: Reader Rx package:
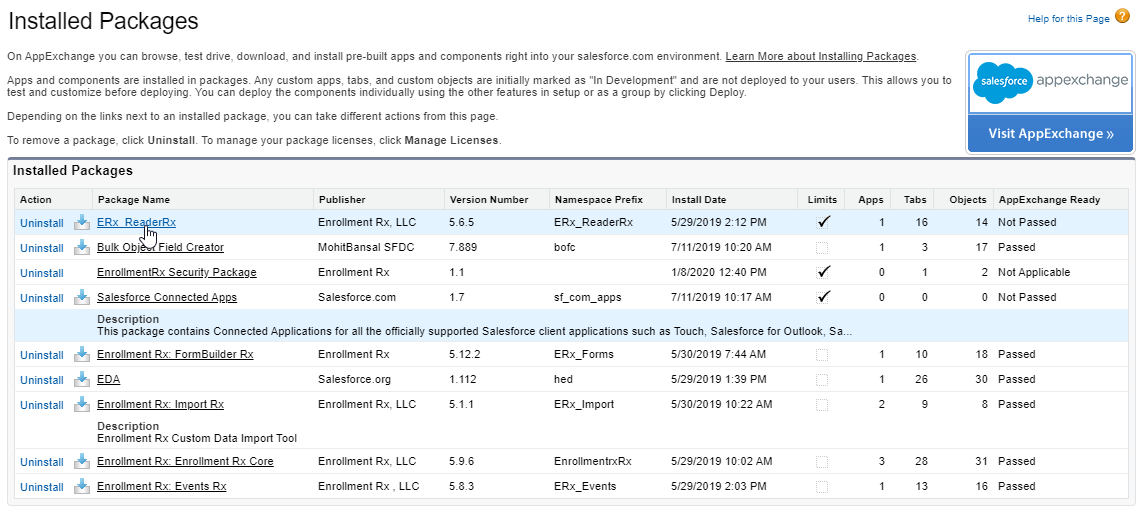
- The details page will open showing the Version name and number:
