Upgrade and Testing Instructions
Upgrade Instructions
Version 6.3.19, released March 10, 2022
Sandbox: https://test.salesforce.com/packaging/installPackage.apexp?p0=04t2E000003MyPF
Production: https://login.salesforce.com/packaging/installPackage.apexp?p0=04t2E000003MyPF
You start the installation process by either clicking the URL or pasting it into your browser’s address bar. If you are logged out of all Salesforce orgs, you will be asked to log in to the org into which you wish to install the application. If you are already logged in to the org, the installation screen will appear immediately.
If you are already logged in to the target org, the Install/Upgrade screen will appear immediately; if not, it will appear after you log in.
Choose “Install for All Users” before clicking the “Install” or “Upgrade” button, like this:

Post-Upgrade Instructions
Mandatory Steps
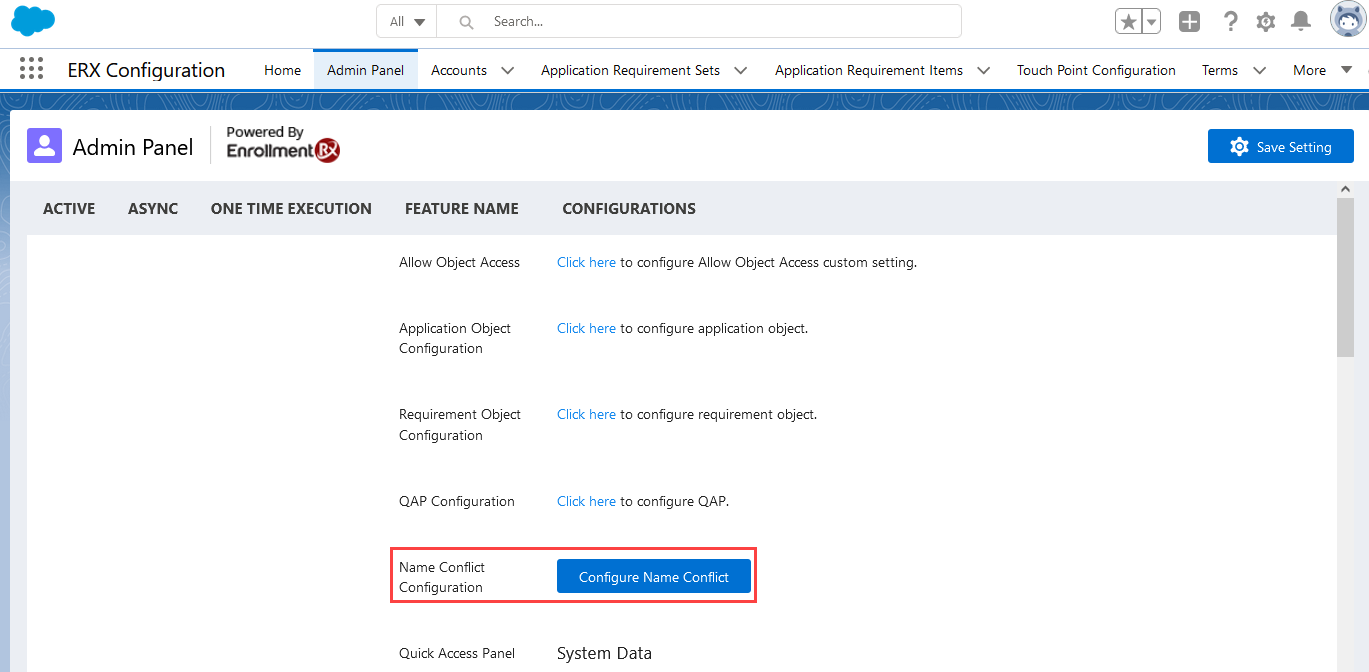
- "One Click" on the Admin Panel: Navigate to the Admin Panel tab and
click on the Configure Name Conflict button.
- Validate the Click Action: Go to Setup, search for Apex Classes
in the Quick Find box, and click on it to go to the Apex Classes page. On the
Apex Classes page, find
ERx_ExecuteLocal.Tip:Click the "E" in the alphabet menu and scroll for the class name.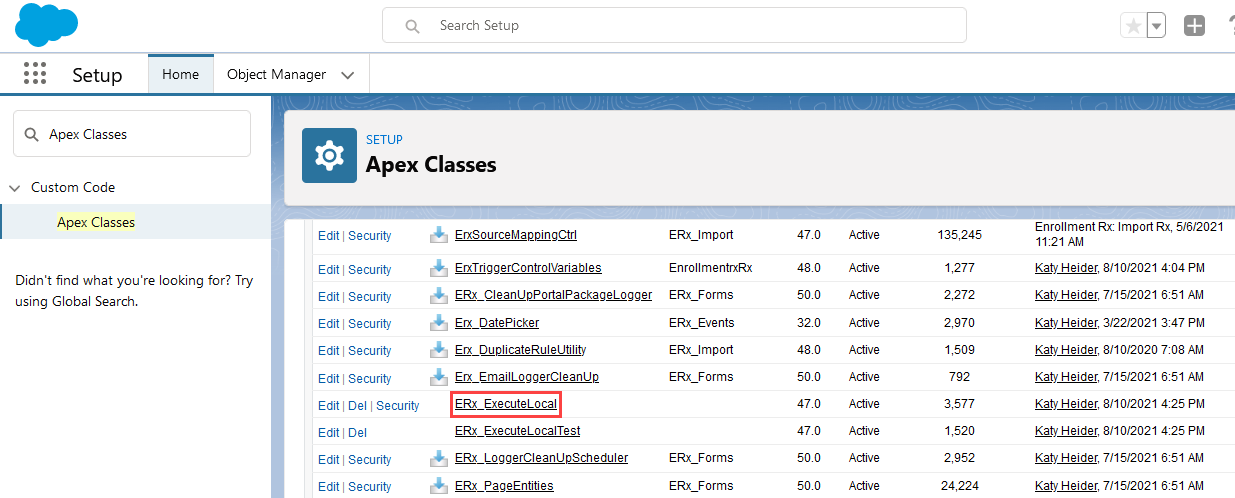
- If you find this Apex Class, move to Step 3 (Save Admin Settings).
- If you do not see it, contact the ERX Support Team.
- Save Admin Settings: Navigate back to the Admin Panel in Core and click on
the Save Setting button.

Steps to Resolve the RIO Picklist and CPU Issue
- Navigate to the Admin Panel in Core
- Click Save Settings
Changes in Document Status Picklist when API Name is Different from Label
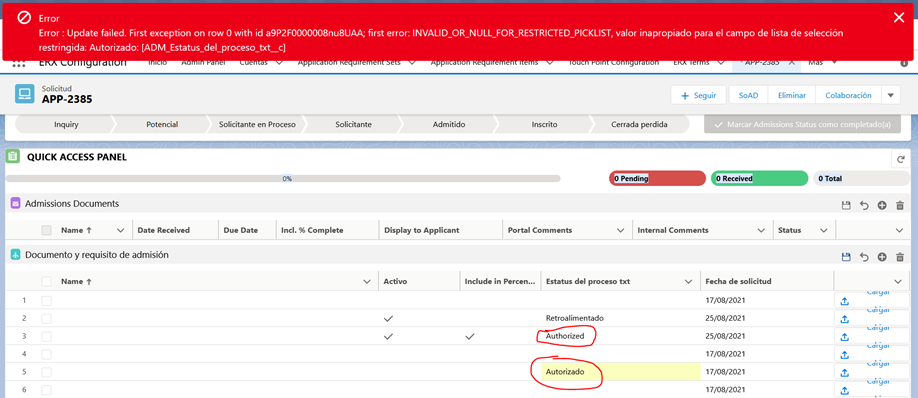
Resolution: Admins will need to take some additional steps:
- Whenever any changes are made on the Document Status Picklist (e.g., adding, deleting, or editing picklist values, changing API names, etc.), the Admin needs to click on the Save Settings Button on the Admin Panel.
- On the QAP, the UI Label name will be shown in the picklist drop down.
Optional Post-Upgrade Steps for Summer '21 Features
Configure the QAP
The new Quick Access Panel configuration UI is backward compatible. All RIOs you have previously set up will be available in this interface after upgrading.
If you would like to make further configurations and changes to objects, field sets, and record types, you can do so after installing Core Summer '21. Click here for documentation on QAP configuration.
Super Clone
Three new Field Sets are available in Super Clone for Summer '21 that your Admin will need to manually create on the Application Object. Instructions are covered in detail in the Super Clone documentation.
Following is an description and overview of the three new fields, plus two optional settings.
- Target Record Fields: Fields added to this field set will appear on the Super Clone dialog under "Target Record Fields." They default to the value on the record being cloned and can be futher updated by the user before cloning.
- Target Record Fields set to NULL: Fields in this field set appear in the "Target Record Fields set to NULL" section on the Super Clone dialog. They default to the value on the record being cloned and are displayed with a strikethrough over the value.
- Source Record Fields: Fields in this field set appear on the SuperClone dialog under "Source Record Fields." They default to the value on the record being cloned and can be further updated by the user before cloning.
- Optional Settings:
- Specify Owner for Destination Records: Select an owner for the new record
- Specify Fields to Exclude: Select the fields that will be excluded from new record.
Sandbox Refresh: Updating the Remote Site Settings