Summer '20 Pardot Installation Steps
1. Install the latest package version of Core Summer '20
Click here for the upgrade links and instructions.
2. After the install is complete, go to the App Launcher > Touch Point Configuration. If you see the PardotProspect setting click the gear icon to follow/update the next steps:
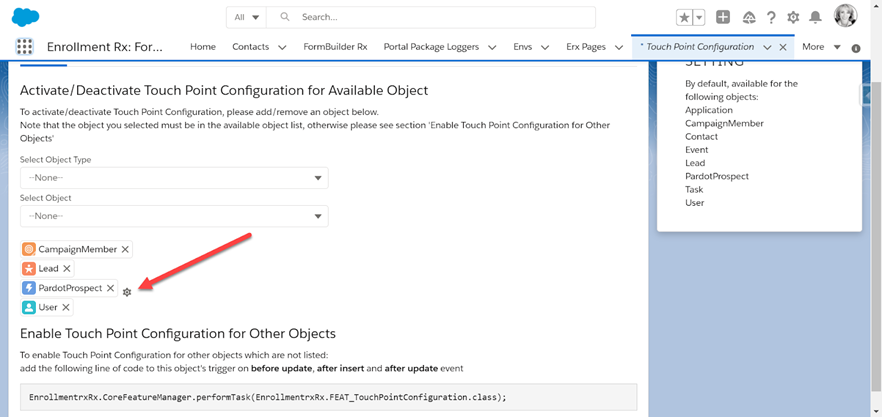
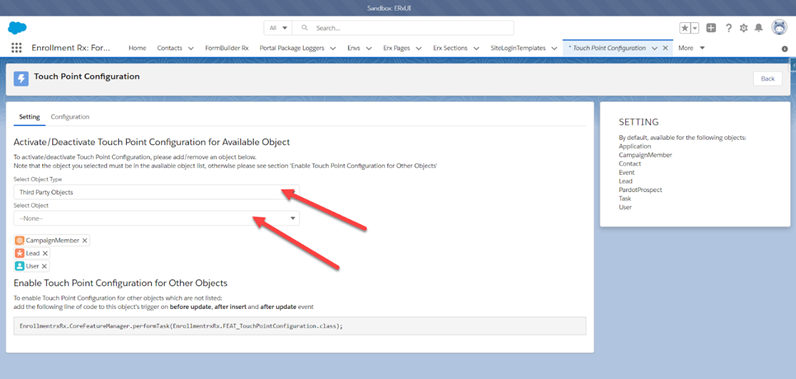
If you do not see this setting and are setting it up for the first time, select the Third Party Object type and select Pardot Prospect again to add it back to the object list:
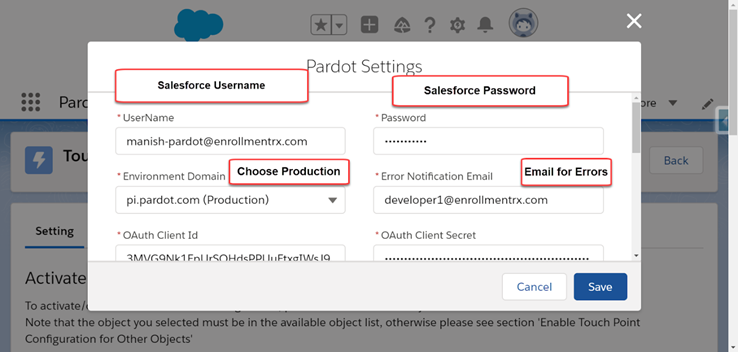
Open up a new tab in Salesforce, then click the gear icon next to the Pardot Prospect Object which will take you to the connector screen.
Enter your Salesforce user name and your Salesforce password as well as the email for notifications. A reminder you have to be a Pardot User and a system Administrator. (You can keep this tab open then in the other tab continue with the following steps.)
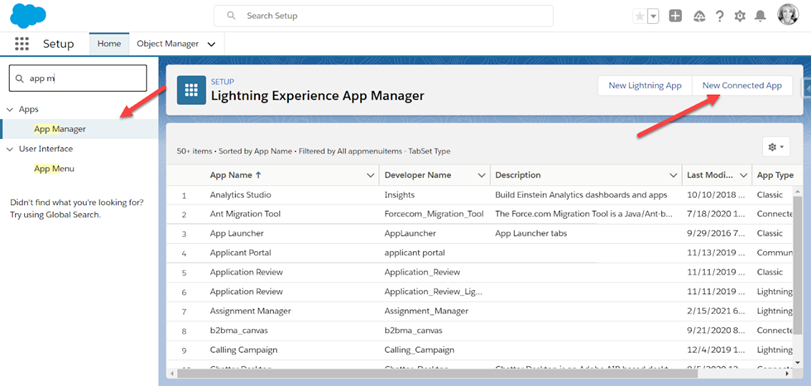
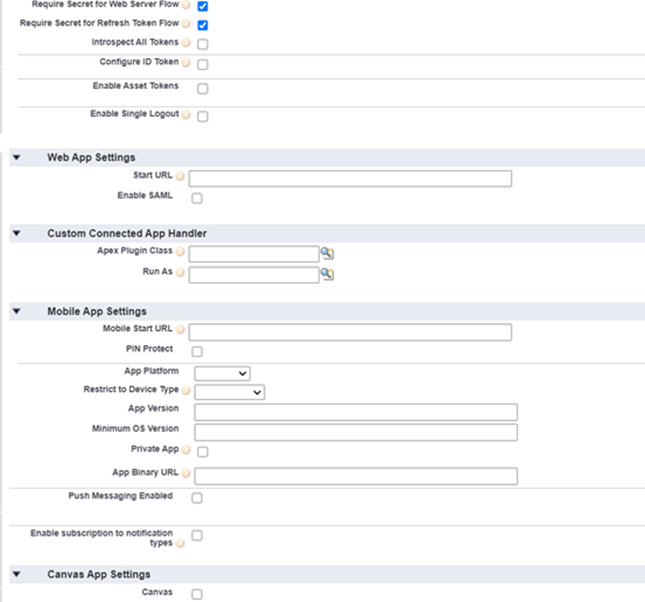
3. Create an Unmanaged Connected App by going to Setup > App Manager > New Connected App:
Enter the following information (also shown below):
Connected App Name: Erx Pardot SSO OAuth
Contact Email: (Your email address)
Enable OAuth Setting: True
Callback URL: https://login.salesforce.com/services/oauth2/callback
Selected OAuth Scopes: Access Pardot Services (pardot_api) and Perform Requests on your behalf anytime( refresh_token_offline_access)
Require Secret for Web Server Flow: True
Require Secret for Web Token Flow: True

Upon saving the connected app, OAuth Client ID and Secret will be generated:
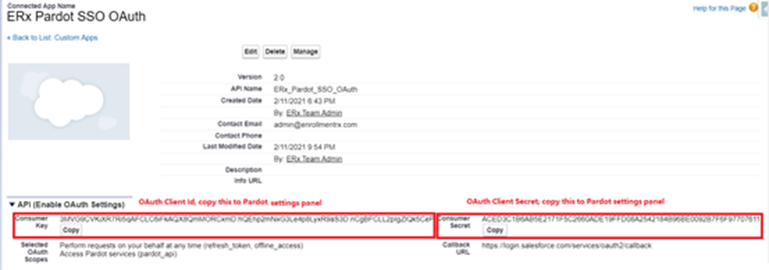
Populate these in the Pardot Prospect Setting page, then save:

4. Find your SSO User Security Token
Retrieve the Security Token by going to your user Icon >Settings >Reset My Security Token, and click Reset Security Token:
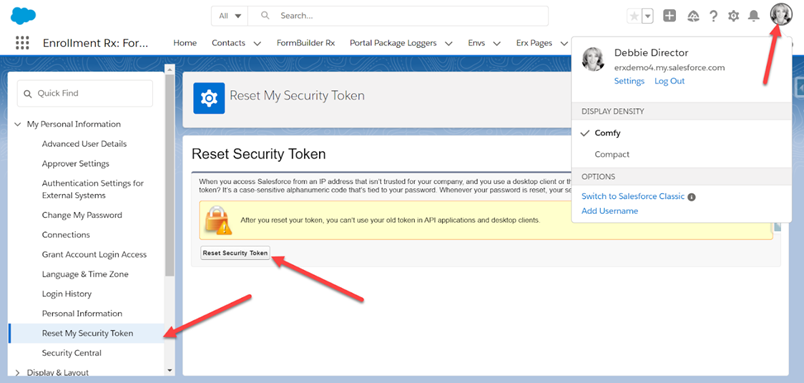
An email will be sent to your user account. Take that security token and paste it here in the Pardot Connector Setting:
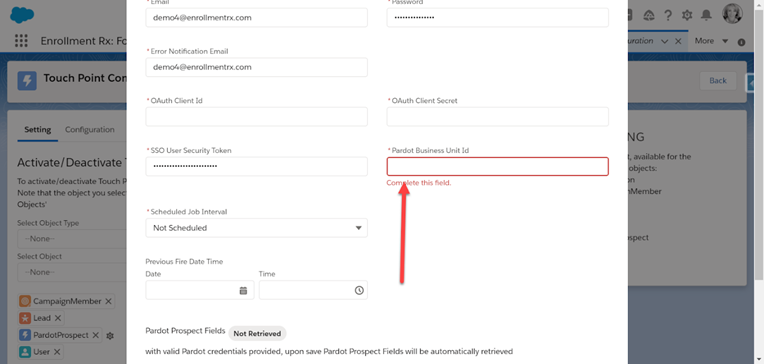
5. Find and enter Pardot Business Unit Id to the Pardot Prospect Setting Page
In a separate tab go to Setup, type in “Pardot Account,” and grab the business ID.
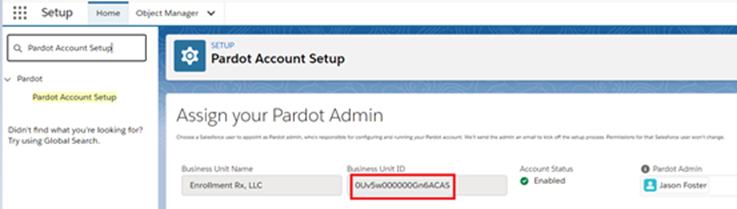
Paste this here in the PardotProspect setting:
6. Create the ERxCoreOAuthProd remote site
Next go to
Name: ERxCoreOAuthProd
Remote Site URL: https://login.salesforce.com/
Active: True
And Save.
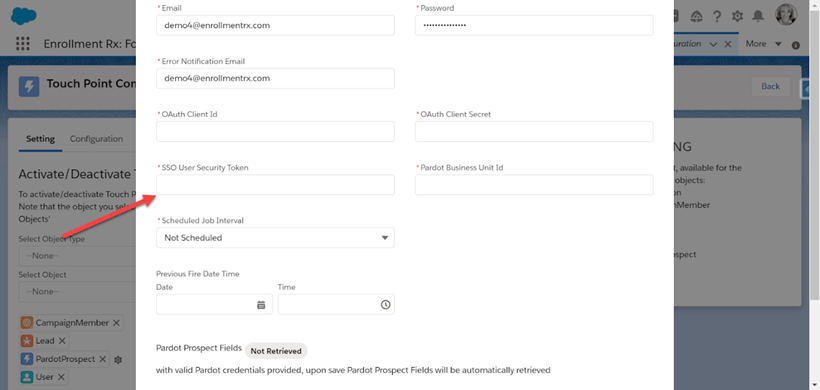
7. Save Setting
You will now have all of the information populated where you can save the record and retrieve the fields. It should look something like this:

Once saved, you can navigate to the configuration tab to review or update any existing mappings from before related to Pardot.