Winter '21 Pardot Installation Steps
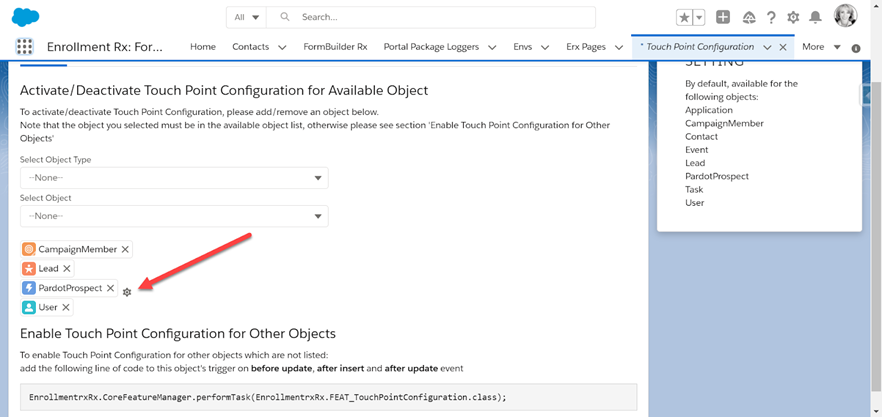
1. Go to the App Launcher (the waffle symbol in the upper lefthand corner of the screen) and click Touch Point Configuration
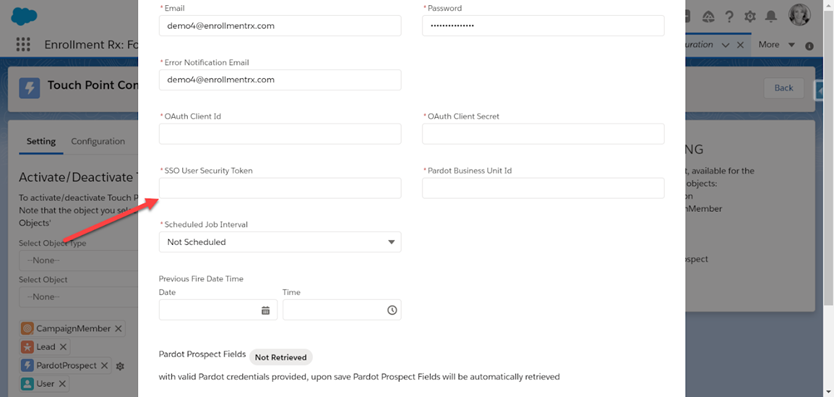
Go to the Touch Point configuration. If you see the PardotProspect setting, click the gear icon to folllow/update the next steps:
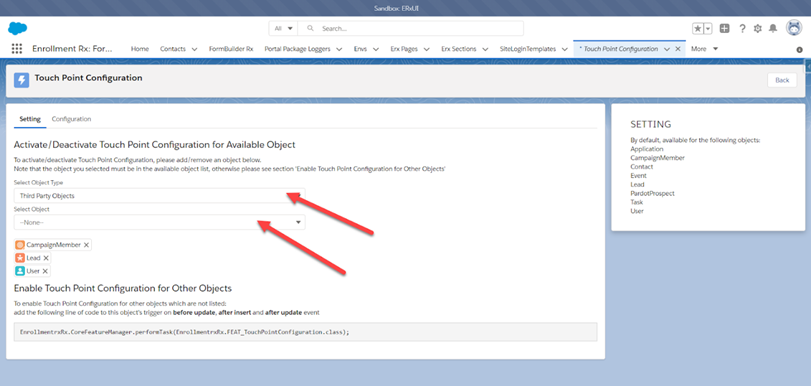
If you do not see this setting and are setting it up for the first time, select the Third Party Object type and select Pardot Prospect again to add it back to the object list:
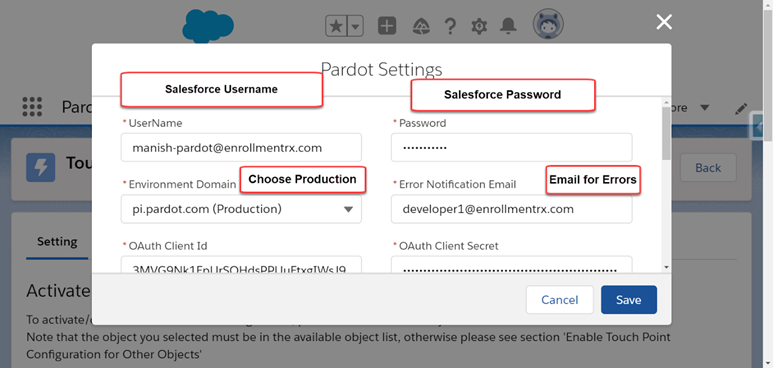
Open up a new tab in Salesforce, then click the gear icon next to the Pardot Prospect Object, which will take you to the connector screen.
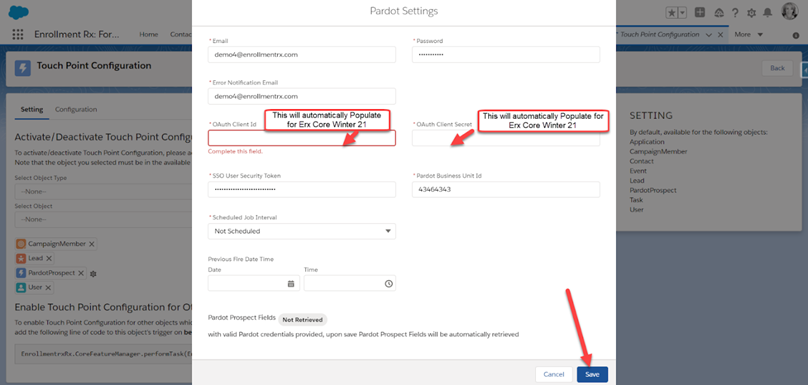
Enter your Salesforce user name and your Salesforce password as well as the email for notifications.
2. Find your SSO Security Token
In a new tab, Retrieve Security Token by going to your and click Reset Security Token.
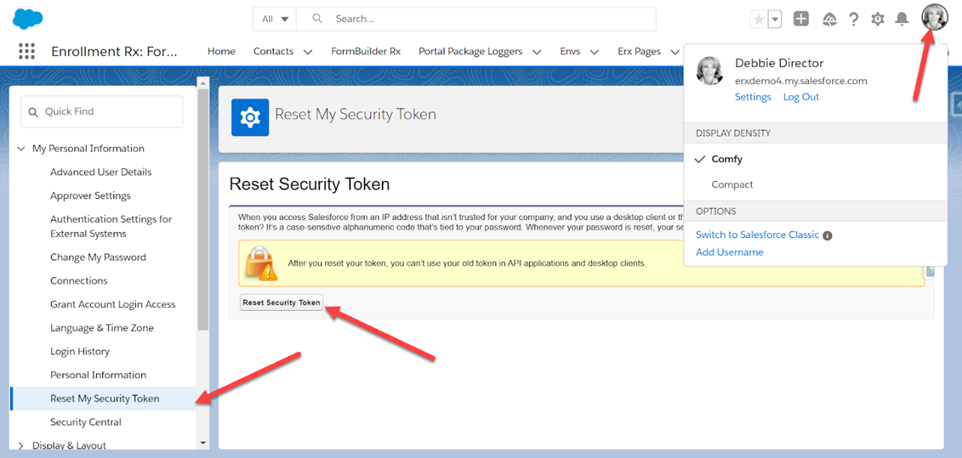
An email will be sent to your user account. Take that security token and paste it here in the Pardot Connector Setting:
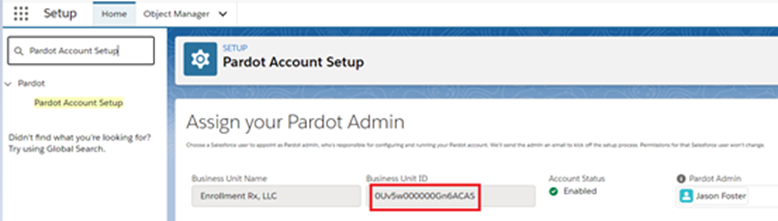
3. Find and enter Pardot Business Unit Id to the Pardot Prospect Setting Page
In a separate tab go to Setup, type in “Pardot Account,” and grab the Business Unit Name.
Paste this here in the PardotProspect setting:
4. Update the ERxCoreOAuthProd remote site
Next go to
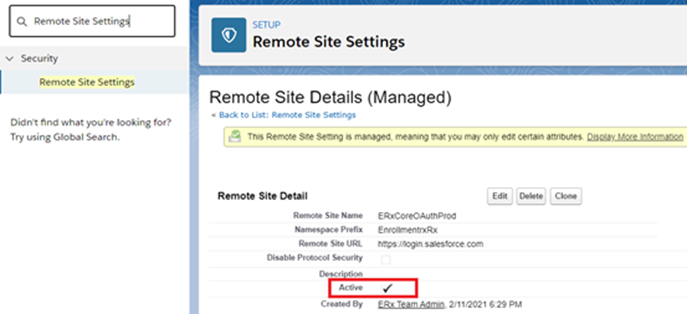
Activate the ERxCoreOAuthProd remote site in Remote Site Settings if it's not already. Click Save.
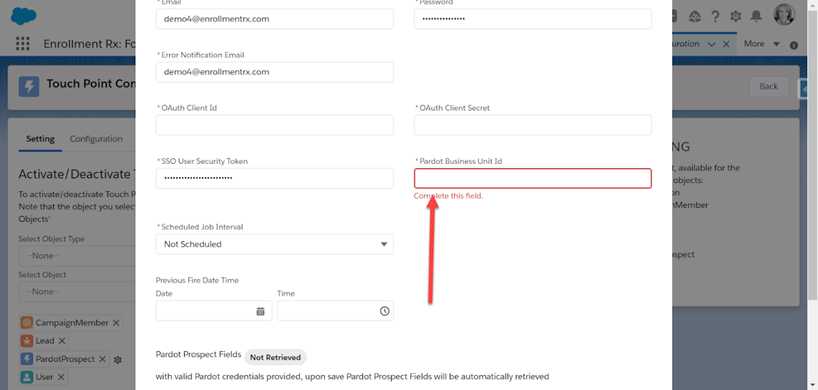
5. Make sure all fields are populated, then Save
Make sure the PardotProspect Setting is updated with the required fields. The OAuth Client ID and Client Secret will populate automatically. Click Save when done.
Once the setting has saved, you can save and the mapping will be restored from what was previously configured. If this is your first time configuring, navigate to the Configuration tab.