Appointment Rescheduling
Overview
This feature allows Site Guest and Community Users to reschedule an existing appointment via a reschedule button on the appointment confirmation mail. Clicking on this button will redirect the user to the calendar, where they can select a new slot to schedule.
Steps to Set Up the Rescheduling Process (Counselor/Admin)
Staff Users can create a template for rescheduling.
- Go to Setup
- Search "Classic Email Templates"
- Click on "New Template"
- Create a template like in the image below
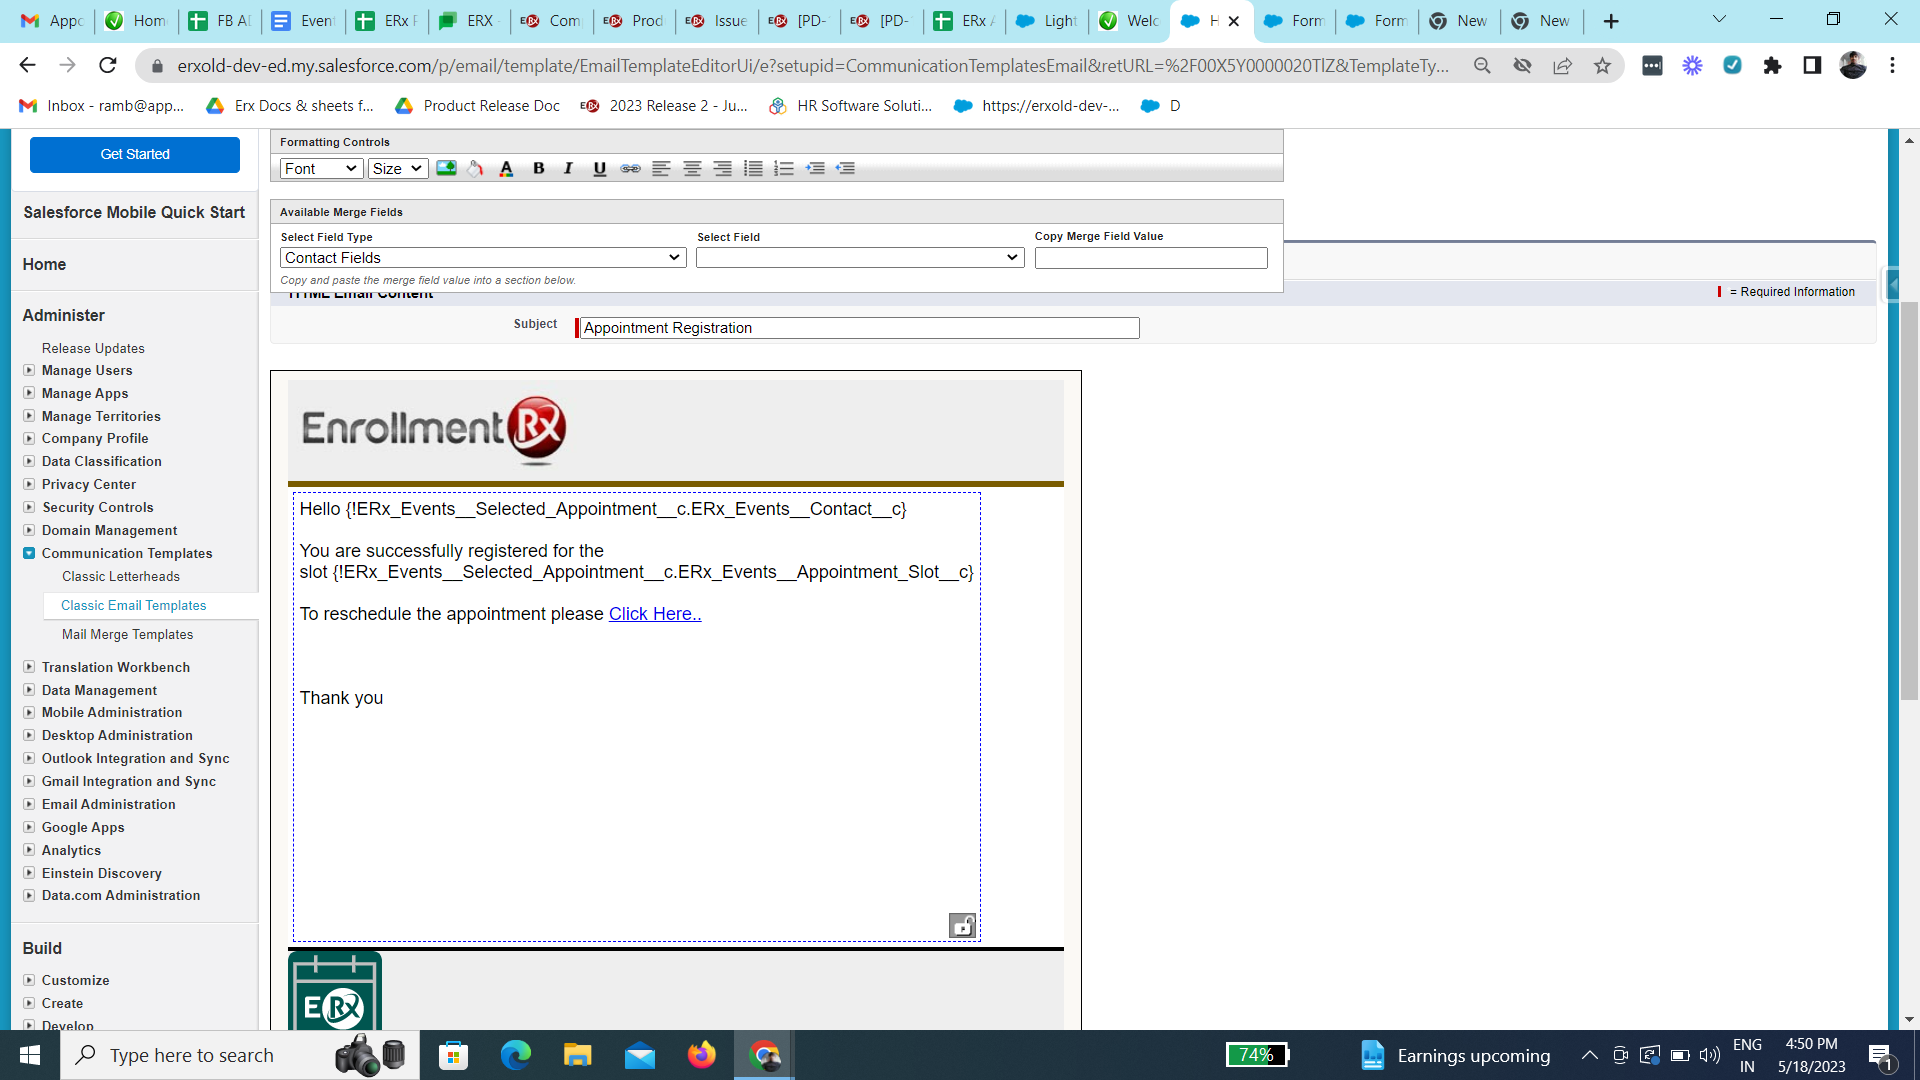
- For the "click here" button, append
/?c__appid={!ERx_Events__Selected_Appointment__c.Id}to the Site Domain URL like thishttps://erxold-dev-ed.my.site.com/DXP/s/?c__appid={!ERx_Events__Selected_Appointment__c.Id}
Rescheduling an Appointment (Student/Guest User)
Overview
A Site Guest or Community User can reschedule a previously booked appointment by
clicking the "reschedule" link on the appointment booking confirmation email.
This will redirect the user to the rescheduling interface.
Steps
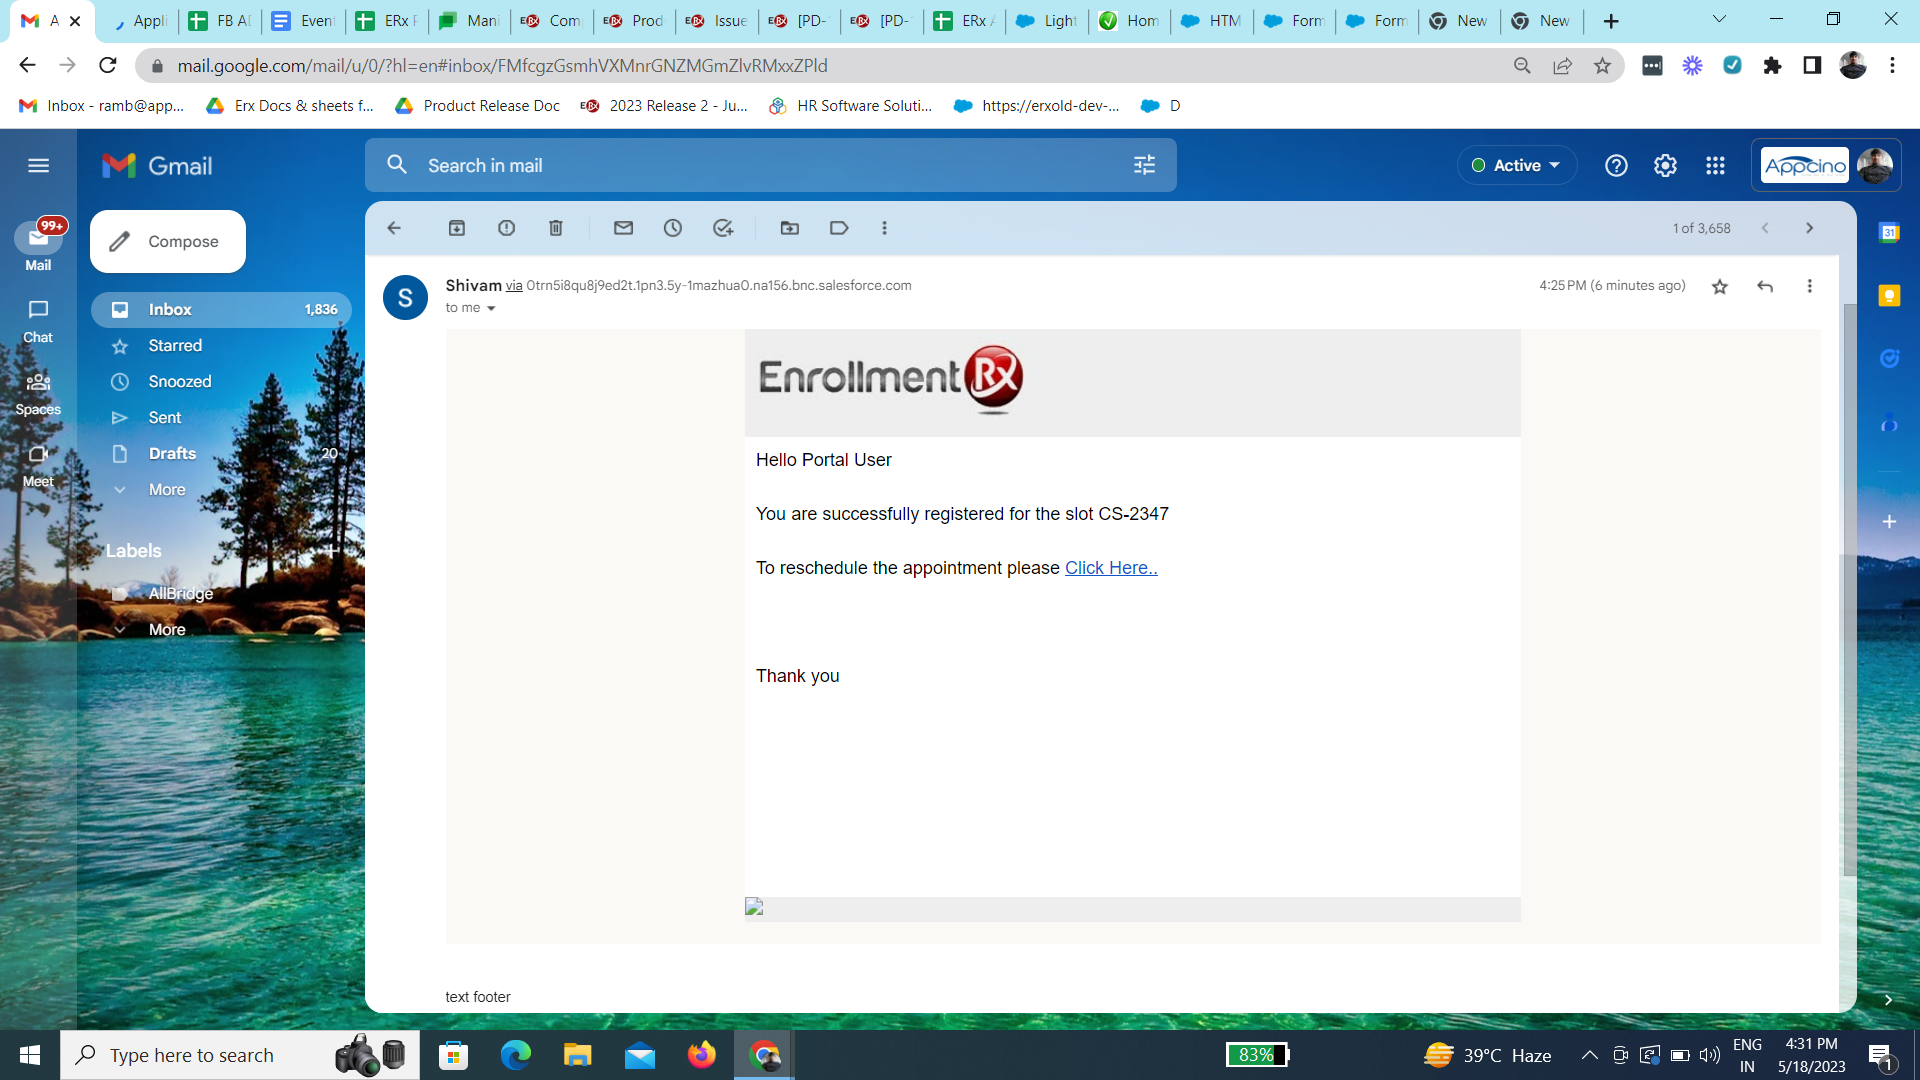
- Open the confirmation email for the booked appointment
- Click on the reschedule button
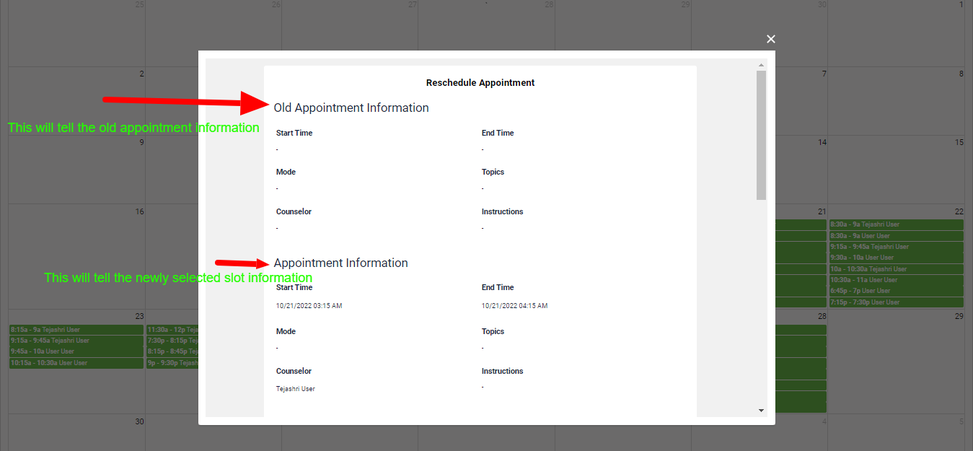
- The user will be redirected to the Student Calendar interface
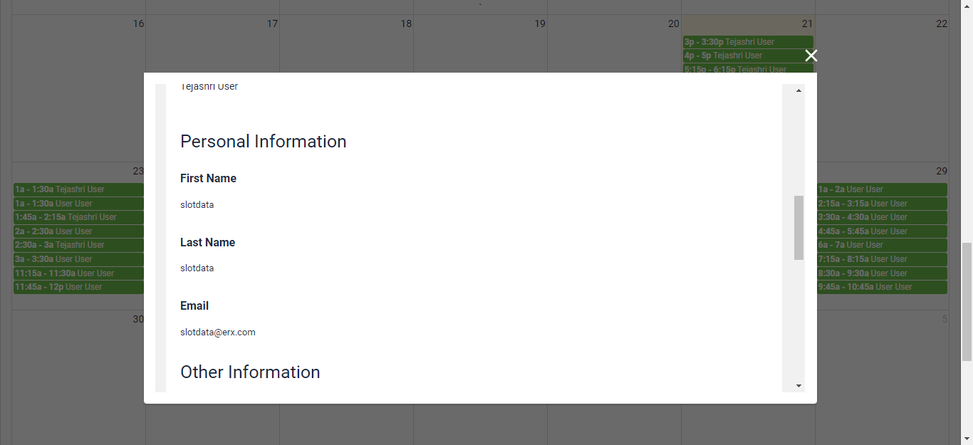
- They can select any available slot; personal information fields will be
auto-populated
- Click the reschedule button to register for a new slot
- Result: A success message will appear on the page, the old appointment record will get updated with the status as "Rescheduled" with a new slot record
Note:
Appointment records with Completed or Cancelled status will note be rescheduled.
Appointment Cancellation Process
Overview
Only an Admin (a backend Salesforce user) can cancel an appointment. Cancellation should trigger a confirmation email to the end user.
Steps
- Go to Appointment Calendar (DXP) from the App Launcher
- You should be redirected to the Admin calendar page
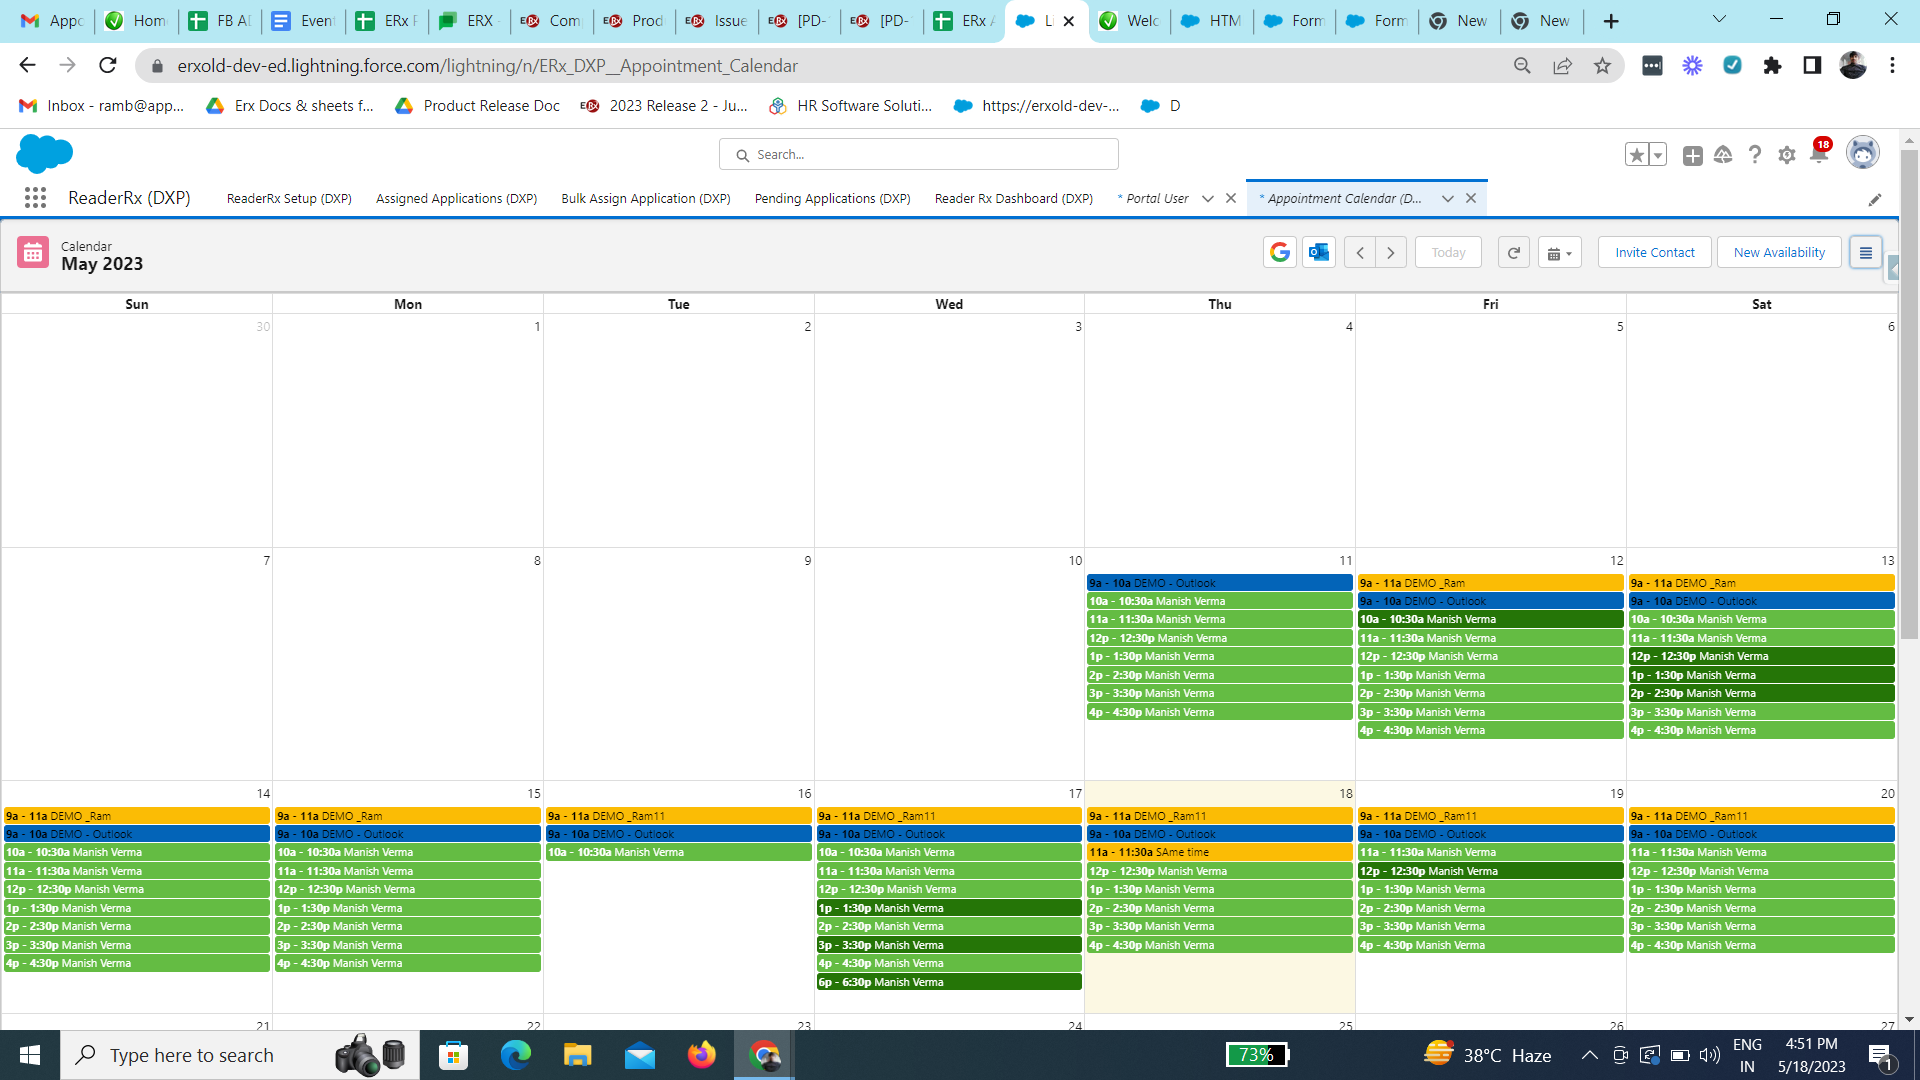
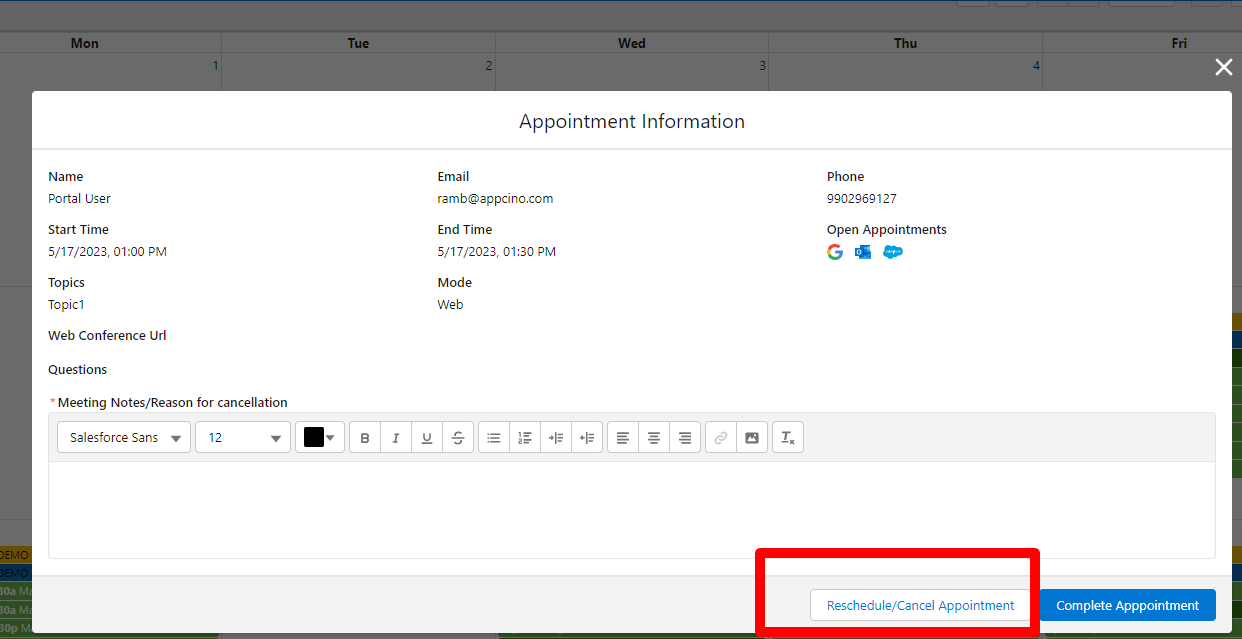
- Click on any slot
- A popup should display like below
- Add information in the “*Meeting Notes/Reason for cancellation” field and click the “Reschedule/Cancel Appointment” button
- A success message will appear that the cancellation/rescheduling was successful
- An automated confirmation email is then sent to the user