Creating EDA Relationship Records
Overview
A checkbox labeled "Create EDA Relationship Records" is available on the Campaign and Visit Series screens.
There are two conditions necessary for this checkbox to be visible:
- Guest Information must be set to "Require Information"
- EDA must be installed
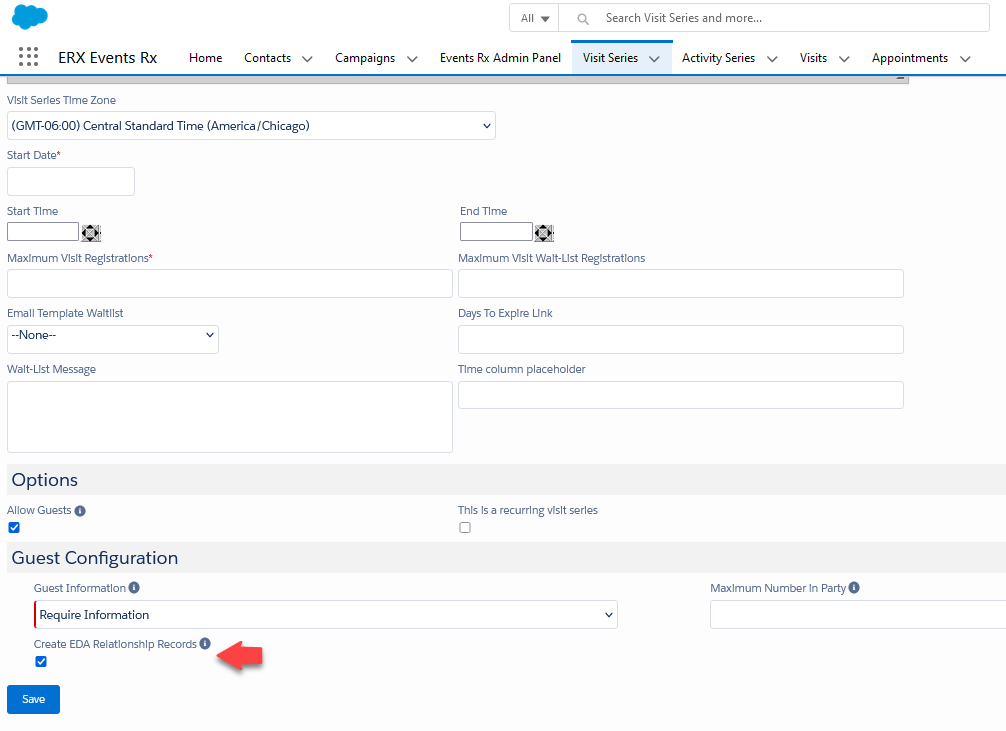
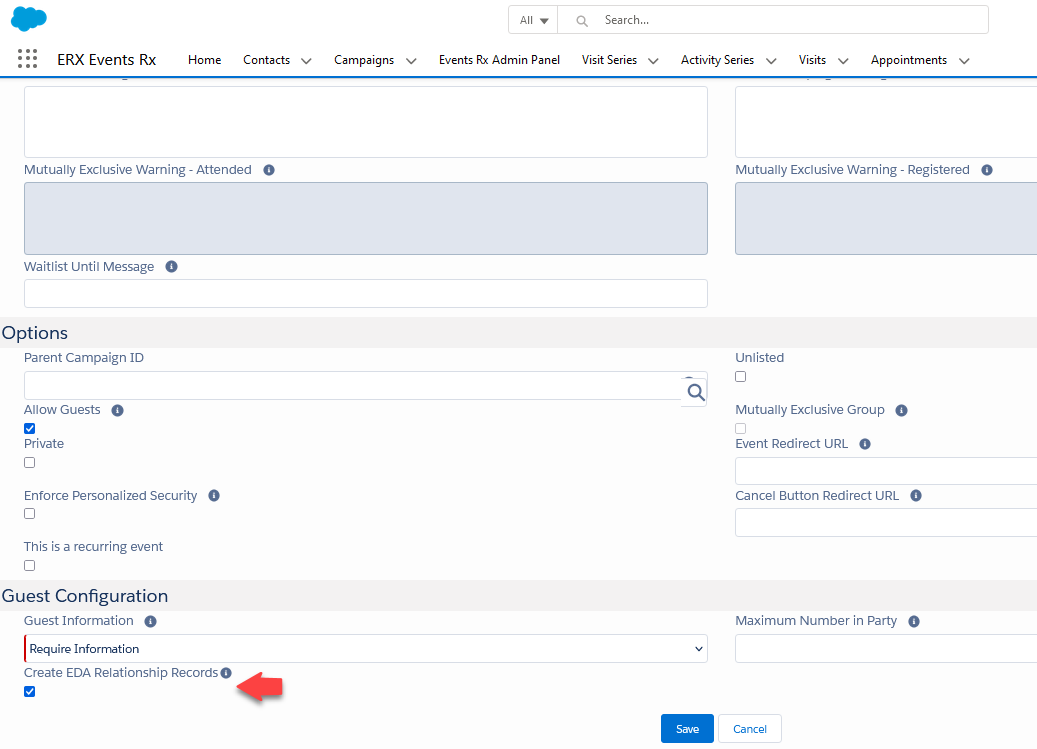
When conditions are met for the EDA checkbox to be visible, you'll find it just below the Guest Information field in the Guest Configuration section.
Here is how it looks on the configuration pages for Visit Series and Campaigns:
How to Use this Feature
Visit Series
Create the EDA Relationship Record
- Navigate to the Events Calendar tab.
- Click the New Visit Series button. This takes you to the Manage Visit Series page.
- Fill out all of the information for your Visit Series. Then, at the bottom of the page under Options, select the Allow Guests checkbox. Checking this box opens the Guest Configuration section underneath Options.
- "Require Information" in the Guest Information field will be selected by default. Leave it selected, enter a number for the "Maximum Number in Party" field, and check the "Create EDA Relationship Records" checkbox.
- Click Save.
Add 'Relationship to Primary' Custom Field to the Visit Object
After saving the Visit Series, you will need to set a custom field on the Visit object that you can include in the Guest Information Section on your event page. Here are the steps:
- On the Manage Visit Series page you just filled out and saved, scroll to
the top (if needed) and click the Configure Visit Series button at the
top. This takes you to the Registration Configuration page.
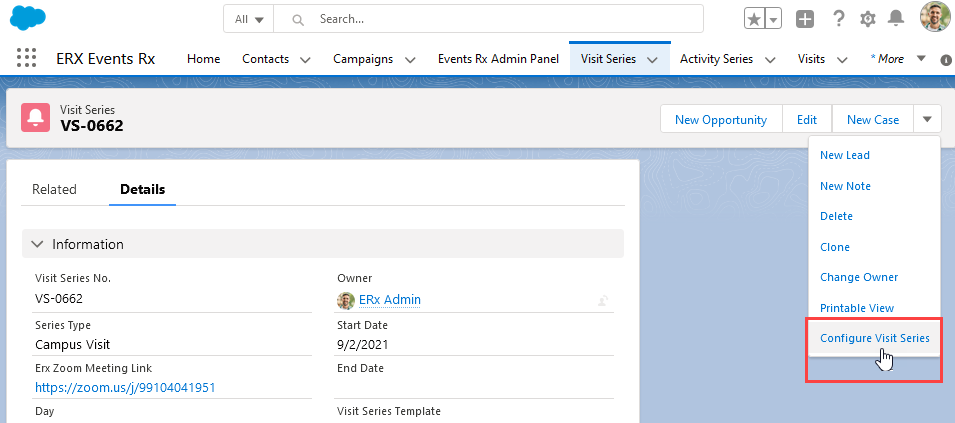 Note:You may need to click the down arrow to the right of the button set to find Configure Visit Series.
 - On the Configuration page, click the blue Add Field bar in the left column. This
pops up the Add Field window.

- In the popup window, select Visit in the Object Name picklist. Each option in this picklist dynamically populates the Field API picklist on the right.
- With Visit selected, click the API picklist and select the
ERx_Events__Relationship_to_Primary__coption. - In the Label field, type in Relationship to Primary

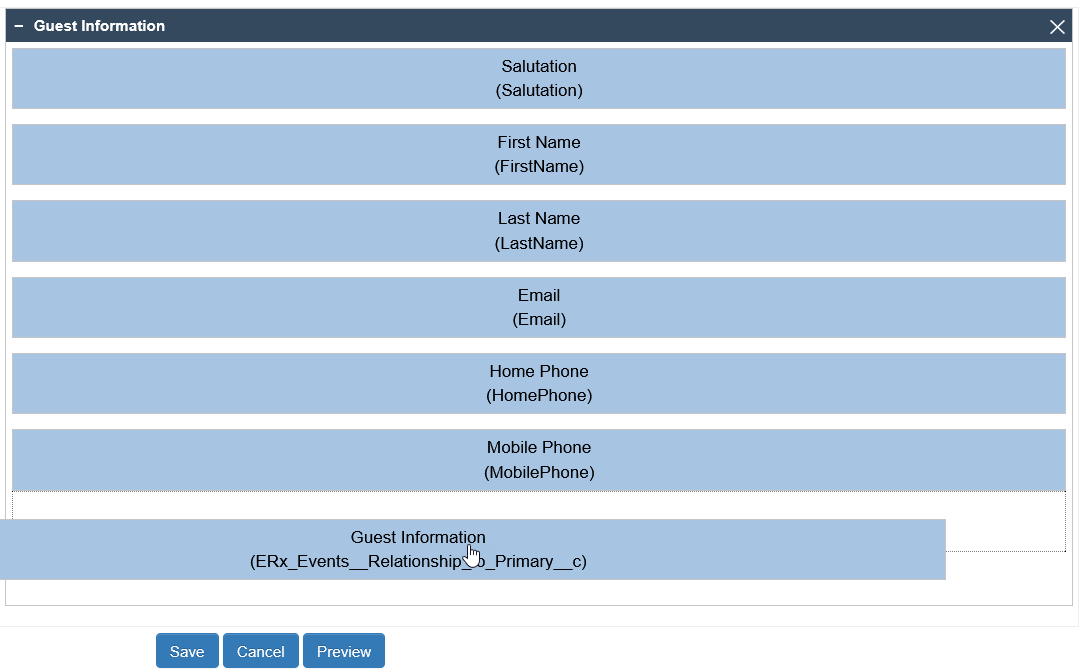
- Click Create. The Relationship to Primary field appears under the Add Field section in the left column. It is now available for you to place in the Guest Information section on your event page.
- To add it to the Guest Information section, simply drag and drop it where you
would like it to appear.
- Save the configuration.
Campaigns
Create the EDA Relationship Record
- Navigate to the Events Calendar tab.
- Click the New Campaign button. This takes you to the New Campus Campaign page.
- Fill out all of the information for your Campaign. Then, at the bottom of the page under Options, select the Allow Guests checkbox. Checking this box opens the Guest Configuration section underneath Options.
- "Require Information" in the Guest Information field will be selected by default. Leave it selected, enter a number for the "Maximum Number in Party" field, and check the "Create EDA Relationship Records" checkbox.
- Click Save.
Add 'Relationship to Primary' Custom Field to the CampaignMember Object
After saving the Campaign, you'll need to set a custom field on the CampaignMember object that you can include in the Guest Information Section on your event page. Here are the steps (these are similar to the Visit Series steps, above):
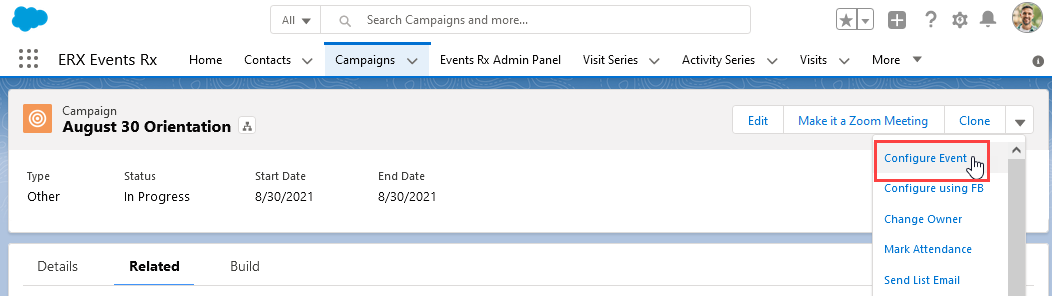
- From the new Campaign record you have just created, click the Configure Event
button in the upper right corner of the page. (If this button is not visible,
you may need to click the down arrow to the right of the button set and access
the link the drop-down list.) Either way, this will take you to the
Registration Configuration page.
- On the configuration page, click the blue Add Field bar in the left column. This
pops up the Add Field window.
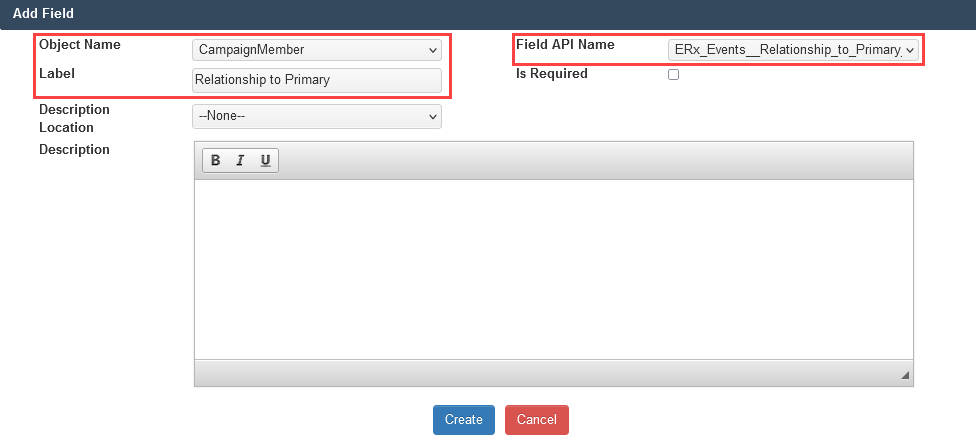
- In the popup window, select CampaignMember in the Object Name picklist. Each option in this picklist dynamically populates the Field API picklist on the right.
- With CampaignMember selected, click the API picklist and select the
ERx_Events__Relationship_to_Primary__coption. - In the Label field, type in Relationship to Primary.
- Click Create. The Relationship to Primary field appears under the Add Field section in the left column. It is now available for you to place in the Guest Information section on your event page.
- To add it to the Guest Information section, simply drag and drop it where you would like it to appear.
- Save the configuration.
Using This Feature with FormBuilder
Follow these steps to configure the Campus Campaign Registration Page to enable the feature in FormBuilder.
- Select & drop Relationship to Primary
(
ERx_Events__Relationship_to_Primary__c) field inside Guest Information add-another section on the page.
- Select Create EDA Relationship Records
(
ERx_Events__Create_EDA_Relationship_Records__c) field in Campaign dataset.