Internal Forms
Overview
The purpose of this document is to teach you how to use FormBuilder Rx to build Salesforce Platform Forms in Lightning to quickly and dynamically capture information from your internal users.
Why should you use this?
Salesforce Platform Forms allow you to leverage many capabilities of Formbuilder Rx that are not available in a standard Lightning page. For example, a Formbuilder Rx page will allow you to update/create multiple related objects at once (like an application and contact), and allow for paragraphs, images, virtual fields and many other rich features. Common examples of Formbuilder Rx and Salesforce Platform Forms can be leveraged are internal business development forms or admission counselor forms updating multiple items at once.
Section 1. Building Your Environment
Step 1
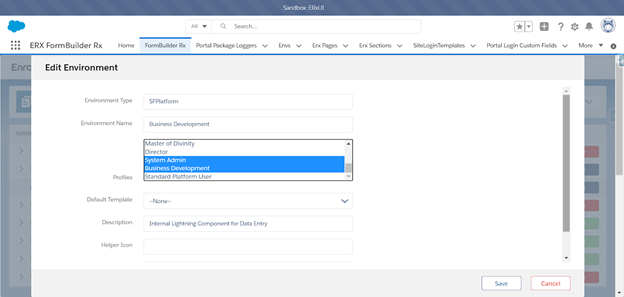
Go to . Choose SFPlatform as the environment type, and select the appropriate profile(s) (see screenshot below). Optionally, you can apply a template to style the form.
Step 2
Step 3
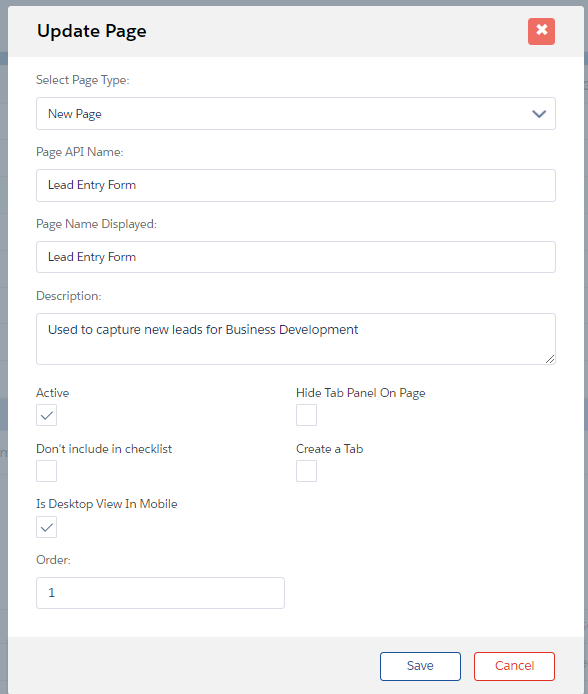
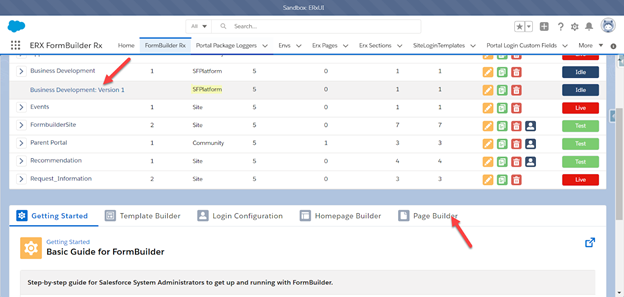
Click the Create New Page button on the Page Builder tab and set up the page you would like to host internally. For the page settings, create a new page, order and name (as shown below). Please note that the order will dictate which page will show up first.
Step 4
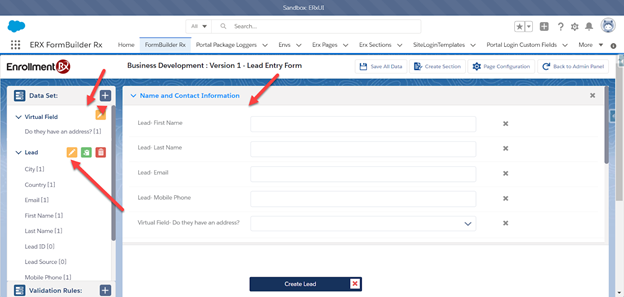
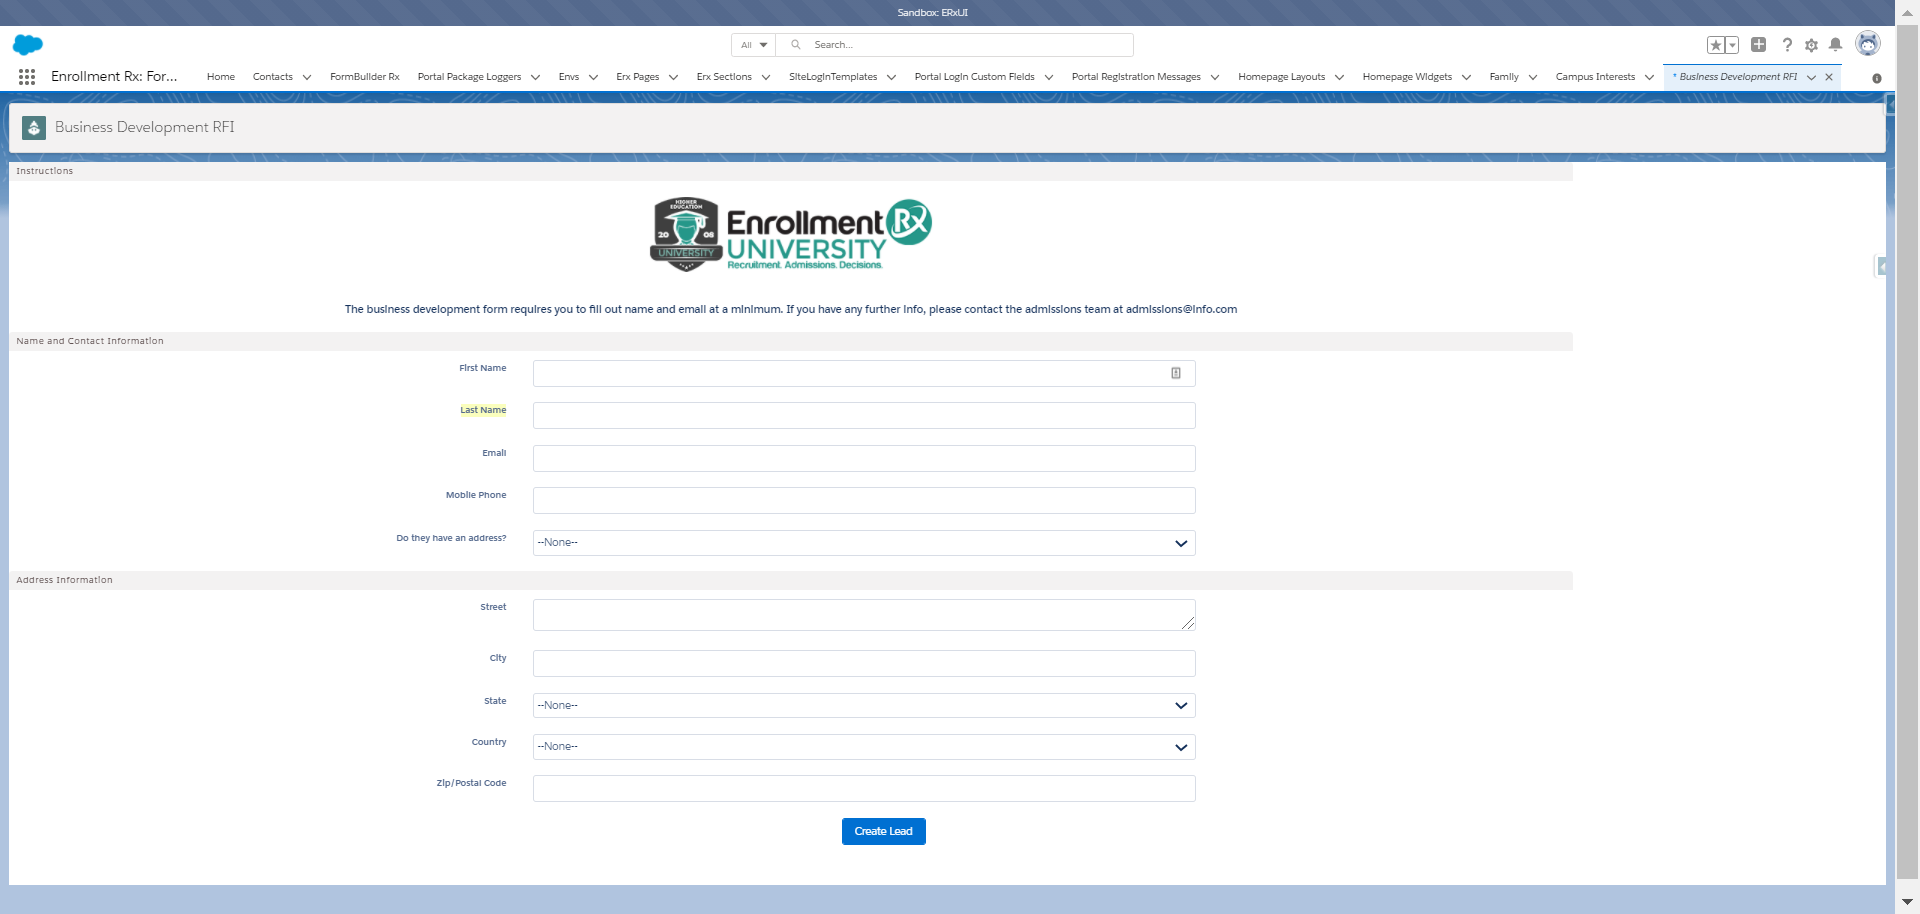
Next, you can start building your page. In this example, the Lead Data set and fields were added to the form. Additionally, a virtual field is shown for business development staff, labeled “Do they have an address”. This controls the address section.
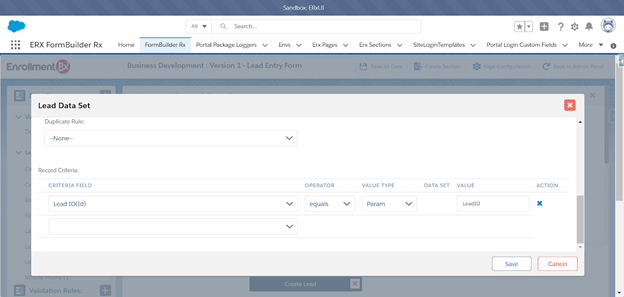
For this particular lead form, enter the following criteria to pass the ID of the Lead as a parameter. The reason for this is since no ID will be passed a new blank lead will be returned so that a new lead is always created when a user visits this form.
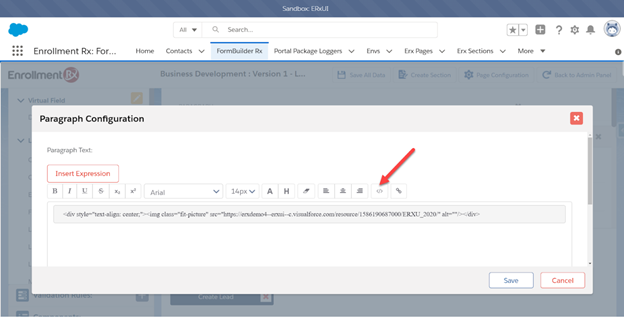
Inserting an Image
By clicking the </> button, you can insert HTML into your paragraph to reference an image, and that can be to an internal static resource or external URL. You can use this HTML as a template to insert your image:
<div style="text-align: center";">
    <img class="fit-picture" src="insert your image url here" alt=""/>
<div/">
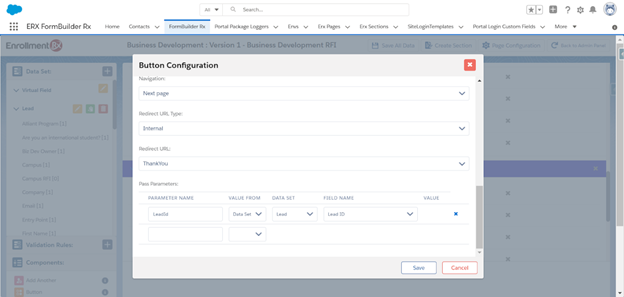
Step 5
Finally, within the Button Configuration dialog (shown below), you can customize what type of action you would like to happen. If you select the Next Page navigation option, it will direct you to the next page in order or you can specify a redirect URL. Your other option is to select a Save Button to save the information and will refresh the page. You can also determine if you’d like the button to direct to another page when a user clicks it.
Section 2. Adding the Form to a Lightning Page
Step 1
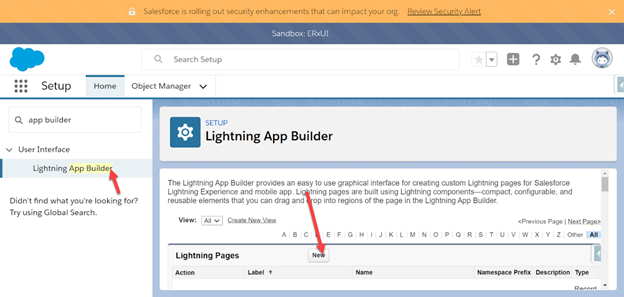
Step 2
Step 3
Navigate to the Custom Lightning Components, and drag FBRx_PageBuilder to the page.

Step 4
Finally, when you save the page, you can determine if you want to add this to any of your applications as a tab.
In this example it was added to the demo tab and the mobile layout.
This process allows the example business development team to add leads directly and take advantage of FormBuilder Rx functionality.
In conclusion, FormBuilder Rx can be added as a component to a Lighting page to help you capture information and take advantage of FormBuilder Rx’s robust functionality. Additionally, it removes the extra steps involved in setting permissions for a site guest user, which are sometimes required for a site internal RFI form.