How to Send Confirmation Emails
To send custom emails for Campaign Member with Registered and Wait-list status note the following:
- Confirmation Emails are controlled by three fields on the Campaign and one on the Campaign Member
- On the CampaignMember: a checkbox called “Send Email”—only Campaign Members with this box checked will receive confirmation emails.
- You should use either Process Builder or Workflow Rules to check this box for those Campaign Members to whom you wish to send emails. A simple Workflow rule that checks the box for all Campaign Members of record type “Campus Campaign Member” is an easy way to start, and you can make more nuanced rules should the need arise to avoid sending confirmation emails under certain circumstances.
- On the Campaign: There are three picklist fields on the Campus Campaign edit page called “Sender Email”, “Email Template Registration” and “Email Template Wait-List”. Use these fields to choose the “From” address and the email templates to use for Registration and Wait-List confirmation emails.
- The “Sender Email” field allows you to select which of your Organization Wide Email Addresses will be used to send confirmation emails for that campaign. This field appears on the edit screen only if you have configured at least one Organization-Wide Email Address.
- The template pick lists contain all and only the Email templates stored in the Email Template folder called "Erx Event Registration Custom Email."
- You can copy the SAMPLE templates in that folder to create your own.
Note:At least one Organization-Wide Email Address must be configured and populated in the “Sender Email” field in order to send confirmation emails for a Campaign. - On the CampaignMember: a checkbox called “Send Email”—only Campaign Members with this box checked will receive confirmation emails.
- Create an event and select a Sender Email and an Email Template for Email Template Registration and Email Template Wait-List.
- Register for the event. Campaign Member will be created after successful registration, and your new workflow rule will check the Send Email checkbox on the Campaign Member.
- When both these conditions have been met (i.e., CampaignMember Status is “Registered” or “Wait-List” and the CampaignMember’s Send Email checkbox is checked) then the appropriate (Registered or Wait-List) email will be sent to the Campaign Member from the address selected in "Sender Email."
Note:
In order to function properly, all Registration and Waitlist email templates must be stored in the email templates folder called “Erx Event Registration Custom Email”. To create your own email templates, you can copy the SAMPLE templates in that folder.
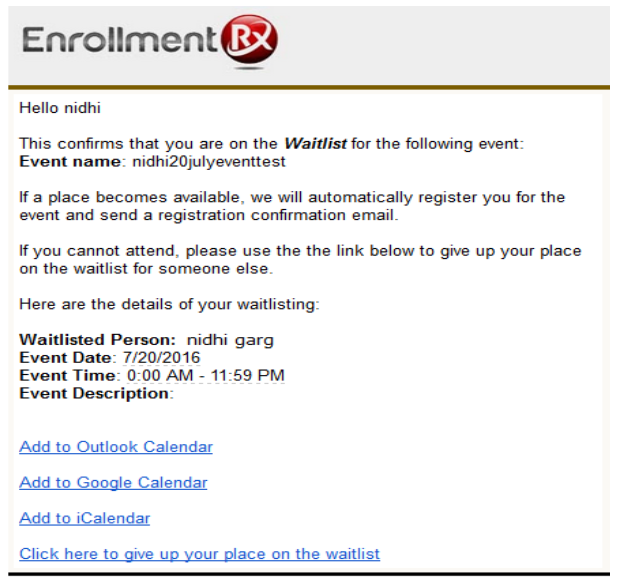
Wait-List status Campaign Member Confirmation Email snapshot
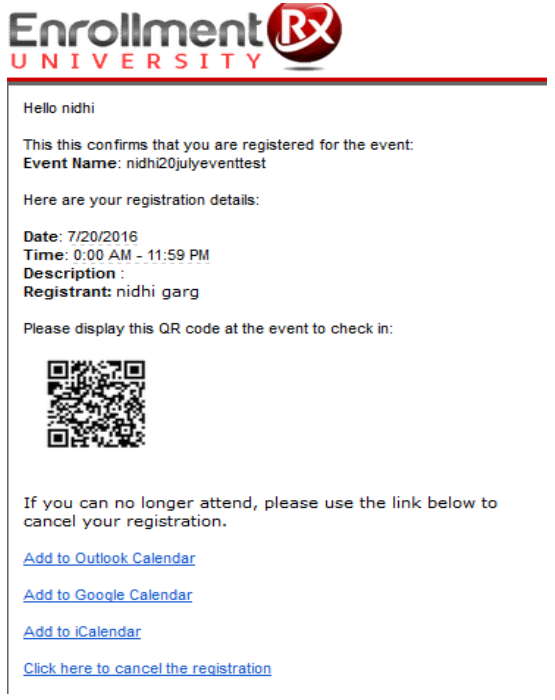
Wait-List To Registered status Confirmation Email snapshot
Note:
If the same Email Template is selected for both “Email Template Registration” and “Email Template Wait-List” then same email will be sent for both Registered and Wait-List status.