Staff Calendar: Configuration and Setup
Overview
The following instructions will step you through configuration and setup of your staff's internal appointment calendar.
- Events Rx 2023 Release 1
- FormBuilder Rx 2023 Release 1
- DXP 2023 Release 1
For New Orgs: Salesforce Settings Verification
Session Settings
In Salesforce Winter '23, Lightning Web Security (LWS) for Lightning Web Components (LWC) is enabled by default. In new orgs, your Admin will need to follow the below steps to disable LWS:
- Go to Setup and search for "Session Settings"
- Click Session Settings when it appears
- On the Session Settings page, scroll down for the Lightning Web Security section
- Uncheck the checkbox next to
Use Ligthning Web Security for Lightning
                        web components
(so that its value is set to false) and click Save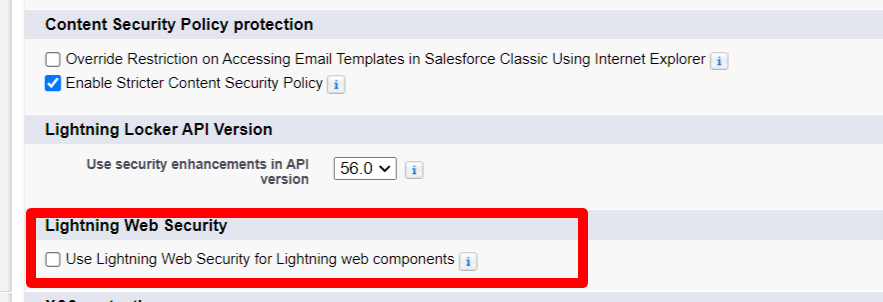
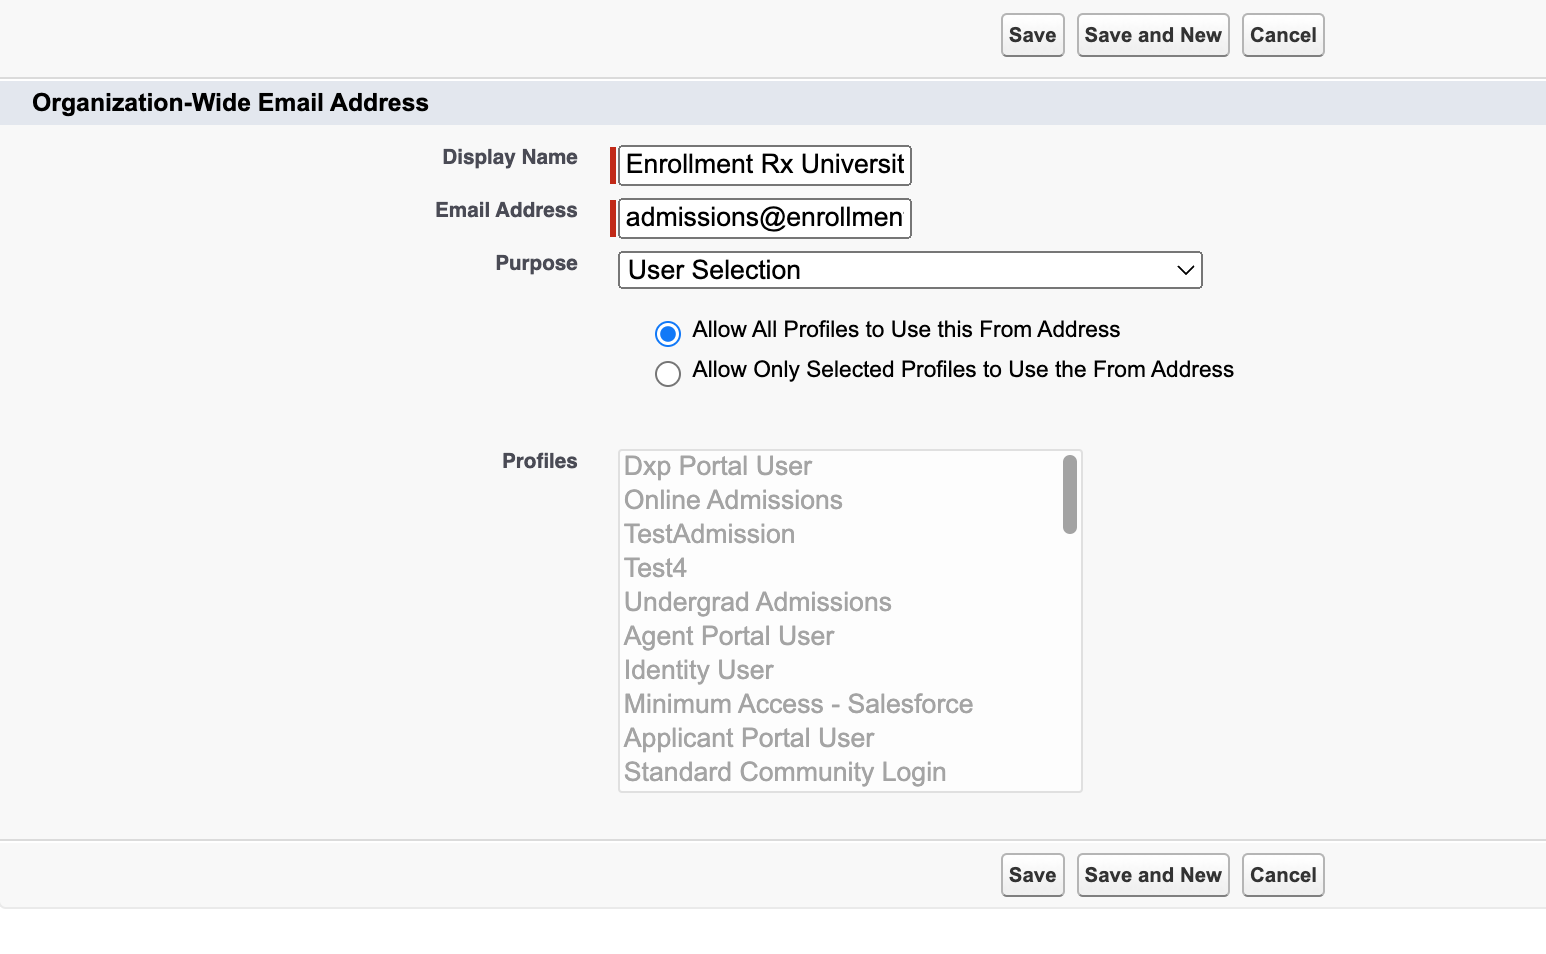
Set Up Organization-Wide Email Addresses
- Go to Setup and search for "Organization-Wide Addresses"
- Click on Organization-Wide Addresses when it appears
- On the Organization-Wide Email Addresses page, click the New button
- Enter your org details and click Save
Set Up Appointment Calendar Configurations
Appointment Manager contains two main setup modules:
- An appointment calendar for your staff users
- An appointment registration page for your external constituents (e.g., students, prospects, financial aid applicants, etc.)
Appointment Calendar for Staff Users
There are six main steps to set up a calendar for your internal staff:
- Contact Enrollment Rx to obtain licenses for the Appointment Manager module
- After the licenses are allocated, your Admin will need to manually update the
user layout by adding the
Events Rx Appointment Userfield - Your Admin should also enable the "Events Rx Appointment User" field on all
related user records. Only those users with the "Events Rx Appointment User"
value set to true will be able to access Appointment Manager. Follow the
below steps:
- Go to Setup and select "Users" and then "Users" again in the
drop-down list

- On the Active Users page, click the Edit link next to the selected user
- Check the checkbox for
Events Rx Appointment Userto set it to true, and click Save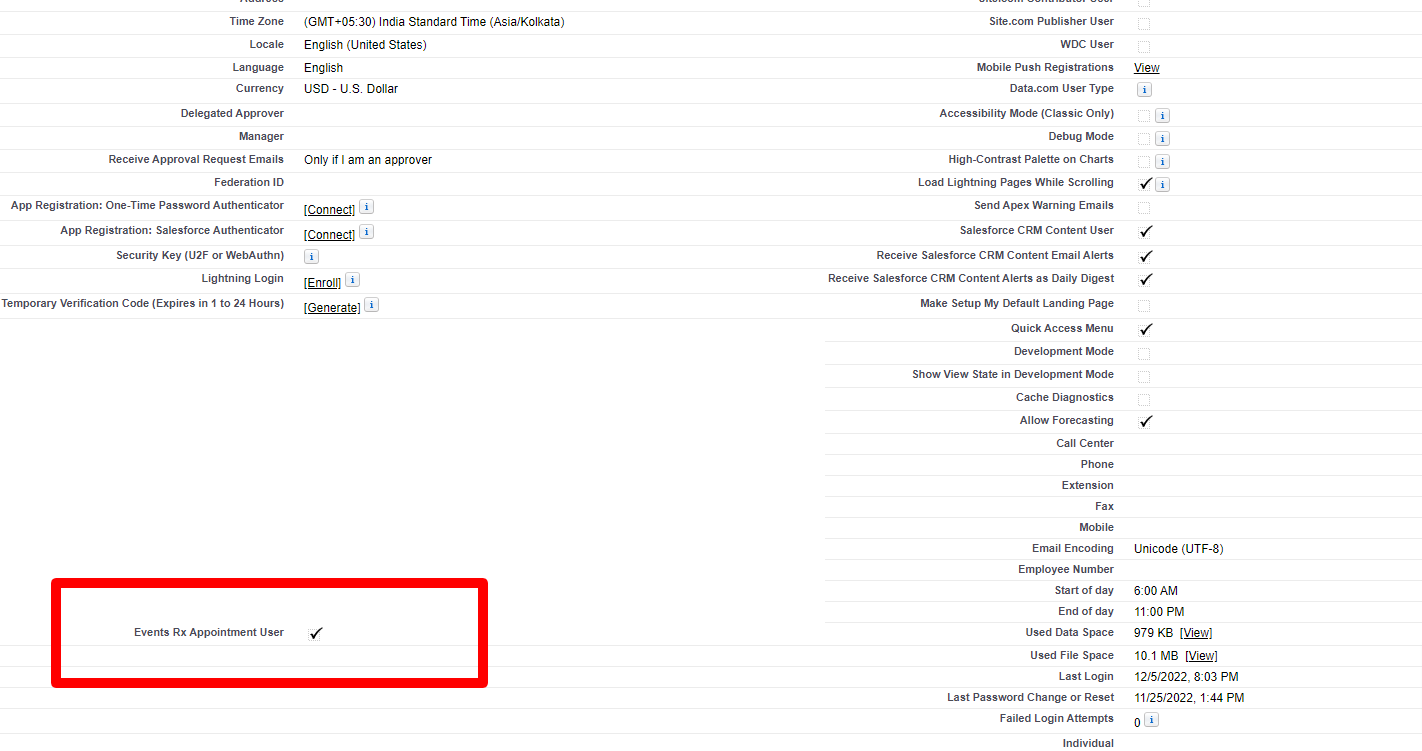
- Go to Setup and select "Users" and then "Users" again in the
drop-down list
- Assign the following three Permission Sets to your staff users:
- ERxEvent Appointment Scheduler Staff User Access
- ERx_DXP Appointment Scheduler Staff User Access
- ERx_DXP User Access
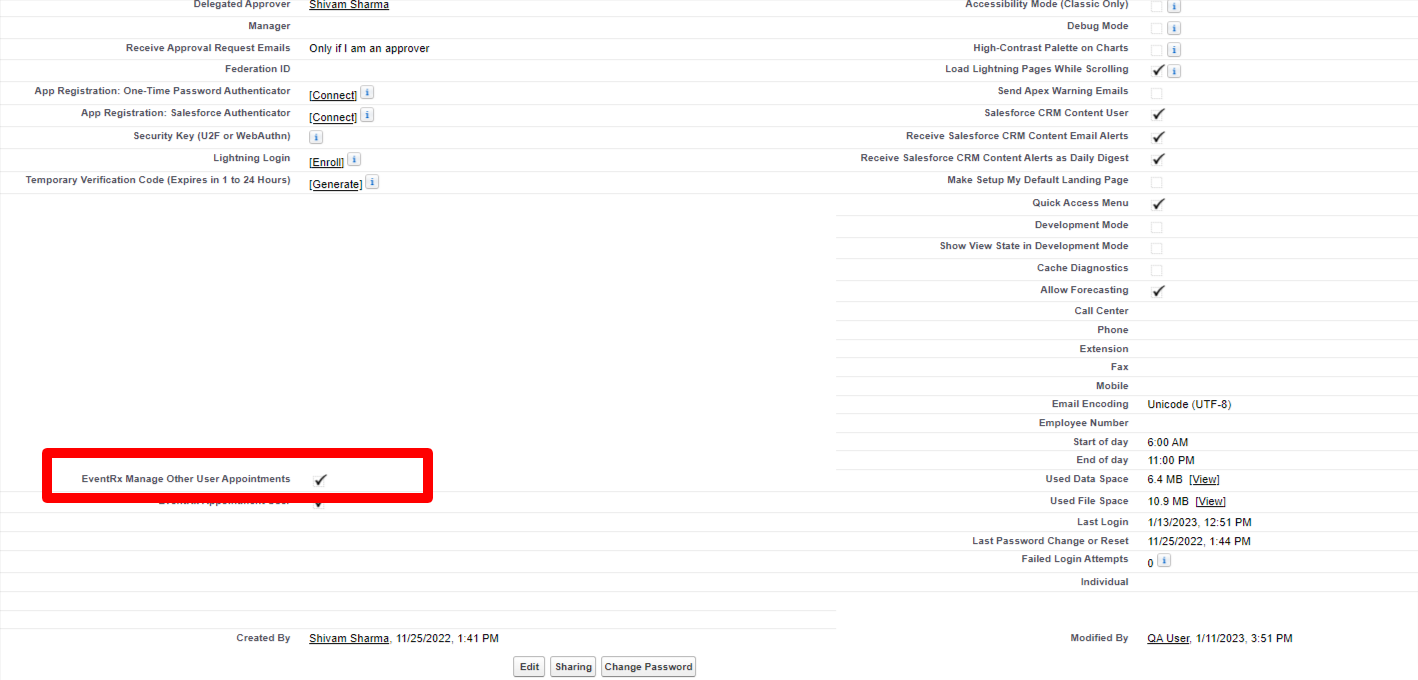
- Check the
EventRx Manage Other User Appointmentscheckbox to set it to true.Note:Follow these steps:Be sure to add the field on the User Layout.- Go to , search "Users" and Edit layout
- Add the
EventRx Manage Other User Appointmentsfield to the layout - Check the checkbox to set its value as true and click Save
- When the field value is set to true for the Staff User, Appointment
Calendar (DXP) will display a new filter option to select a staff user

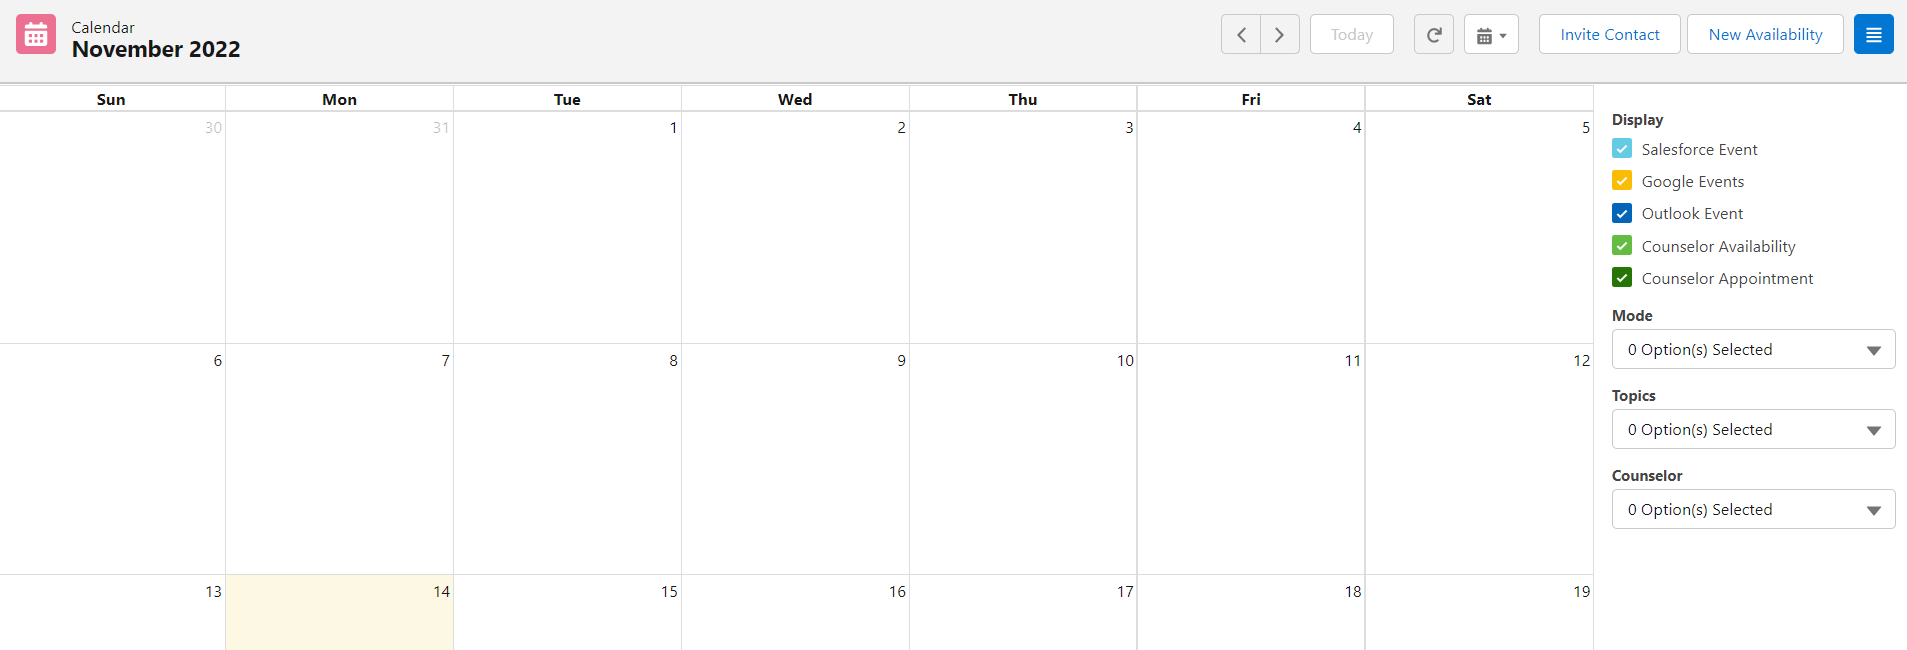
- Access the Appointment Calendar (DXP) interface page:
- In Salesforce Lightning Experience, click the App Launcher
- Search for Appointment Calendar (DXP)
Set Up Staff User Availability Slots
- Go to the App Launcher and find "Appointment Calendar (DXP)"
- On the Appointment Calendar tab, click the New
Availability button -- the below screen should display:
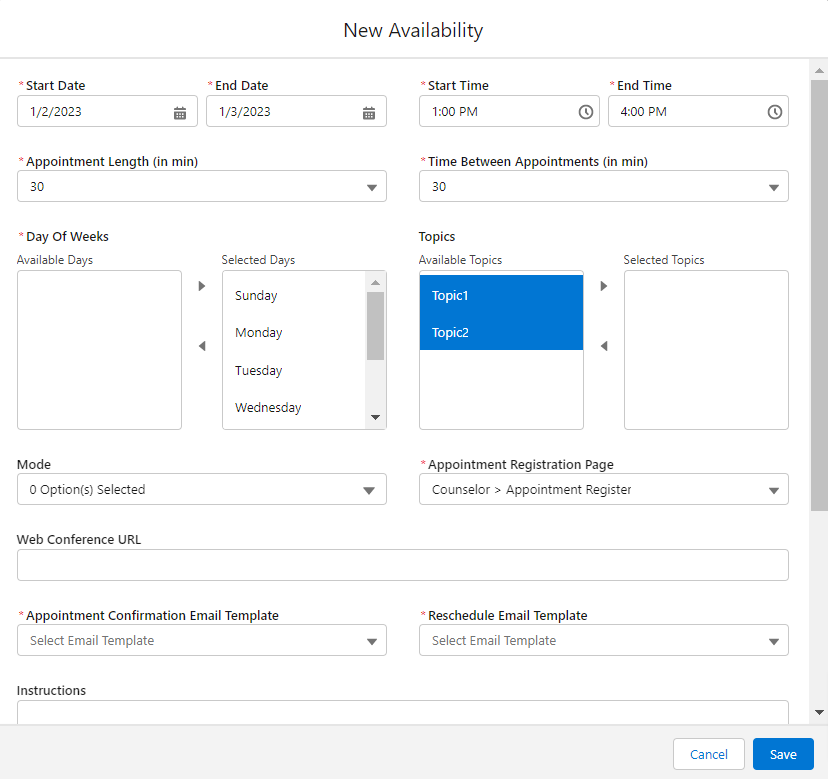
Availability Slot Creation Examples
The availability attributes are:
- Start Date: Start Date of a recurring appointment
- End Date: End Date of a recurring appointment
- Start Time: Appointment range start time
- End Time: Appointment range end time
- Appointment Length: Duration of a single appointment measured in minutes
- Time Between Appointments: The gap between appointments measured in minutes
- Days of Week: On which day the appointment is scheduled
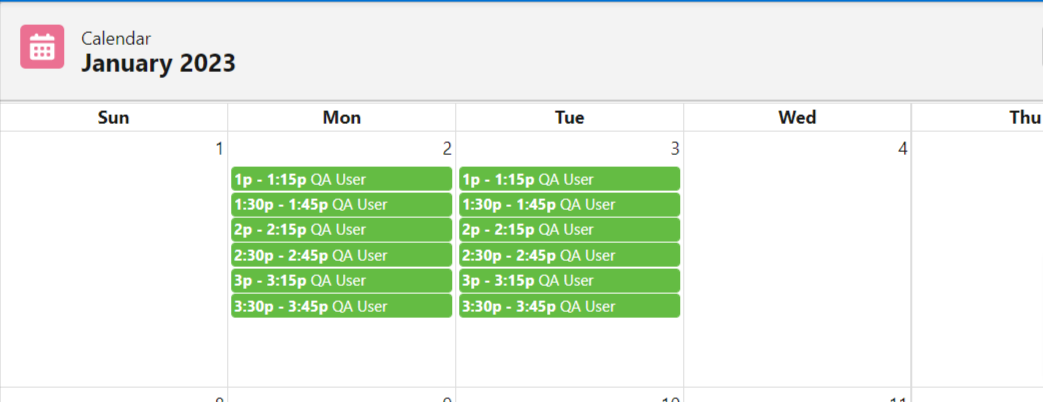
Slot creation Scenario 1
| Start Date | End Date | Start Time | End Time | App Length | Time Between Appointments | Days of Week | Output |
|---|---|---|---|---|---|---|---|
| 1/2/2023 | 1/3/2023 | 1:00 PM | 4:00 PM | 30 | 30 | All Day | The system creates 3 slots each day (30 minutes each with a 30-minute gap) as shown below |
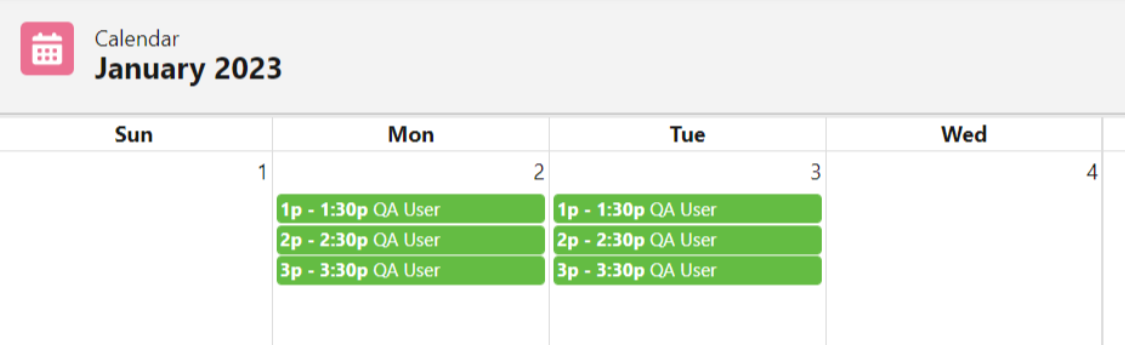
Slot creation Scenario 2
| Start Date | End Date | Start Time | End Time | App Length | Time Between Appointments | Days of Week | Output |
|---|---|---|---|---|---|---|---|
| 1/2/2023 | 1/3/2023 | 1:00 PM | 4:00 PM | 15 | 15 | All Day |
The system creates 6 slots each day (15 minutes each with a 15-minute gap) as shown in the image below |
Enable Google/Outlook Integration
- Go to Custom Settings
- On the Custom Settings page, click the Manage link next to the Events Rx custom setting
- Click DEFAULTS
- On the Events Rx Detail page, click the Edit button
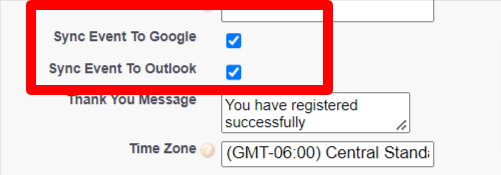
- On the Events Rx Edit page, scroll down and check the following boxes
to set them to true:
- Sync Event To Google
- Sync Event To Outlook
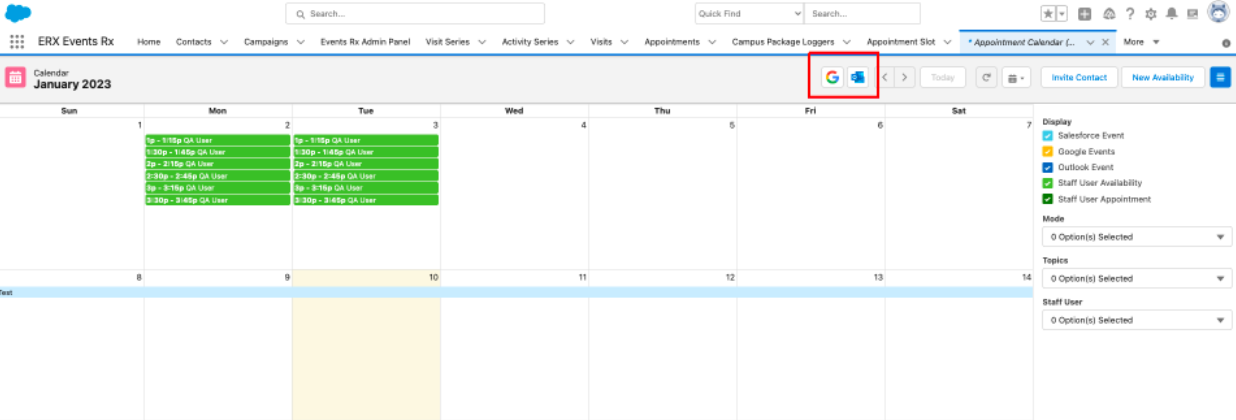
- Navigate to the Appointment Calendar to verify the Google and Outlook icons
have been added:
Scheduler Job Integration
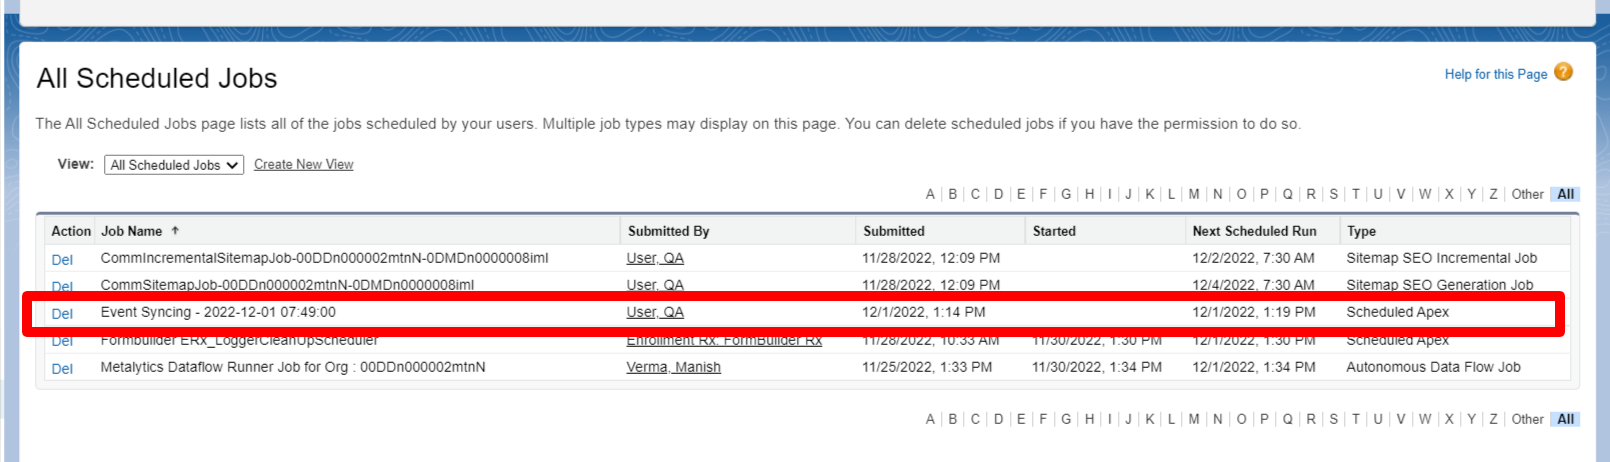
Staff users need to run the below script in the Developer Console to start Scheduler Jobs for Google and Outlook integration. This job will run every five minutes after the first execution.
Steps
- To open the Developer Console, click the Setup icon and the "Developer Console" link in the Quick Access menu
- In the Developer Console window that pops up, click on the Debug menu and select the Open Execute Anonymous Window option
- Copy and paste the following script:
-
Datetime sysTime = System.now().addSeconds(60 );
String nextFireTime = '' + sysTime.second() + ' ' + sysTime.minute() + ' ' + sysTime.hour() + ' ' + sysTime.day() +
'' + sysTime.month() + ' ? ' + sysTime.year();
System.schedule( 'Event Syncing - ' + sysTime, nextFireTime, new ERx_Events.EventRxSyncEventScheduler());
-
- Click Execute