Outlook Integration
Steps to Configure Outlook
- Open a browser and go to the following URL:
https://portal.azure.com/ - Sign in with your Microsoft Account
- In the Search ar, type "App Registration" and click on it
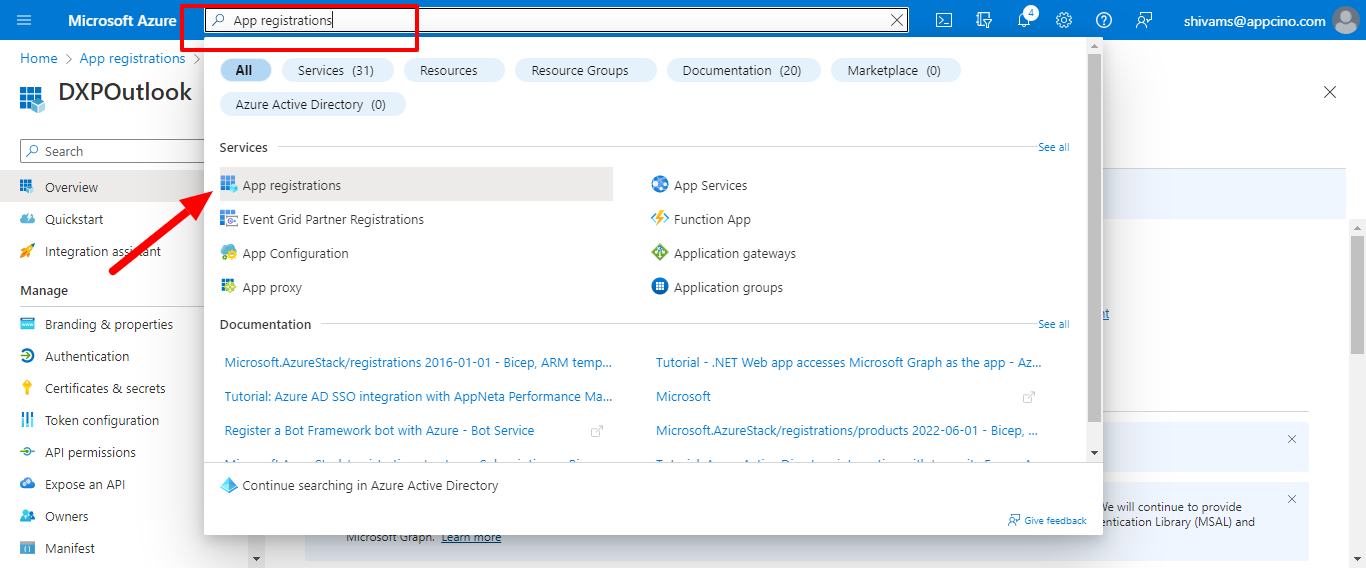
- Click on "New Registration"

- Give any name to the App
- In the Supported Account Type, select any type as the requirement
- Account Type = need to put
- In the Redirect URL section, select "Web" in the drop-down menu and add
your Visualforce page "EventRxOutlookIntegration" URL. Append
/apex/EventRxOutlookIntegrationSteps to Find the URL in Visualforce Pages
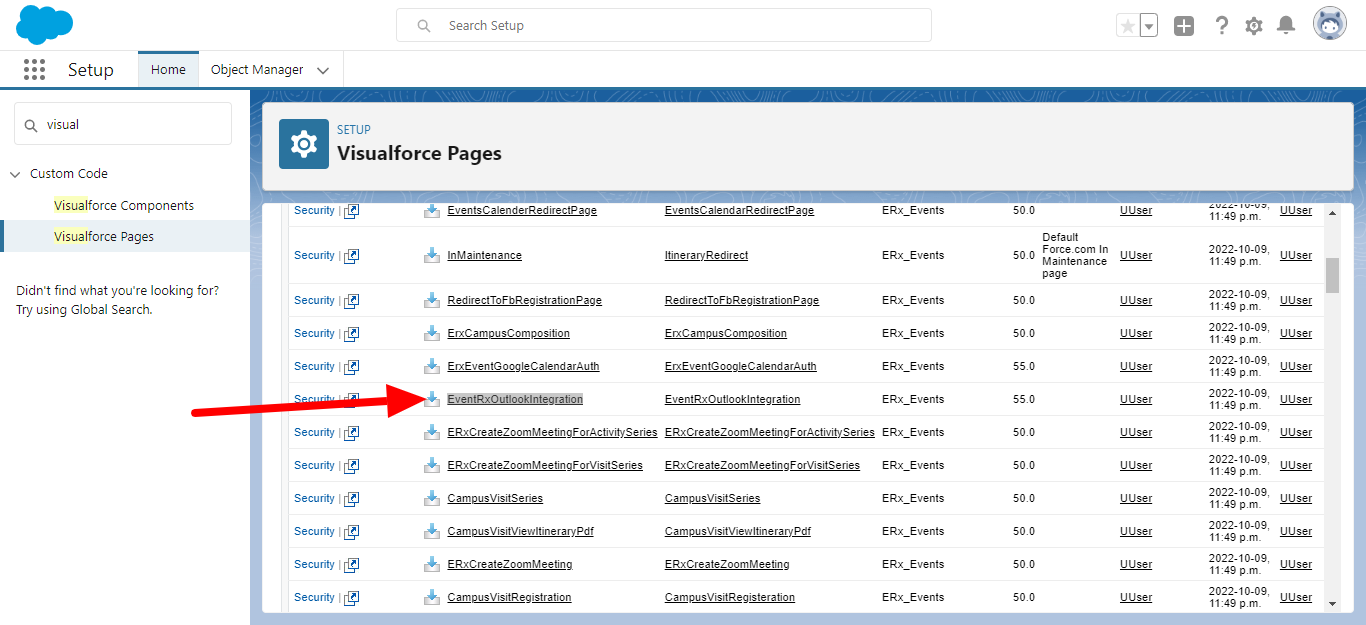
- Navigate to your Salesforce org. Click Setup and search for Visualforce Pages
- On the Visualforce Pages screen, click the
"EventRxOutlookIntegration" link
- Click the Preview button

- Copy the URL before the ".com" and append
/apex/EventRxOutlookIntegrationin the above instructions - Example URL:
https://enterprise-site-5151-dev-ed--erx-events.vf.force.com/apex/EventRxOutlookIntegration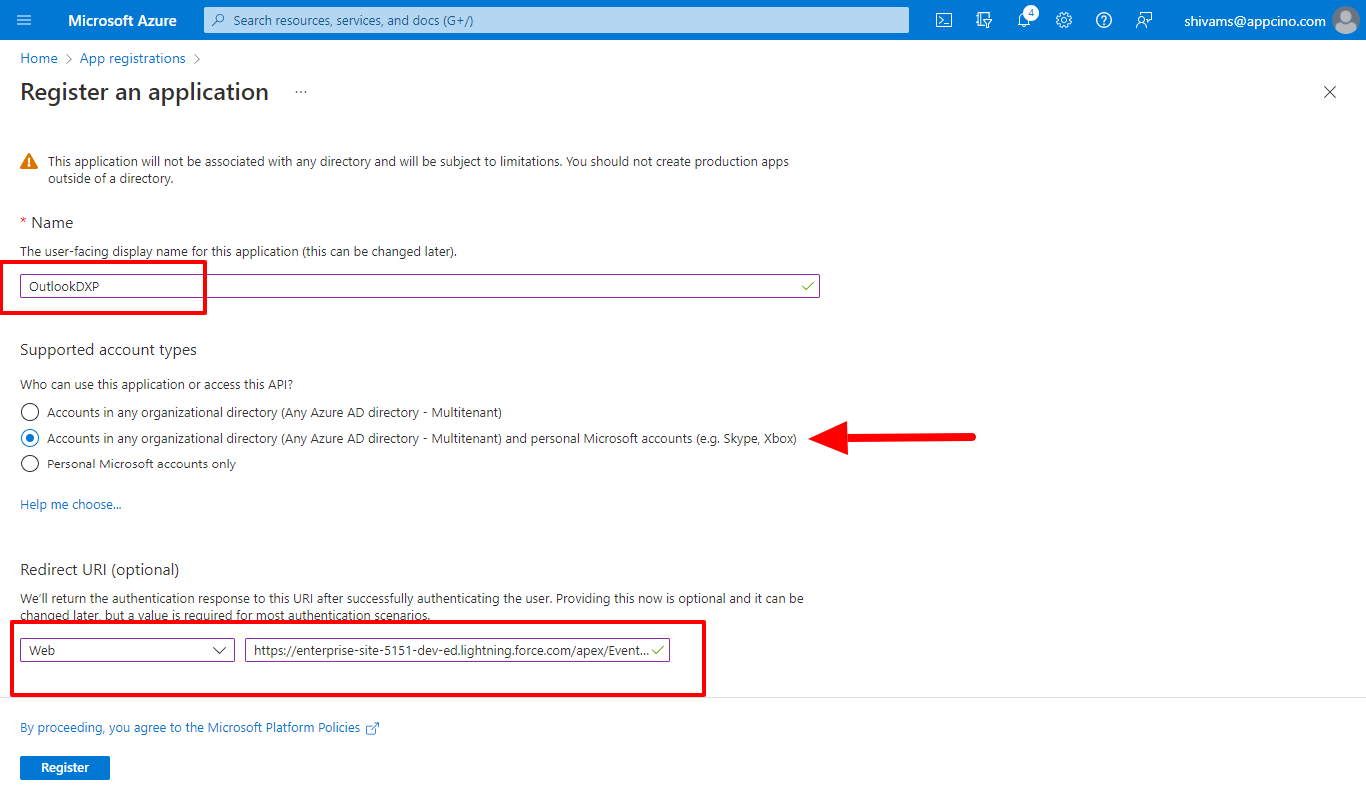
- Next, click the Register button
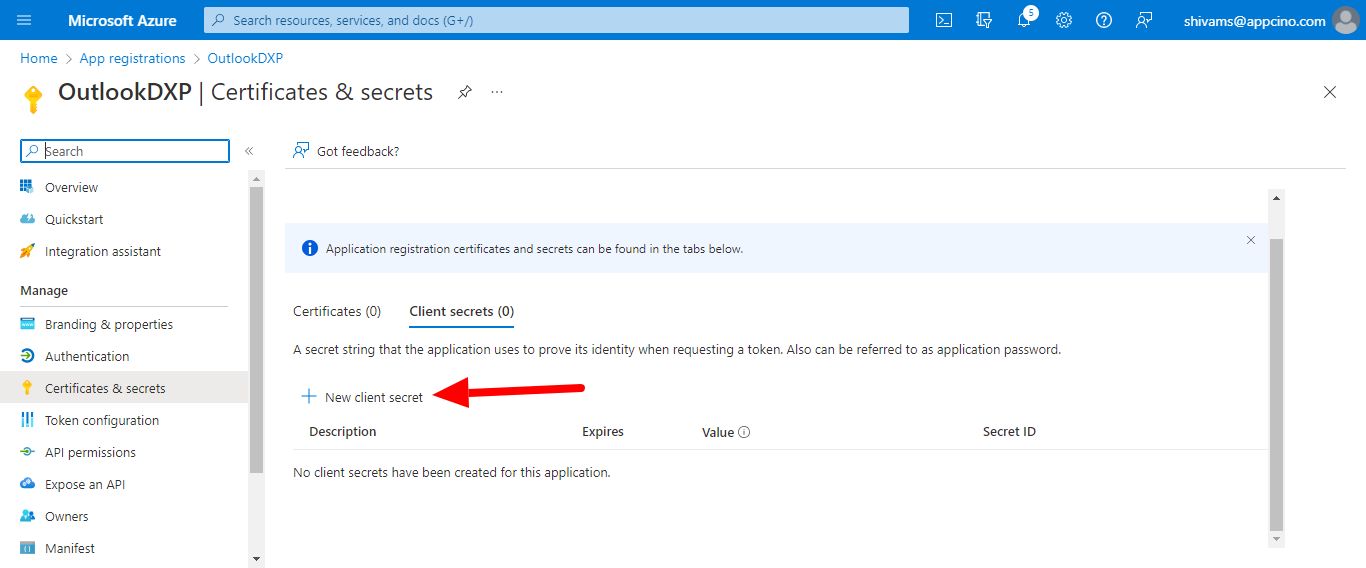
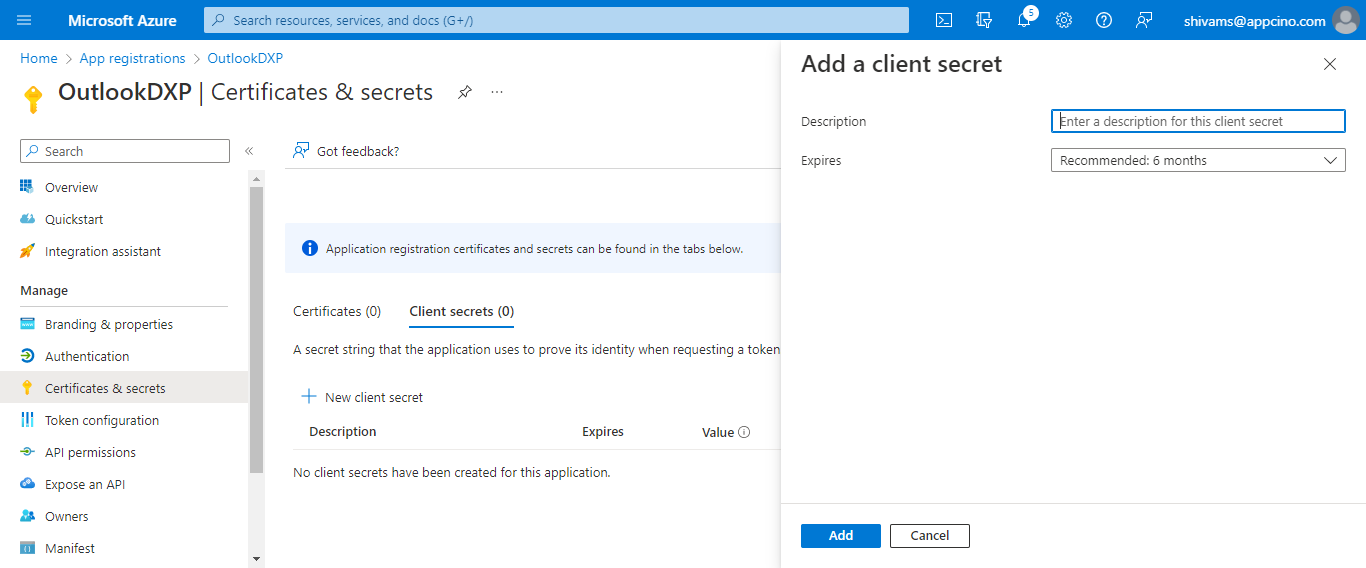
- Click "Add a certificate or secret"

- Click on "New client secret"
- Add any description. On the "Expires" drop-down menu, select any value
according to your requirements. Then click the Add
button.
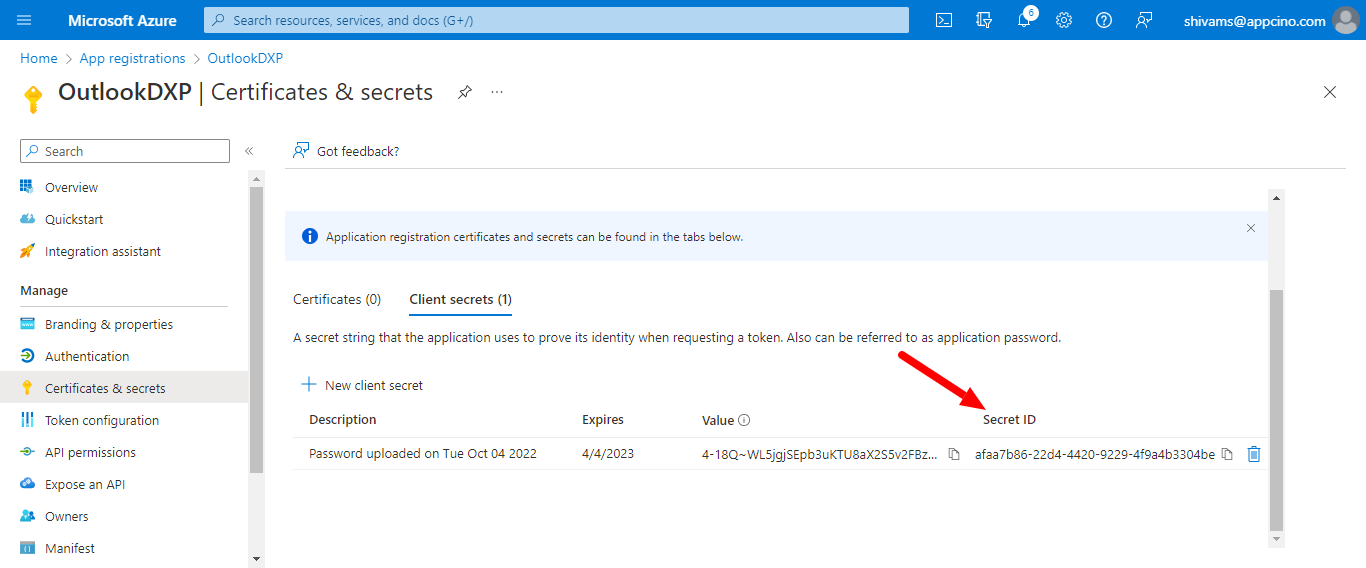
- Your client secret will be generated like in the example here:
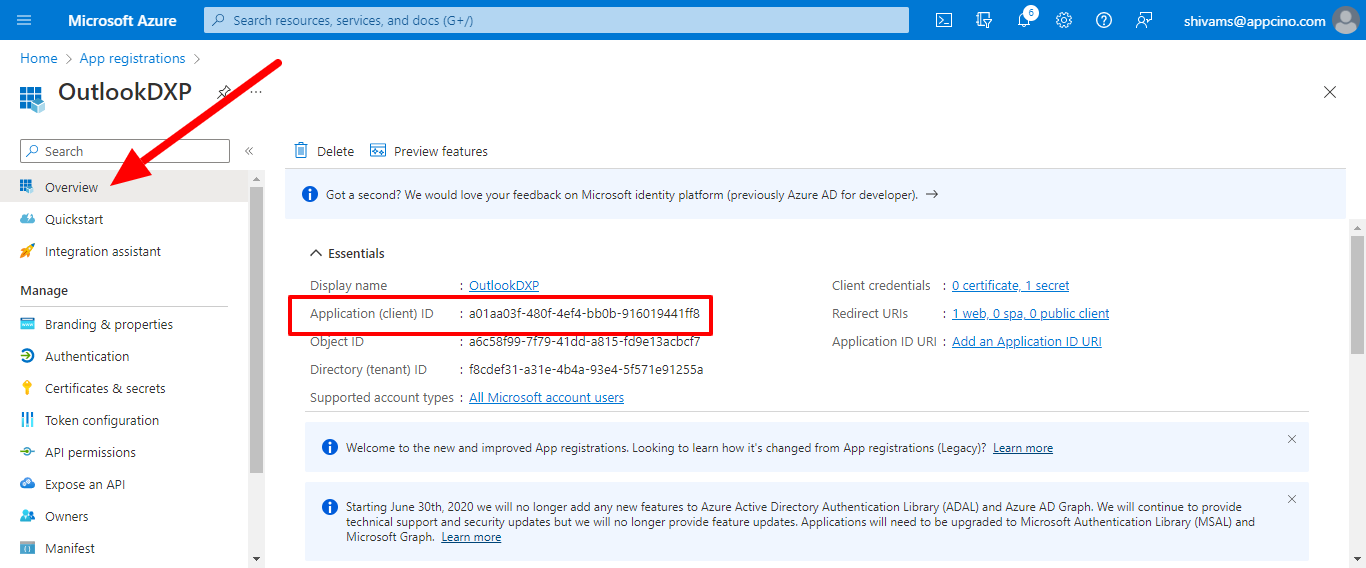
- The Client ID will be available from the Overview link
- Now go back to your Salesforce org and click Setup
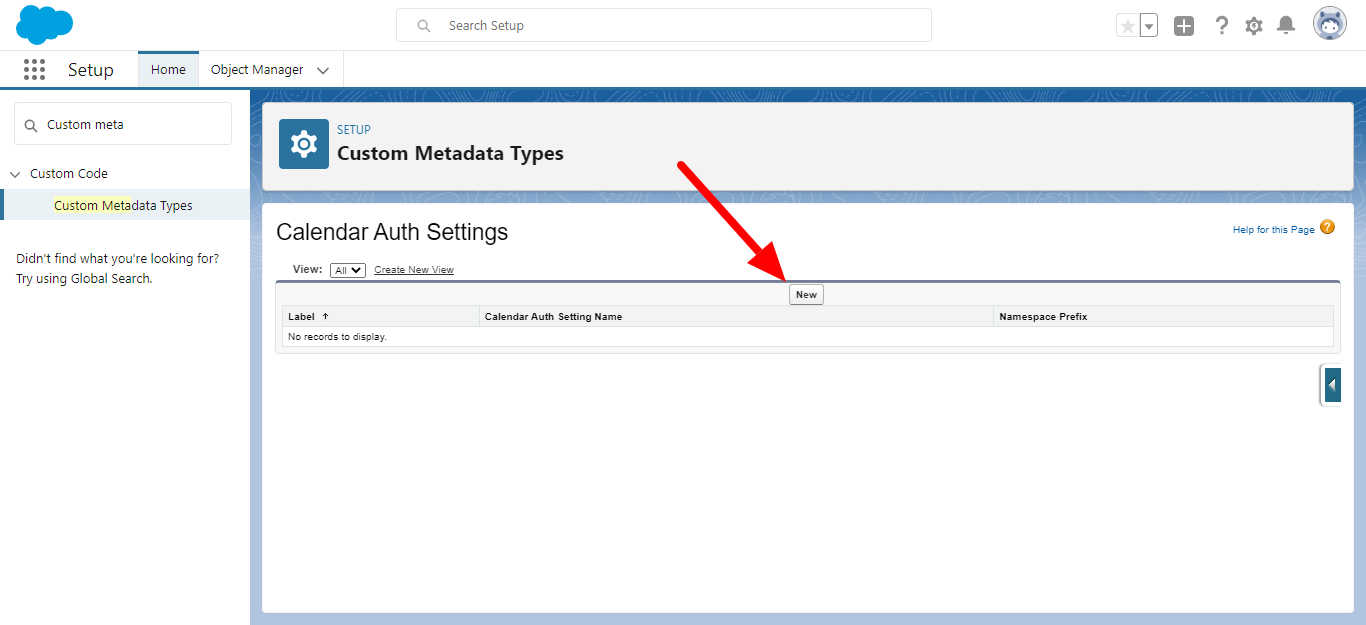
- Search for "Custom Metadata Type"
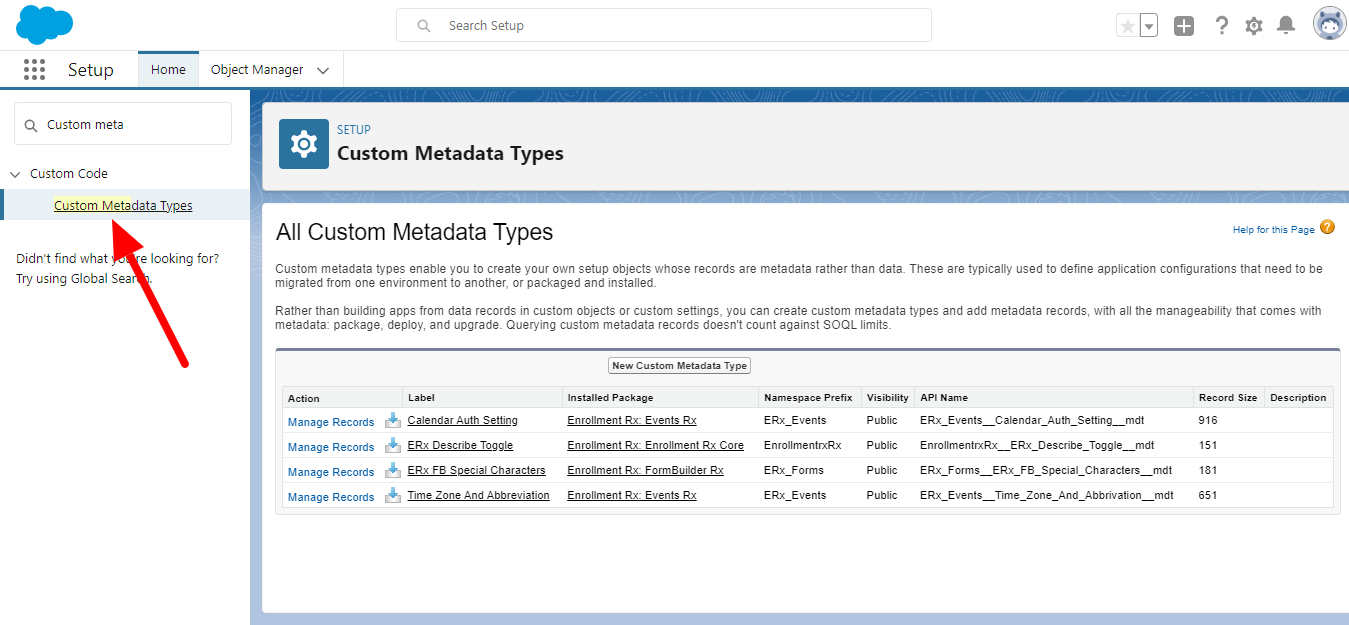
- Click on the "Manage Records" link next to "Calendar Auth Settings"
- On the Calendar Auth Settings page, click New
- Add a Label and the Calendar Auth Setting Name
- Add the Client ID, Client Secret and Redirect URL in their respective
fields
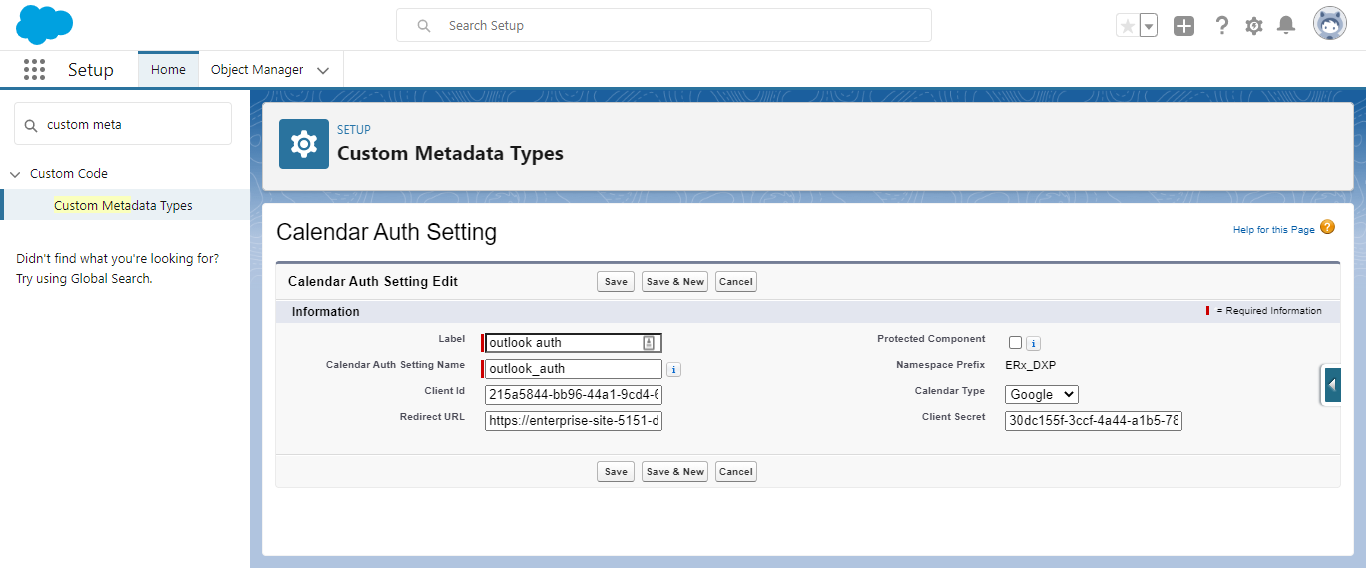
- Click Save
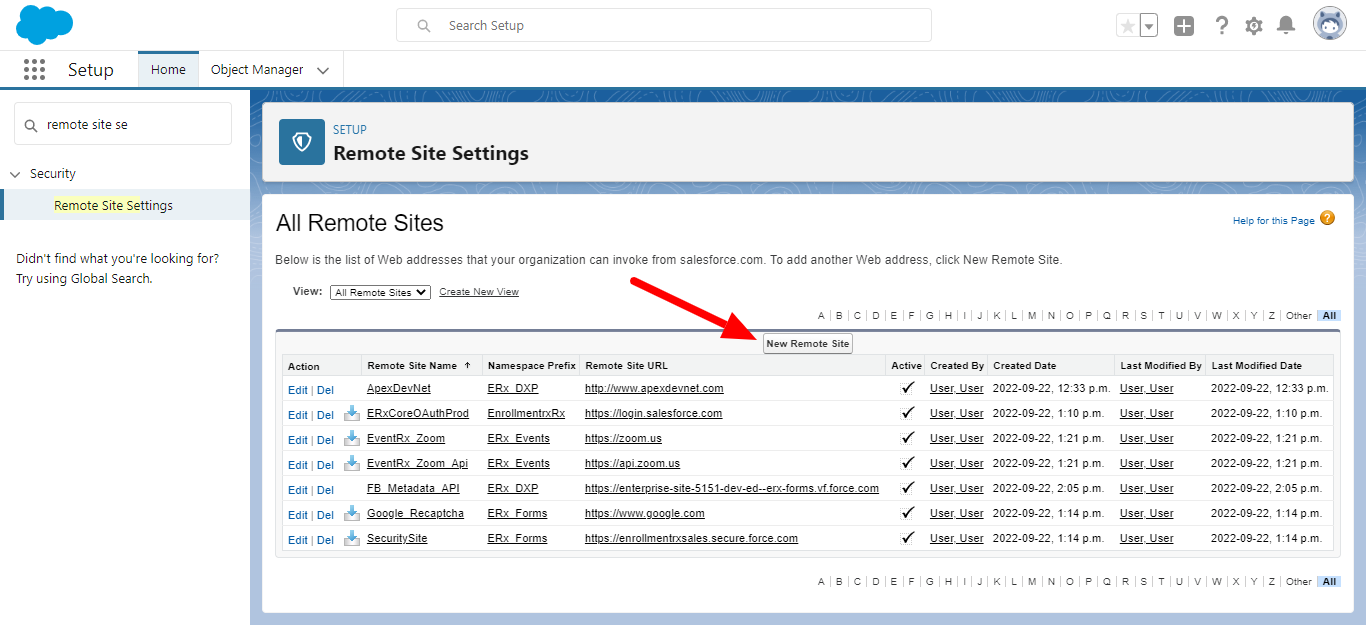
- Now, in the Quick Find box, search for "Remote Site Settings"
- Click the New Remote Site button
- Give any name to the Remote Site, but the Remote Site URL must be
https://login.microsoftonline.com/.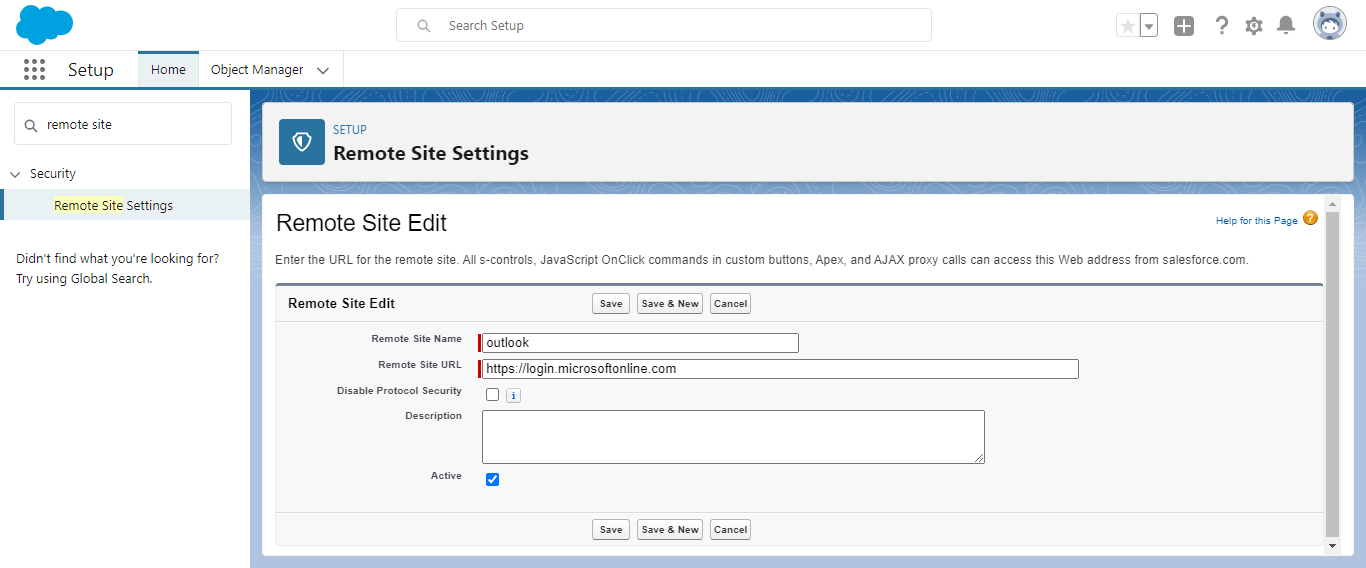
- Click Save & New
- Here, you can also add any name to the Remote Site, but this time the
Remote Site URL must be
https://graph.microsoft.com/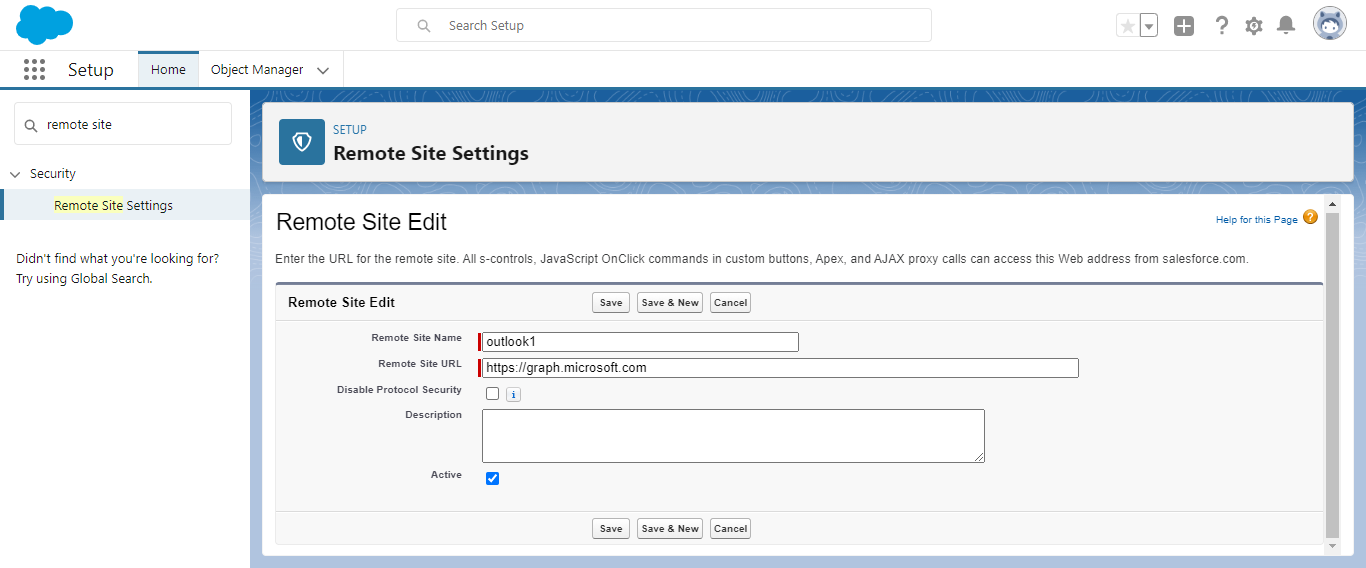
- Click Save