Manage Visitor Lists
To configure visitor lists, follow these steps
- Open the tab ERx Events Admin Panel
- Click on the “Manage Visitor Lists” icon
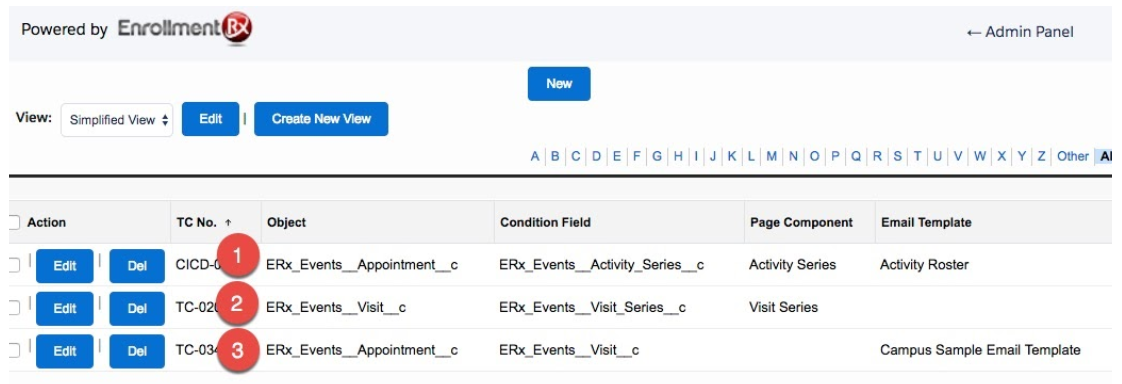
- You will need to create three Visitor List records, as shown above, each of which will generate a table of either Visit records or Appointment records. Each of these provides rich functionality:
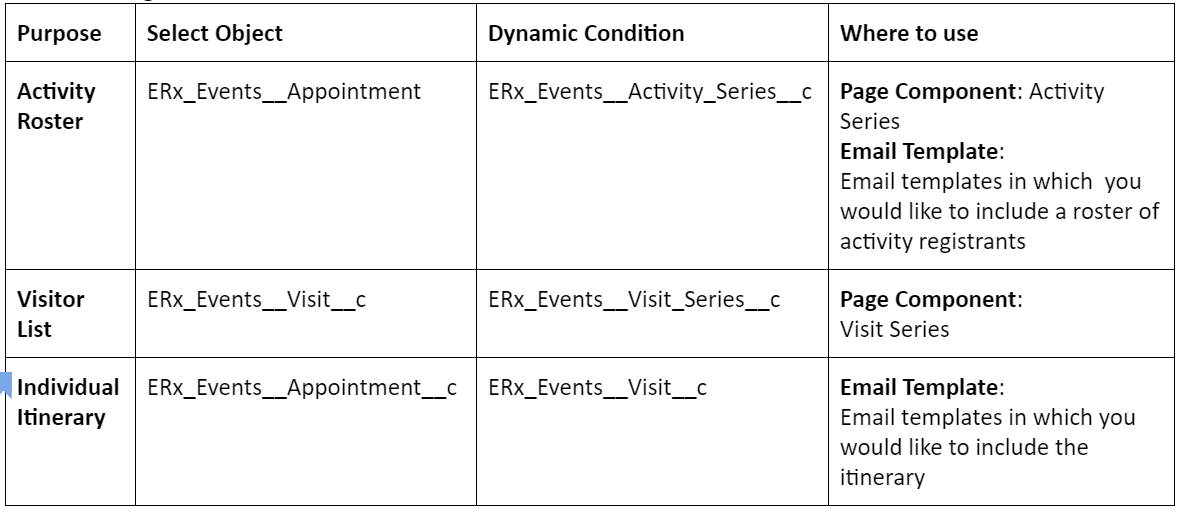
- An Activity Roster listing the registrants (a list of Appointment records) for a given activity on a given day. The roster displays on the Activity Series record, and can be emailed or output as a PDF.
- A list of visitors (a list of Visit records for a given date) for display on the Visit Series detail page, from which the list can be printed for use, e.g., as a sign-in sheet for visitors registered for that date.
- An Itinerary, which is a table listing a visitor’s appointment records for a scheduled visit, to be displayed on the Visit record. The itinerary can be emailed to the visitor and also output as a pdf and printed for the visitor on the day of their visit.
The following table outlines the standard attributes for each of these three records
- Click on the New button to create New Table Configuration
- Select Object: This will present the object names which are list in the Events Rx custom setting, in the “Campus Table Objects” field.
- Select Column: Select the fields you want in the table.
- Selected fields: The fields/columns which have been added to the table. They can be dragged and dropped to rearrange the order in which they appear, left to right. Click “X” to remove one.
- Sort Order: Determine the display order of the records in the table, top to bottom
- Dynamic Condition: Choose the lookup field on the object that will be used to select the records.
- Table Header: Enter header text.
- Table Footer: Enter footer text.
- Table Color: Select table color.
- Font Style: Select table font style.
- Where To Use: Select where this table will be used. See the following sections on Page Components and Email Templates
- Preview: A preview of the table.
- Save: This will save the configuration.
- Two configurations for the same object are not allowed.