Guest Checkout
Overview
The Guest Checkout feature allows users to purchase products without logging in. This page outlines the configuration requirements and the end-user checkout experience.
Configure Guest Checkout
Note:
Be sure to follow these 2026 Release 1 post-installation steps to configure user permissions if you haven't already.
FormBuilder Page Configuration
- Create a Guest Checkout Page:
- Navigate to the Page Builder subtab and create a new page. Select
Cart Guest Checkout as the page type. Enter the required
details and save the page.

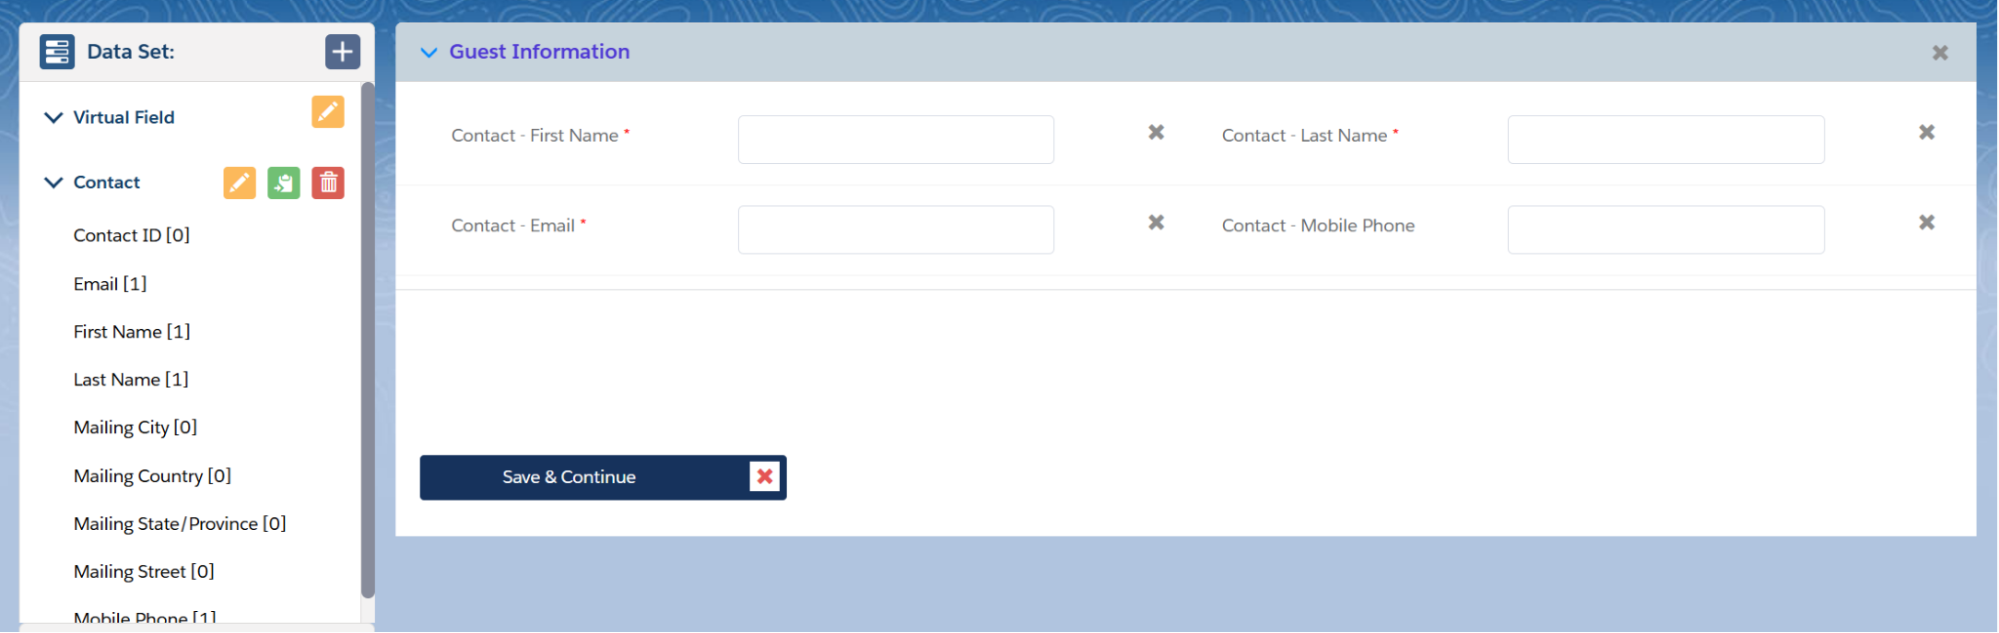
- Configure the Contact Data Set. Ensure it includes the following fields:
First Name, Last Name, Email, and Mobile Phone.
- Configure the Save & Continue button:
- Set the Redirect URL as
/apex/ERx_DXP__DxpFbMiddlewareGuestMemoryToDB. - Pass the parameter
cId(mapped to the Contact ID field in the Contact Data Set).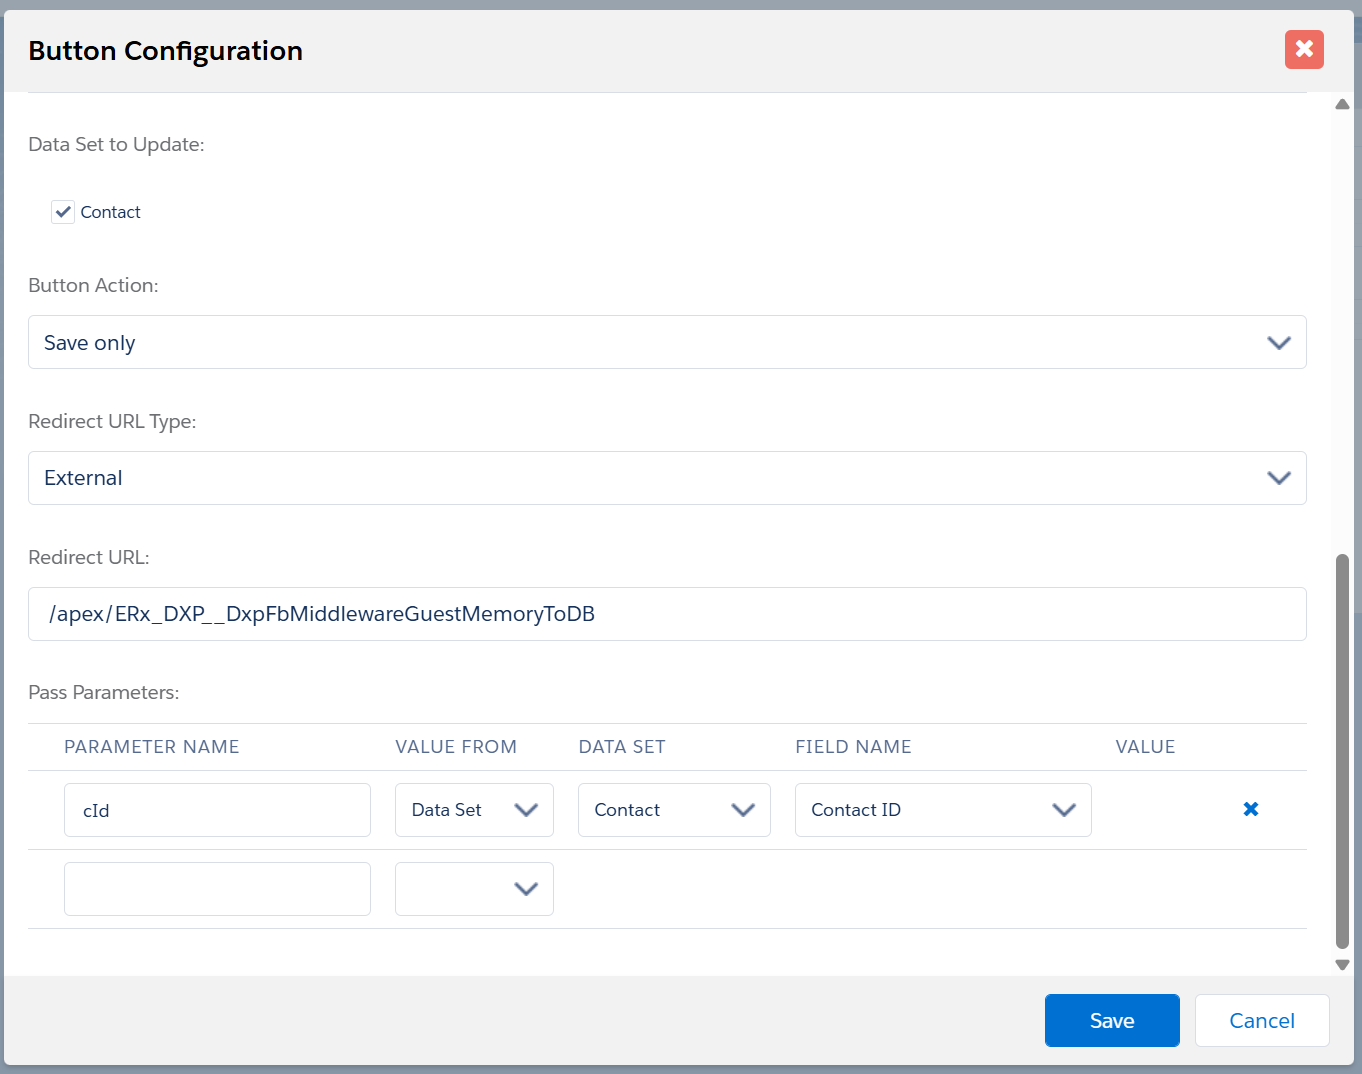
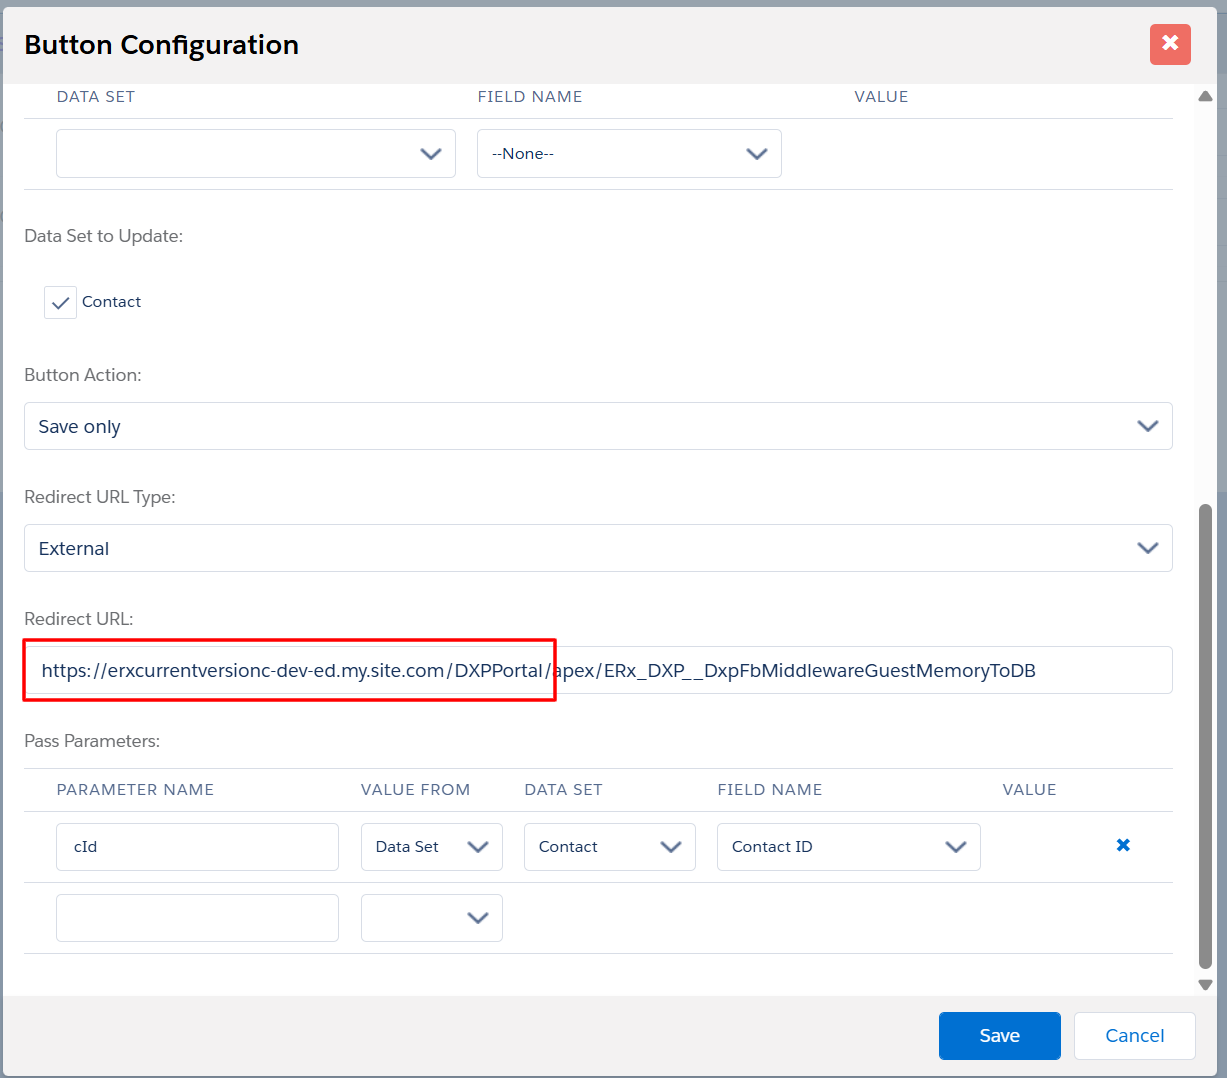
- If multiple DXP communities exist, include the specific
community site URL in the configuration.
- Set the Redirect URL as
- Navigate to the Page Builder subtab and create a new page. Select
Cart Guest Checkout as the page type. Enter the required
details and save the page.
- Environment Settings:
- Locate the Cart Guest Checkout URL field in the environment
settings and enter the URL of the created Cart Guest Checkout
page.
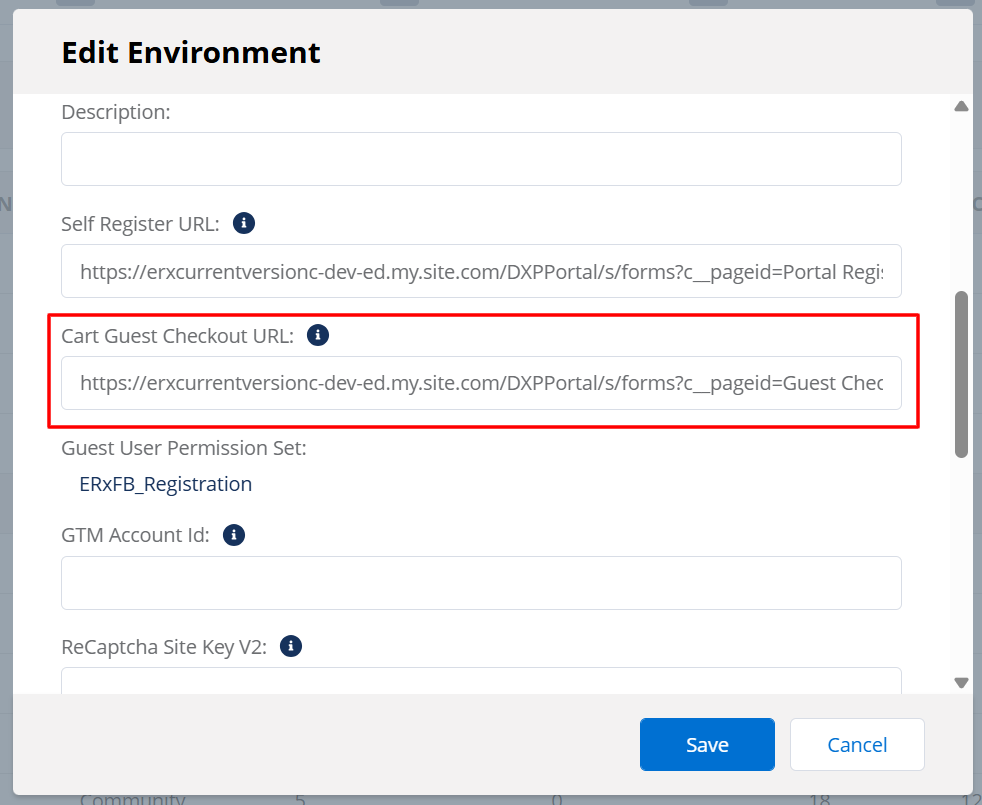
When users select Checkout As Guest, they are redirected to this page.
- Locate the Cart Guest Checkout URL field in the environment
settings and enter the URL of the created Cart Guest Checkout
page.
Guest Checkout User Flow
- A User visits the site, adds a product to the cart, and clicks the Checkout
button.
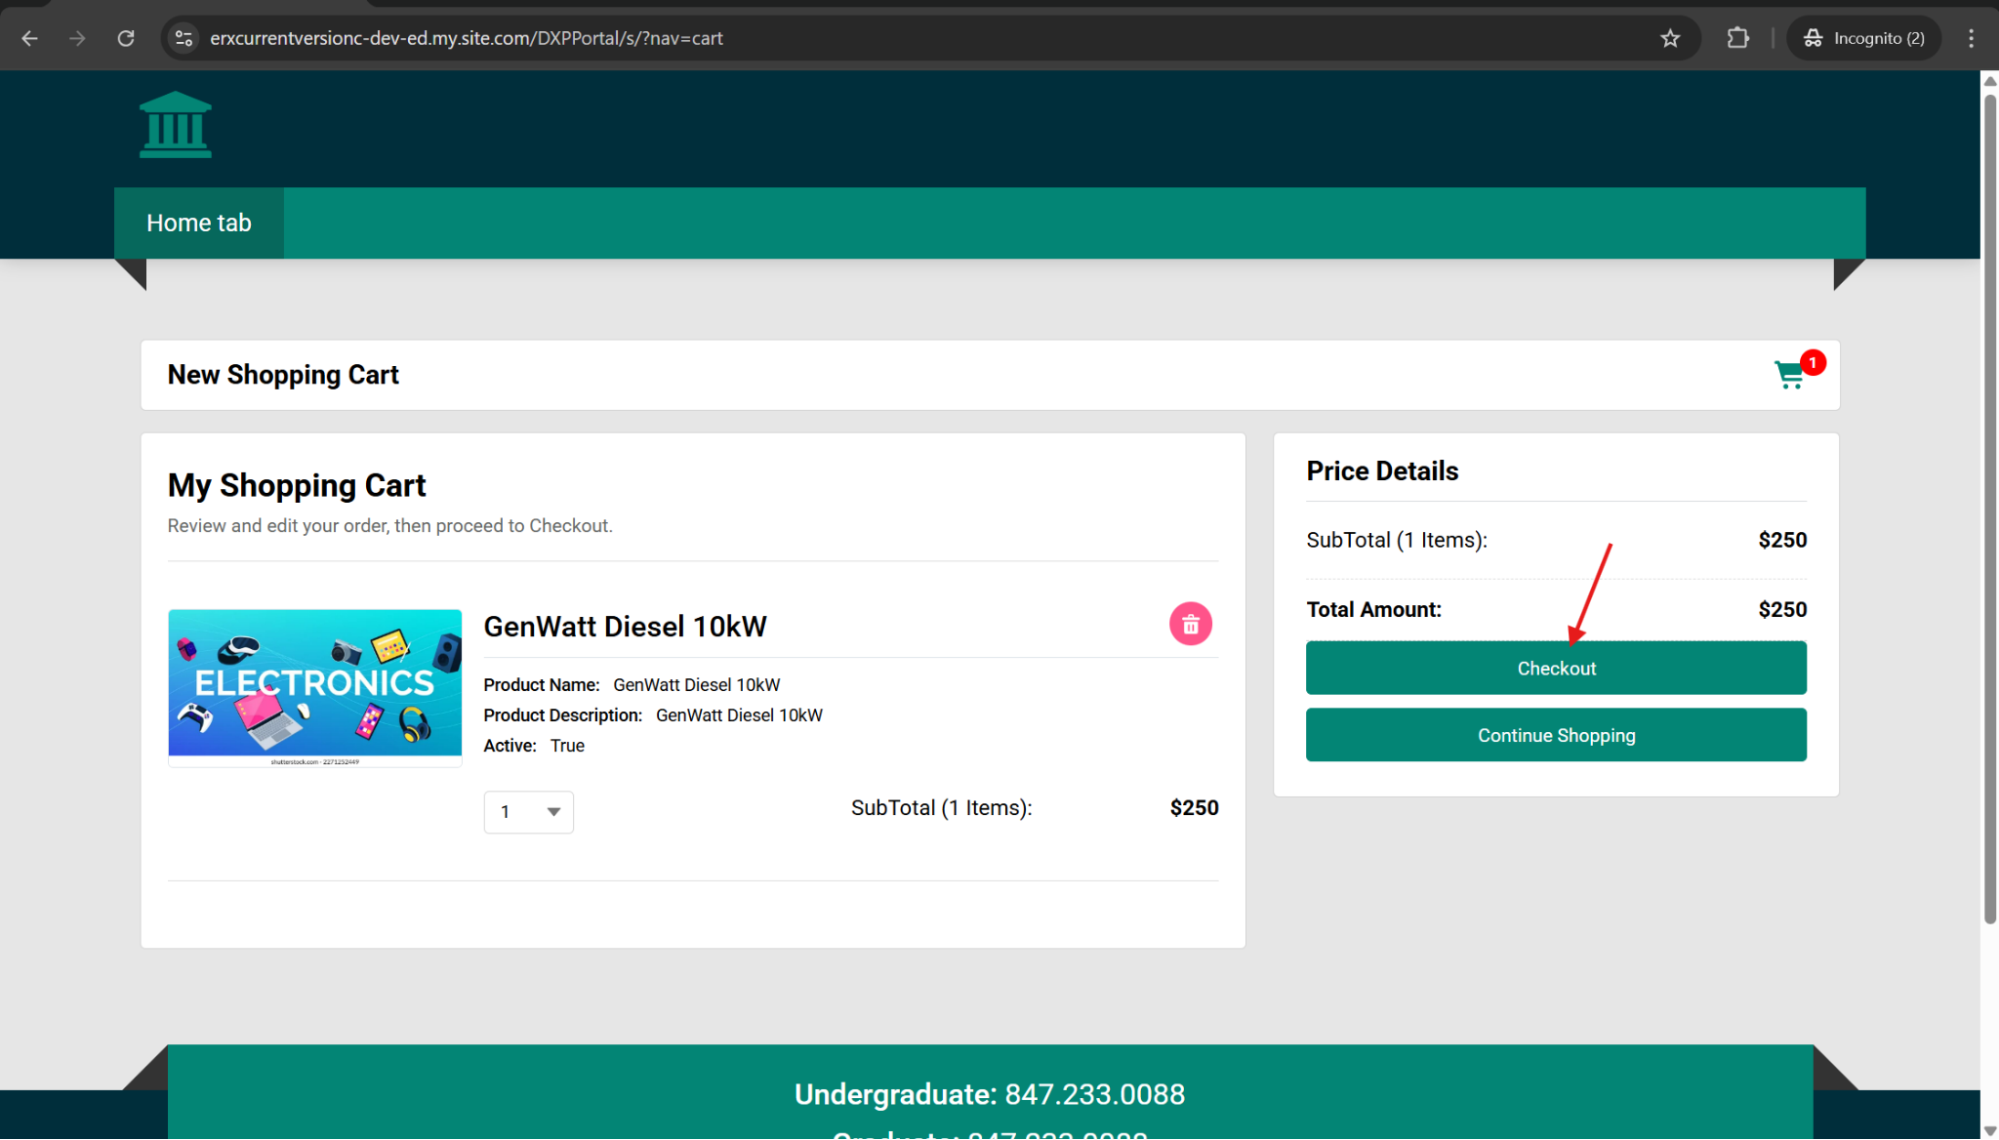
Guest users can also apply product-specific coupon codes and general discount coupon codes. (Any other type of couple code will throw an Invalid Coupon Code error.)
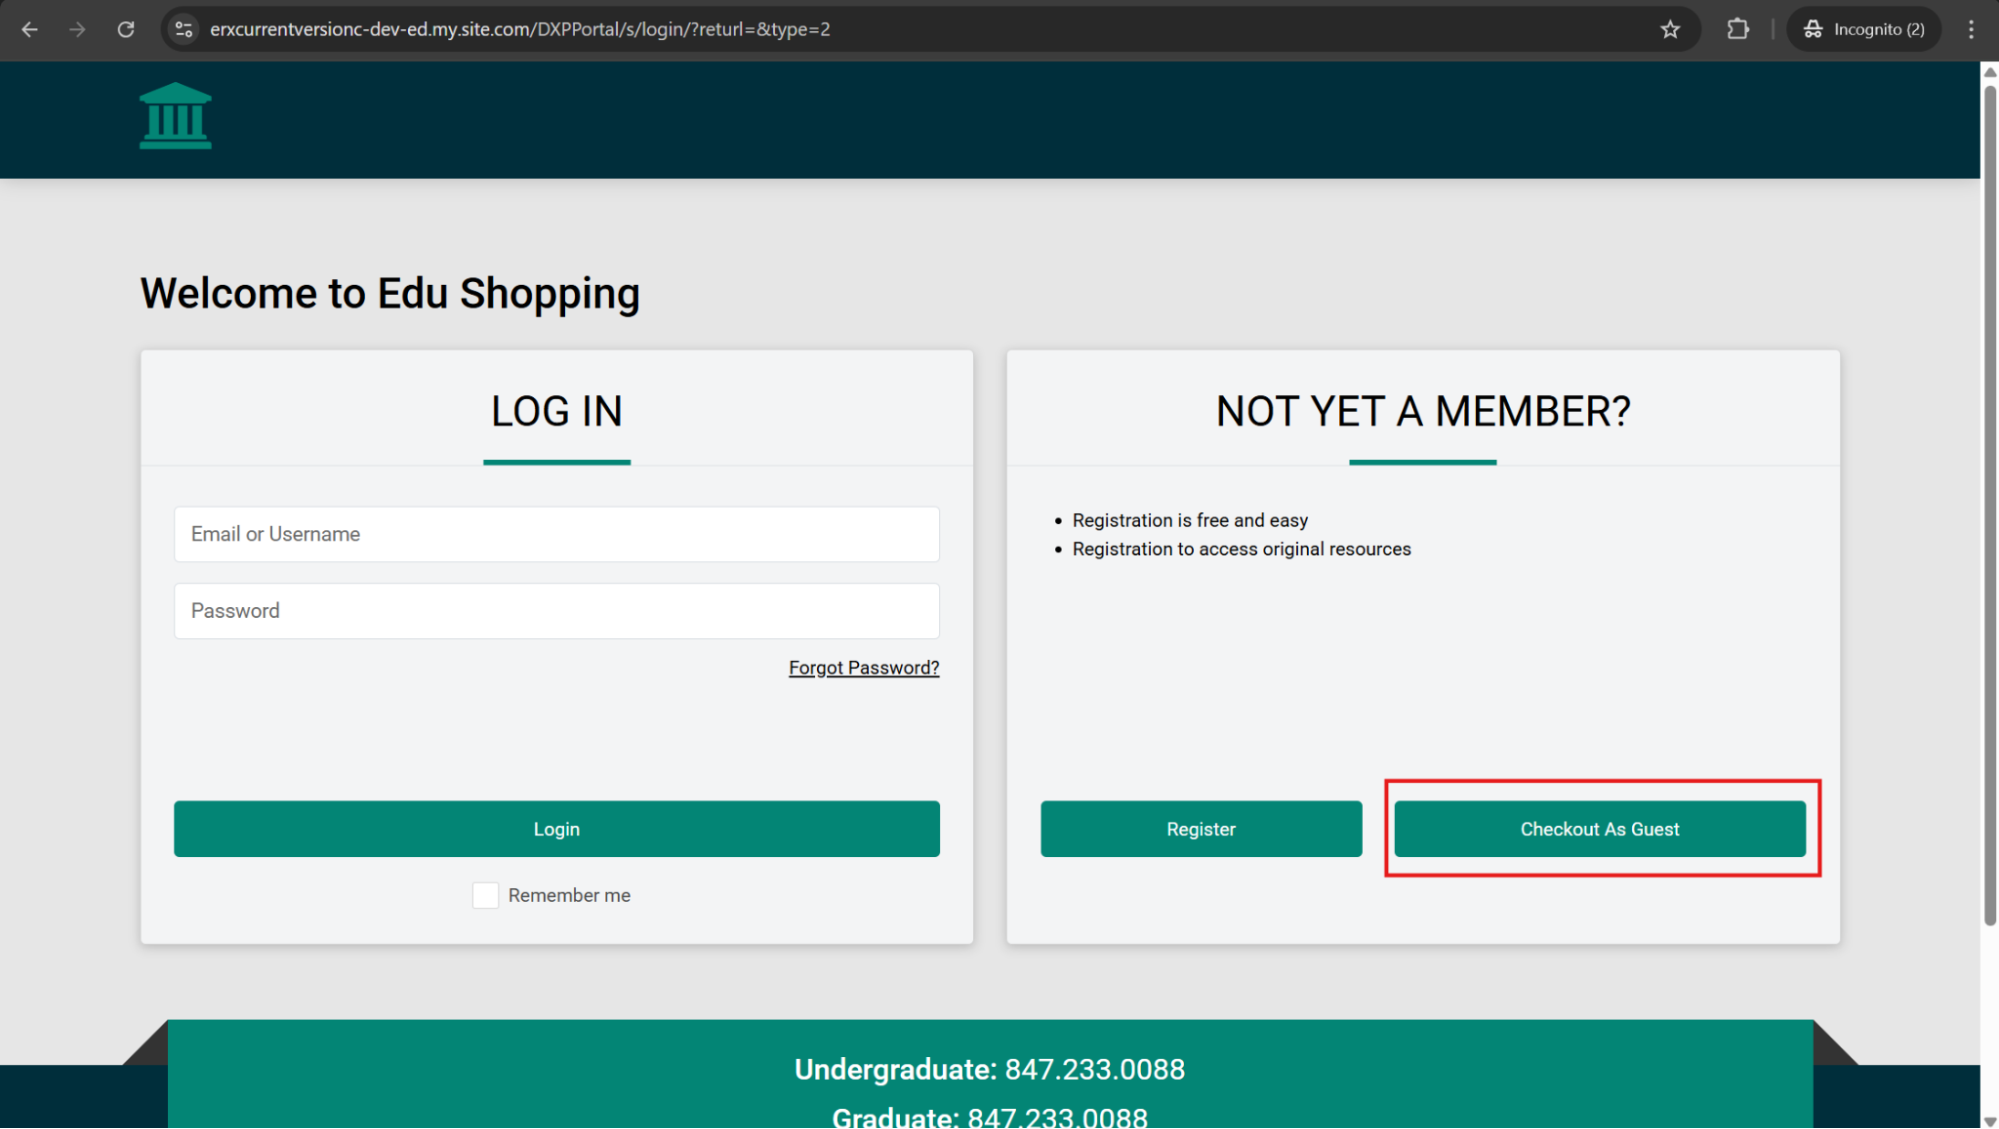
- After clicking the Checkout button, the system redirects the user to the login page,
where they'll see a new Checkout As Guest button. The user then clicks the
Checkout As Guest button.
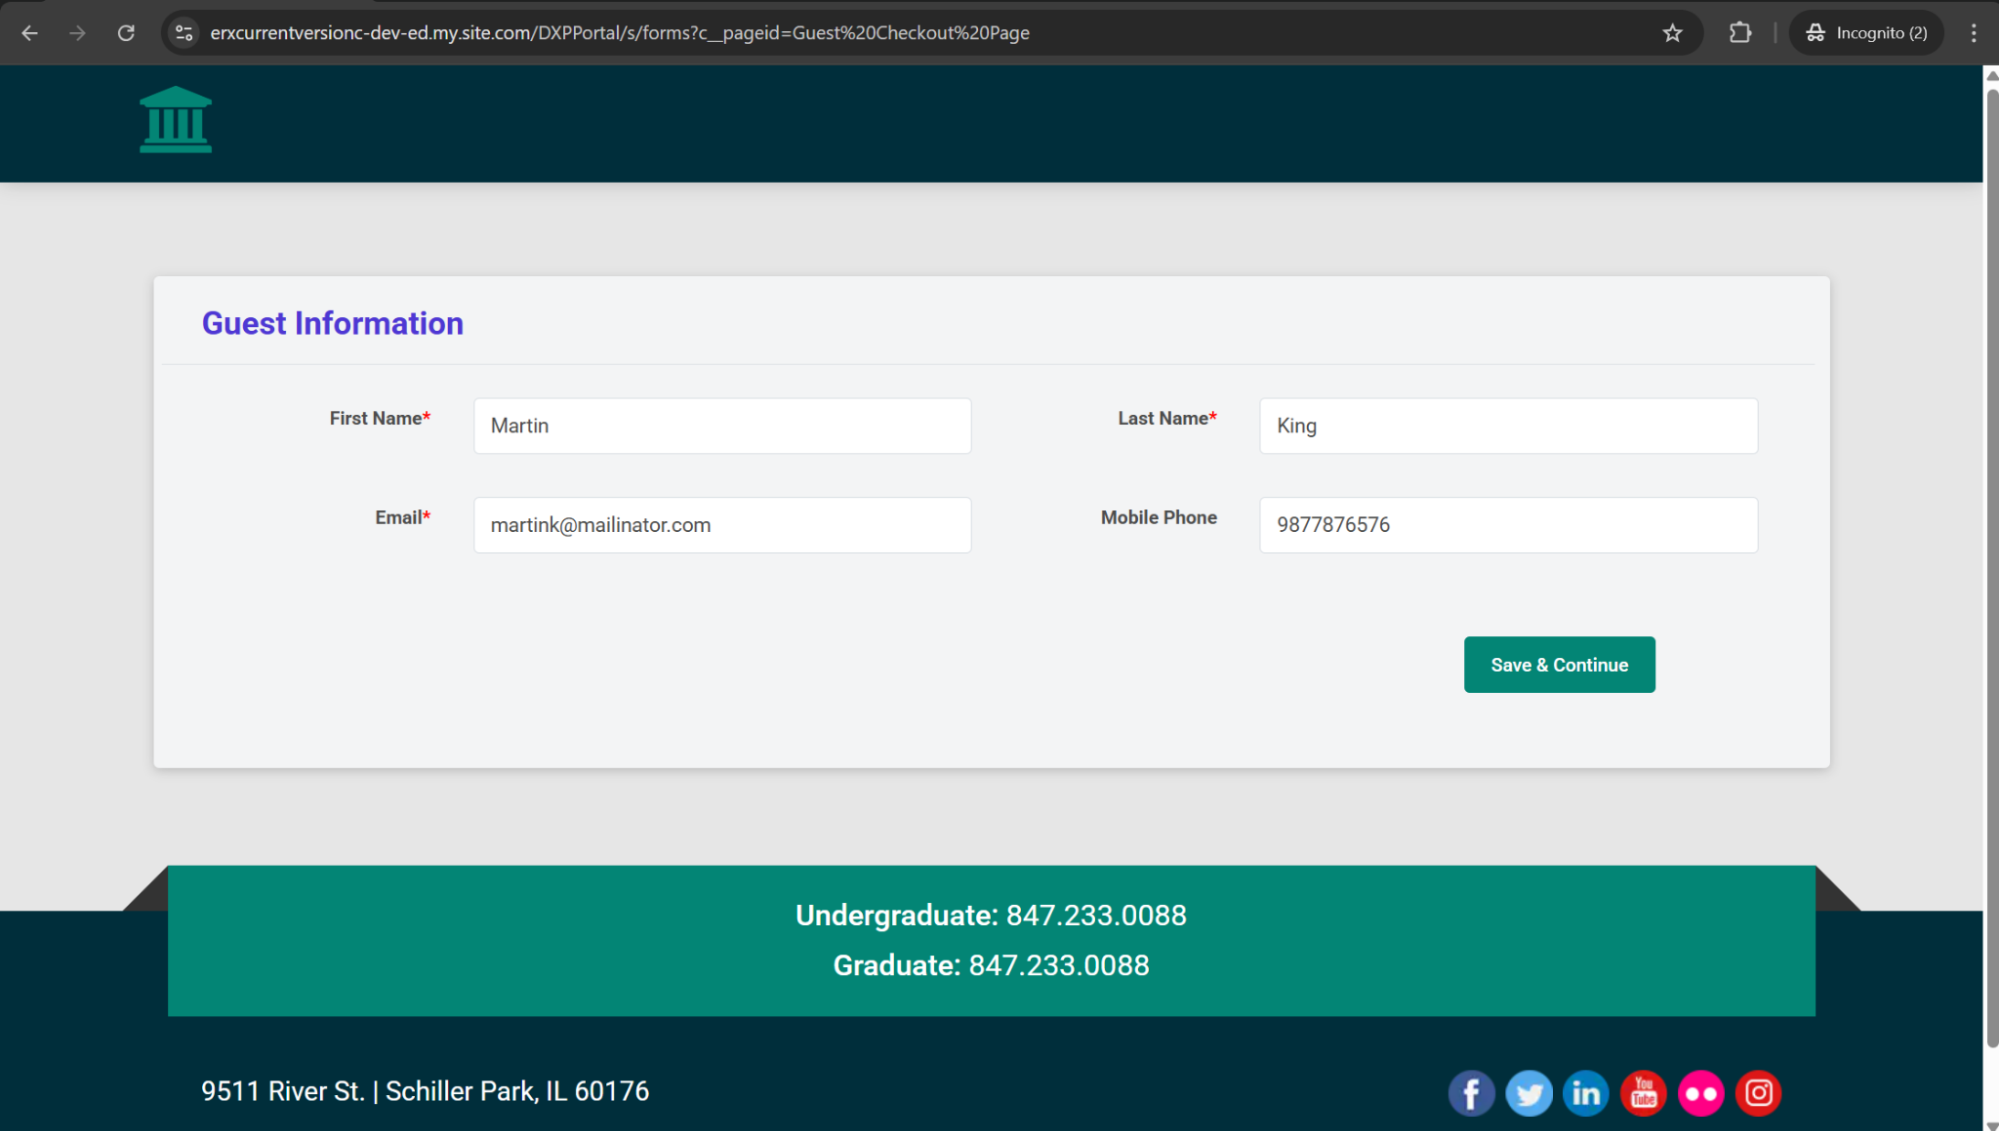
- A "guest user details" page opens. The user completes the Guest Information
form and clicks the Save & Continue button.
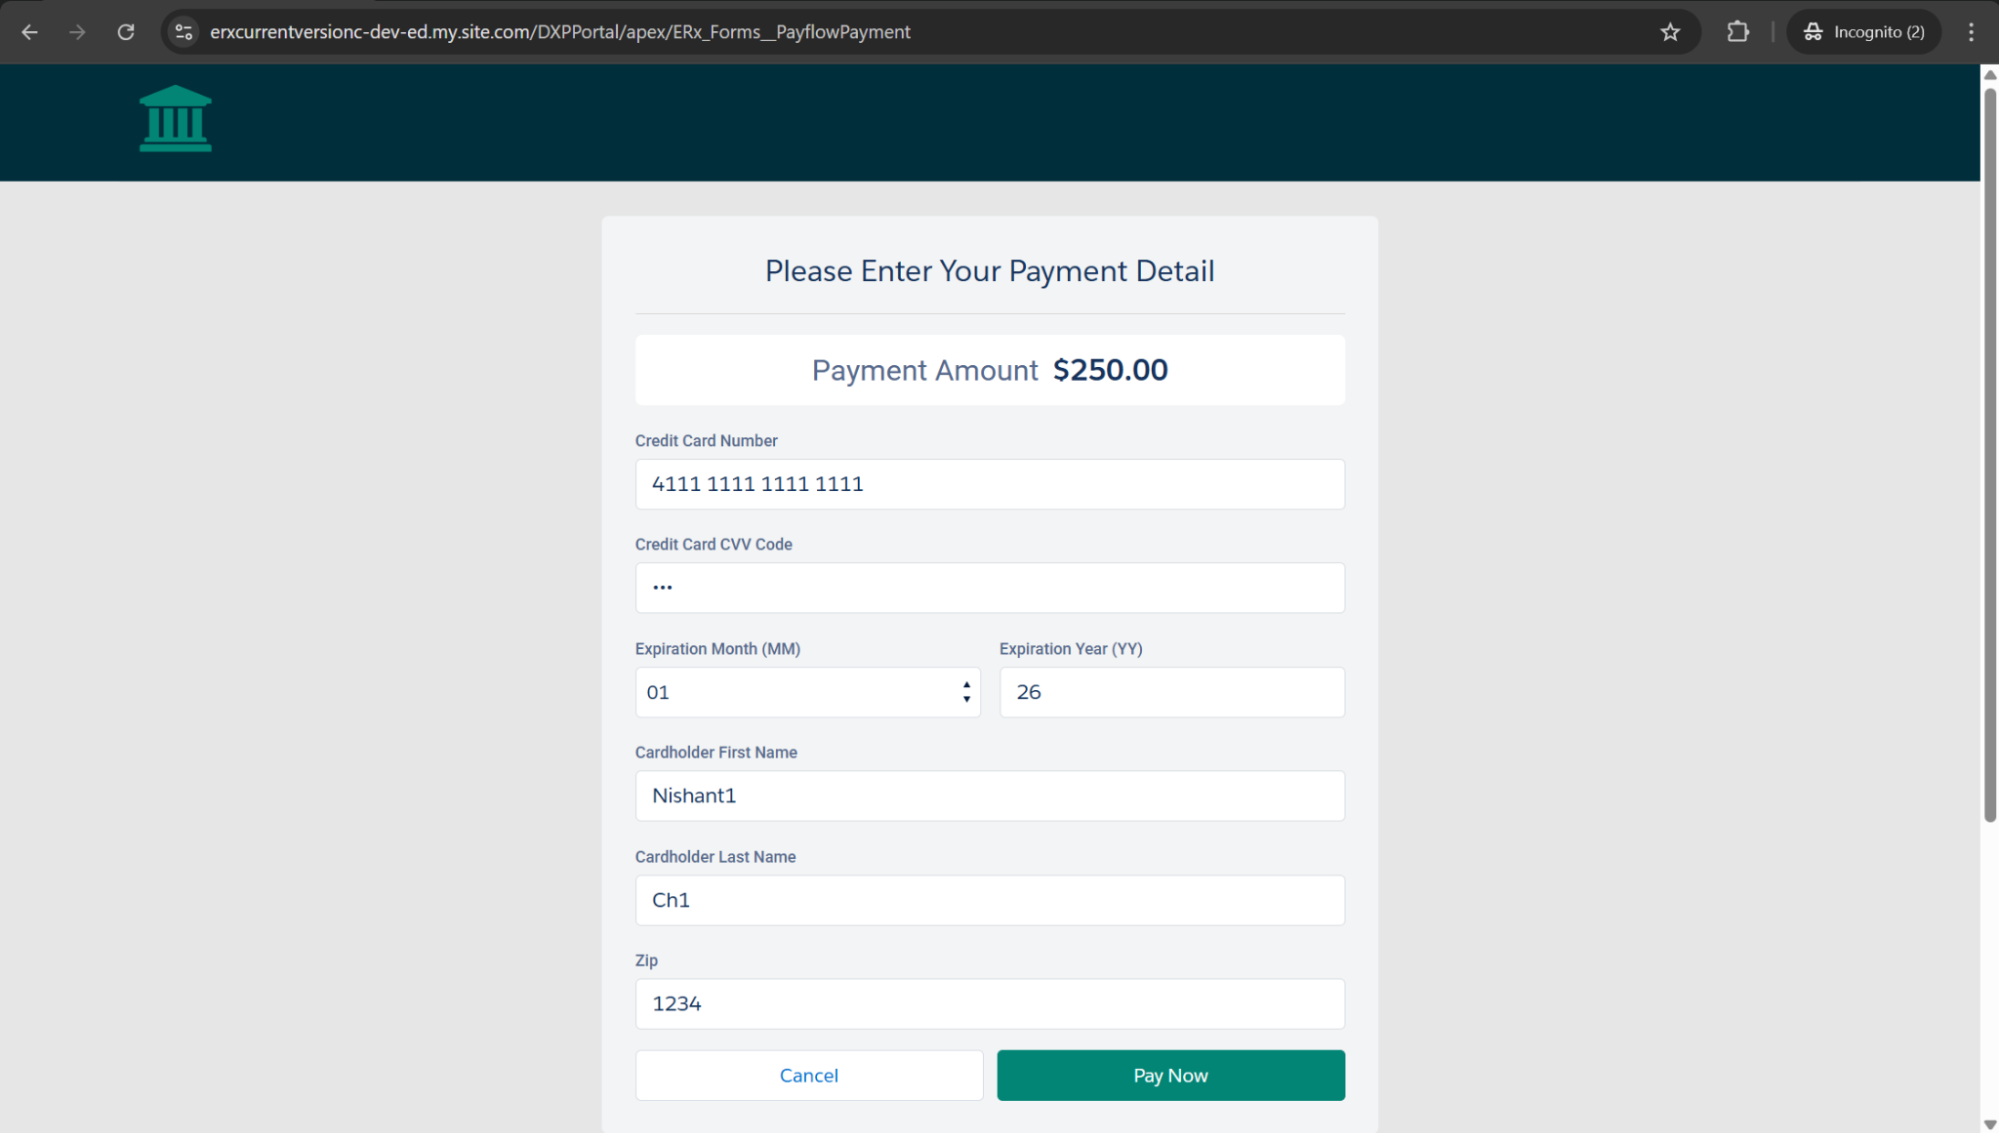
- The system redirects the user to the Payment page. After a successful payment:
- A Contact record is created.
- Associated order and payment records are generated.
- Your admin can go to the contact record to confirm that the system created the
contact (e.g., Martin King) and successfully attached the associated User Order and
payment details in the related record.

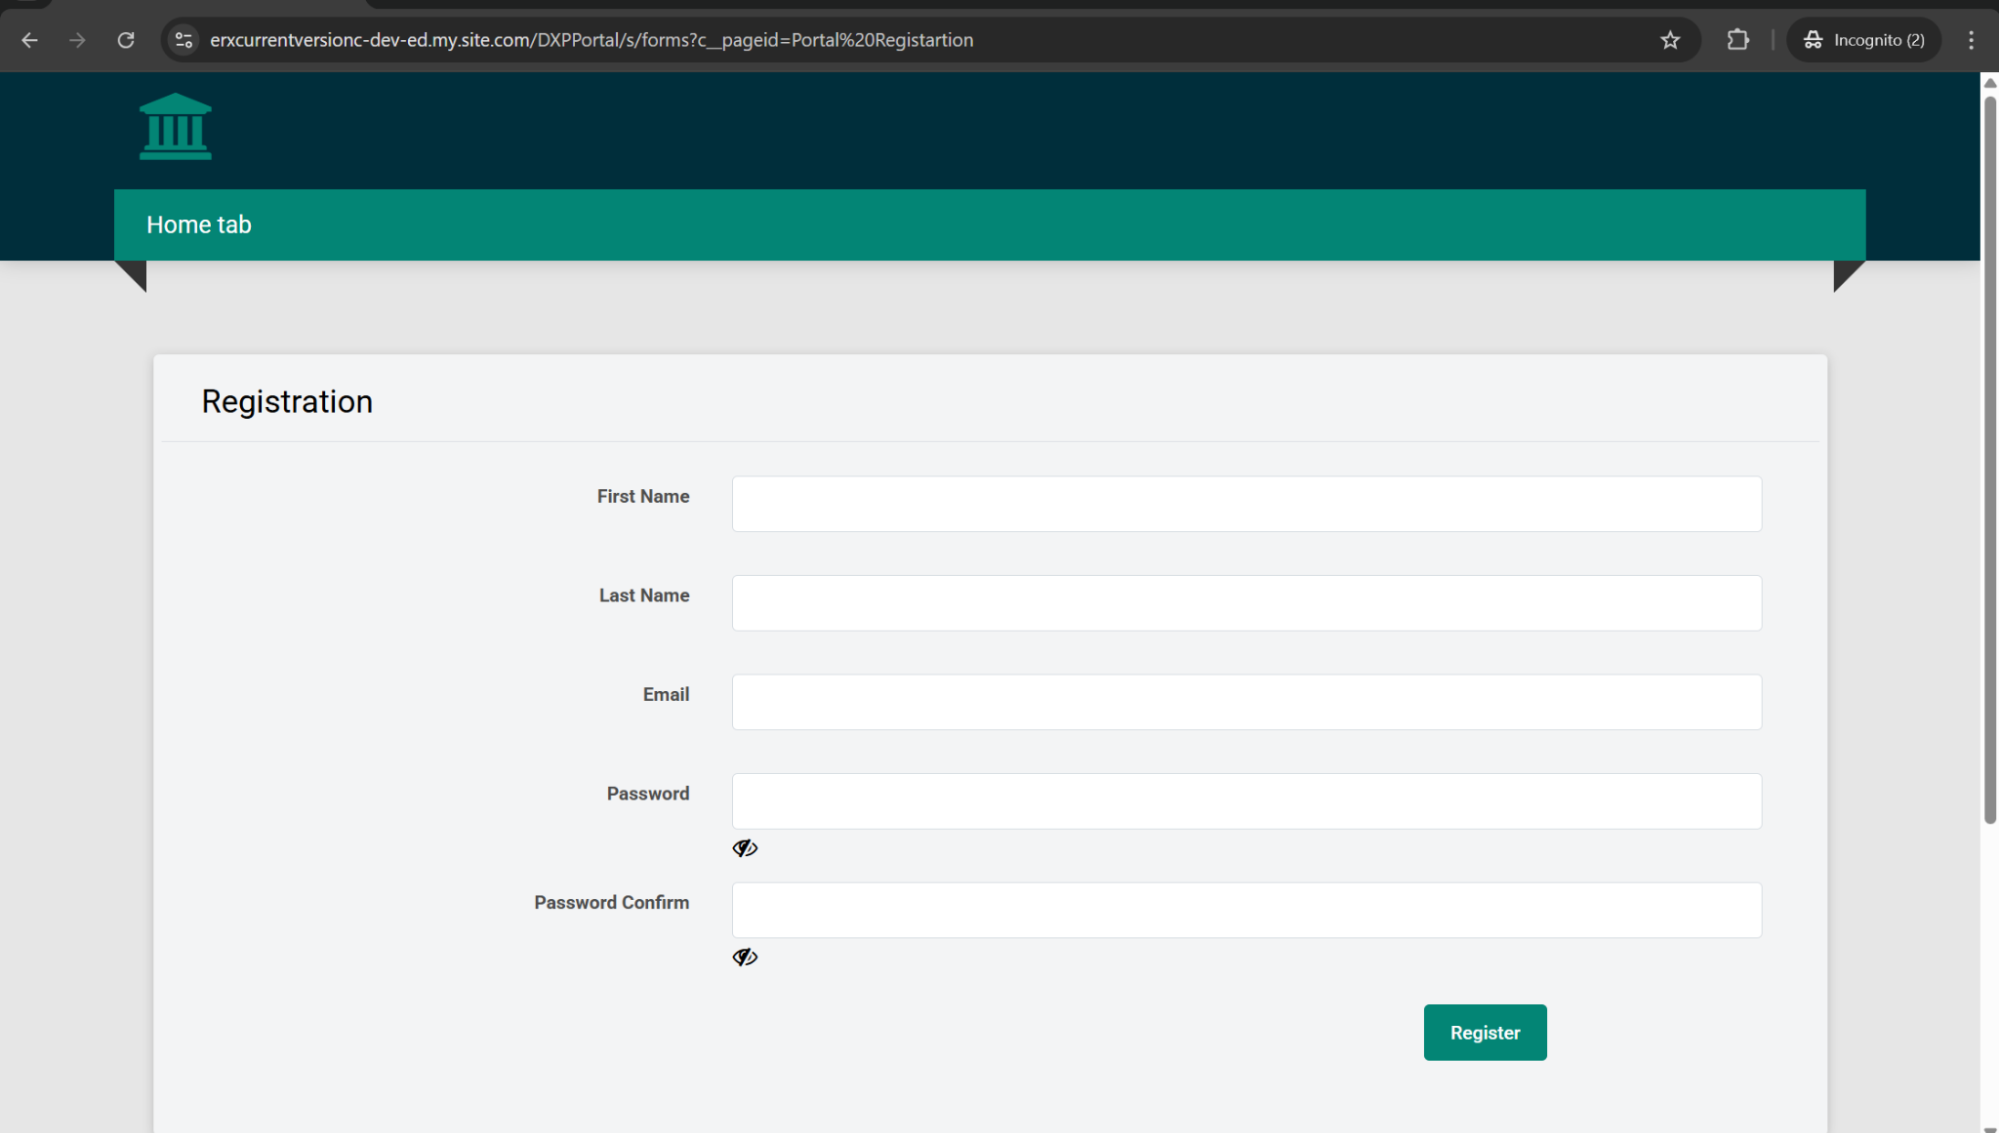
- The Payment Successful message page now includes a Register Yourself button.
Clicking this button redirects the user to the Registration page URL that your admin
configured on the edit environment screen.