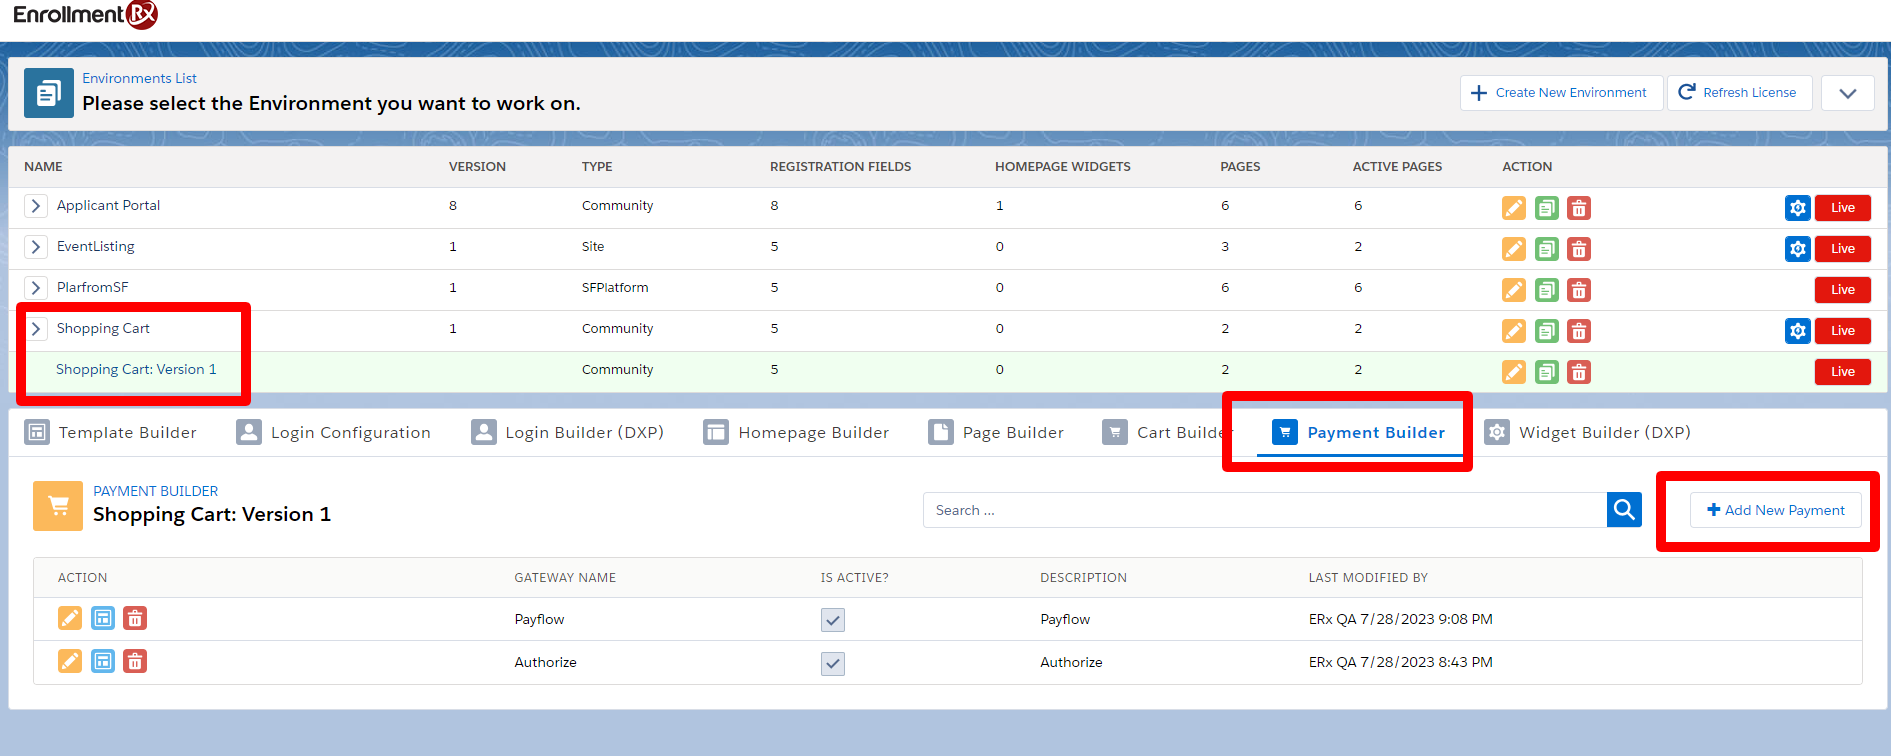
The Cart Builder Tab
Overview
The Cart Builder subtab in FormBuilder is where you'll configure Shopping Cart for a selected Community along with its Product Objects, images, and filters.
Cart Creation Process
Follow these steps to create a Shopping Cart.
- Go to the FormBuilder Rx tab in FormBuilder
- Select a Community (and version, if applicable) from your Environments list
- Click the Cart Builder tab
- Click the Create New Cart button
- In the popup window that appears, enter details such as the Cart name,
select the Active checkbox, and click Save when you're done

- A cart record will be created and appear on the Cart Builder tab

Add Product Objects
Follow the below steps to add product objects to the Cart configuration.
- Click on the Add New Product Object button
- In the Popup window that appears, start typing the name of a Product object. A list of objects should appear dynamically here. Note:In the Product Name field, search with the object API name. Only product objects for standard objects and custom objects will be available for mapping.
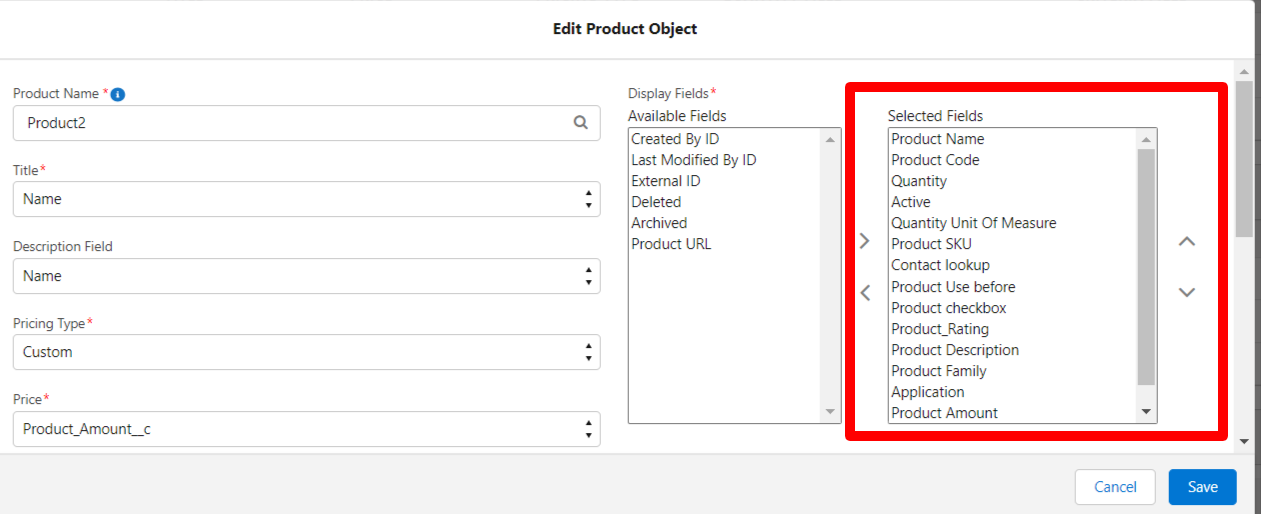
- Fill in the required details and select Display Fields

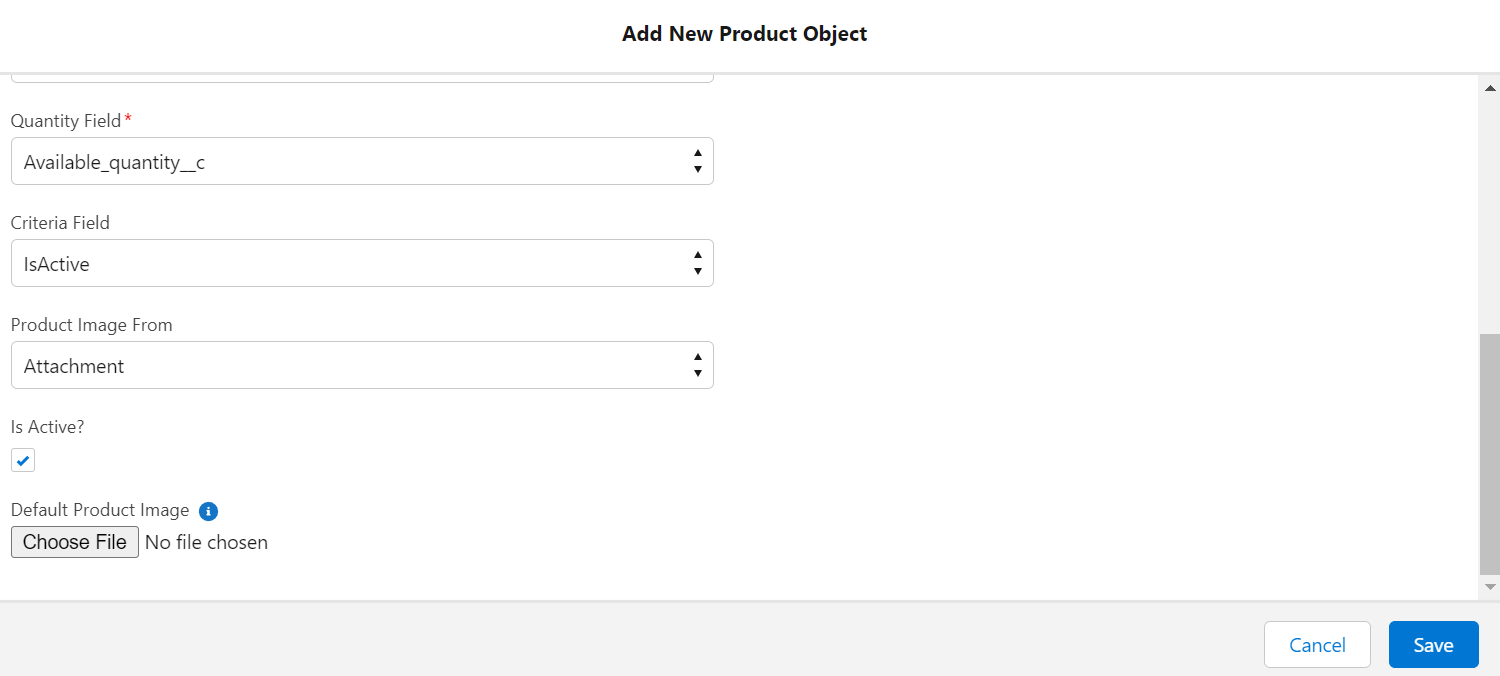
- Click Save
- After clicking Save, a Cart Product Configuration record will appear

Reference: Supported Fields
| Sr. No. | Field Name | Supported Field Type |
|---|---|---|
| 1 | Title | Text |
| 2 | Description | Text, Text Area, Text Area Long |
| 3 | Pricing Type | Custom, Standard |
| 4 | Price (this field only displays when the Pricing Type is "custom") | Currency |
| 5 | Price Book (this field only displays when the Product name is "Product 2" and the "Pricing Type" is "Standard") |
Standard Price Book name Custom Price Book name |
| 6 | Quantity Field | Number |
| 7 | Criteria Field | Checkbox |
| 8 | Product Image Form | Attachment |
| 9 | Default Product Image | This option will add the same image to all Product Items |
| Display Fields | The selected fields section will get displayed on the front end inside the list view/grid view/product detail page. |
Add Images
Follow the below steps to add product images.
- Go to Salesforce Classic and navigate to the Products Tab (you may need to click the "plus" sign on the tab bar to open the All Tabs page and scroll down for Products)
- Click on any product for which you want to add an image
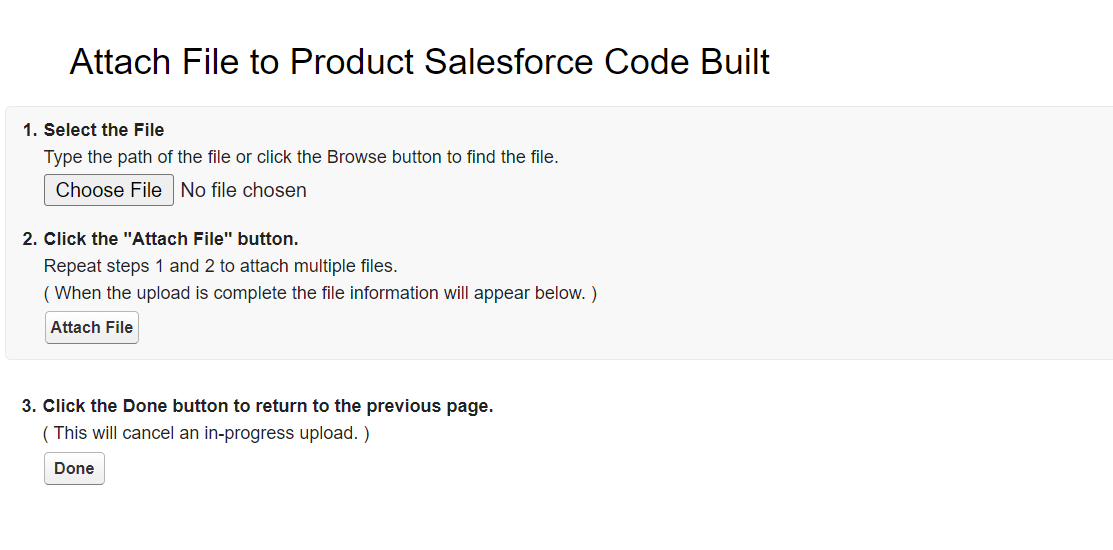
- Scroll down to Notes and Attachments and click on Attach File
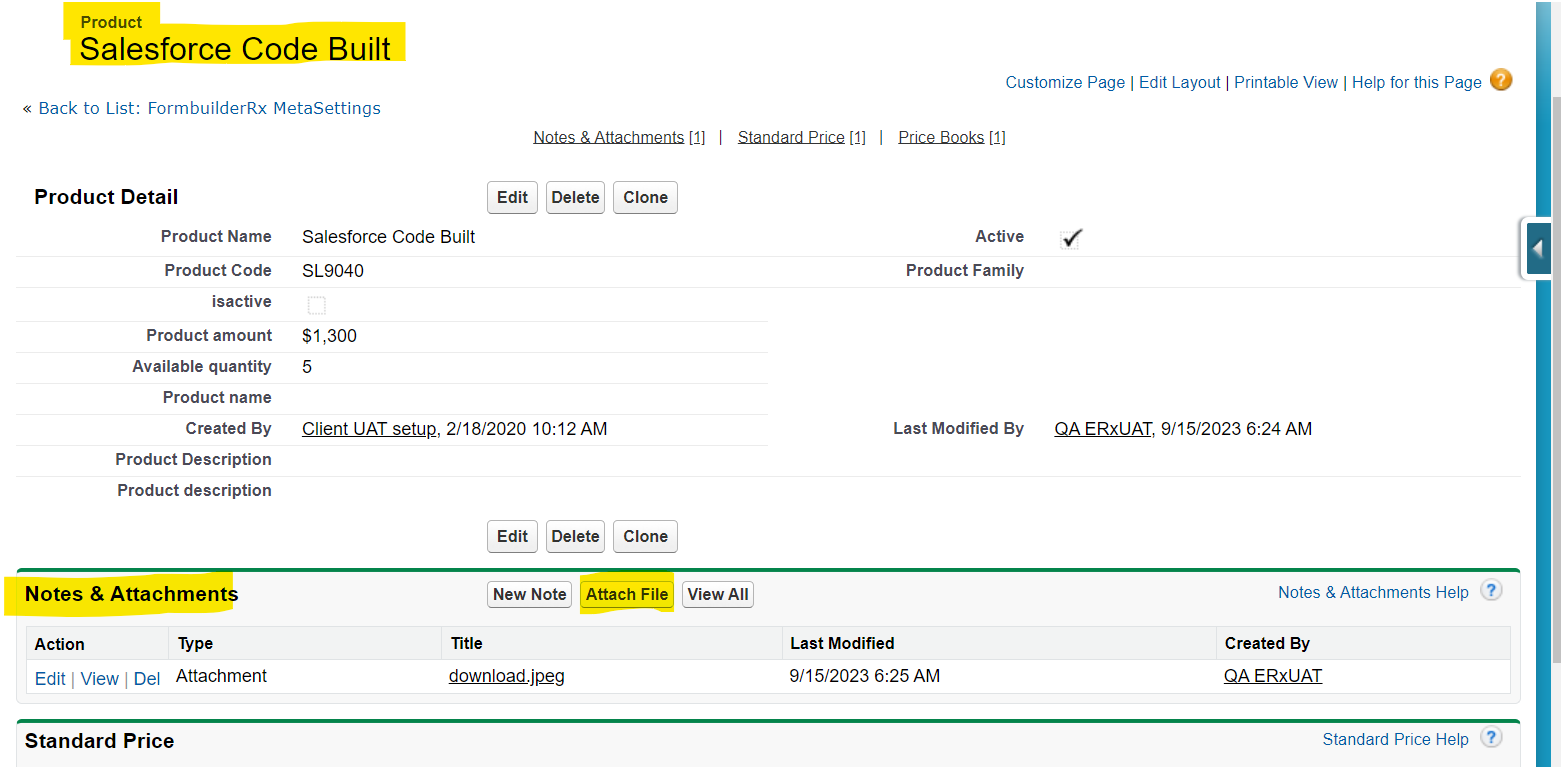
- Choose the imaage file you want to upload and click Done
- On the front end, the uploaded image will be displayed for that particular product
Create Product Filters
On the Cart Builder Configuration popup, you should see a Default filter along with a Create New Filter button. Follow these steps to add new filters.
- Click the Refresh button
- Click the Add New Filter Button
- In the popup window that appears, enter details
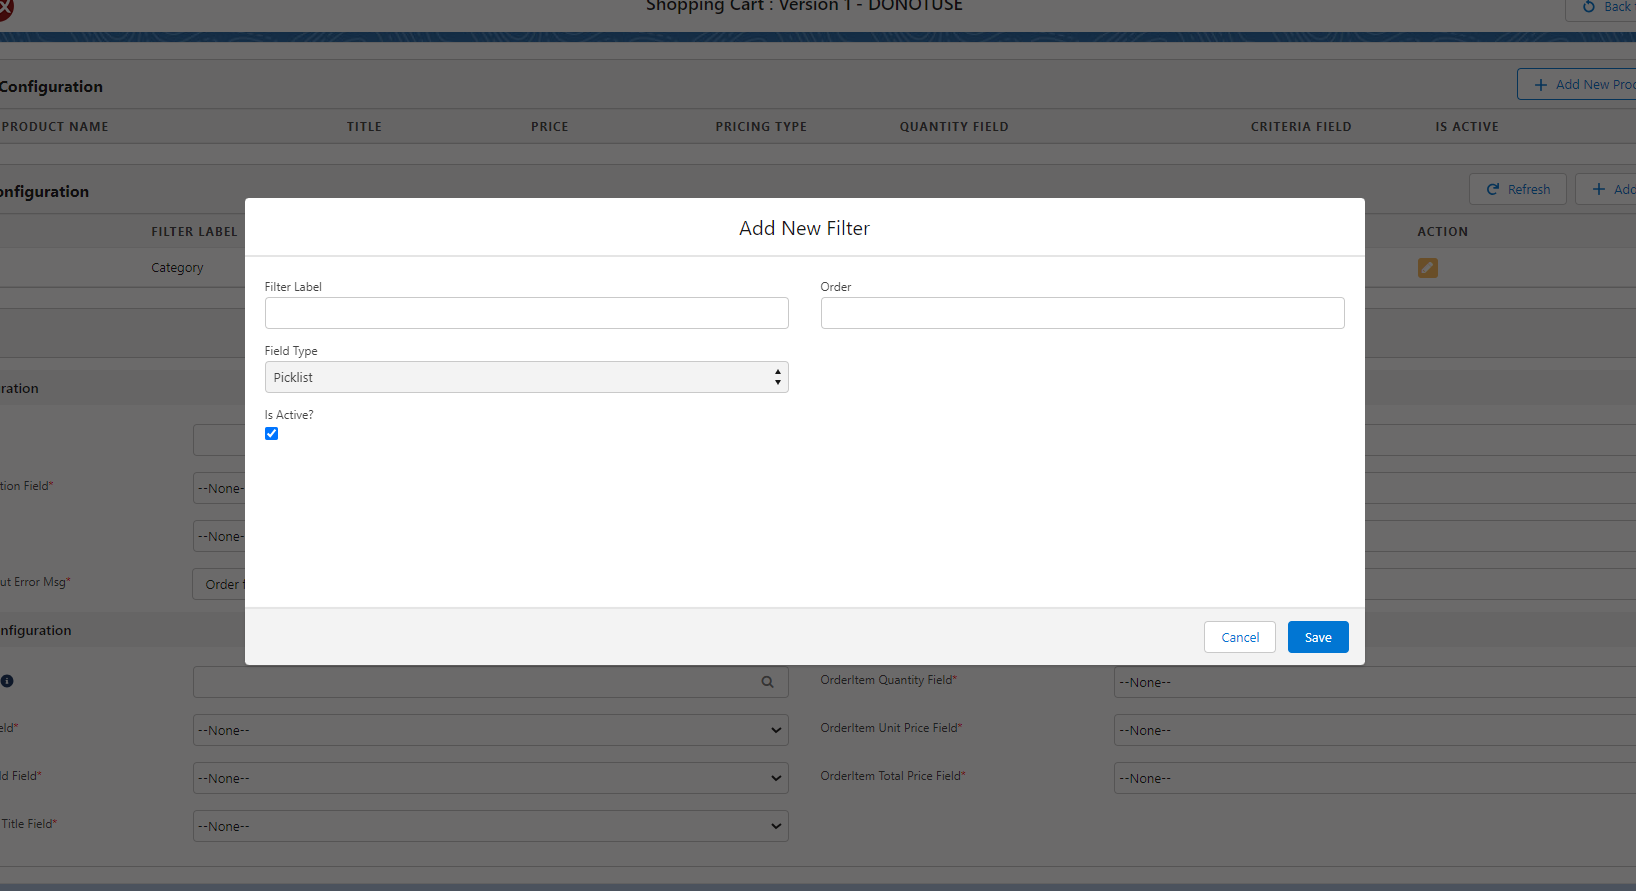
- Click Save
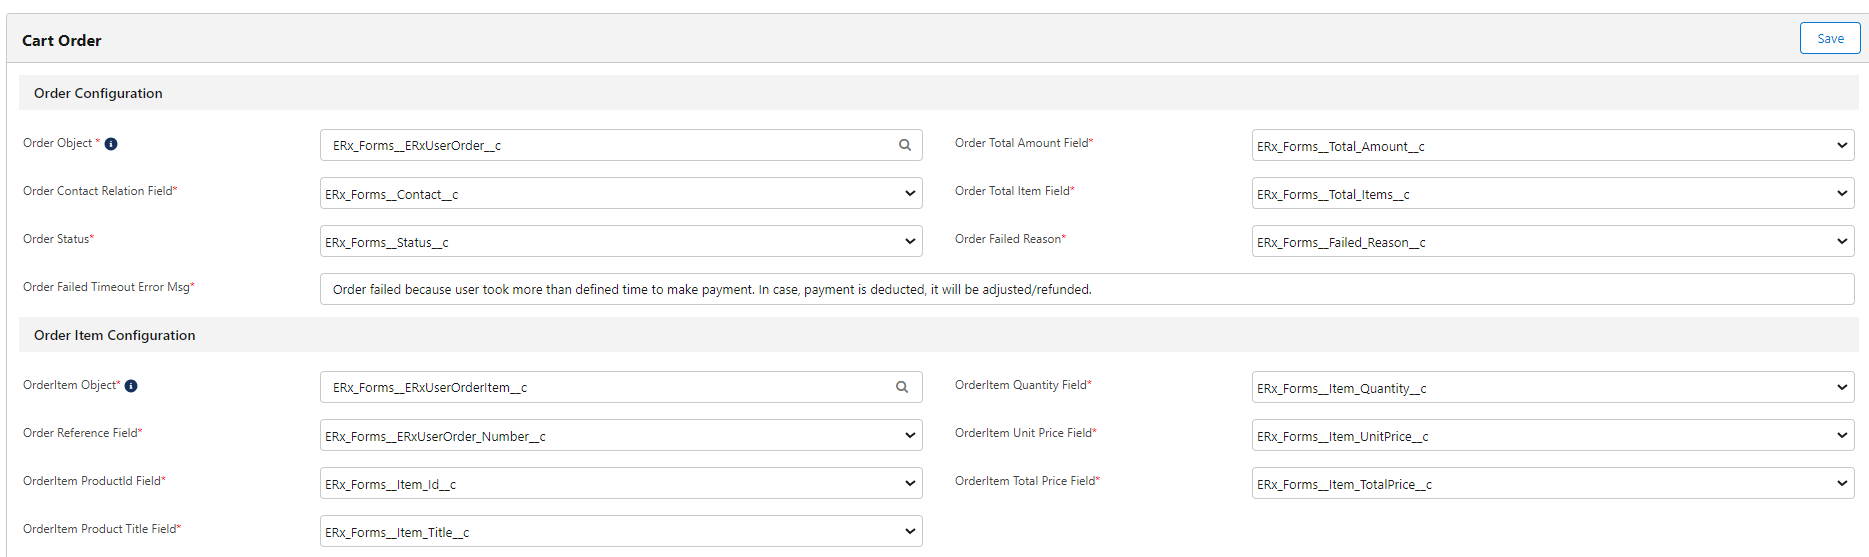
Cart Order and Payment Configuration
In the Cart Order section of your Shopping Cart Configuration page, enter the order details and item configuration and click Save. The order object name is erxuserorder, and the order item object name is erxuserorderitem.