Create a New Template
Overview
In a template, you can supply an HTML header and footer (the body of your pages is generated automatically), or, you can clone and modify one of five out-of-the-box templates included in the FormBuilder Rx package.
This page will step you through our built-in template options.
Use an Out-of-the-Box Template
Follow these steps to create a new template with one of our pre-built themes.
- From select the Environment you want to work on (the current Environment's name will appear at the top of the page).
- Click the Template Builder subtab, then click the New Template
button. This will launch a popup.
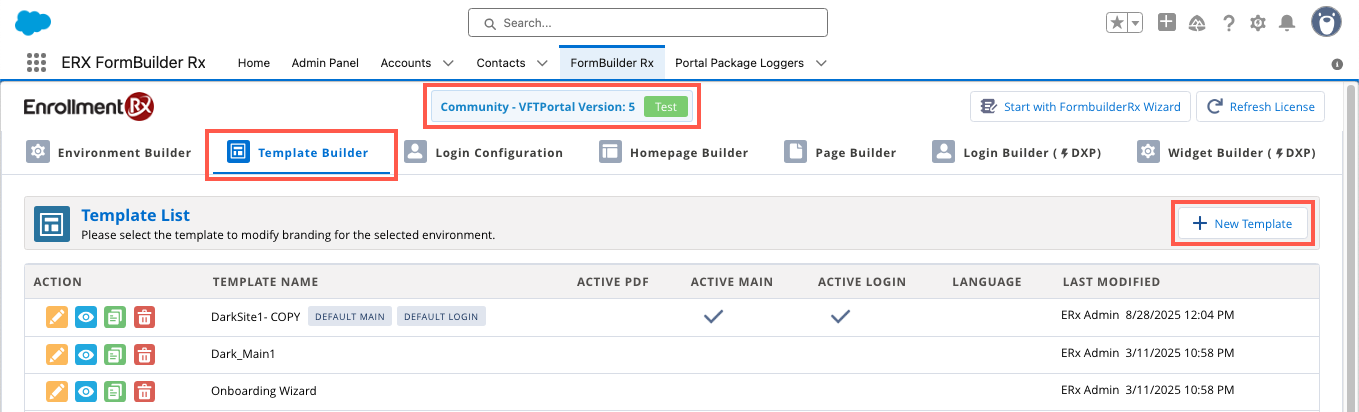
User interface is related to 2025 Release 1.
- In the "New Template" popup, select "Use ERx Templates."
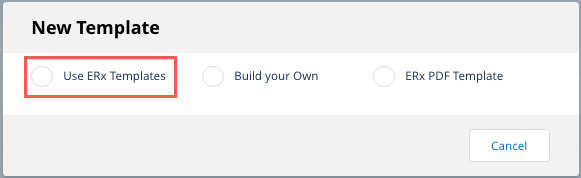
As soon as you click this radio button, a dialog window will appear.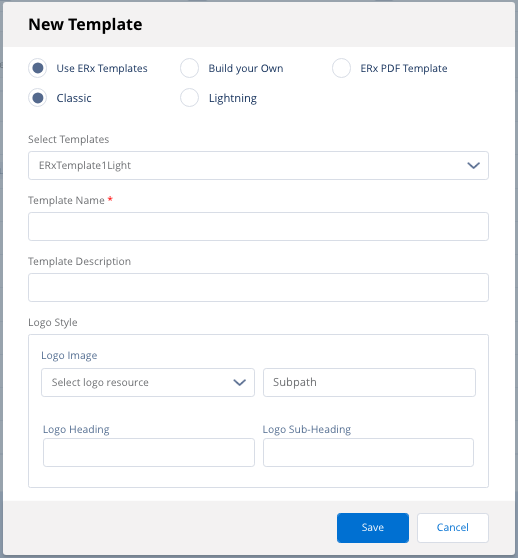
- In the New Template dialog, select "Classic" (default) or "Lightning," choose
from the list of built-in templates, enter a name for the template and optional
description, and select a logo resource. From here you can also switch to the
"Build Your Own" or "ERx PDF Template." Tip:Selecting a logo resource is optional. You can leave this blank and add a logo later.
- Click Save to close the dialog.
- The template you just created will appear at the top of the Template List.
Out-of-the-Box Templates At a Glance
Following are sample versions of our five pre-built, customizable templates:
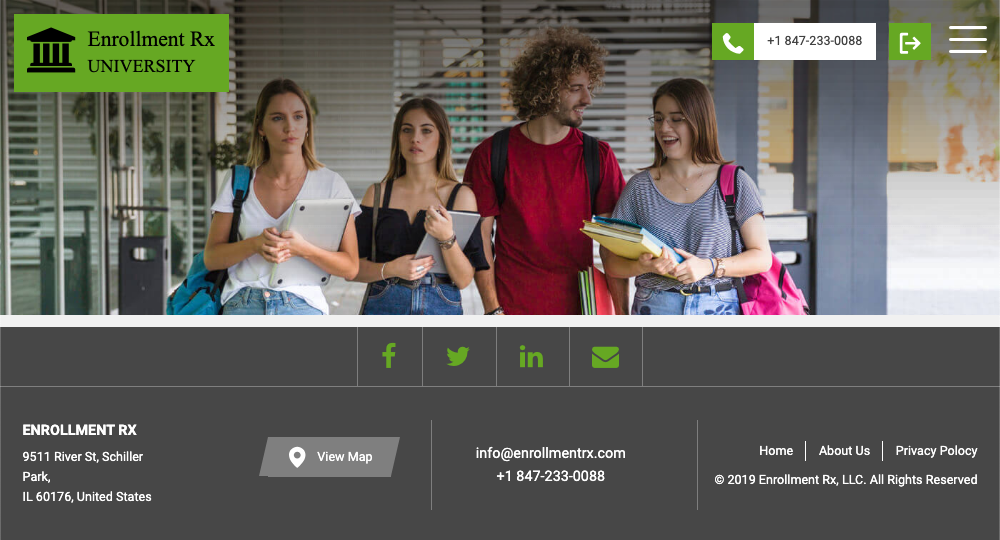
- ERX Template 1 'Light' Theme

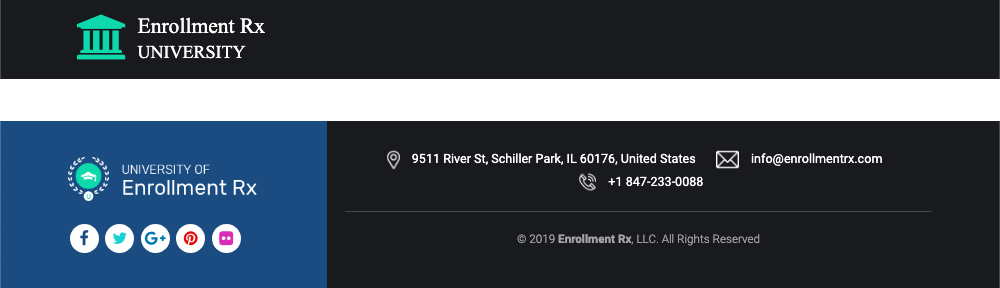
- ERX Template 2 'Dark' Theme
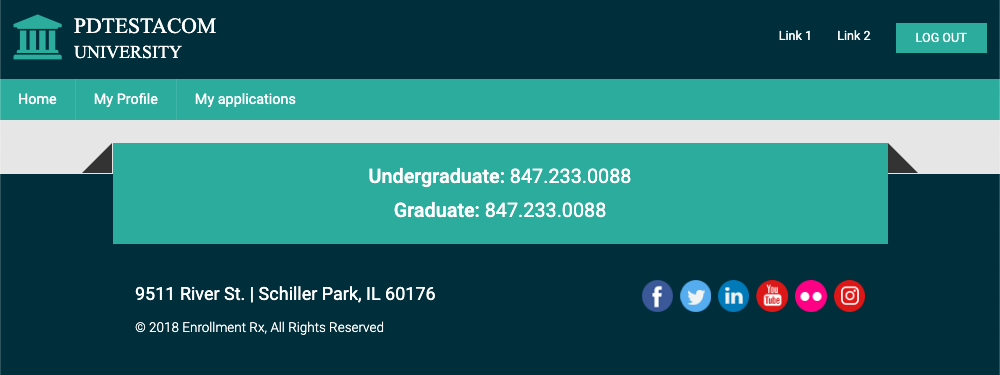
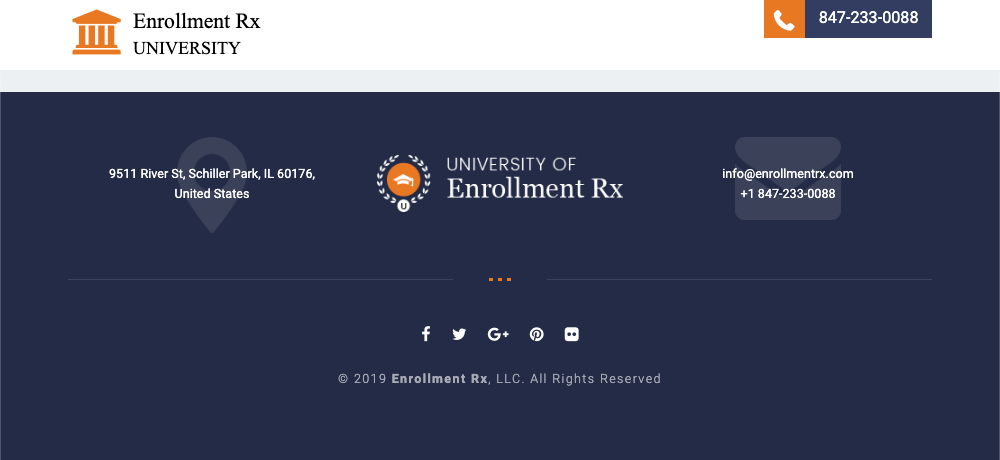
- ERX Template 3 Theme
- ERX Template 4 Theme
- ERX Template 5 Theme
Customizing Your Template
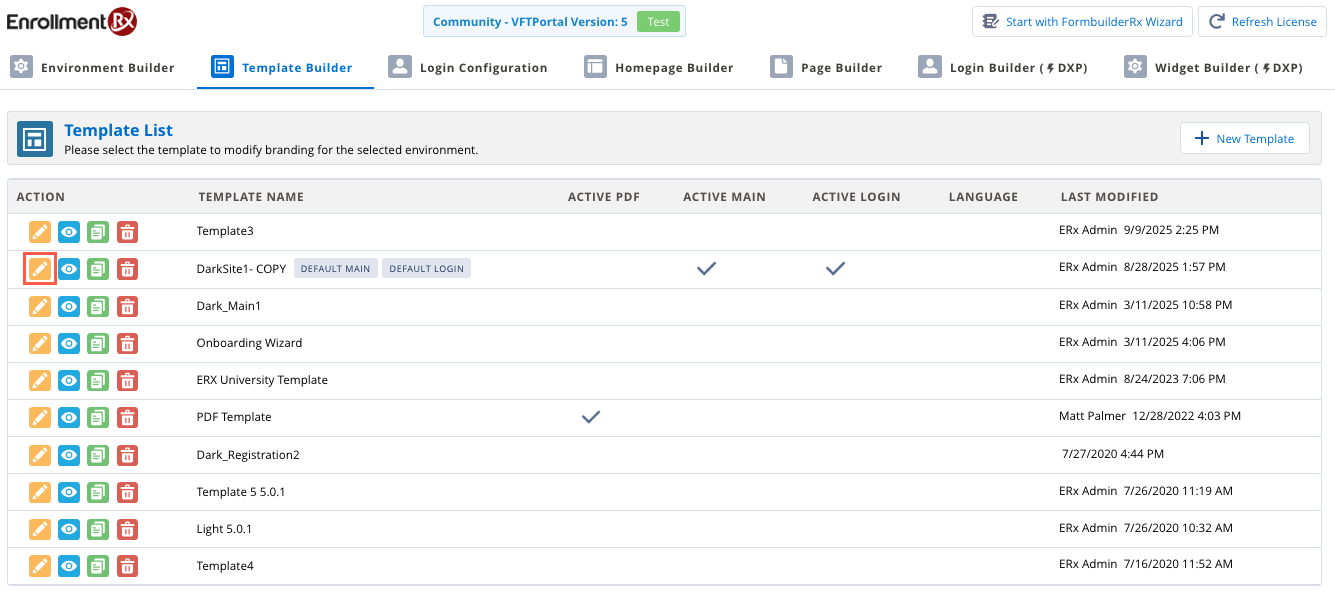
- Click the pencil icon next to the name of your template to launch the
Edit Template dialog.
User interface is related to 2025 Release 1.

- If this template is for use in a Site, scroll to the bottom of the dialog window and in the section called "Display Criteria Main Template," check the Active and Set Default checkboxes.
- If this template is for use in a community, scroll to the bottom and in the section called “Display Criteria Login Template," check the Active and Set Default checkboxes.
- Customize the fonts and colors used in the template Scroll down in the template to this pane:
 Note:To view these style customizations in more detail and learn about what each field controls, visit the Out-of-the-Box Template Style Controls page.
 - Customize the color of the hyperlinks in the footer
- Copy and paste this sample CSS into the <style> tag of the template (you can change the hexidecimal color to match your branding):
footer .foot_top_left ul li a {color:#ec1212;}
- Copy and paste this sample CSS into the <style> tag of the template (you can change the hexidecimal color to match your branding):
Use dynamically generated tabs and logout button
We automate generation of the “Logout” button and tabs after a user logs in, and we suppress these before the user is logged in. Therefore, a single template can serve both pre- and post- login pages. Of course, you can still maintain separate templates for pre- and post-login (and there are often good reasons to do so), but it is no longer necessary.
If you currently use an ERX Template in your communities, we recommend that you replace it with a new one so that we can automatically generate the “Logout” button and Tabs using the Create a Tab (and Tab Label & Tab Order) functionality.
How to redirect the dynamically generated logout button
You can customize the dynamically generated Logout button in an ERx theme template to redirect to the page of your choice. If you use different FormBuilder templates for different campuses, for example, you can redirect Portal users to the appropriate template after they log out.
- From the FormBuilder Rx tab, click on the Environment you want to modify and click the Template Builder tab.
- Click on the yellow pencil icon next to the name of the appropriate template to launch the Edit Template dialog.
- In the Template Header section of the Edit Template dialog, find this
block of HTML:
<div class="top_nav pull-right"><a
                                href="/secur/logout.jsp" target="_self" class="link_logout">LOG
                                OUT</a></div>
and add the following highlighted text directly after logout.jsp and before the quotation marks (replace "param=value" in this example with your template name):
- Click the Save button to save your changes and close the dialog window. The above steps will prevent auto-generation of the link.
Changing the Logout URL if You Are Using DXP and FormBuilder
If you're using an out-of-the-box template with DXP and FormBuilder, the steps are slightly different for changing the logout URL.
- Go to in the Quick Find field
- Click the "All Sites" link when it appears in the list under the field - this will open the Digital Experiences list on the All Sites page
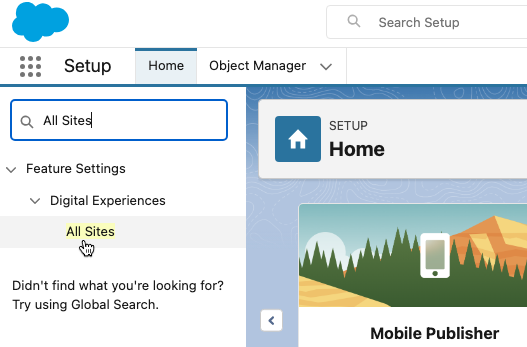
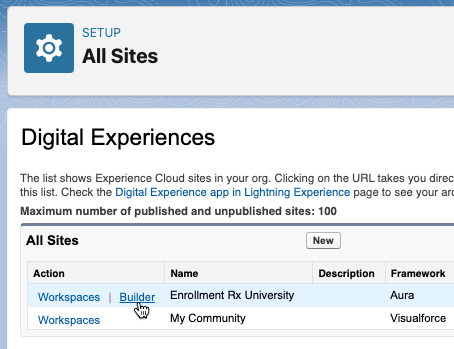
. - On the All Sites/Digital Experiences page, click Builder next to the
community/portal you want to modify - this will open the Experience Builder tool
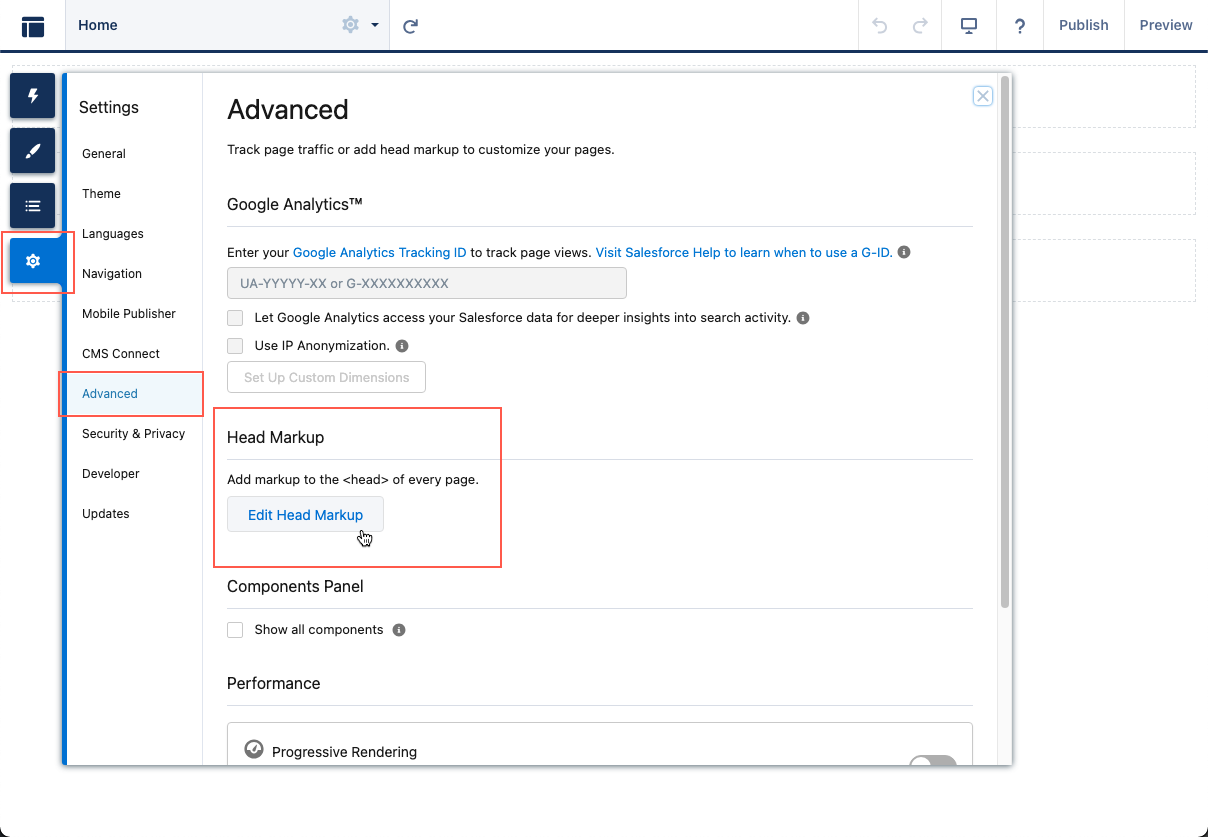
- To modify the head markup, click Settings > Advanced and then click the Edit
Head Markup button to launch a dialog window
- Copy and paste the JavaScript code below into the Head Markup field
<script>
const myTimeout = setTimeout(myGreeting, 5000);
function myGreeting() {
const div = document.createElement('div');
div.className = 'top_nav';
div.innerHTML = '<a href="/secur/logout.jsp" target="_self" class="link_logout">LOG OUT</a></div>';
document.genElementsyClassName('main-nav')[0].appendChild(div);
}
</script>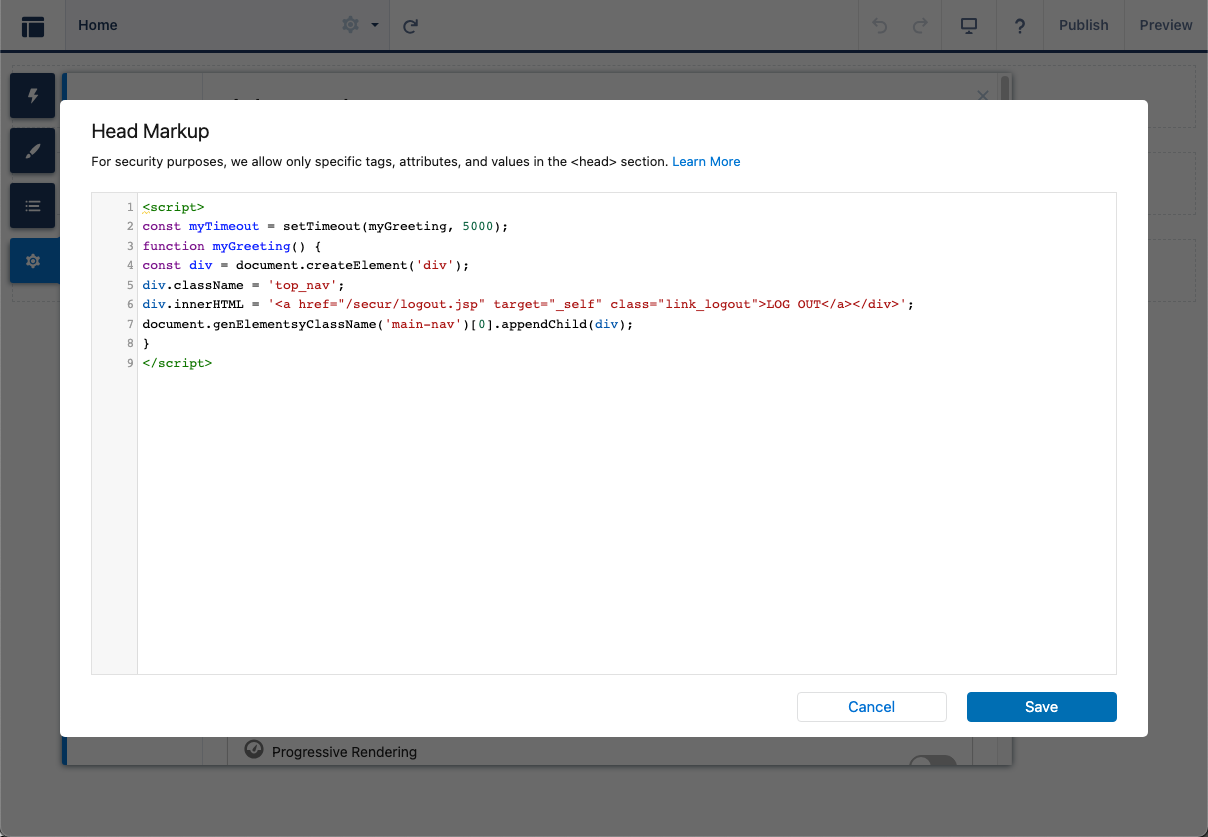
- Click Save