Create and Edit Pages
Overview
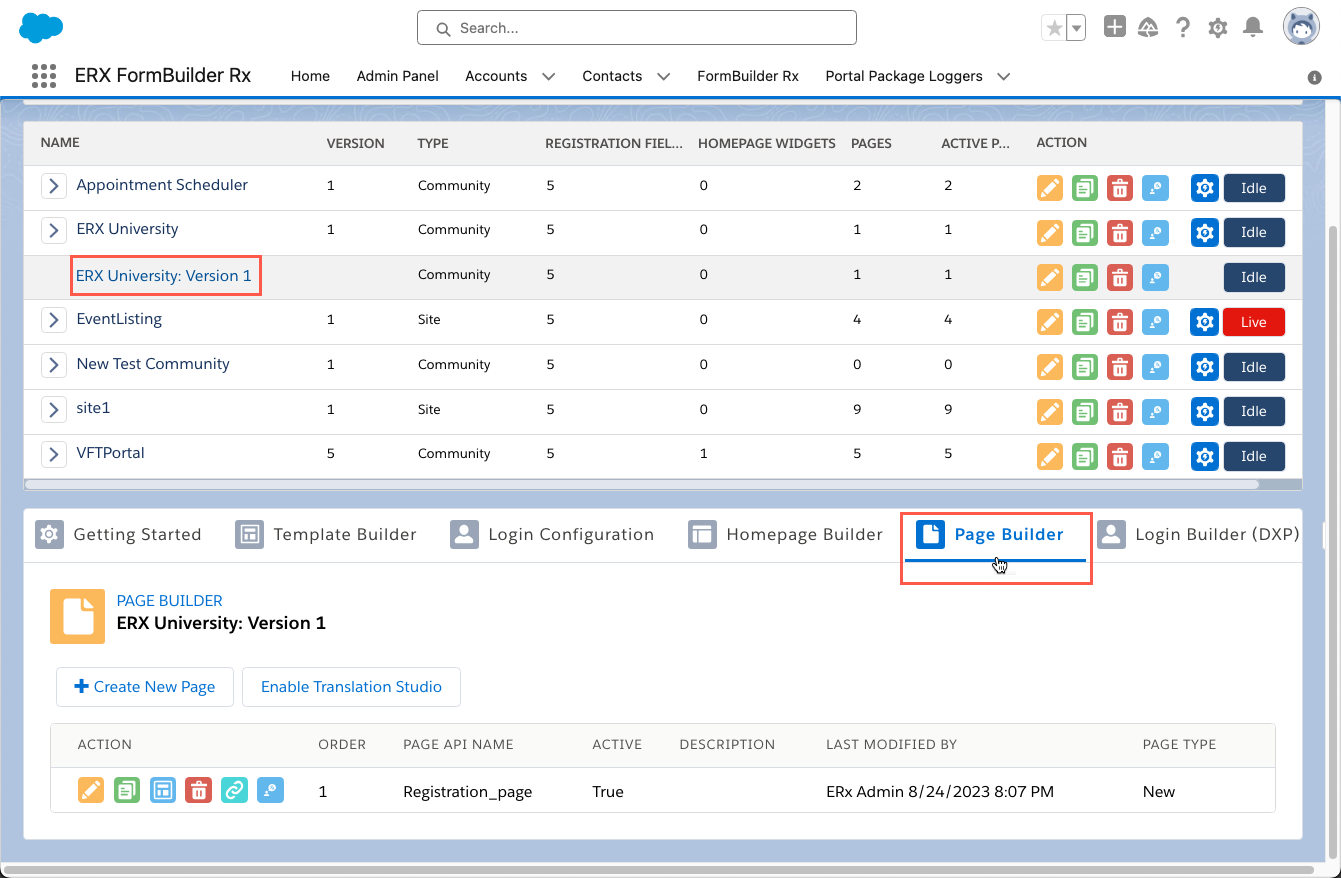
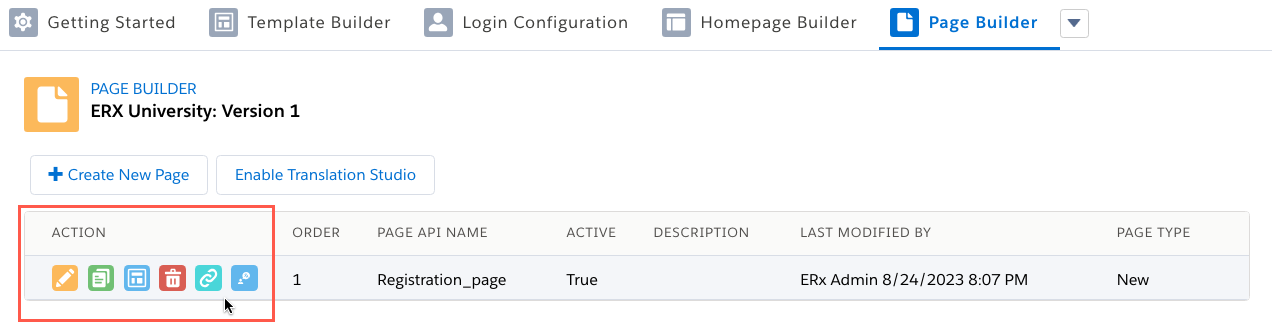
On the Page Builder subtab, existing pages in each Environment are listed with options to:
- Edit the page properties
- Clone the page
- Configure page fields, components, appearance, validation rules, and data sets
- Delete the page
- Copy the page URL
- Add language Translations
Create a New Page
 button. The Create New Page dialog will open
showing the controls listed below:
button. The Create New Page dialog will open
showing the controls listed below: 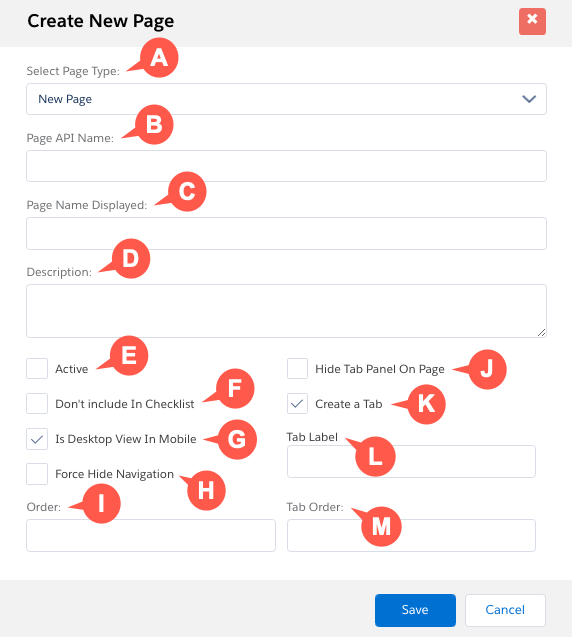
- Select Page Type: Select “New Page” to build a page with clicks, not code.
- Page API Name: The name that will appear in the list of pages in Page Builder and as a parameter in the URL of the page in the end user’s browser.
- Page Name Displayed: The name displayed in Community Portals in the left
Navigation panel. Note:Do not use the ampersand character “&” in page names; neither in the API Name nor in the Page Name Displayed. Doing so will cause the page to not render.
- Description: Add an optional description for the page. This is for your admin users and appears in the Description column in the selected Environment's page list.
- Active: If this is not checked, the page will not be displayed to the user.
- Don’t include in checklist: Only applicable to Community environments. If checked, this page will not appear in the navigation sidebar, but will still be accessible. This is useful for “Success” messages or other pages the user will never navigate to directly.
- Is Desktop View In Mobile: This is checked by default, which means pages will display on mobile devices the same way they do on desktops. Normally, you should keep this box checked; otherwise dependencies between sections will not work on mobile devices. Note:If this box is not checked, then, on mobile devices, every section of a page will display as a separate page.
- Force Hide Navigation: When this is checked, the left navigation panel is hidden on the front end. Its purpose is to create a more seamless experience for users.
- Order: A numeric value that determines the page’s order in the navigation. It is not necessary to order pages sequentially (i.e., pages can be numbered ‘10’, ‘20’, ‘30’, etc.).
- Hide Tab Panel on Page: If you are using the “Create a Tab” feature to generate a tab bar in a template header (refer to K, L, and M below), checking this box will prevent the bar of tabs displaying in the header when this page is displayed to the end user.
- Create a Tab: If you are using an ERX Template, checking this box will add a navigation tab in the horizontal tab bar of the template header.
Note:Checking this box will also reveal the Tab Label and Tab Order fields in the Create New Page dialog (L and M, below).
- Tab Label: If you have checked “Create a Tab," enter the text that the tab should display/
- Tab Order: If you have checked “Create a Tab," enter a numeric value that determines the left-to-right order/position of the tab for this page.
Click the Save button in the dialog to create the page.
Creating Pages for a Site or Sites
A Site Environment can have multiple, independent pages, since each has a unique URL. This means that to have multiple public pages, only one Site needs to be created. It is not necessary to create a Site for each page. However, you may create multiple Sites and have multiple Site environments if you wish.
About the Force Hide Navigation Panel Feature

System Behavior
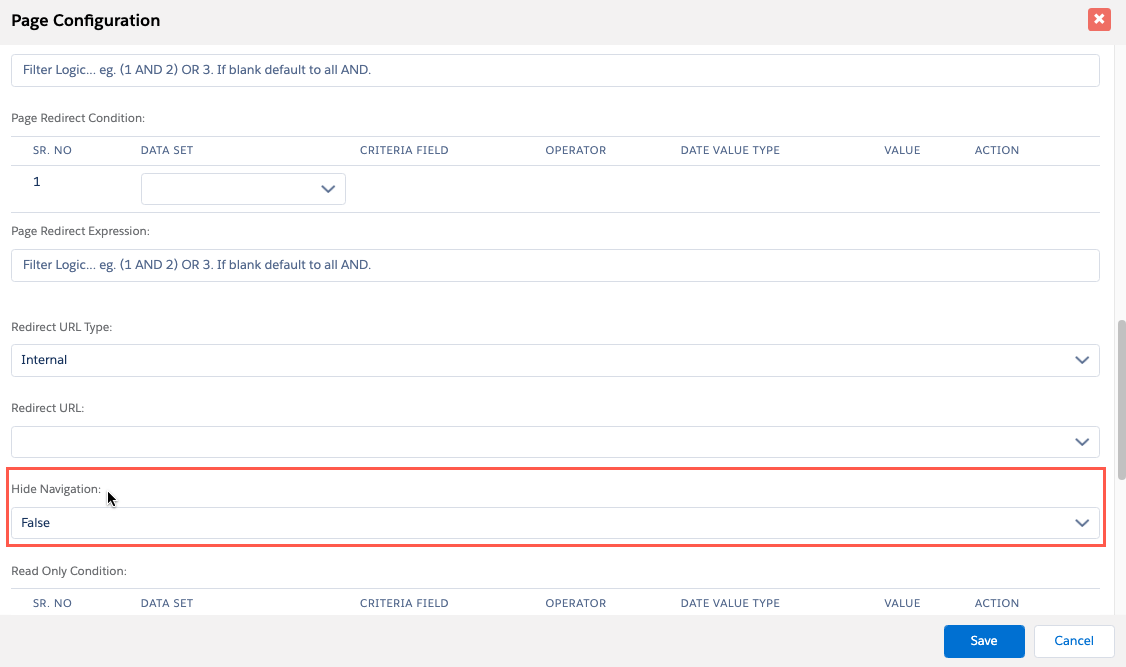
| Force Hide Navigation | Result |
|---|---|
| Checked |
Users will have a seamless Hide Navigation Experience. There won’t be any delays or fluctuation on the page. |
| Unchecked | The Navigation Checklist is displayed on the front end (to your end user). |
When Force Hide Navigation is unchecked, the Hide Navigation feature will work as normal.
