Working with FormBuilder Custom Templates
Instructions for customizing templates after the Summer '20 upgrade
Purpose of this Document
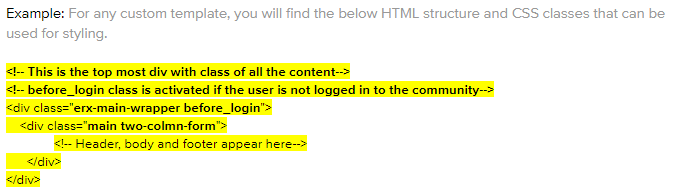
Prior to the FormBuilder Summer '20 release, the client custom template used a div tag in the header that was closed in the footer section. It was set up this way to apply styles to the middle section of the page.
In Summer '20, we closed the div in the header to comply with W3C standards for valid HTML, styling, and scripting. Specifically, any tag that starts in the page header or footer must now be closed there as well.
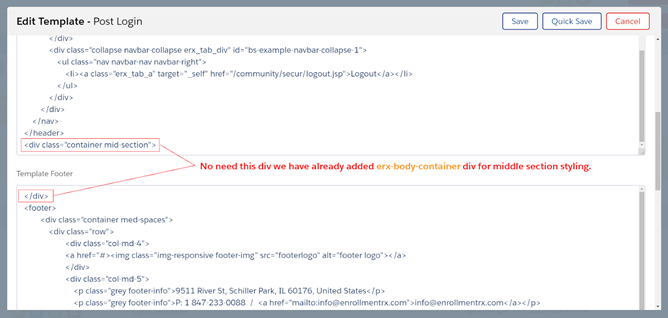
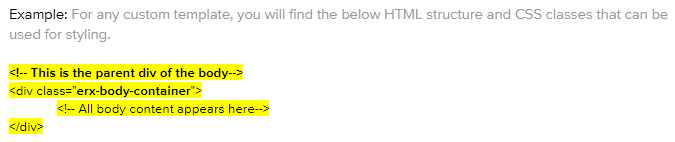
This change essentially disabled the CSS styles that had been previously applied to the middle section of pages using custom templates. To resolve this issue, we have introduced a new erx-body-container class to style the middle section.
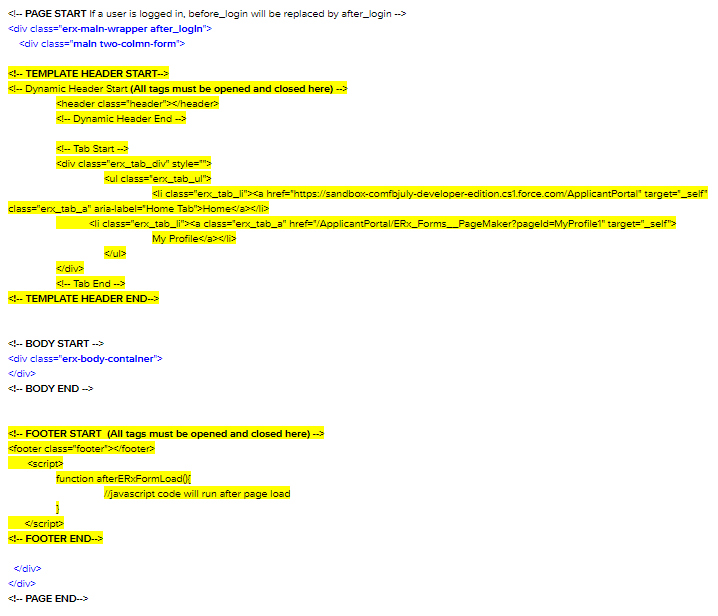
New Structure for Custom Templates (as of Summer '20)
Below, the HTML markup in blue is generated by FormBuilder code, but customers can also utilize custom classes to change branding.
Recommendations for Building Your Own Template
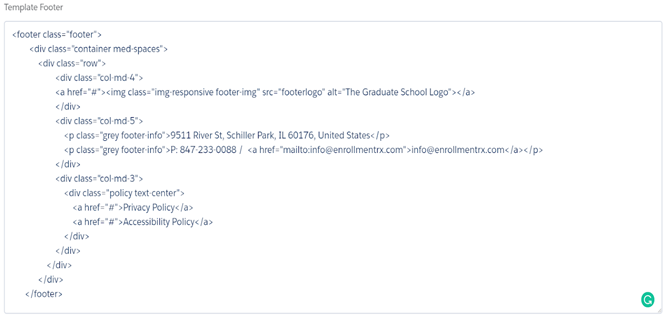
1. Always remember to close the div tags in the header template that are opened there.
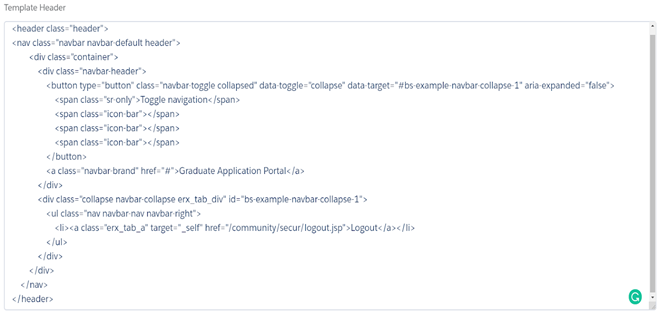
2. Also do the same (open and close tags) within the template footer.
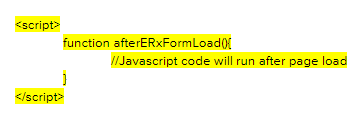
3. Always write any custom Javascript/JQuery in the afterERxFormLoad function.
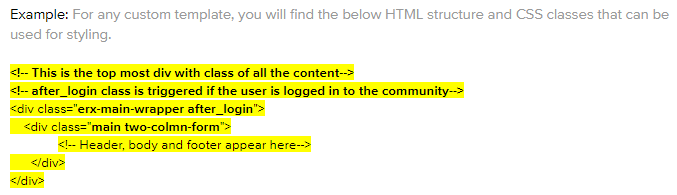
4. Apply styles to “after login” content (e.g., Home and Pagemaker pages) using the after_login class.
5. The middle section of the portal pages can be styled/branded with the FormBuilder CSS class erx-body-container.
6. Styling can also be applied to pre-login pages, such as Login, Forgot Password and Registration, and sites pages using the before_login class.