New Community
Setting Up a New Community
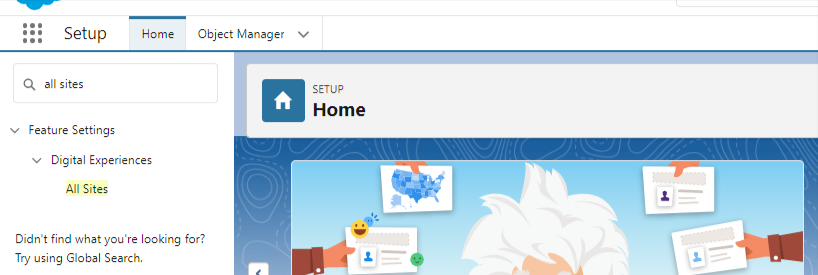
Follow the below steps to set up a new Community with Experience Builder:
- Go to , search for All Sites in the Quick Find box and click the link when it appears
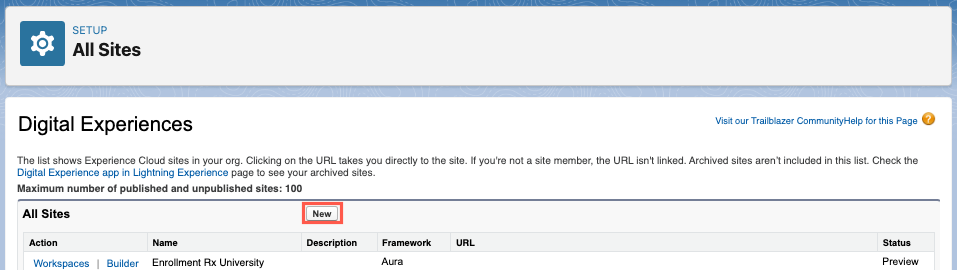
- On the All Sites page, click the New button
- Select an Experience (template)
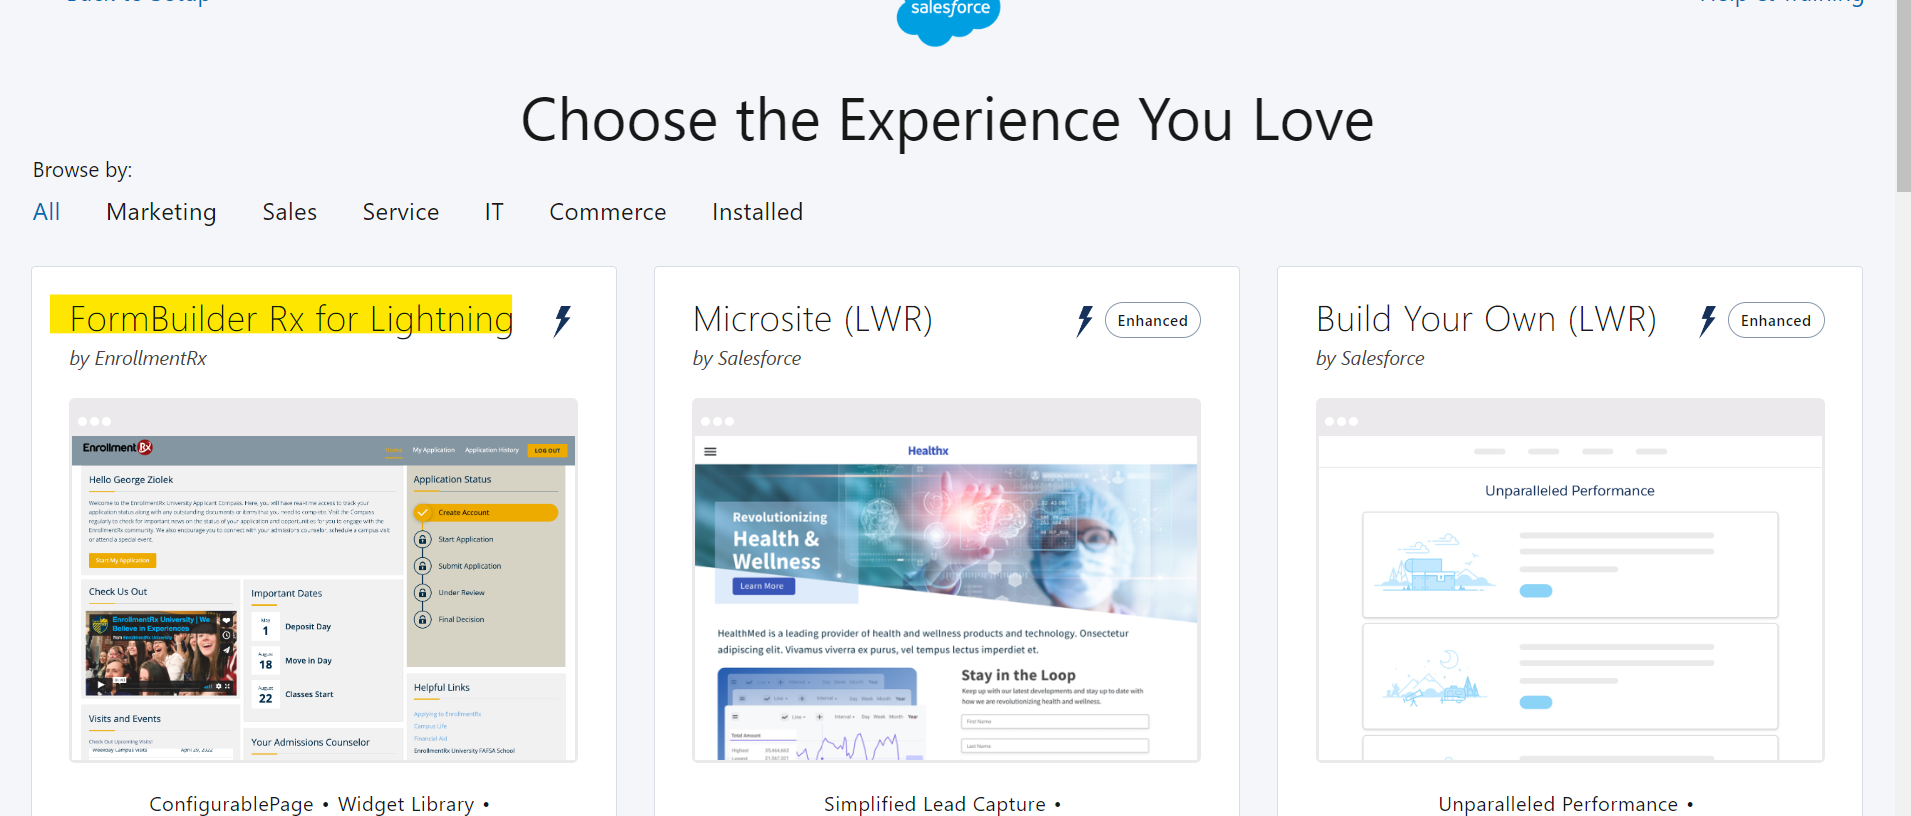 Tip:We suggest using the “FormBuilder Rx for Lightning” template to avoid extra steps for login, registration and branding pages.
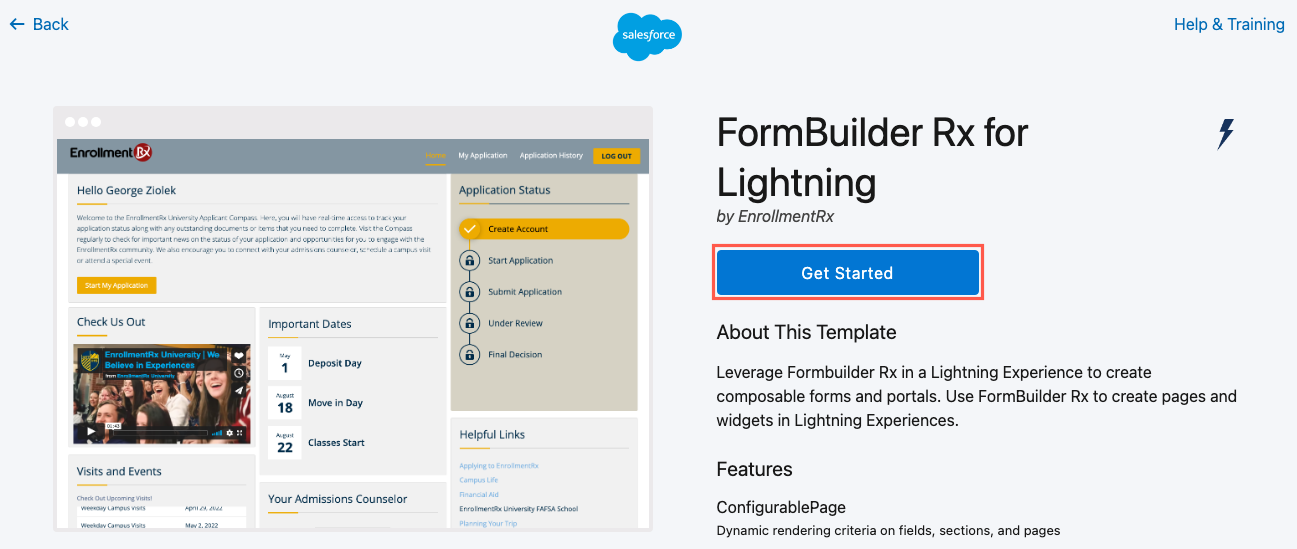
 - Click on the template and click Get Started
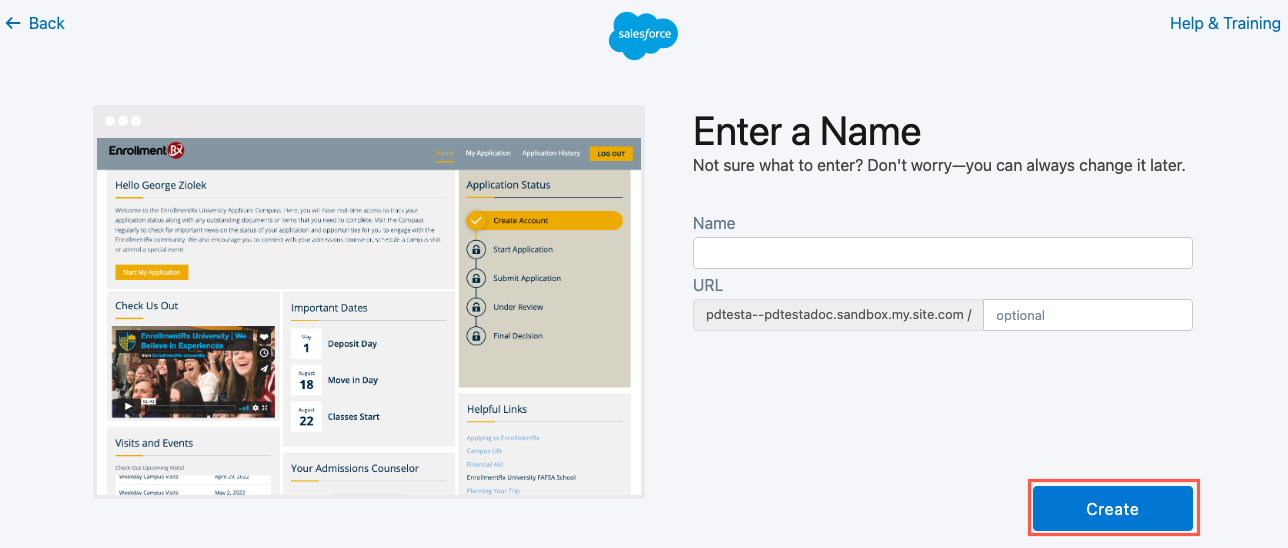
- Add the Community Name and URL (the URL is an optional step at this point; you can add it later)
- Click Create (you'll see a success message once the Community is
created)
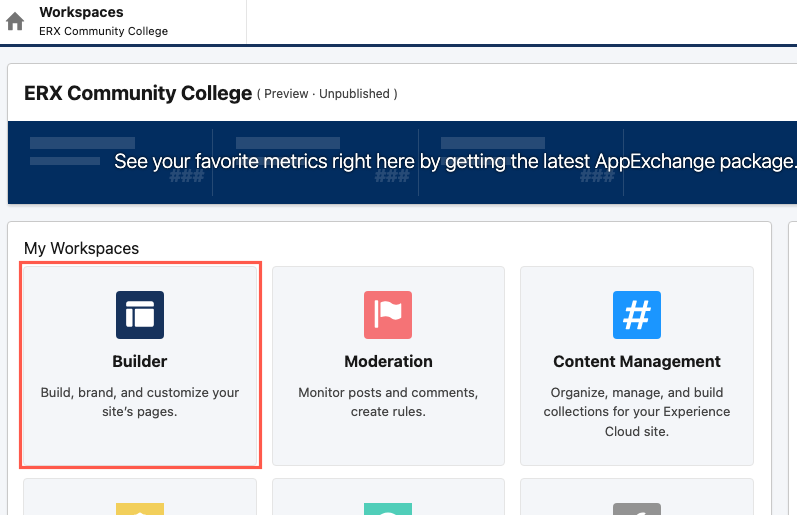
- After creating the Community you'll be sent to the Workspaces page. Click
Builder under My Workspaces.
- Inside the Builder tool, click Settings and then Theme
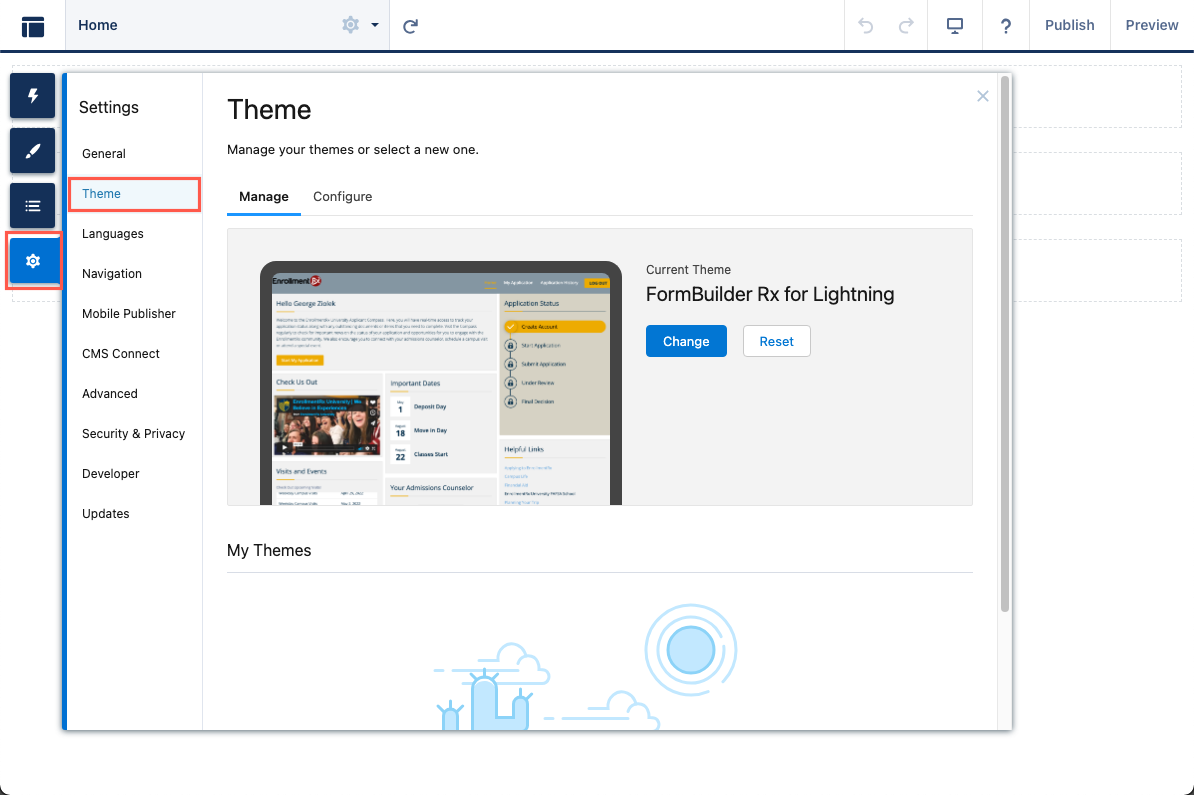
- Select the Configure tab in the Theme section and click the New Theme
Layout button

- Enter the name of the theme and select the theme component

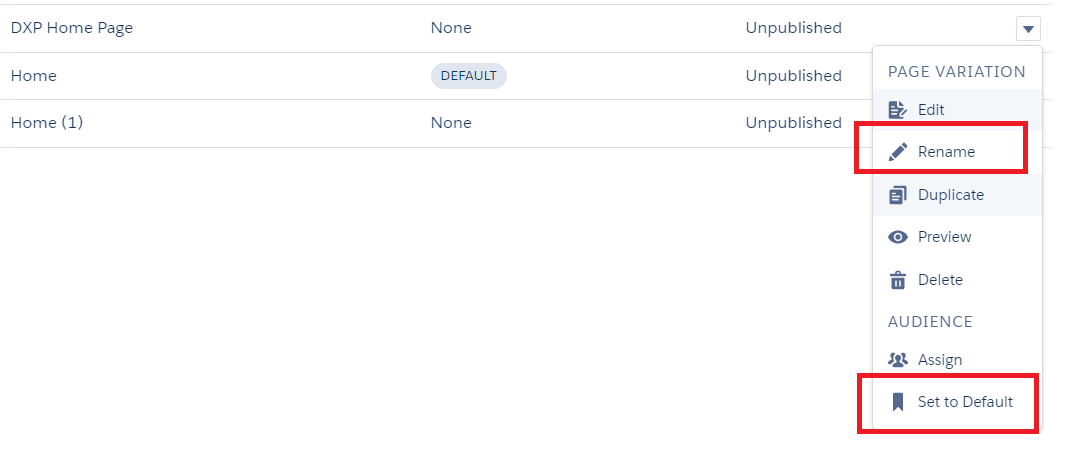
Page Variation Creation Process
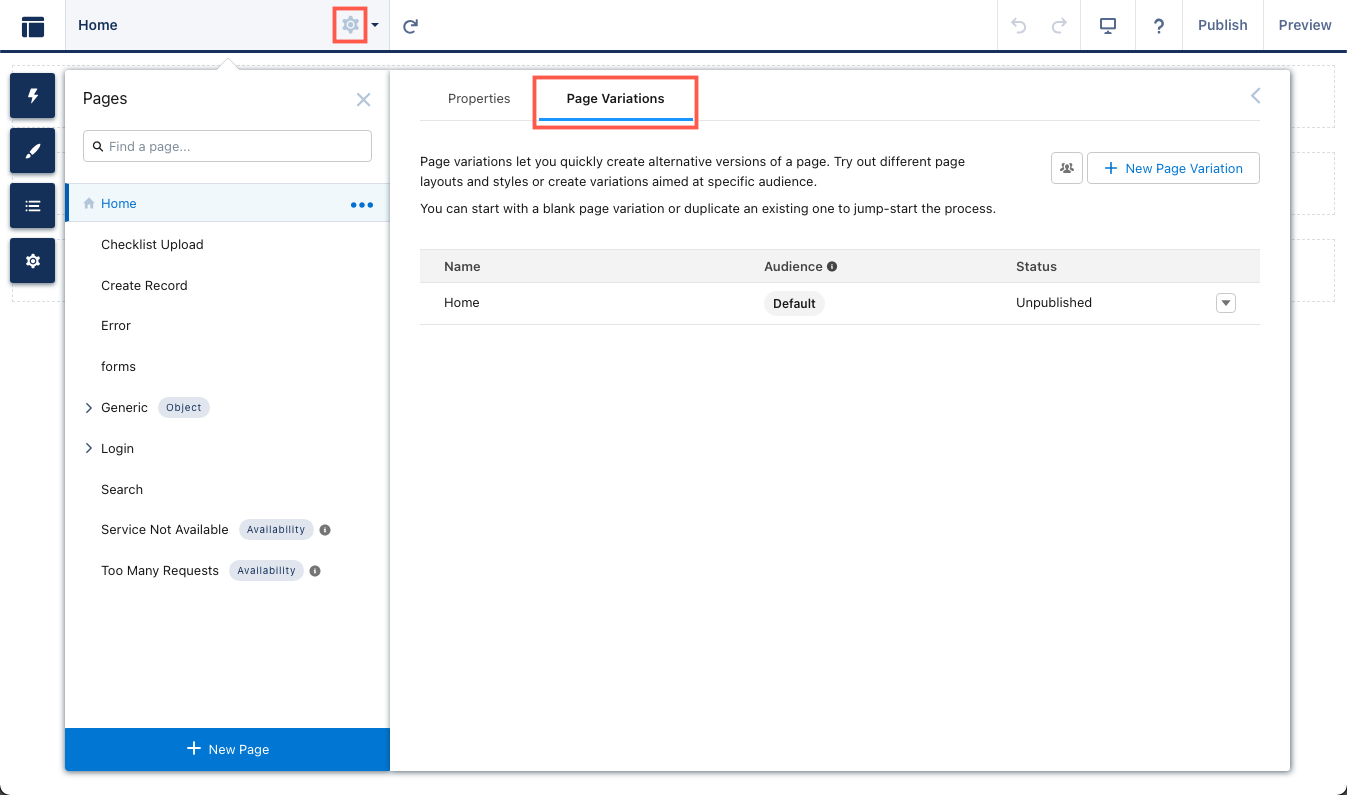
- In Experience Builder, click the Home gear icon (labeled "Page Properties") and
select the Page Variations tab
- Click the down arrow at the end of the default homepage row and select
Duplicate

- Click Rename to create a new name for the variation and then set it as
the default
Map the DXP Theme Component to the Homepage
To map the DXP theme to the Home Page for the Default template, follow these steps:
- In Experience Builder click the Home gear icon (labeled "Page Properties") and select the Properties tab
- Select "Override the default theme layout for this page" Checkbox
- Select the DXP theme as shown in the below image

- Drag the DXP cart component to the new Shopping Cart variation
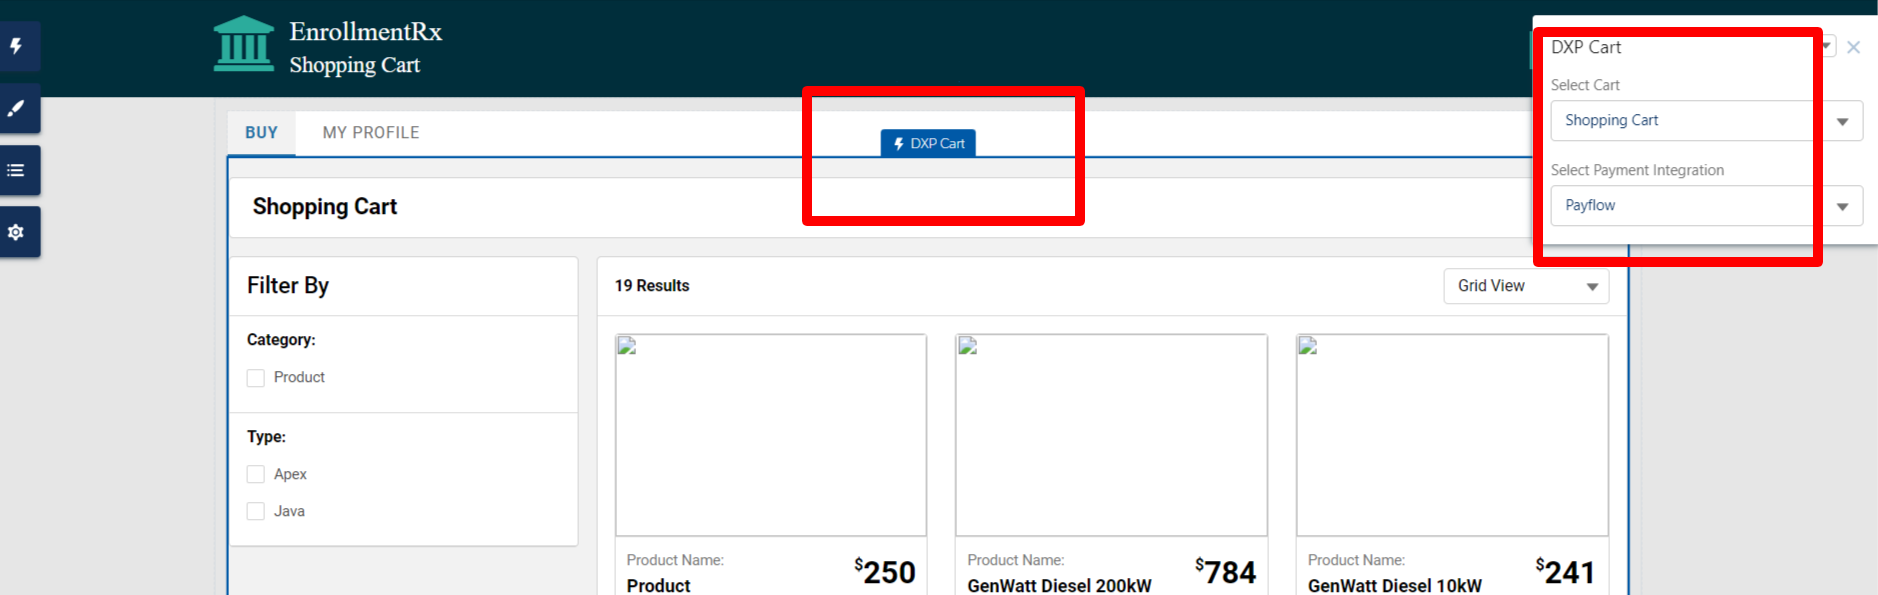
- Click the Publish button to save the changes and publish the site