Configure Sections and Fields
Overview
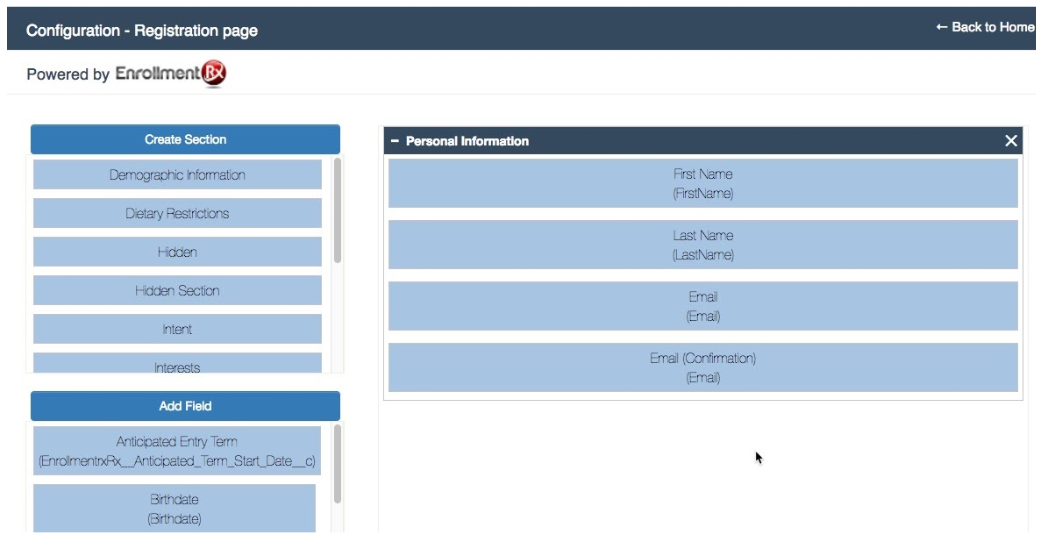
Once a Campaign is created, you can configure its Registration Page. That is, you can build sections on the Registration form and put any field from the Contact or Campaign Member record onto the page. The interface allows you to create or update sections as well as fields on a Registration form and also maintain their order, using drag-and-drop functionality.
Steps
Step 1
OR
Step 2
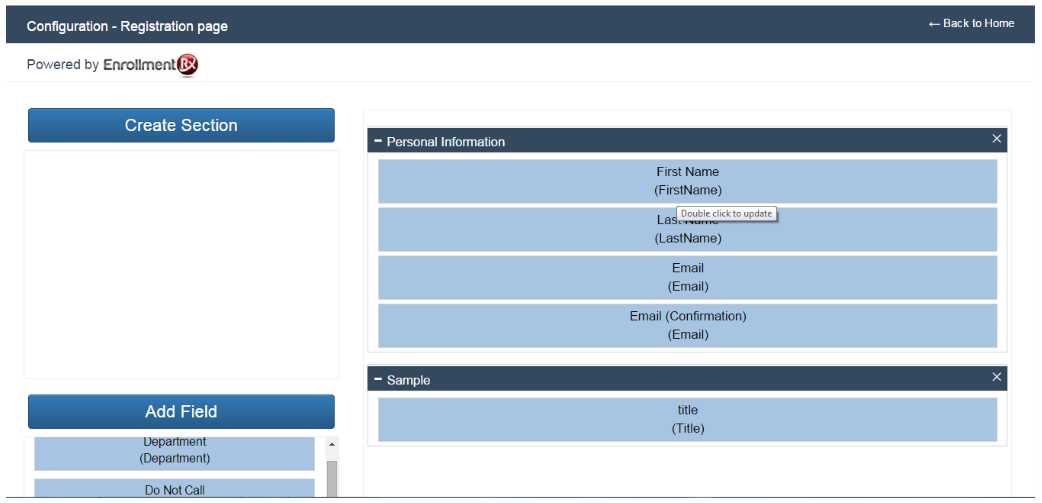
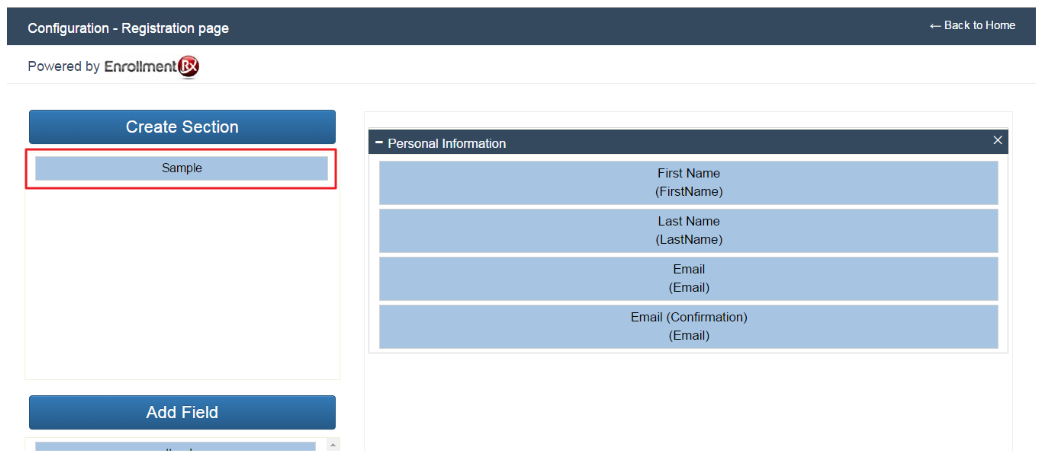
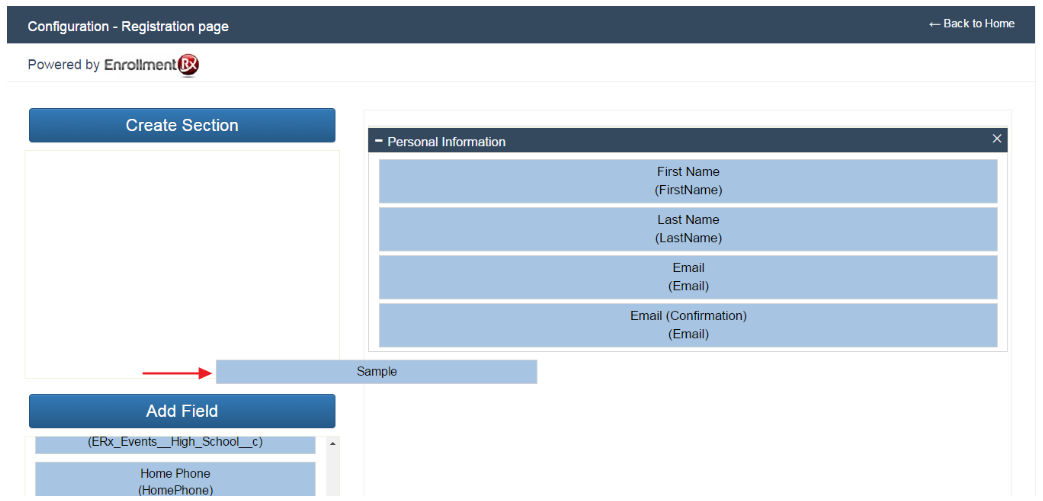
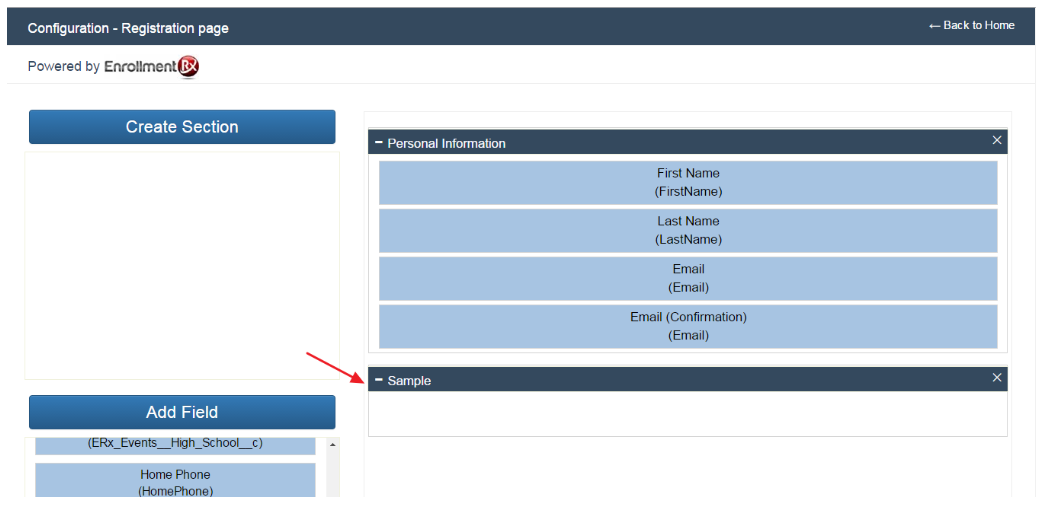
This will open the following page. Every configuration page has a default section named “Personal Information” with the following fields:
- First Name
- Last Name
- Email (Confirmation)
Persistent Fields and Sections
In addition, you will see on the left the names of sections and fields that you created in the course of configuring other registration pages. Once you create a section or field for a registration page, it becomes available for placement on all pages. On every page where you use it, you can accept the default configuration (the one that was set when it was created), or you can override any configuration setting for just the current page.
Step 3
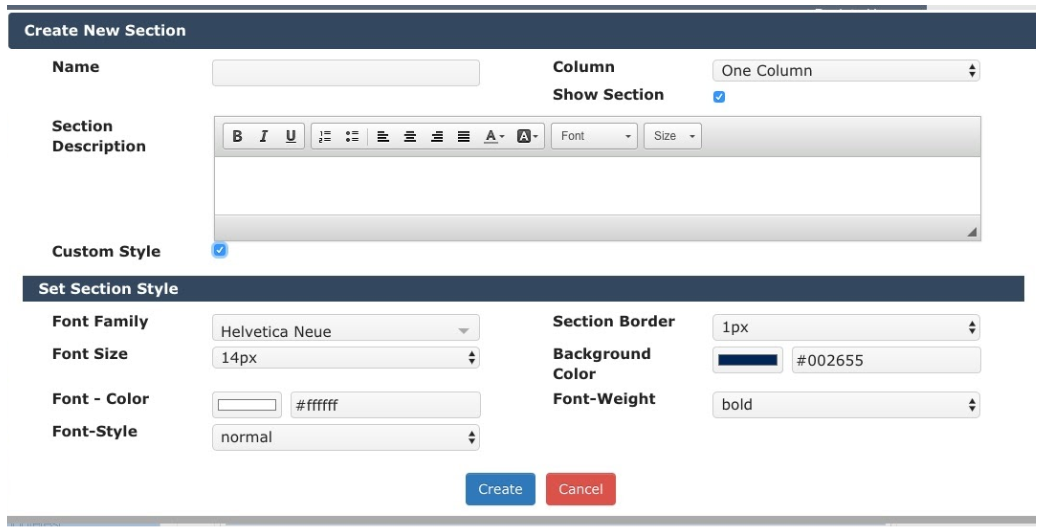
| Field | Description |
| Name | The label of the section. Each section name must be unique. |
| Column | Select whether you wish to display the section fields in a one-column or two-column format. When the end user tabs from field to field the tab order will be down the first column then to the top of the second column, then down the second column. |
| Show Section | You can choose to show or hide the section on the registration page. If this box is not checked, the section and any fields within it will not display on the registration page. This is so you can populate these fields from cookies or parameters that you embed in the URL. |
| Section Description | Description of the section which will be displayed below the section header on the registration page. |
| Custom Style | Check this box to set a custom style for the section. If this is not
checked then the default style will be used. The following style attributes
can be customized:
|
Step 4
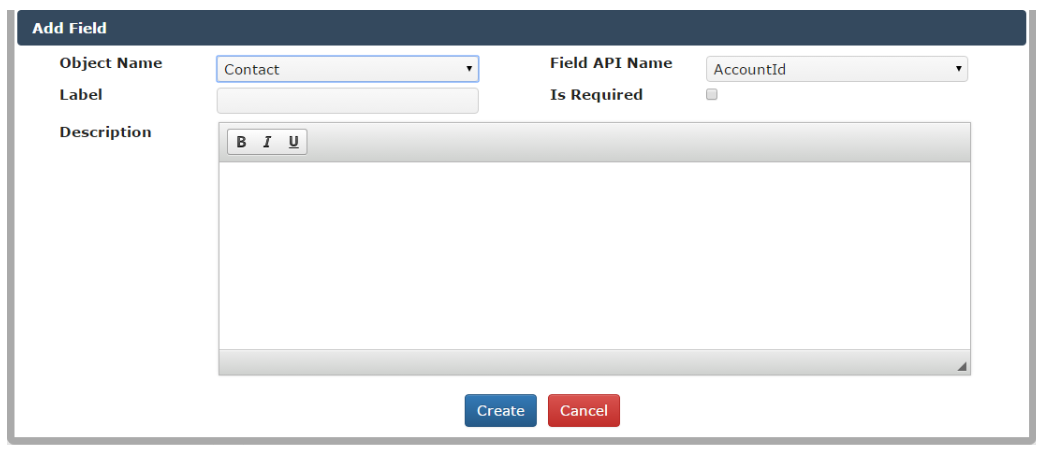
- Object Name: The name of the object which holds the field you want to use. Only the Contact and Campaign Member or Visit are available.
- Field API Name: Based on the selected object, the Field API Name list will be populated. No two custom fields created for event registration forms can reference the same Field API Name.
- If Field type is Date, you may set the allowable dates in three ways:
- A fixed date range can be specified by filling in both the Start Date and End Date
- An open ended date range can be specified either by:
- Filling in only the Start Date, in which case all dates after the Start Date will be allowed
- Filling in only the End Date, in which case all dates between today and the End Date will be allowed (where “today” is the day on which the registrant fills out the form)
- An arbitrary set of dates can be specified by
- Choosing a Calendar User, whose calendar will be used to set the allowed dates
- Entering an Event Subject, which will make allowable any date on
which an event with that subject appears on the Calendar User’s
calendar
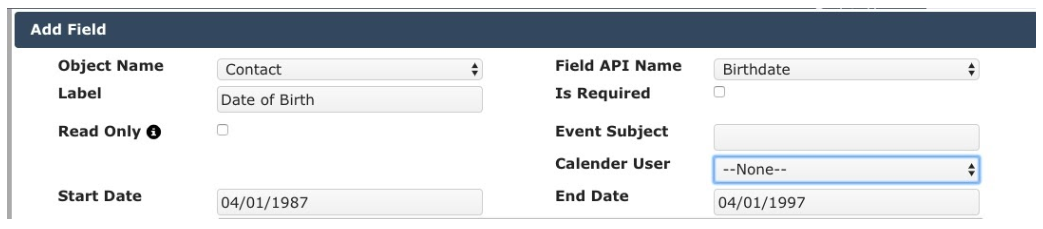
- If Field type is Reference (Lookup), then you may optionally specify Record type
to restrict the lookup to records of that type.
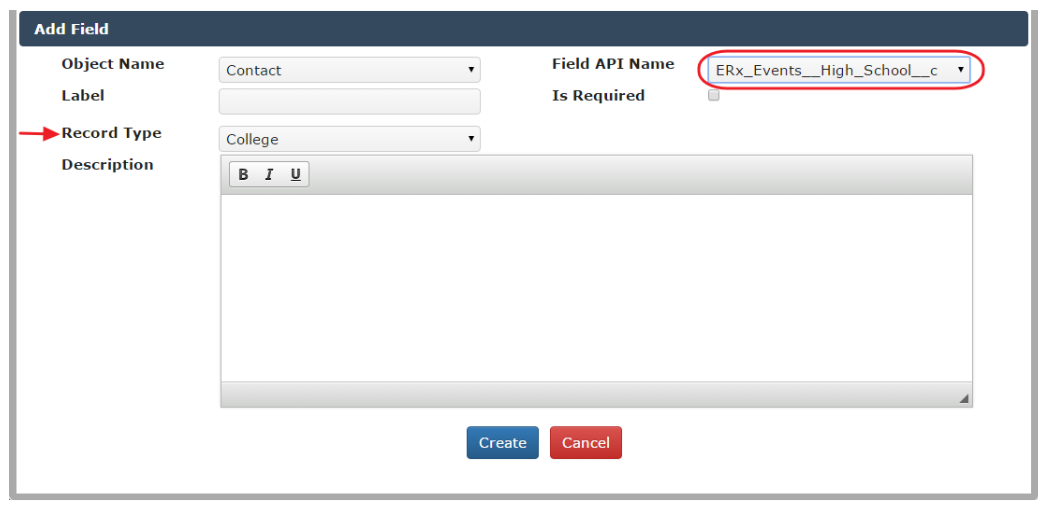
- Label: The label of the field which will display on the registration form. This is required.
- Is Required: Set whether the field is required or not -- note that this setting affects all the registration pages on which the field appears.
- Description: Description to be displayed below the field label on the event registration page.
- Once the field has been configured, click the Create
button. The field will be created and visible in the field panel on the left
side of the screen.
Step 6
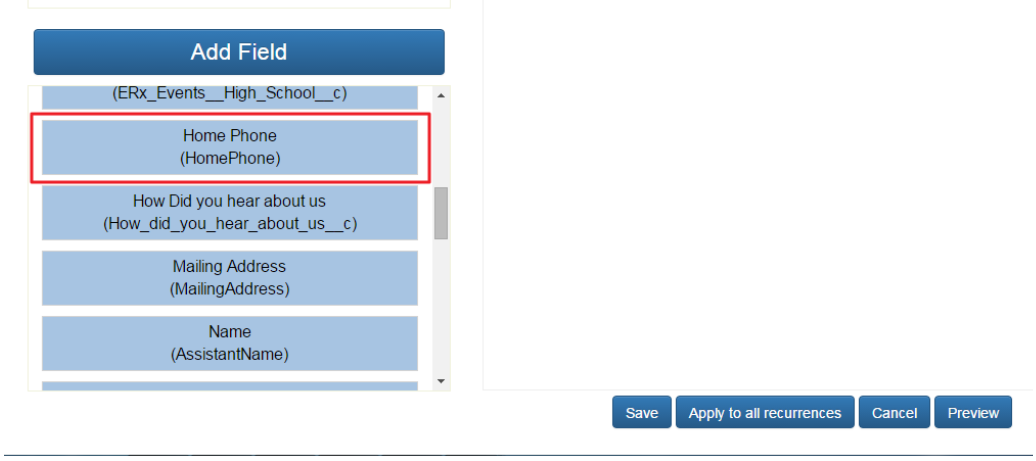
To display field(s) in a particular section, simply drag the field from the field panel and drop it in any displayed section.
Step 7
You can change the order of the displayed sections by dragging them up or down in the displayed section area.
Step 8
Fields are also movable between sections. Within the same section you can change the order of the fields by dragging and dropping them.
Step 9
Click on the “Save” button to save the layout configuration. Clicking save will return you to the campaign detail page.
Step 10
Step 11