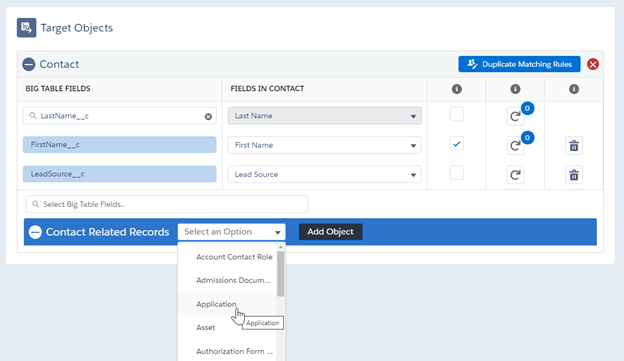
To add additional objects to your mapping, choose the object you want to add and press
“Add Object.” (Fig 2.11). The list of values is dependent upon which object mapping
section the Define Related Record button was. Next to each related record will be a
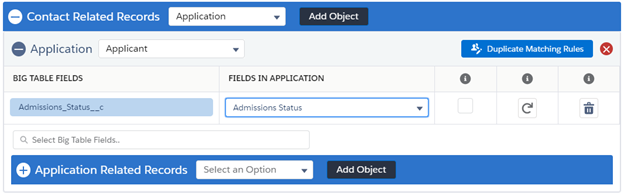
label with the name of its parent object (Fig 2.12a). Figure 1. 2.11 — Choosing an additional object to map Figure 2. 2.12a — Next to the related record mapping is the label of its parent object
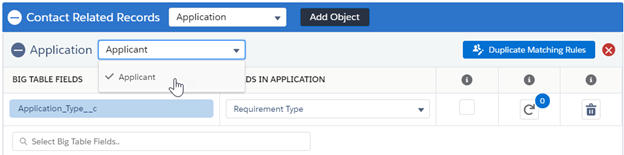
As of the Spring 2018 release, a new feature is the ability to choose which reference
field is used to connect a child object to the parent. This appears as a dropdown in the
header. The dropdown will include any reference field that looks up to the Parent
object. For example, the Application has the managed “Applicant” lookup to the Contact
record. If a custom lookup to Contact called Agent also existed, that would be listed as
an option (Fig 2.12b). Figure 3. 2.12b — Choosing which reference field to populate, that connects the Child object to the Parent
As modifications are made to the field mapping, the messages “You have unsaved changes” and “Mapping saved successfully” will tell you whether or not the most recent changes have been saved.
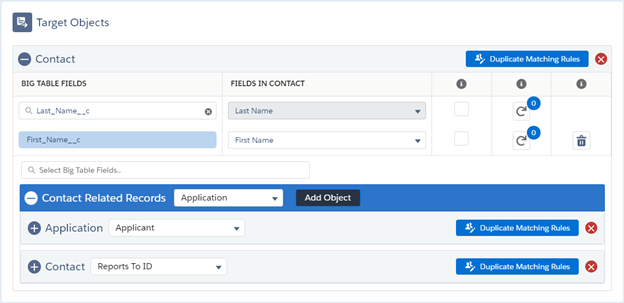
Use the Expand All and Collapse All buttons
as well as the “+” and “-” signs to expand and collapse sections for ease of use(Fig
2.13 and Fig 2.14).
Figure 4. 2.13 — A completely collapsed mapping Figure 5. 2.14 — A partially collapsed mapping
Use the X in the top right of each Target Object section to delete the entire object. Unlike altering a field mapping, clicking Save or Update is not required for this action to be saved, and deleting a section will also delete any related object mappings. If this is done accidentally the mapping must be recreated.
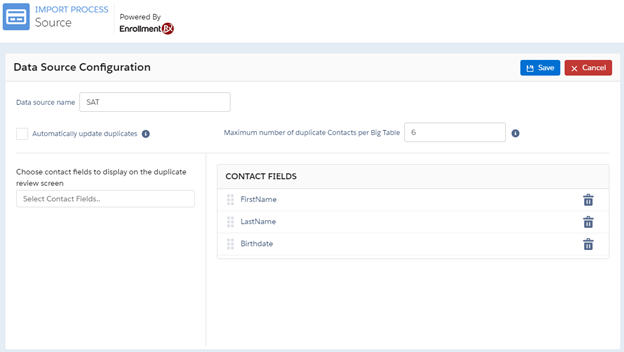
To create a new Data Source and set of mappings, click the New Mapping button (now a plus
sign) in the button set near the top right corner of the screen. A new Data Source popup
will be displayed (Fig 2.15). You can specify the Name and whether or not to
automatically update duplicates. To Edit the columns for the Duplicate Review Screen,
click View Details after selecting the Data Source. Default columns are set for each new
Data Source created through the mapping screen. Figure 6. 2.15 — Creating a new Data Source
The Clone Mapping button works the same way as the New Mapping button, but also copies all existing mappings, transformations, and duplicate matching rules onto the new source. Use this button if you are creating a mapping similar to an existing one
Use the “Home” button to leave the mapping screen and return to the Import Rx Home
tab.
After saving a mapping, you can define transformations and create duplicate matching
rules. These are covered in following sections.
Errors may display on the Mapping Page if invalid actions are taken. Below are some of the common scenarios.
Attempting to map fields with incompatible data dates. For example, mapping a text field to a date field. You will receive the error “The fields you have selected have incompatible types and cannot be mapped together.”
Attempting to map a Target FIeld more than once. For example, trying to map two fields from the Big Table to the standard “email” field on Contact. You will receive the error “You may only have one mapping for a given target field. Please review your mappings below.”
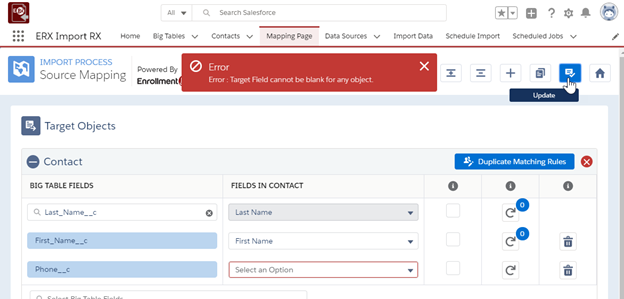
Trying to save a mapping with a source field but no target field (Fig 2.16). Figure 7. 2.16 — Error when no target field is chosen
Feedback Widget
Was this page helpful?
Thanks — comments are optional, but we’d love to hear what was helpful.