Syncing Application Data with Pardot
Issue
Only the Advanced edition of Pardot allows for the syncing of custom objects. In all other editions, ERX Application data will not sync automatically.
Solution
Steps to Sync Your Custom Object Data
- Create a formula field on the Contact.
- Reference the formula field in Pardot.
- Use automation options to update the Contact.
Step 1: Create a Formula Field
In order to display values from the custom object on the Contact, a formula field needs to be created on the Contact to reference that value.
Here are the steps you can take to build the reference formula field:
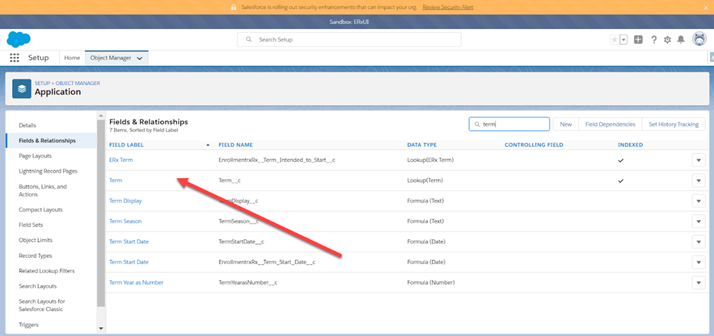
- Identify the Application field you want to display on the Contact and note the
type of field it is (e.g., picklist, number field, or date field). (If you are
not sure of the type of field, go to Object Manager > Application > Fields and
search for your field type.) Here is an example for the Term Lookup Field:
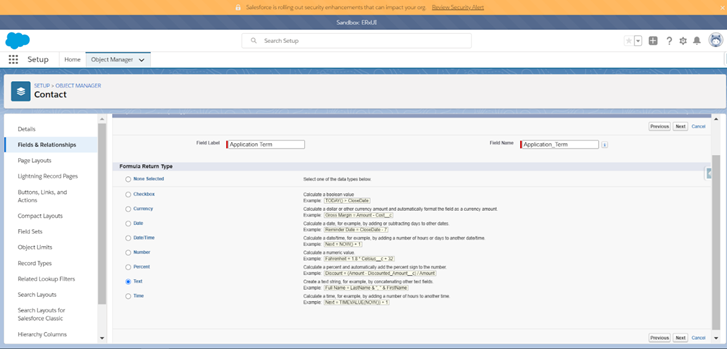
- Go to Object Manager > Contact > Create a new formula field. If the Application
field you want to display is a picklist, text field, or lookup, choose Text as
the Formula Field Type. If it’s a number, date or checkbox, select that as the
formula type. This screenshot shows the Text type for the Term Lookup:
- In the formula editor, find the Application field by going to Active Application
and selecting your field.
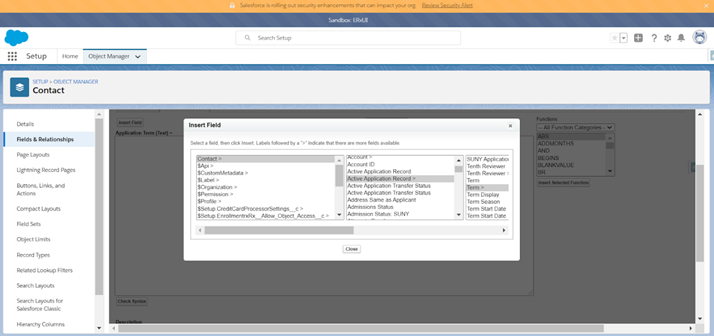 Note:If it’s a picklist, put the operator TEXT() with the field API within the brackets. In this instance, since it’s a lookup field on the Application, you’ll need to go to one more level to the term name (see below).The following screen shot shows the rest of the field lookup menu. Once you have your field, click Insert.
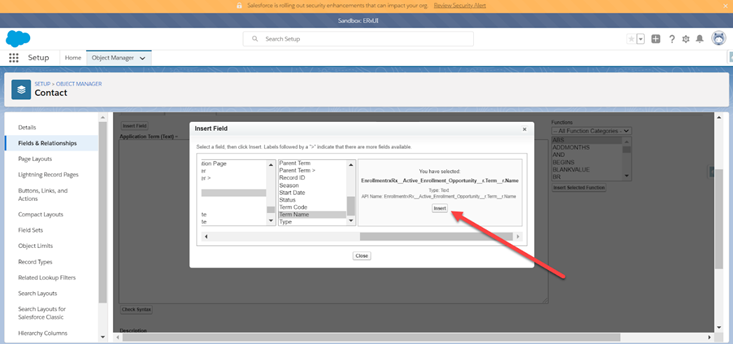
- Once your field is inserted, click Next (on the top right). You will see any validation errors at this point. If there are no errors, go to the next page, make it visible, add it to the relevant page layouts, then save.
Step 2: Reference a Formula Field in Pardot
- Go to Pardot, the BriefCase to the bottom left called Admin, then Configure Fields >Prospect Fields.
- Click Add Custom Field (top right).
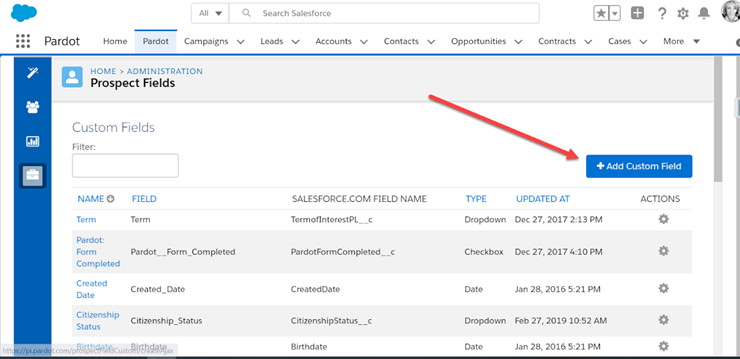
- Title your new field in a way that will make sense. ERX recommends using a similar or the same name as the new formula field you created.
- Next, click the “refresh” icon and select your field (see below). The field type
in this instance will be text because it’s displaying a text formula field value
from the formula we just created.
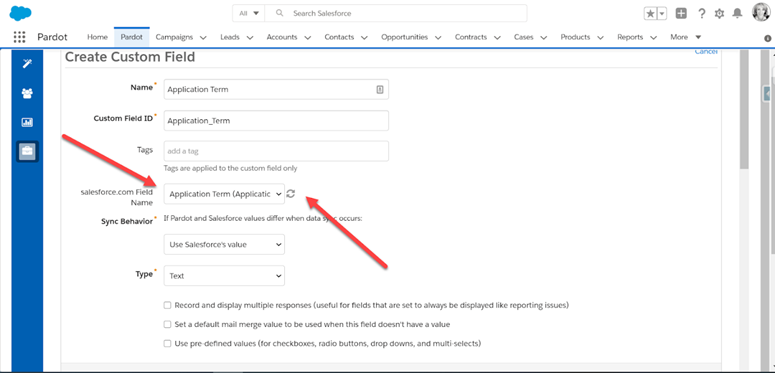
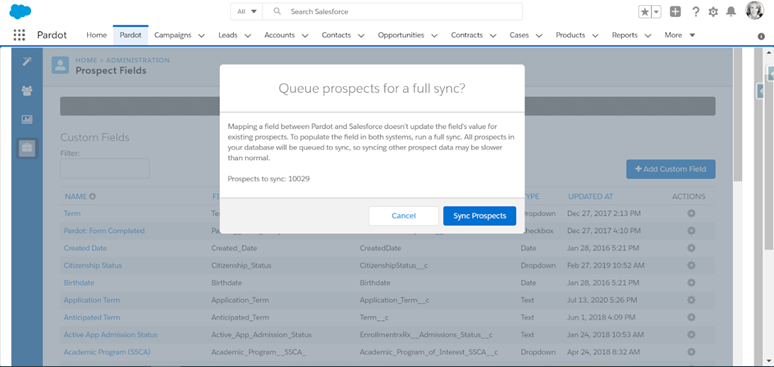
- Save the field.
If you do not sync all records, only records that are triggered to sync in the future will have this value.
Step 3: Use Automation Options to Update the Contact
Since a change in a formula field on the Contact doesn’t trigger a change to sync with Pardot, an automation is needed to update the Contact record.
If you are an Integration Rx client, this could be done in Jitterbit, but otherwise ERX typically recommends using a Process Builder.
Any time you are using automation, please be aware of other automations on the same object to prevent conflicts. For example, if you have four Process Builder flows on the Application object, there might be instances where they can be consolidated.
This is one example of how you can set up a Process Builder, but it will vary depending on the other automation and functions in your org.
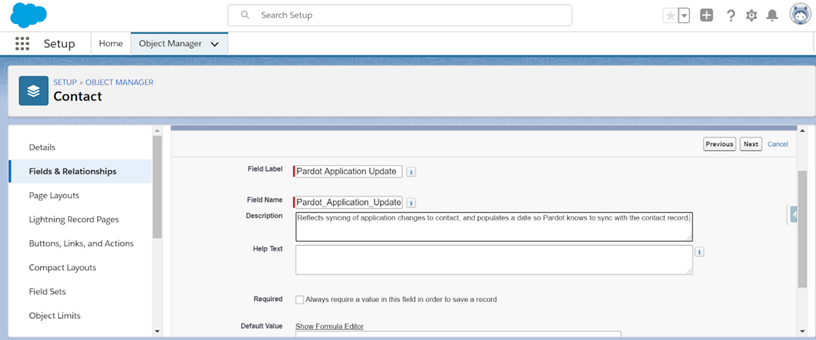
- Determine a field on the Contact to update. This can be an existing field, but
ERX also recommends creating a custom date field titled something like “Pardot
Application Update.” Here is an example:
- Create a new Process Builder by going to Setup >Type (in Process Builder). Click
Process Builder.
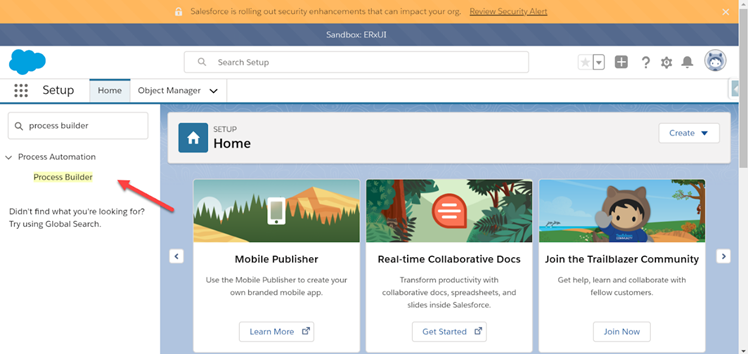
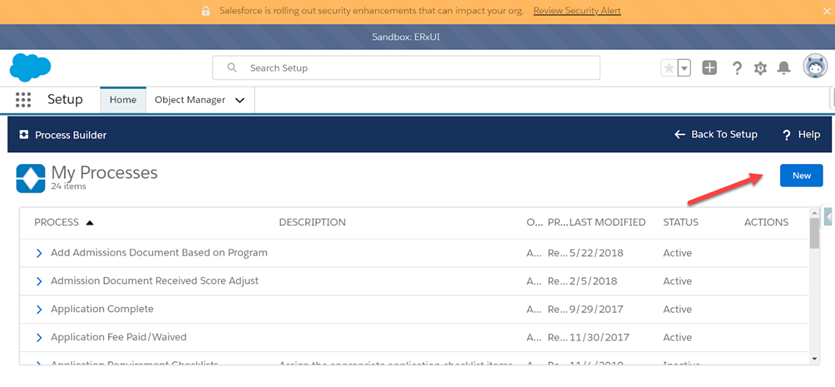
- On the menu, click New:
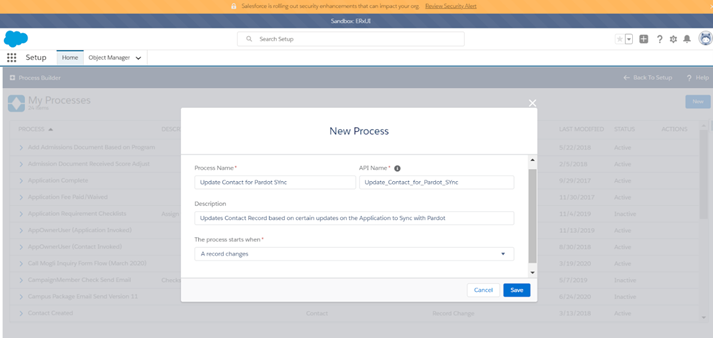
- Define your new process and add a description. “Select process” starts when a
record changes. Here is an example:
- Select the Application Object in the first node (please note, you may get a
warning that you have other processes on this same object, which may mean you
need to evaluate/consolidate). Be sure to select the “when a record is created
or edited” radio button, then Save.

- On the Criteria Node, define the specific fields that should trigger a change. For example, admission status, term, and program might be instances where you want the record to sync. In these instances you can use the “Is Changed” operator to fire only when one of those fields changes.
You can add an immediate action of updating a Contact field. For this example, use the new Pardot Update Application Field to update to today’s date using the (Today Function). You can then activate the process.