Approval Process Dashboard
Overview
As of Summer ‘21, the Approval Process Dashboard is used to run reports for applications that are active within an approval process. You can set criteria to filter these reports and view at-a-glance details about the applications along with their status and step in the process.
Your Reader Rx admin will need to enable the Approval Process Dashboard tab. Go to Setup and type App Manager in the Quick Find box. Click the Edit button for ERX Reader Rx (you’ll find it in the drop-down list at the end of the row).

The Approval Report UI
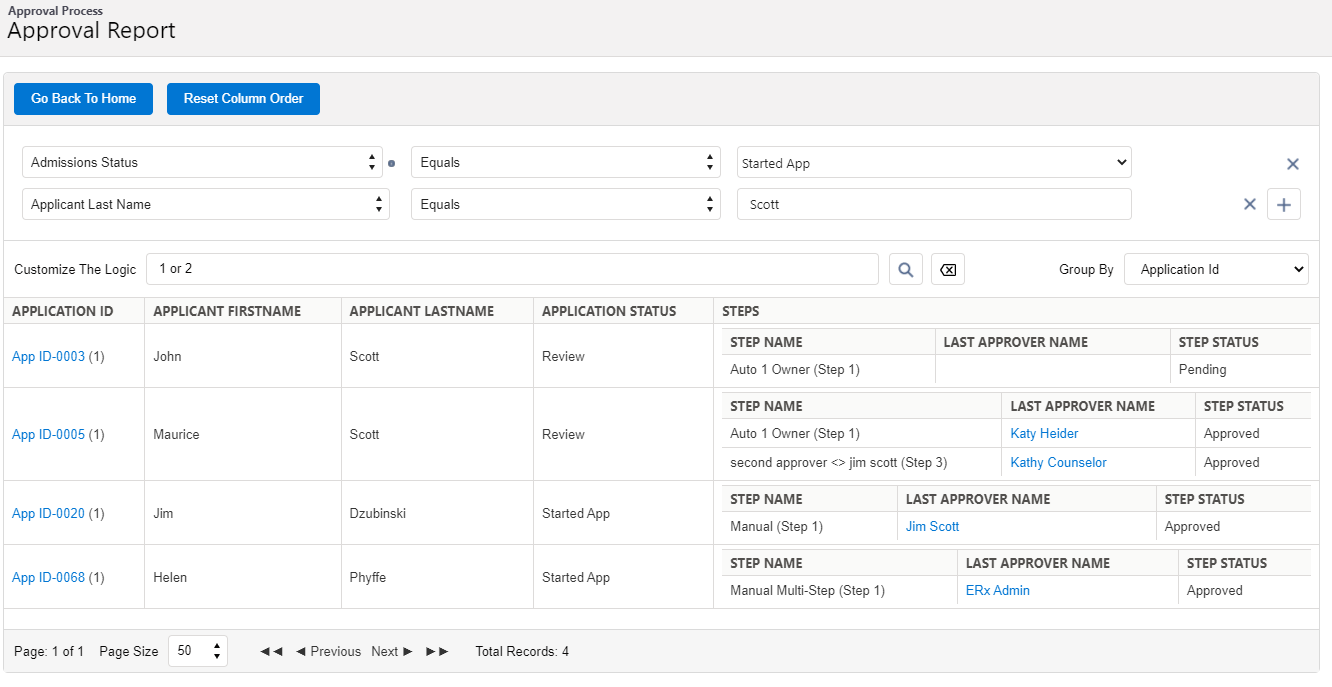
Filter Criteria
By default, the DashboardFilterFields field set on the Application object is the source for the filter criteria. You can customize this field set by going to and clicking on DashboardFilterFields.
Customize Logic
If you’re using multiple filters for a report, you can customize logic with standard logical operators (e.g., 1 OR 2, 1 AND 2, etc.).
Group By
By default, three fields are displayed in this picklist:
- Process Status
- Application ID
- Last Process Reviewer
Steps
- Step Name
- Last Approver Name
- Step Status
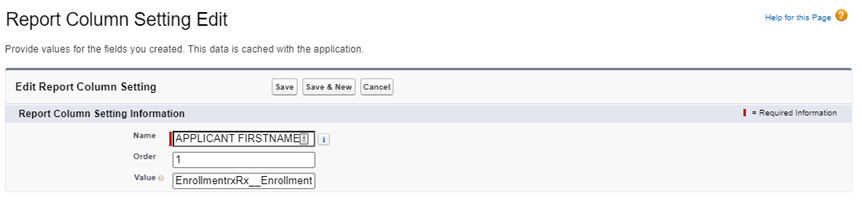
EnrollmentrxRx__Enrollment_Opportunity__c-EnrollmentrxRx__Applicant_First_Name__c.
Column Fields
Four fields are displayed by default:
- Application ID
- Applicant First Name
- Applicant Last Name
- Admissions Status
Add or remove these fields by going to and clicking the Manage link next to Report Column Setting, as above.
For fields in the Report Column Setting that are not steps, the formula for the Value is:
ProcessInstance, ProcessInstanceNode,
EnrollmentrxRx__Enrollment_Opportunity__c.
Considerations and Limitations of this Feature
The maximum number of reports that can be viewed with this feature is 50K.
Backward Compatibility
If you have configured another object for the application, like the EDA Application Object, you’ll need to select field sets in the "Report Filter FieldSet" picklist manually. Navigate to the Reader Rx Configuration tab and scroll down to the "FieldSet Mapping" section for this option.