Build a Registration Page
Overview
You can use Page Builder to build a custom registration page for your Community, rather than using the standard FormBuilder registration page. Follow the below steps to create a basic page you can use to build on.
Steps to Build a Registration Page
- Navigate to the FormBuilder Rx tab, click on the FormBuilder Environment for
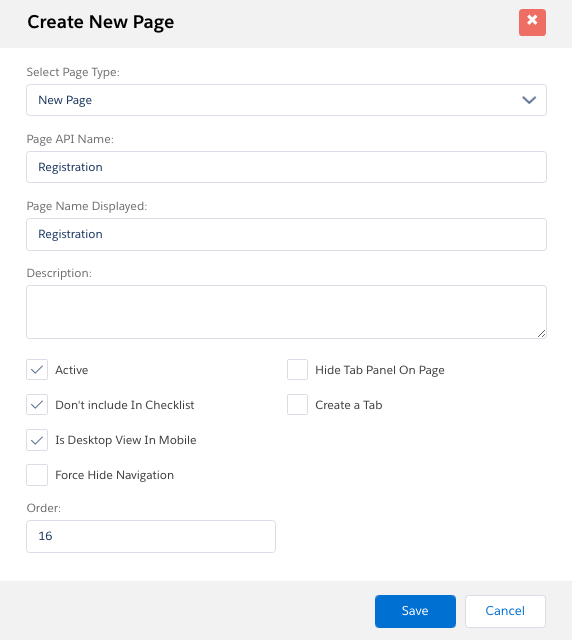
your Community, and click the Page Builder subtab. Create a new page called
"Registration." Check the checkboxes for "Active," "Don't Include in Checklist,"
and "Is Desktop View in Mobile." Add any number in the "Order" field.
 Tip:You can find descriptions of the above dialog window fields here.
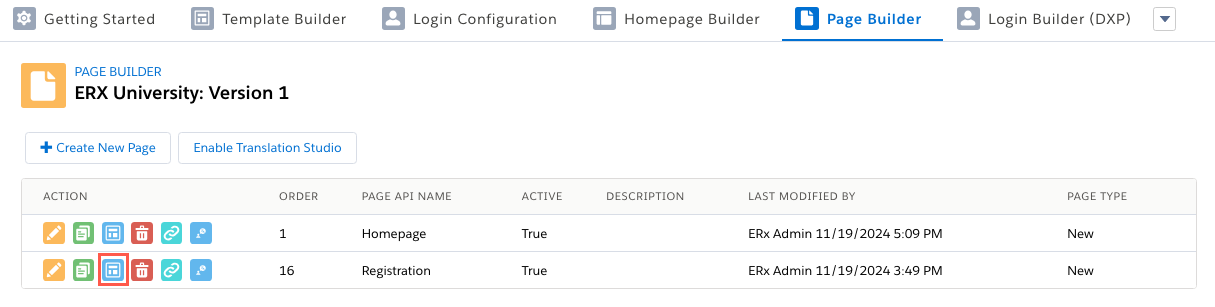
 - After clicking Save, the new page will automatically appear in the list on the
subtab. Click the Configure icon to add fields, data sets, and
components.
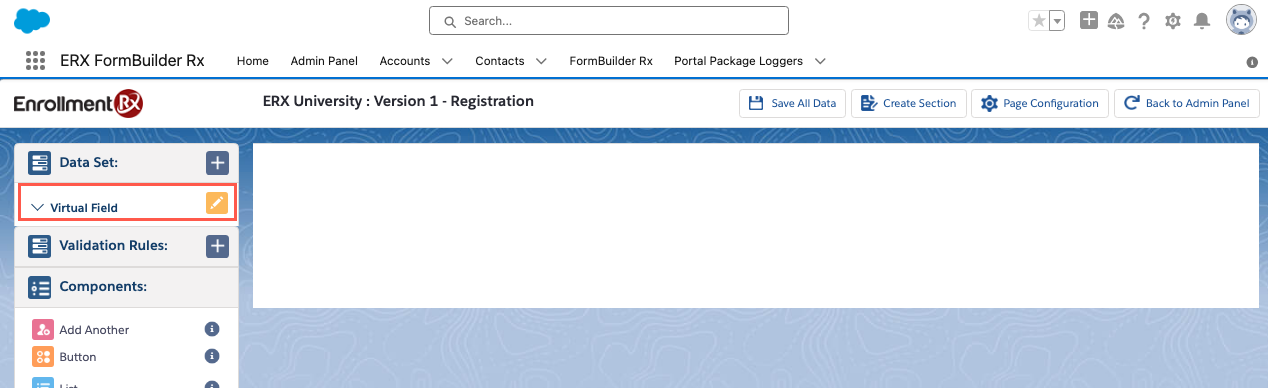
- On the Configuration page, click the yellow pencil icon to create virtual
fields.
- In the dialog that pops up, create two Virtual Fields called “Password” and “Password Confirm” and click
Save.
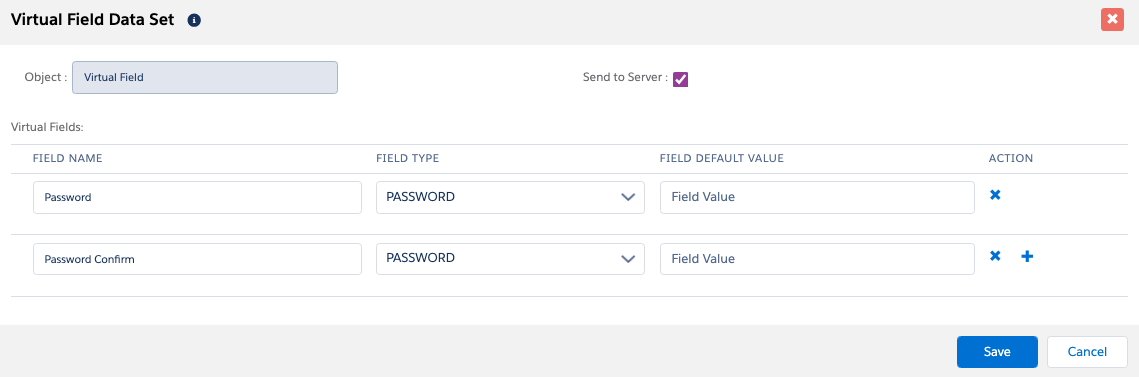
Important:The two fields must be named as above. No other names will work. - From the Configuration screen, click the + (plus) icon to open a new dialog window.
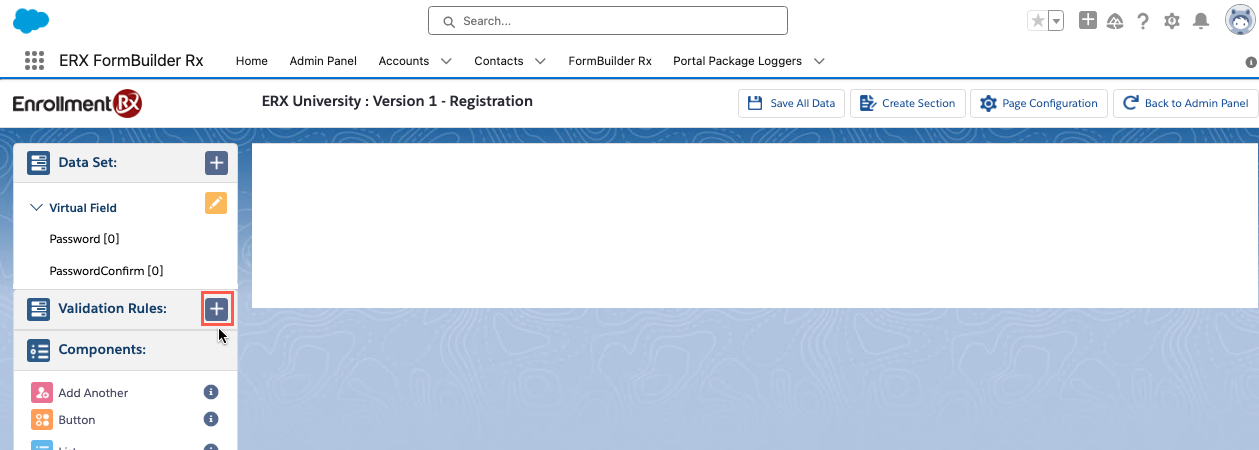
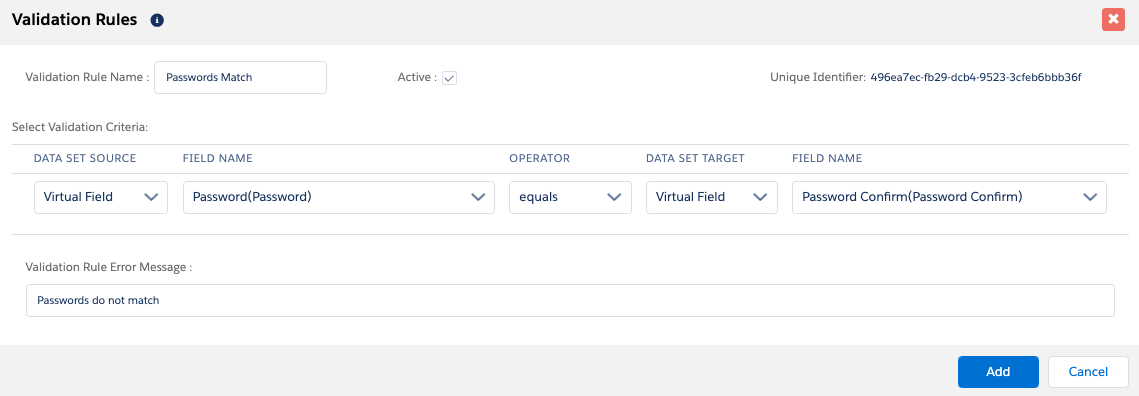
- Add a Validation Rule
that requires the Password and Password Confirm fields to match.
- Create an Account Data Set.

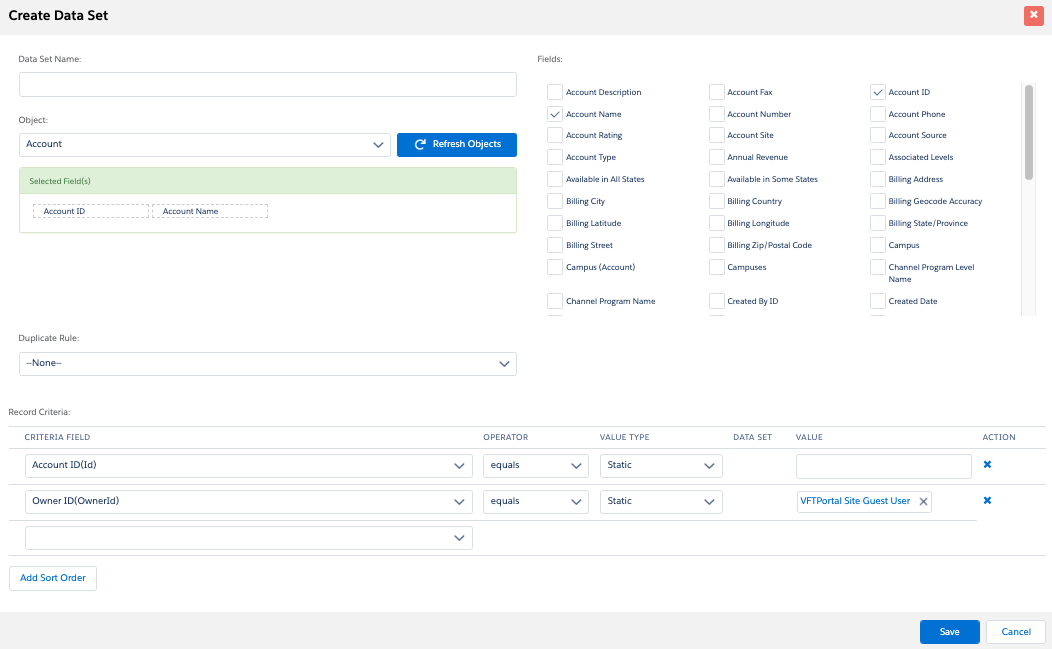
- Create a Contact Data Set.

- Drag these fields from the Contact Data Set onto the page:
- AccountId (make this field hidden--not rendered)
- First Name
- Last Name
- Password
- Password Confirm
- Drag this field from the Account Data Set onto the page
- Account Name (your page should look like this):
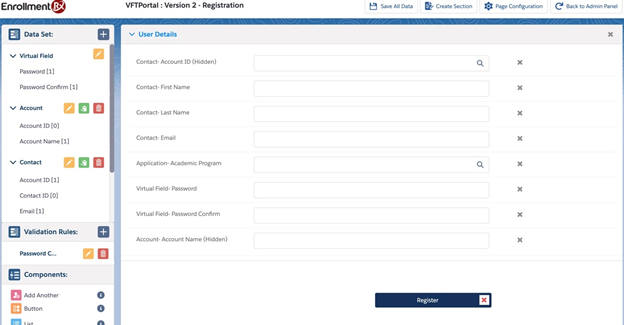
- Account Name (your page should look like this):
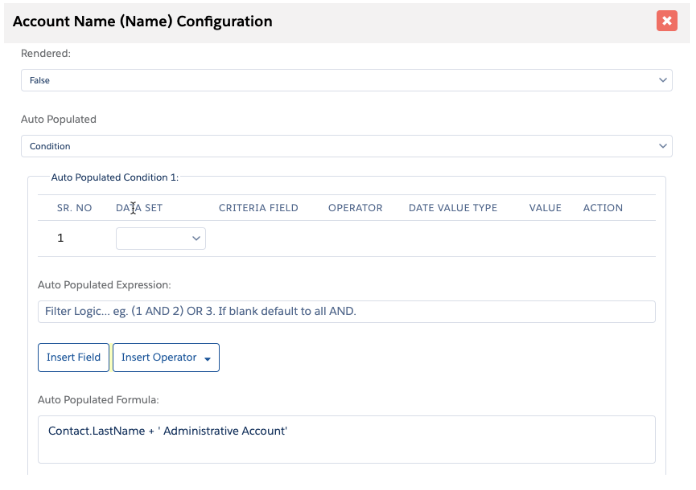
- Double click the “Account Name” field and configure the dialog that opens:
- Set “Rendered” to “False”
- Set “Auto Populated” to “Condition
- Leave “Auto Populated Condition 1” blank (this will result in auto population always)
- “Set the Auto Populated Formula to: Contact.LastName + ‘ Administrative
Account’ (be sure to include a space between the single quotation and
the word Administrative)”
- [Optional] Build an Application Data Set
- Record Criteria:
- Set “Applicant” equals Contact Data Set “Contact ID”
- Set “Record ID” equals NULL, to assure that a new application will be created when a Contact who is already in the database registers
- Duplicate Rule: you can define a Duplicate Rule for the Application and use it here to identify a pre-existing application (when a pre-existing Contact is found by the Contact Duplicate Rule) to update, rather than to create a new Application. This will require that you create a “key” text field on the Application and populate it with a deduplication key, such as [Contact Full Name + Program Name + Term Name], and use this deduplication key in a Matching Rule referenced by your Duplicate Rule.
- Drag any Application fields that you want onto the page
- Make sure the Registration button is configured to update the Application data set
- Record Criteria:
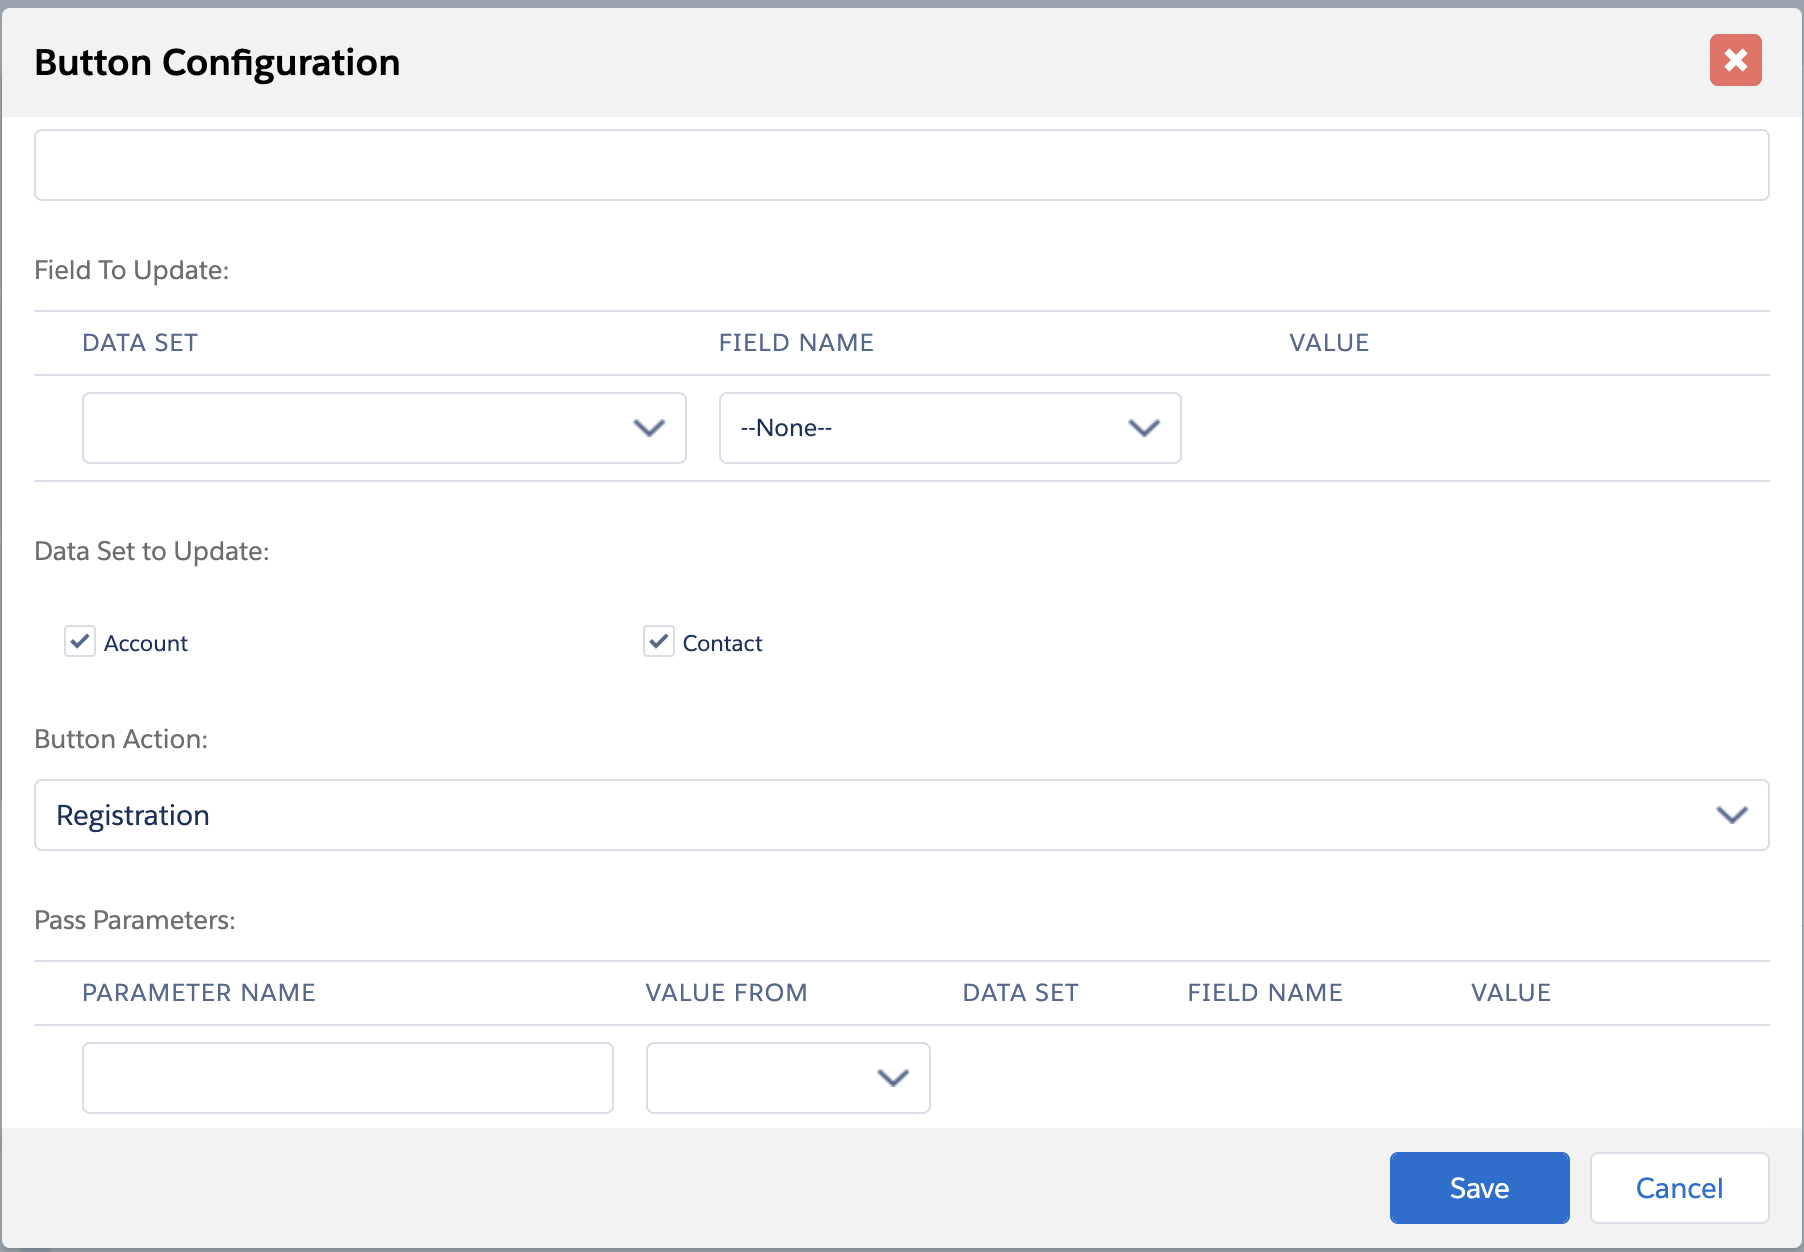
- Drag a button onto the bottom of the page and set its “Button Action” to
“Registration” and set it to update both the Contact and Account data sets
Activate the Custom Registration Page
If you want to include fields from the Application on the page, proceed with the following steps.
- To activate your new Registration Page, update the Registration page settings in
both your Community and its Site.
- Go to .
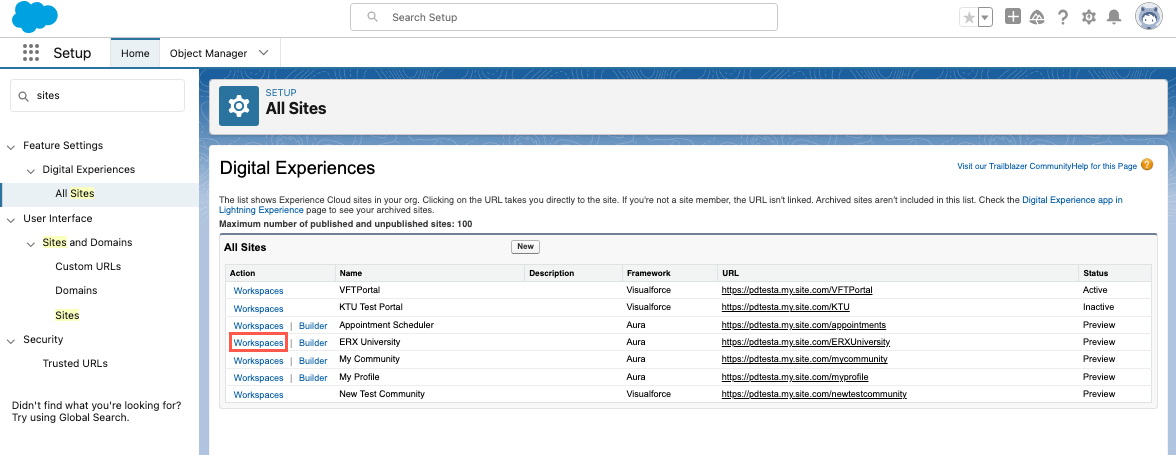
- In Workspaces, click Administration.
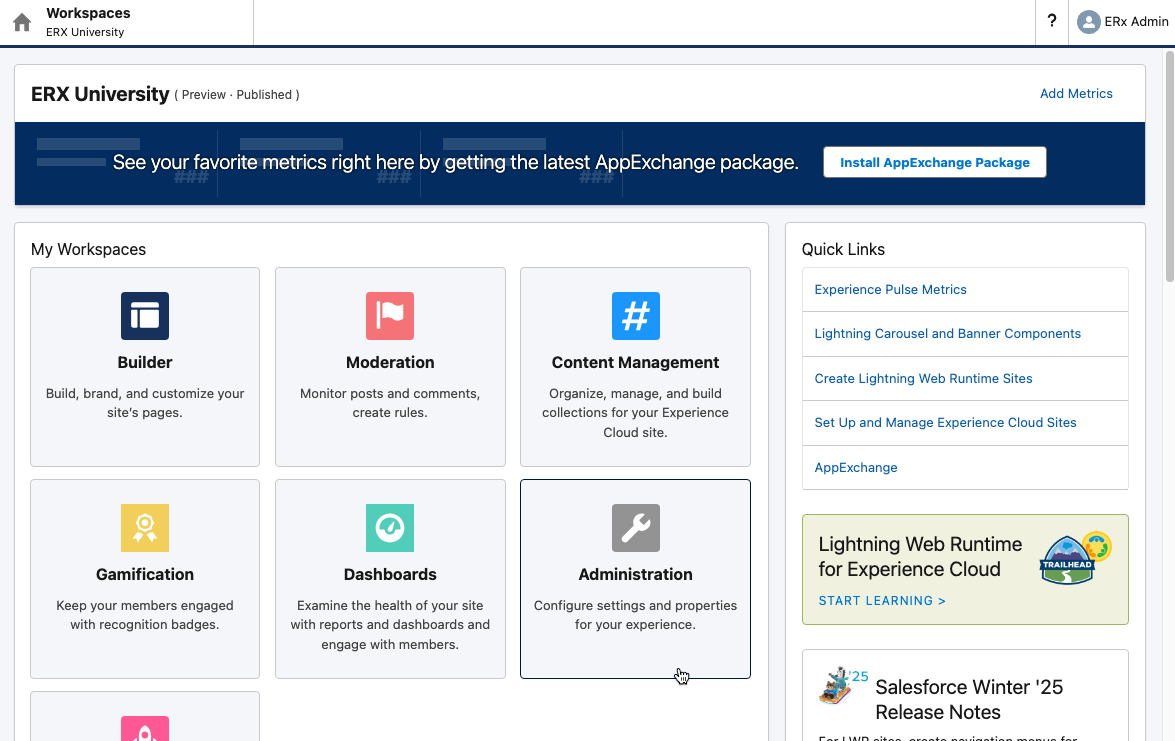
- On the Administration page, select Login & Registration and scroll down to “Registration Page Configuration.”
- Check the box for "Allow customers and partners to self-register."
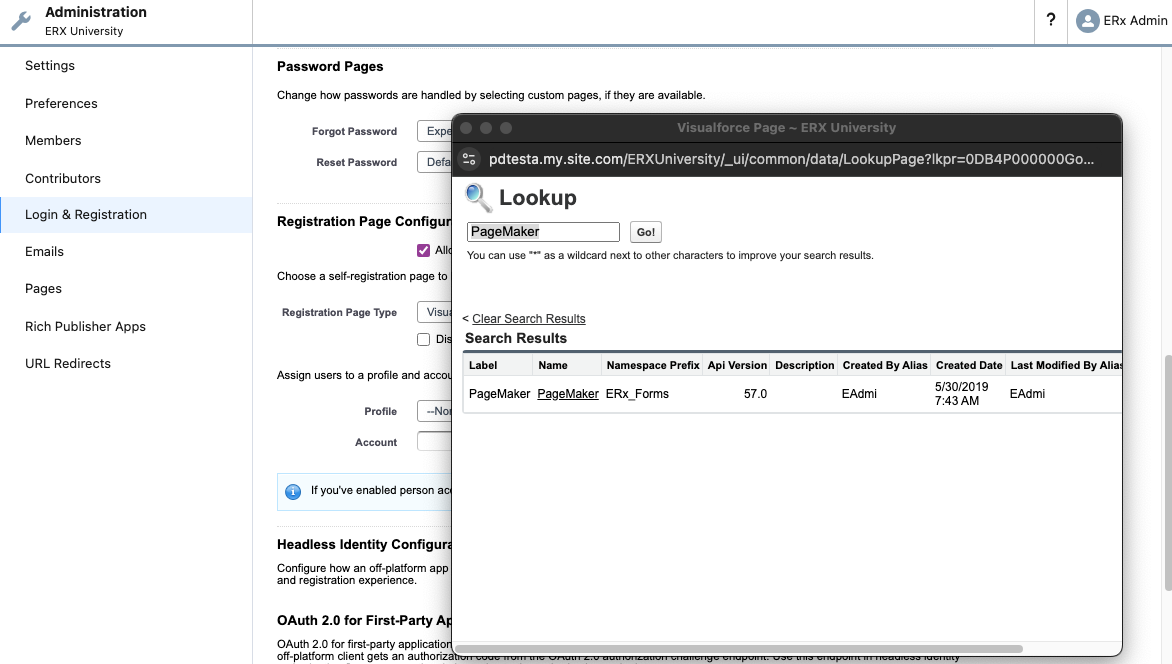
- Set “Registration Page Type” to “Visualforce Page,” type PageMaker and
use the magnifying glass to find and select the page
ERx_Forms__PageMakerlike this: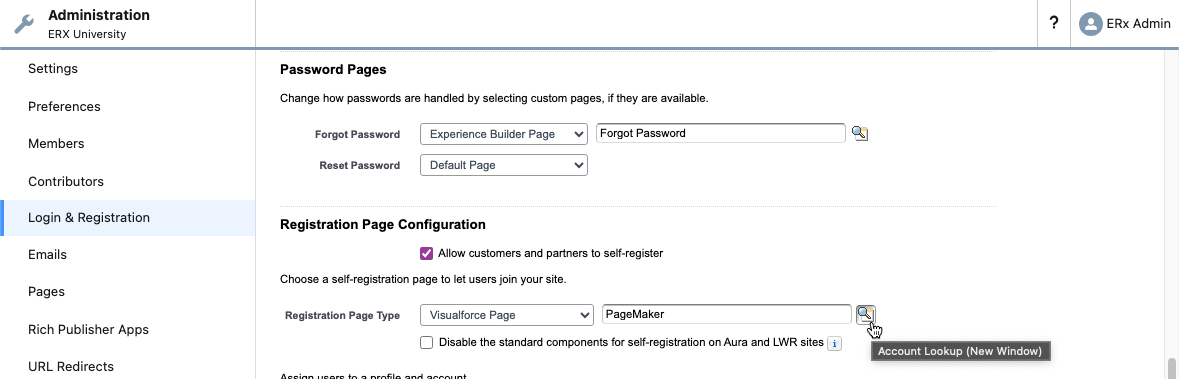
- Go to .
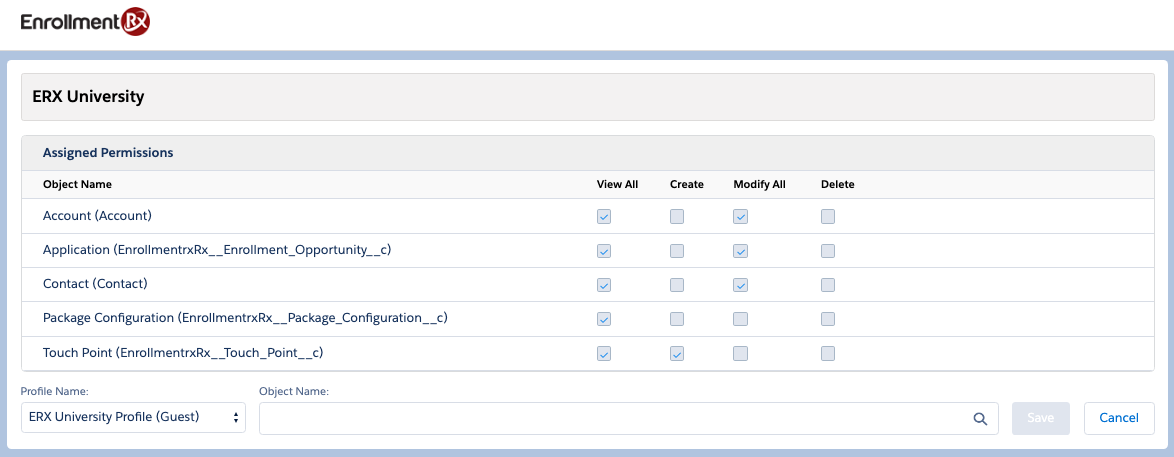
- Configure Allow Object Access for the “Site Guest Profile” from the FormBuilder Rx tab.
- First, select the gear icon next to the environment associated to where
the registration form was configured.

- Next, select the associated profile and add objects associated to the
registration form like Account, Contact, Application (ERX object, or
EDA, or custom, or Education Cloud), and any other object the
registration form is interacting with.
- First, select the gear icon next to the environment associated to where
the registration form was configured.
- You will need to modify the Login page so that the “New User” link points to the
new registration page. To do this, edit the template of the login page and
insert this bit of code into the footer, immediately following the
</footer>tab, substituting your Community’s domain and the API name of your registration page:<!--change registration link--> <script>$("[aria-label='New User']").attr('href','https://[YOUR COMMUNITY DOMAIN]/apex/ERx_Forms__PageMaker?pageId=[API NAME OF YOUR REGISTRATION PAGE]');</script>