Create a Section
Overview
Pages in FormBuilder are composed of Sections. Before you can add sections to a page, you'll need to create a Data Set (click here for instructions). Once a Data Set is in place, the Create Section button will become available on the configuration page.
Create a Section
With a Data Set in place, follow these steps to access the Create Section dialog:
- Select the Environment you want to work on in FormBuilder (click the Environment's Name), then click the Page Builder tab.
- From this tab, click the blue Configure button next to a page you've
already created (you can also create a new page).
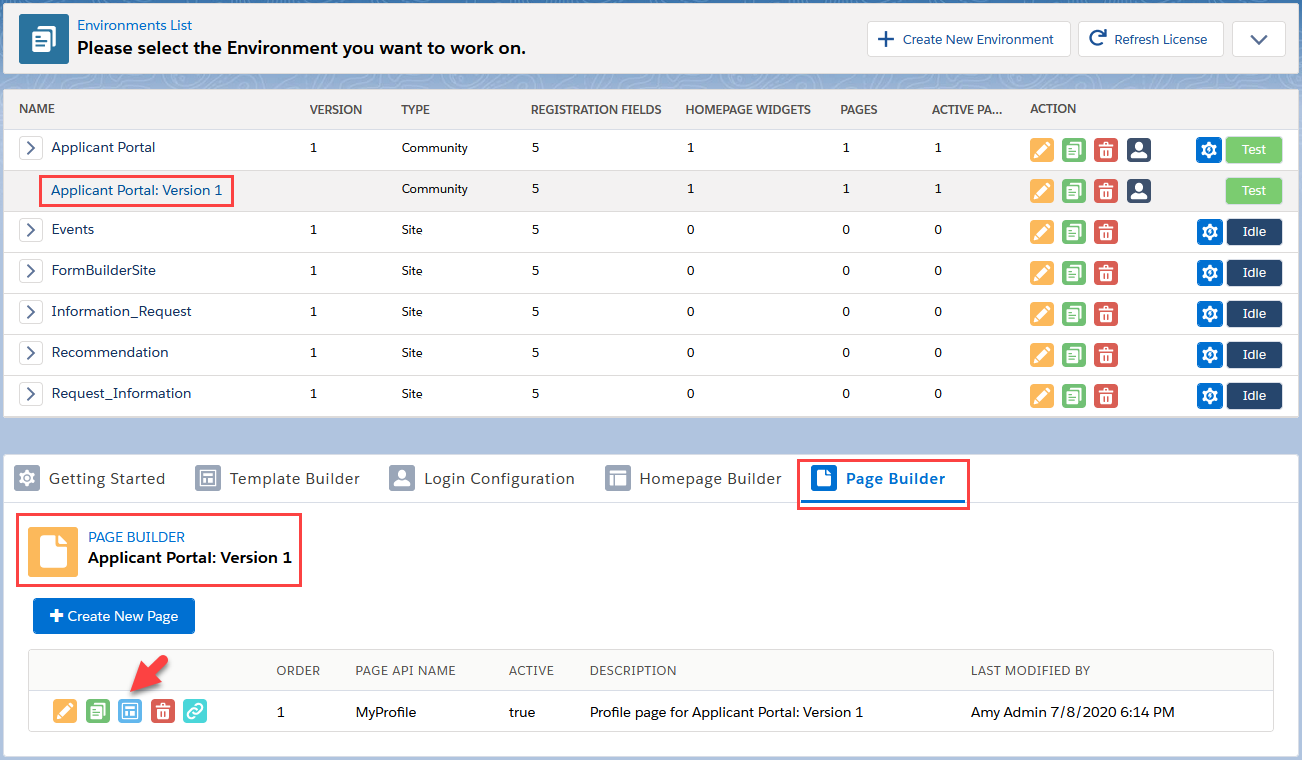
- On the configuration page, click the Create Section button at the top.
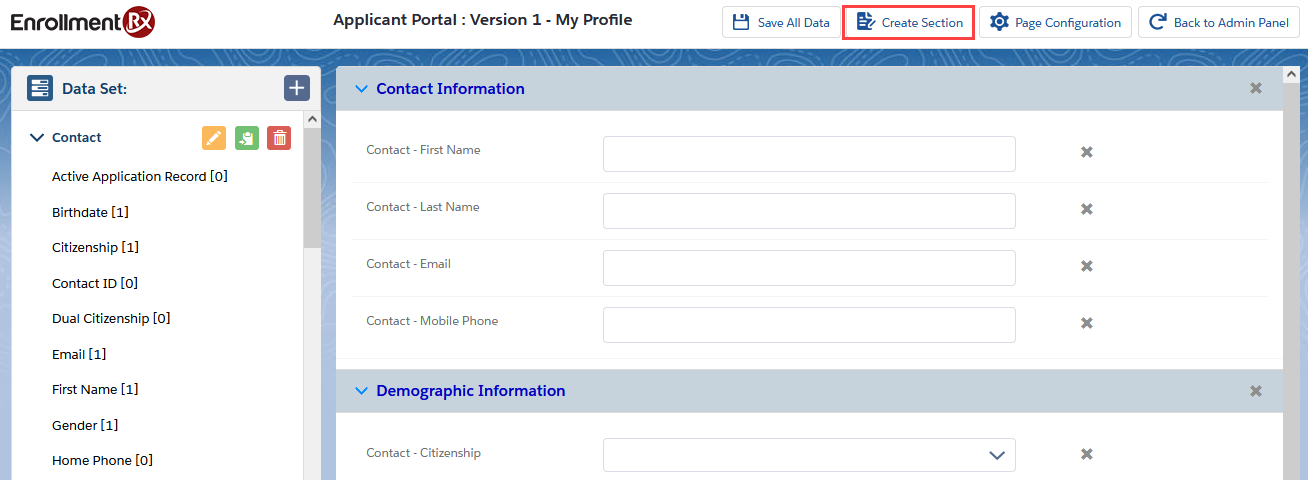
This button will launch the Create Section dialog window. See the image and table below for annotations.
The Create Section Dialog

| Section | Description |
|---|---|
| A. Section Name | A section label that will appear on the page at the top of the section. |
| B. Section Name Background Color | Use a color picker to customize the Section Name background. |
| C. Layout |
“Description” fields (for Administrators’ reference) added to most configuration screens |
| D. Description (Admin) | Configure the section to display one column or two columns of fields. |
| E. Rendered | Configure the section to always display to the user, or only under certain conditions. |
| F. Read Only | New in Summer '21: Set conditions under which the Section will be editable. Learn more in "Read Only Conditions for Page Sections," below. |
| G. Description | Text that will appear on the page beneath the Section Name. |
| H. Description Background Color | Use a color picker to add a background to your description. |
| I. Tab Indexing | The direction the cursor will move between fields when pressing the Tab key. This overrides the Page Configuration setting. |
Read Only Conditions for Sections
You can set Read Only conditions for Page Sections. These conditions — False, True, or Condition — are displayed in a picklist with False as the default.
Following is an overview of the the conditions and their descriptions.
False (default)
If Read Only is set to False, all fields in the section will be editable on the front end (e.g., on the Portal page).


True
If Read Only is set to True, all fields in the section will be grayed out on the front end and not editable.


Condition
If Read Only is set to Condition, two new sections — "Read Only Condition" and "Read Only Expression" — will appear dynamically beneath the picklist. Here you can add one or more conditions and evaluation criteria.

