Create/Manage Visit Series
Creating a New Visit Series
This will open the Manage Visit Series page, which allows you to create, configure, and edit your series. This is discussed in more detail below and in the next few subsections.
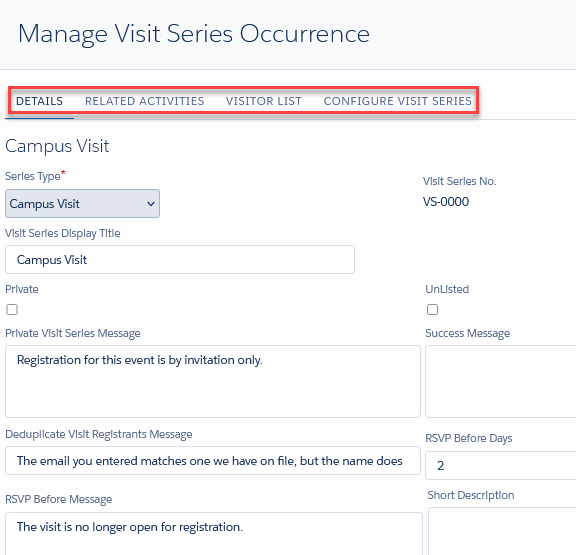
There are four tabs available on the Manage Visit Series page. When you create a new series, you'll only see the first two tabs: Details and Related Activities. When you edit an existing series, all four tabs will be visible.
Details: This tab within the page shows the principal fields of data that define a Visit Series, described below.
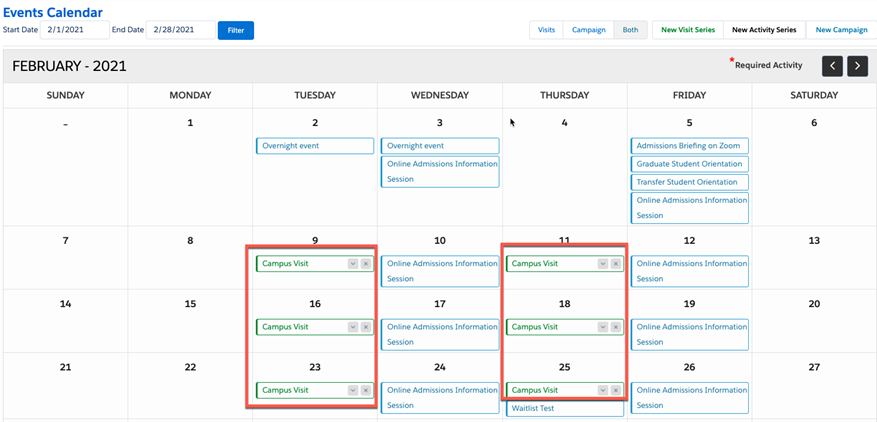
Related Activities: This tab allows you to connect one or more Activity Series to this Visit Series. At least one Activity Series must be associated with a Visit Series on a given date in order for the Visit Series to appear on the EventListing page for that date.
Visitor List: This tab will open the Visit Series details page, on which you can see a table of visitors registered for that date
Configure Visit Series: This tab opens the drag and drop interface for customizing the Visit Registration Page. It work just like the Configure Event button on campaigns.
Fields on the Details Tab
Series Type: This picklist contains all the available titles for Visit Series. You can edit this field to add additional series type values.
As of the Summer ‘21 release, you can configure two Visit Series of the same Type that have overlapping dates.
For Winter ‘21 and before, if you need to do so, add a new value to the Series Type picklist, so you can create two Series of different Series Types.
Private: Restricts visit registration to Contacts already in the database who access the registration page via a Private URL (as for Events) containing the Visit Series ID, the date, their ContactID and their Contact’s "Random String."
Private Visit Series Message: The message displayed when someone accesses the registration page without a PURL (the default value for this message is stored in the Custom Setting “Events Rx” under the labels “Campus Private Campaign Message” and “Private Visit Series Message”).
Unlisted: Hides the listing on the EventListing page. The Registration page can only be accessed by those who have the URL.
Success Message: Message displayed upon successful registration.
Deduplicate Visit Registrants Message: This is displayed when a Contact already exists in the database with the same email address but a different first or last name than those entered on the registration form. Registration is prevented in these cases. The message should tell the registrant that they must change either the email address or the name in order to proceed. To disable this function, check the checkbox called “Disable First/Last Name Match” in the custom setting “Events Rx”; then matching will be done on email address alone.
RSVP Before Days: The minimum number of days before a visit required for registration.
RSVP Before Message: The message displayed when user accesses the registration page after the RSVP Before Days minimum.
Short Description: The description shown on the EventListing “List” view.
Visit Registration Template (required): Select the template (header and footer) to frame the registration page.
Lead Source: The Lead Source to be populated on Contacts created through Visit registration (this list is drawn from the list of Lead Sources the Contact and Lead Objects).
Email Template Reminder: select the email template from among those stored in the () folder called “ERx Event Registration Custom Email.” At the time of registration, this email will be scheduled to be sent to the registrant on the day configured in the next field at the time configured in the custom setting "Events Rx” in the field “Reminder Email Schedule Time." If left blank, no reminder email will be sent.
Send Reminder Days Before: Enter the number of days before the start date of the event that the Reminder Email should be sent. If left blank, no reminder email will be sent.
Registration Page Description: This description is shown on on the registration page. This is a rich text field. In addition to using the rich text editing controls to style your text, you may paste any HTML into this field.
New in Summer '21, rich text controls have been added for text color, font highlight color, font and font size. These options are available for Visit Series and Campaigns.
Time Zone: A time zone option is new in Summer '21 for Visit Series. Select a time zone with Start and End times to display on the registration page. You may edit the values in this list, but each value must begin with a string formatted like this: (GMT-00:00).
Start Date: Specify the start date for the Visit Series (End Date is set in the Visit Series Recurrence section, below)
Start Time: The time the visit starts. This time is displayed on the Event Listing page. It determines the order in which visit series are sorted when multiple occur on a date. This field is optional; if you leave it blank, the visit series will display on the EventListing Calendar without a time.
End Time: The time the visit ends. This time is displayed on the Event Listing page.
Maximum Visit Registrations: Enter the maximum number of people that can register for this event.
Maximum Visit Wait-List Registrations: Enter the maximum number of people who can be put on the wait-list if the maximum registrations limit is reached.
Email Template Waitlist: Select the email template from among those stored in the email template folder called “ERx Event Registration Custom Email.” This email will be sent automatically to to the next person on the wait list when a space becomes available. It will contain a link they can use to register and select activities. They must then select activity slots to register.
Days to Expire Link: The number of days the link in the above-mentioned email (“Email Template Waitlist”) will be valid for the user to register. If they do not register within this time frame, the link will expire and the next person on the waitlist will be automatically invited to register.
Wait-List Message: This message displays when only waitlist spots are available. The user can then put themself on the waitlist, but they cannot register for activities until a space becomes available and they are sent the Email Template Waitlist email inviting them back to the registration page (with their information prepopulated) to register for activities.
Time column placeholder: If you enter text here, it will display in the Time column on the EventListing, instead of the start time.
Custom fields: Any field you create on the Visit Series object may be placed on the layout by including the new field in the Visit Series Fieldset named “Custom Fields on Visit Series” shown here (you must be in Classic to work with Fieldsets. Go to
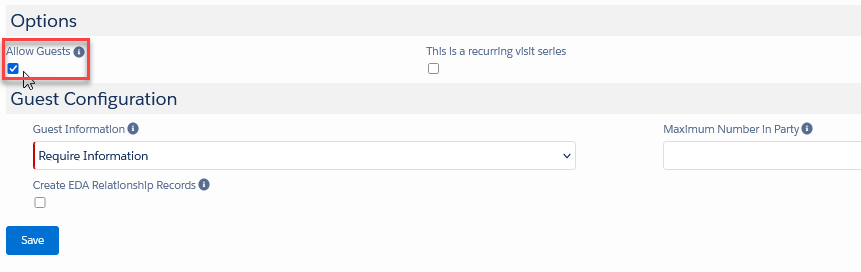
See Guest Configuration and Guest Information Section for additional details and instructions.
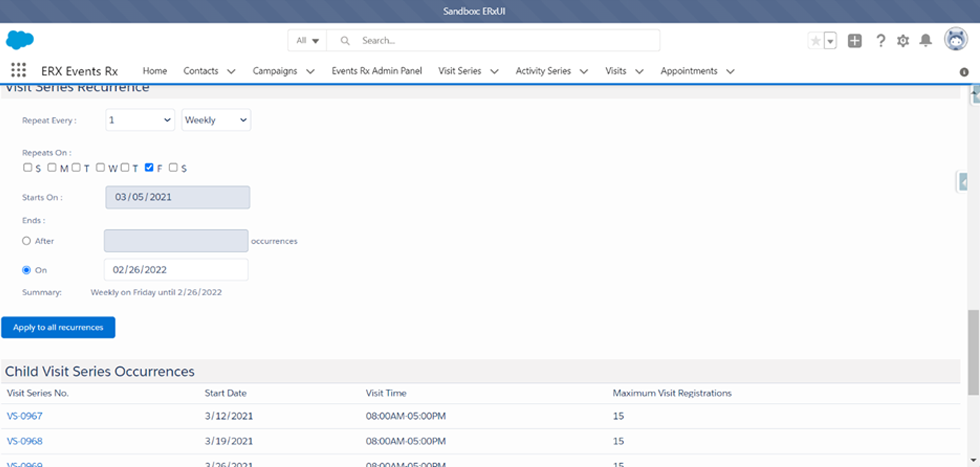
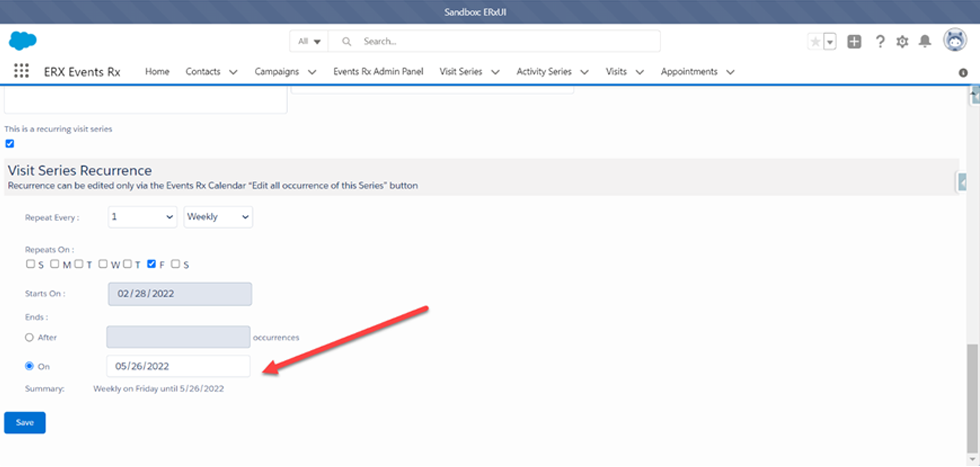
The Visit Series Recurrence Section
These controls allow you to configure the recurrence pattern of the series. Choose “Weekly” to set the days of the week on which the series should recur. Daily, Monthly and Yearly options are also available.

Fill all the fields correctly and Save the Visit Series.
Updating Visit Series
This documentation is intended for all users of Visit Series who are on Events Rx Winter ’21 and later.
Starting with the Winter ’21 release of Events Rx, we optimized the underlying code and recurrence controls for Visit Series. What this means for our users is that — unlike earlier versions of Events Rx — you should not edit series dates to update the date range or extend the series.
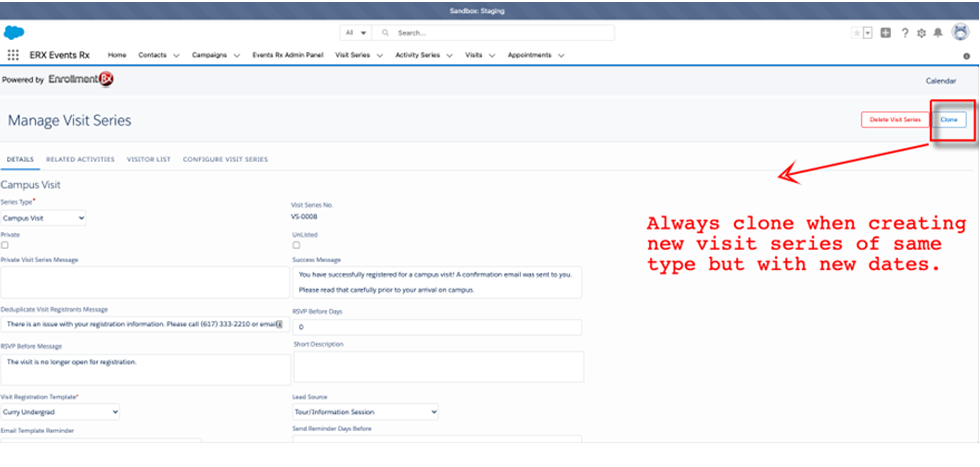
Instead, there are some important steps you must take: You will need to clone the Visit Series, which is described in more detail below.
New Visit Series Structure
Starting with Events Rx Winter ’21, Visit Series are now made up of a parent visit series with child recurrences. Following is an example.
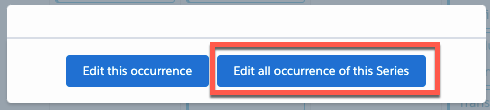
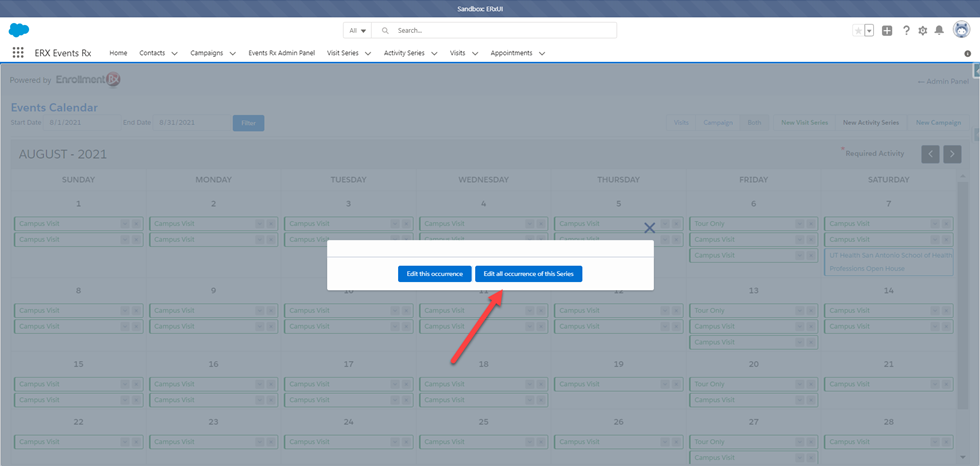
Navigate to the Events Calendar in the Events Rx app, select a visit series and click to “edit all occurrences”:
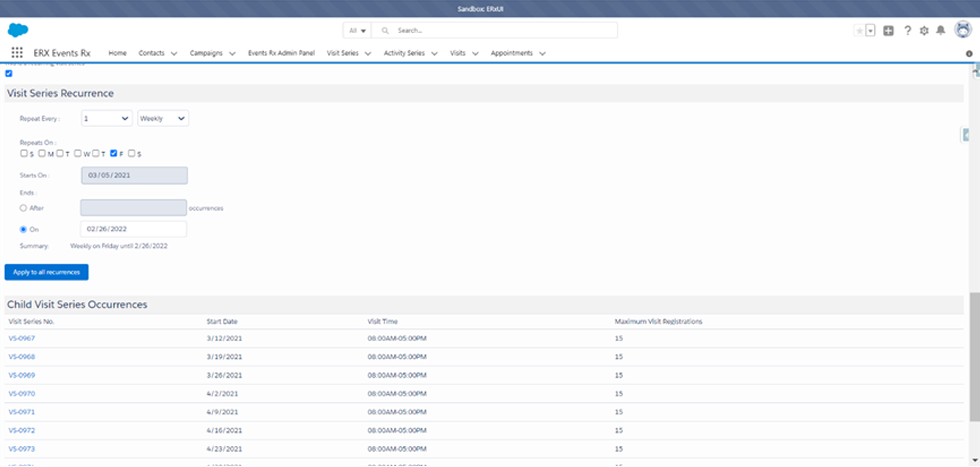
You’ll see the parent visit record and the recurring “child records” (which are each a related Visit Series), below:
How to Properly Update the Date Range or Extend the Visit Series
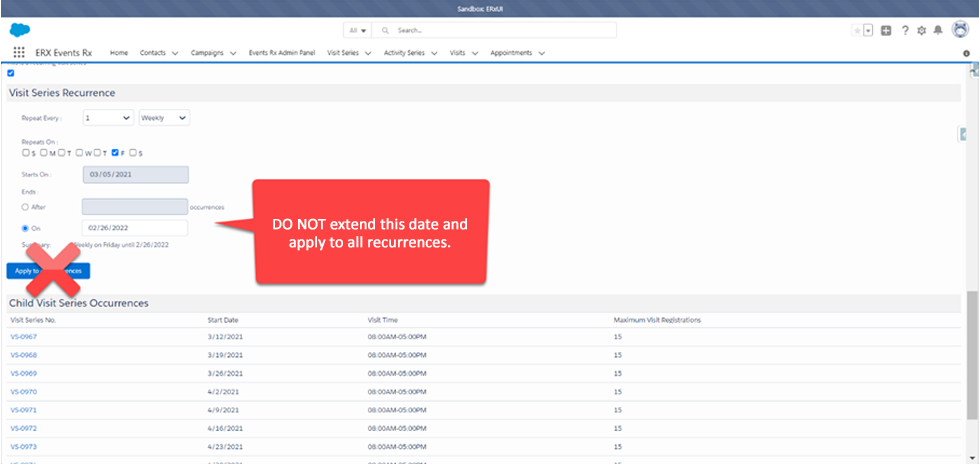
In this new structure, do not change the end date to extend a series and then “Apply to all Recurrences.”
This could create duplicates and have other negative effects.
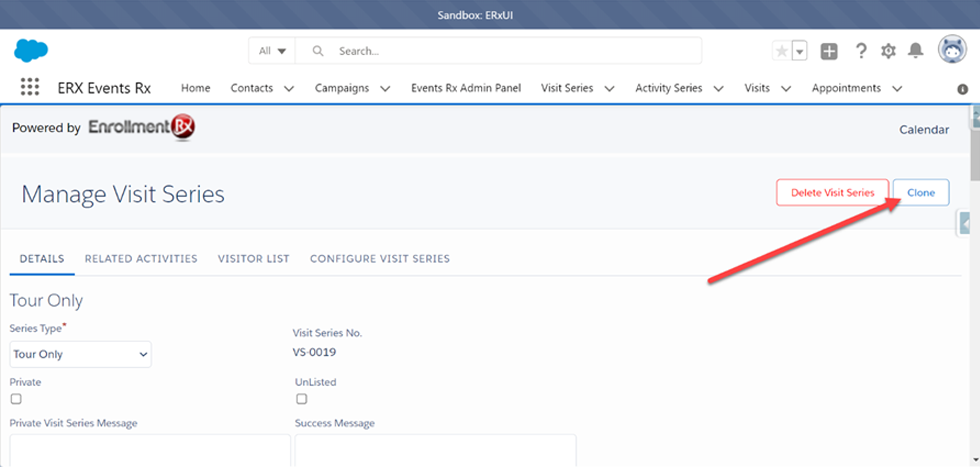
Instead, we have provided a mechanism in Winter ’21 to clone the Visit Series, as well as the related Activity Series.
Example Scenario:
You have a campus tour that occurs every Friday and ends in February of 2022.
If you want to extend this series after 2/26/2022 until 5/26/2022, do not change the date and hit “Apply to all recurrences,” but scroll up to the Clone button:
In the newly cloned record, enter the start date as 2/28/2022.
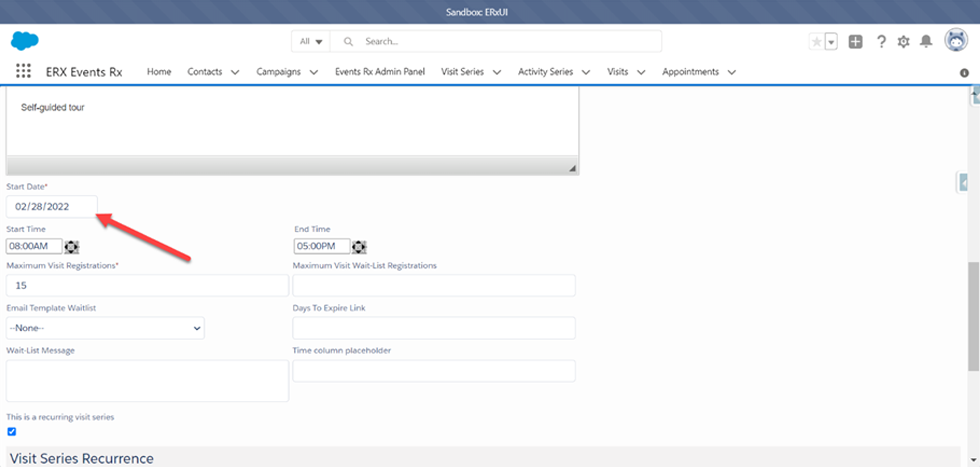
Save the change, and the new Visit Series will be cloned with the same settings as the original.

Issues with Editing Visit Series Dates in Winter ’21 and Later
If you edit series dates in Winter ’21 and later, you may run into these types of complications:
Example: The Visit Series start date is equal to today’s date, the end date (e.g., 12/1/2021) is greater than today’s date, and an admin changes either the start date or end date of all recurrences:
- All child records that do not have registrations and exist from today’s date to the end date will get deleted.
- New child records will be created that exist from today’s date to the end date.
- Duplicate records that have registrations will be created, starting from today. This is because we persist old registered Visit Series.