Button
Overview
Button components provide functionality for saving and navigating between pages. Each page contains eight positions into which you can drag a button.
The Next and Previous pages are determined by the page order as shown on the Page Builder tab.
Elements of the Button Configuration Dialog
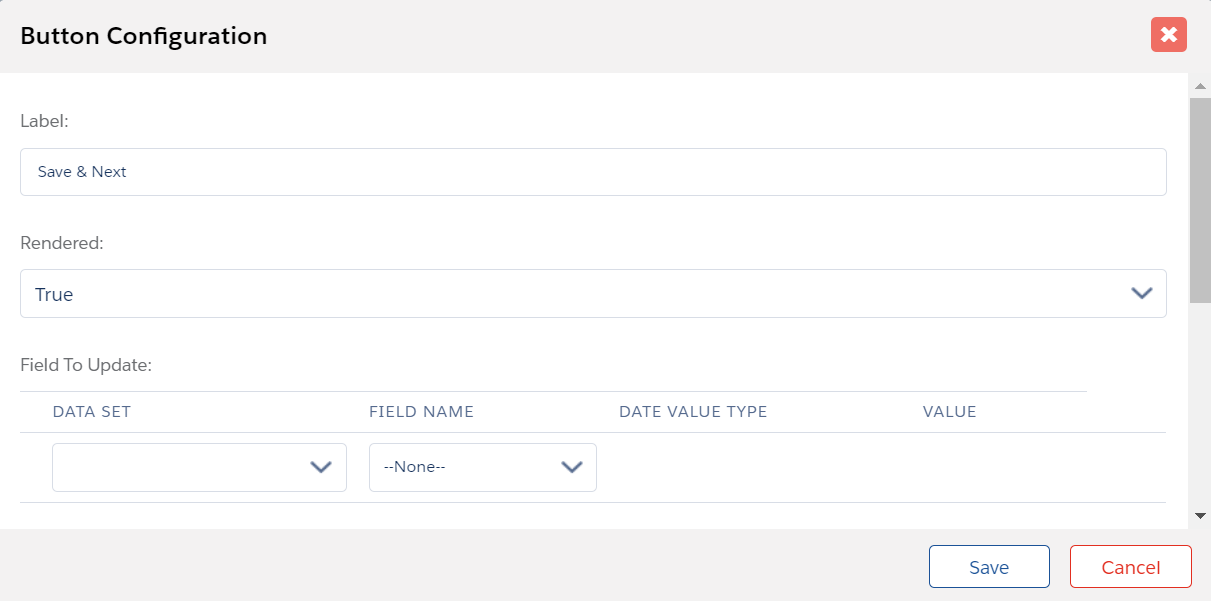
- Label: Enter a label for the button.
- Rendered: Set conditions under which the Button will be visible.
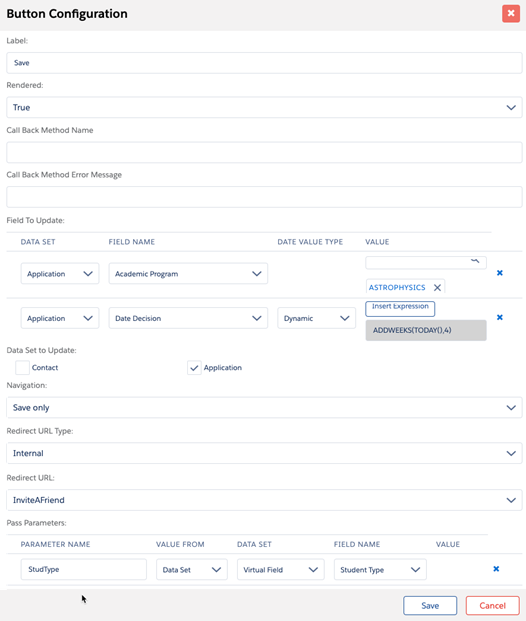
- Call Back Method Name: Name of the javascript method (which you will have put into the template header or footer) to call before executing the other button actions. FormBuilder will wait for the response from the method and then proceed to save the page.
- Call Back Method Error Message: The message to be displayed if the call back method does not return a response or returns an error.
- Field To Update: Select a field from a data set and set the value or variable expression with which you want to populate that field.
- Data Set to Update: Choose which Data Sets on this page will be updated upon saving. In some cases it may not be necessary to save a data set. For example, if its fields never changed values and were used strictly to set conditions for other data sets.
- Navigation: Select which functionality the button will have. There are
five options:
- Previous Page: Go back to the previous page. Does not save any information.
- Next Page: Save and proceed to the next page.
- Save only: Save and remain on the same page.
- Submit: This functionality is explained in the following section.
- Submit & Save Data Set: This functionality is explained in the following section.
- Redirect URL Type [Internal|External]: You may choose to have the button redirect the user to either an internal page (a page belonging to the Env) or to any external page.
- Redirect URL: Choose either a page name from the drop down menu if you have selected “Internal”, above, or type the external URL to which you would like the user to be redirected.
- Pass Parameters: When Navigation is for the Next page, there is an
option to define a parameter that will be passed into the next page, where it
can be referenced. Simply give the parameter a name and specify a value —
either static or taken from a data set.
Navigation: Submit
When configuring a Button, choosing the Navigation option of Submit provides additional functionality:
- Check All Pages: Selecting this field causes validation to be performed when the button is selected. The validation checks that each Page_Completion component is checked. Pages with the field “Don’t include in checklist” checked are excluded.
- Enforce Page: Controls whether or not a list of incomplete pages is shown when the user tries to submit. The list will display if this is checked.
- Error Message: Enter text for an error message to display if there are any problems while submitting. This is required if Check All Pages is checked
- Field To Update: Choose a Data Set and field within it to update when the page is successfully submitted.
If a page is not in the checklist, it will not be validated. If it is in the checklist, it will be validated even if there is no Page_Completion component. Therefore every checklist page needs a Page_Completion component. On the final page (the Submit Page) of your multi-page form, you can configure the Submit button to update the Page Completion component’s checkbox, in addition to updating whatever field you are using to record that the multi-page form has been submitted.