Add Another
The “Add Another” sub section allows a portal user to see, create, and edit one or more
records or sets of related records, for example the user can create one or more
recommendation records, specifying for each the name, title, and email address of the
recommender, or they can create one or more Emergency Contacts or Family members. The
Add Another subsection must be dragged into a section, opening its “Add Another
Configuration” window, which contains these controls:

- Title: Enter the title of the subsection, which will appear above each record.
- Title Type:
- Static -- The Title will be shown for each record, e.g., "Recommendation
- Incremental -- The Title will be shown for each record, followed by a number that increases by 1 per record, e.g. “Recommendation 1”, “Recommendation 2”, etc.
- Layout: Configure the section to display one column or two columns.
- Tab Indexing: The direction the cursor will move between fields in a two column layout when pressing the Tab key (down each column, or zig zag across columns then down). This overrides the Page Configuration setting.
- Data Set Configuration: (described below)
- Rendered: Configure the section to always display to the user, or only under certain conditions.
- "Add" Button Label: Enter a label for the button that adds a record in the subsection (defaults to “Add Another”).
- "Add" Button Position: The horizontal space is divided into 8 columns—1 is leftmost and 8 is rightmost—enter a number between 1 and 8 to position the button.
- "Add" Button Rendered: choose whether or not to show the “Add Another” button or make it conditional upon criteria you specify. Note that if you specify a maximum (below), then the “Add” button will no longer display once the maximum number is entered.
- "Delete" Button Label: Enter a label for the button to be used to delete a record in the sub section.
- "Delete" Button Position: The horizontal space is divided into 8 columns—1 is leftmost and 8 is rightmost—enter a number between 1 and 8.
- "Delete" Button Rendered: Choose whether or not to show the “Delete” button or make its appearance conditional upon criteria you specify.
- Maximum Record Type: Choose static to enter a fixed number or dynamic to pull the number from the database
- Maximum Records:
- If you chose “Static”, then enter the maximum number of records that can be added in the subsection before the page can be submitted (i.e. before its checkbox in the navigation menu can be checked)
- If you chose “Dynamic”, then specify the field that contains the maximum number by clicking the “Insert Maximum Field” picker
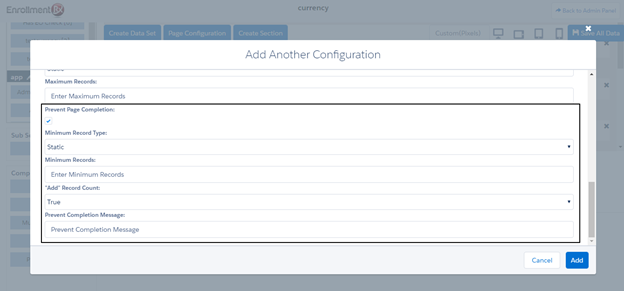
- Prevent Page Completion: check that a minimum number of records have been
entered before the page can be marked complete (this will not prevent the page from
being saved; it will only prevent the checkbox in the left navigation from being
checked—and, thus, the entire multi-page form from being submitted—until the minimum
number of records has been entered by the user). Checking this box reveals the
following fields:
- Minimum Record Type: choose static to enter a fixed number or dynamic to
pull the number from the database
- If you chose “Static”, then enter the minimum number of records that can be added in the sub section before the page can be submitted (i.e. before its checkbox in the navigation menu can be checked).
- If you chose “Dynamic”, then specify the field that contains the minimum number by clicking the “Insert Maximum Field” picker
- “Add” Record Count: select “Condition” to specify the criteria a record must meet to count against the minimum; select “True” to make all records count.
- Prevent Completion Message: message displayed when minimum is not satisfied
and the user saves the record (not to prevent saving, but only to remind
them that they must satisfy the minimum).
- Minimum Record Type: choose static to enter a fixed number or dynamic to
pull the number from the database
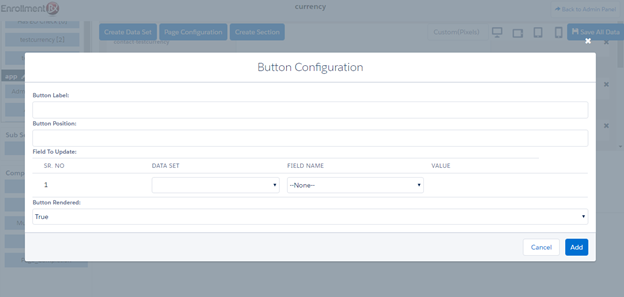
- Button Configurations: Click the Configure Button to
add (optionally) a button to update any field related to the record being
created/edited. For example, in the case of recommendation records, you might add a
button labeled “Resend Request” to check a box on the recommendation record that
will trigger workflow to resend a request to the recommender whose record is being
edited.