Attachments and Files in List Views
When the Processing Staff is looking at an application, it is most convenient for them to see a list of the Attachments or Files attached to a record in the related list of, e.g., Education History records on an Application. Otherwise, when looking at the list of Education History records, they do not know if there is an Attachment or File hidden inside.
To enable this feature, you need to select the Object Name (from the list of objects) on which you wish to add the fields.
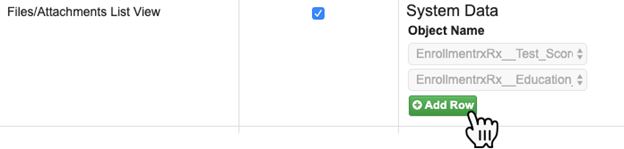
Select an object and click Save Row. This will automatically created four fields on the selected object:
- ERx_Attachments (API name: ERx_Attachments__c) Formula (Text)
- ERx_Attachments_Raw (API name: ERx_Attachments_Raw__c) Text Area(255)
- ERx_Files (API name: ERx_Files__c) Formula (Text)
- ERx_Files_Raw (API name: ERx_Files_Raw__c) Text Area(255)
The text area fields hold raw data about the Attachments or Files and the formula fields display this data in a user friendly form.
If you have upgraded to ERx Core Summer 19, and you previously had enabled Attachments, then you will see a button labeled “Add List View for Files” beside each previously configured object like this:

Click this button to create the fields for Files.
Once you Save Setting, the field will be displayed in the related list of, e.g., Admission Documents, along with Attach File link. It will allow you to view the Attachments and Files attached to a record as well as attach a new file, if required.

Click this button to create the fields for Files.
Once you Save Setting, the field will be displayed in the related list of, e.g., Admission Documents, along with Attach File link. It will allow you to view the Attachments and Files attached to a record as well as attach a new file, if required.
In the example shown above, a formula field called Attachments will be automatically created on the Education History Object. All the attachments related to each Education History will be displayed under this field along with a link called Attach a File.
Procedure:
- In the Admin Panel select the Object Name (e.g., Education History) and click Save Row
- If you now look at the list of Custom Fields on the Object’s setup page (e.g., Education History), four fields with the names listed above will have been automatically created – one Text Area type and another of Formula Type each for Attachments and Files. The text area fields hold raw data about the Attachments or Files and the formula field displays this data in a user-friendly form.

- Use the newly created formula field called Attachments in your page layouts and related lists (e.g., the Education History related list on the Application page layout).

- On all these fields, through Set Field-Level Security, provide permissions to the profiles whom you want these fields to be visible.

- Now this field can be configured on the object as well as in the Application (see screen below).
