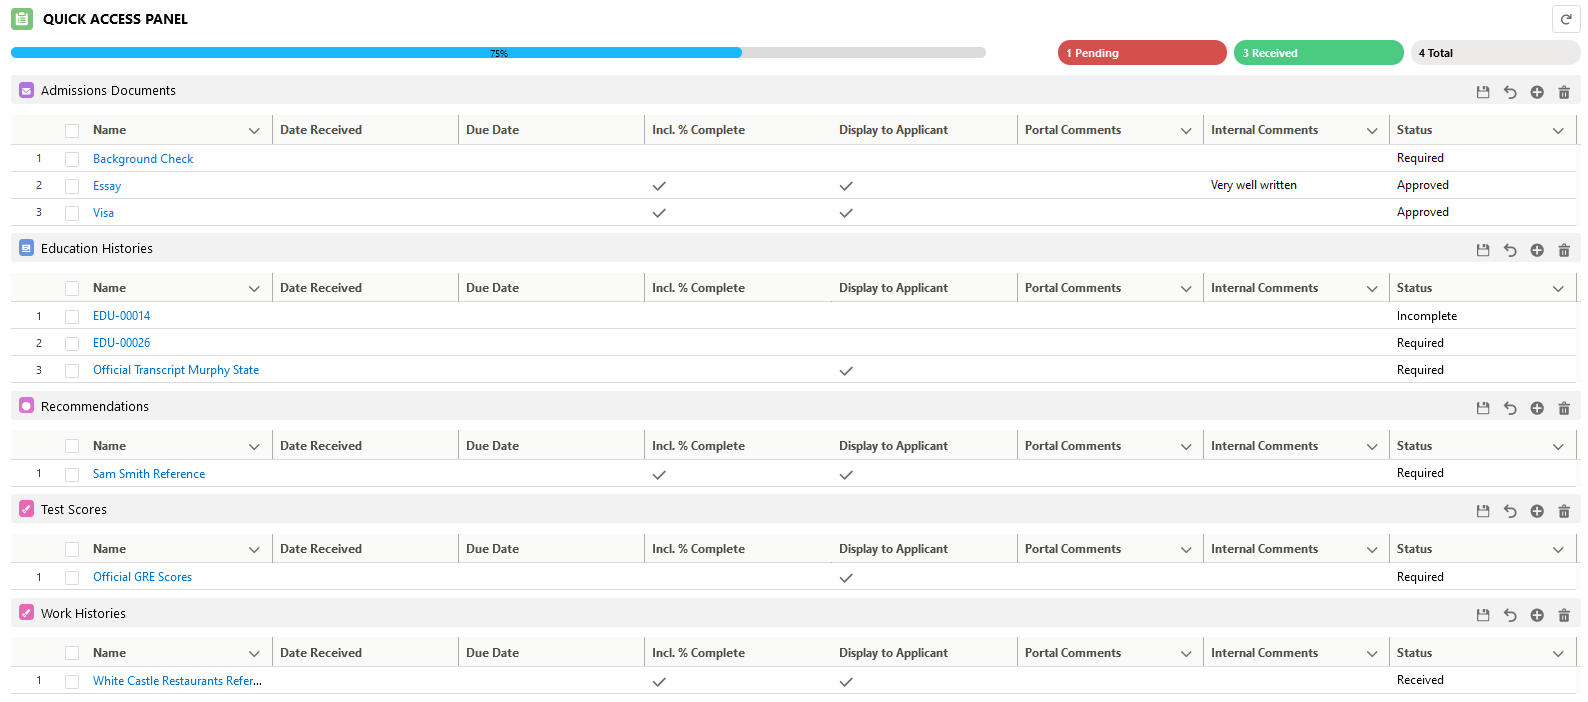
The Quick Access Panel Component

Elements of the Quick Access Panel Component
The % Completed Bar
% Completion is computed via the following formula:
(Received/Total)
Pending: All documents in which the Include in Percent Complete* field is checked, and status is one of the statuses selected through Select Pending Statuses button on the Admin Panel
Received: All documents in which the Include in Percent Complete* field is checked, and status is one of the statuses selected through the Select Received Statuses button on the Admin Panel
Total: The sum of the count of pending and received documents (i.e., all documents in which the Include in Percent Complete* field is checked).
*The field Display on Portal was formerly used to pick out the items included in the percent complete calculation. However, once the features Selective Percent Complete is activated, the new Include in Percent Complete field will play this role.
Configurable Columns
New in Summer '21, you can use the QAP Configuration interface to customize column labels and fields for different requirement objects in the QAP component.
Support for Record Types
Also new in Summer '21, the QAP configuration interface also includes support for record type creation and customization. Click here for more information.
Buttons for each Requirement Item Object in the Quick Access Panel
The "save" button
You can update any of the fields displayed within the Quick Access Panel. After doing so,
you must click on the save button ( ) to save your changes.
You will lose your changes if you save the page before clicking the save
button.
The "new" button
) to add new documents. This opens a dialog like this:

You can add documents of any of the application Requirement Item Objects (by default these are Admissions Documents, Education History, Test Scores, and Recommendations). The above snapshot displays the addition of an Admissions Document record. Fill out all the data required for the record. Click on the Create button, then the document will get created and it will display in the Quick Access Panel.
 ). Click
here for instructions on creating the NewDocument field set.
). Click
here for instructions on creating the NewDocument field set.The "undo" button
The “undo” button ( ) will undo unsaved changes.
The "delete" button
To delete a record, check the checkbox to its left and click the undo button ( ).
).

